Need for Speed High Stakes ‘Insufficient memory’ Error
Some Windows 10 users have tried to play the old iteration of Need for Speed High Stakes only to discover that the game fails to install properly or refuses to start. While some users are saying that they end up encountering an ‘Insufficient memory available on setup‘ at the end of the installation procedure, others can install the game just fine but they can’t launch it.
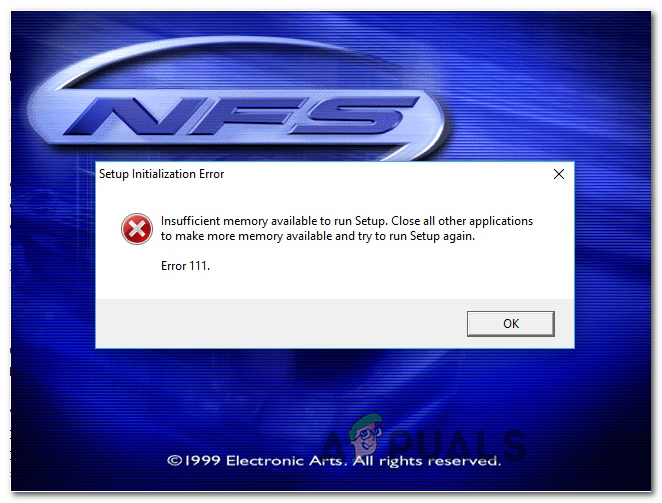
If you are seeing an error when trying to install the game, start by forcing the installation executable to install with admin access. This fix was confirmed to work by a lot of users that were previously unable to install the game.
In case you have installed the game from a traditional media and you double-click on the launcher and nothing happens, you might be able to force the game to launch by enabling Compatibility mode with Windows XP.
However, depending on your GPU, Nvidia, AMD, or Intel might have already released a patch that will enable to you run this game on Windows 10. So ensuring that you have the latest drivers installed should be a priority before considering the technical approach.
If nothing else works, your only chance at running this game on your current configuration is to install a modified version of the game, apply the modified expansion, and then configuring and running the game via nGlide.
Running Installer with Admin Access
In the event that you’re encountering an error during the installation phase of Need for Speed High Stakes, this problem might occur due to insufficient permissions. Several affected users that also found themselves in a similar scenario have confirmed that they managed to fix the issue by forcing the installer to run with admin access.
To do this, right-click on the installer (setup.exe) and click on Run as administrator from the newly appeared context menu. When you’re prompted by the UAC (User Account Control), click Yes to grant admin access.

See if you are able to complete the installation after you grant admin access. If the problem is still occurring, move down to the next potential fix below.
Running Executable in compatibility mode
If you can install the game just fine but you are encountering an error when launching the game (or you double-click on the executable but nothing happens), you might be able to fix the issue by forcing the executable to run in compatibility mode with Windows XP.
Some nostalgic players that were attempting to play NFS High Stakes on their Windows 10 computer have reported that this solution was the only thing that allowed them to play the game normally.
If you’re looking for step by step instructions on running the game in compatibility mode with Windows XP, follow the instructions below:
- Navigate to the launching executable of NFS High Stakes and right-click on it. Then, click on Properties from the newly appeared context menu.
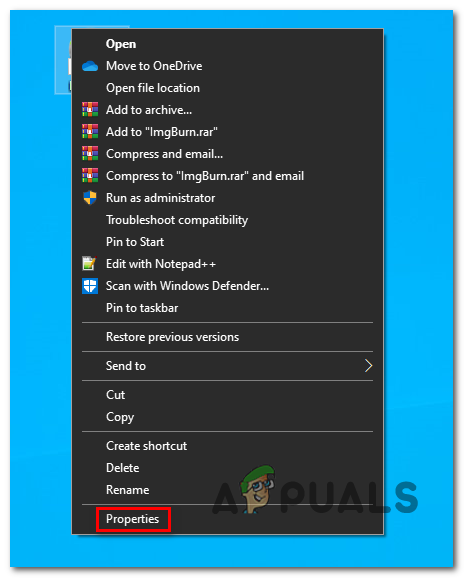
Accessing the Properties screen - Once you’re inside the Properties of NFS High Stakes, click on Compatibility from the vertical menu at the top.
- Next, check the box associated with Run this program in compatibility mode and then select Windows XP (Service Pack 3) from the associated drop-down menu.
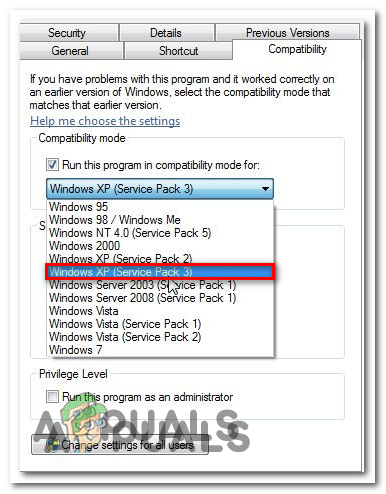
Running Compatibility mode with Windows XP - Click Apply to save the changes, then launch the game again and see if the problem has been fixed.
If you’re still encountering the same problem, move down to the next potential fix below.
Updating Graphics Drivers
Although this might not be the go-to solution considering that Need for Speed High Stakes is a legacy game that was released in 1999, a lot of users have managed to get this issue resolved after they updated their GPU drivers to the latest version available.
This operation is successful is because Nvidia, AMD, and Intel have all released Graphics Driver updates that teach newer operating systems (Windows 10, Windows 8.1, and Windows 7) how to run legacy games that were only designed to run for Windows XP or older.
To take advantage of this functionality, you need to ensure that you update your GPU driver to the latest version.
Note: If you have both an integrated and dedicated graphics card, you should update both.
Fortunately, every GPU manufacturer nowadays includes an auto-updating utility that will perform this task automatically so you don’t have to worry about not finding the correct driver version for your rig.
When you’re ready to proceed, follow the instructions below to update your Graphics Drivers to the latest version:
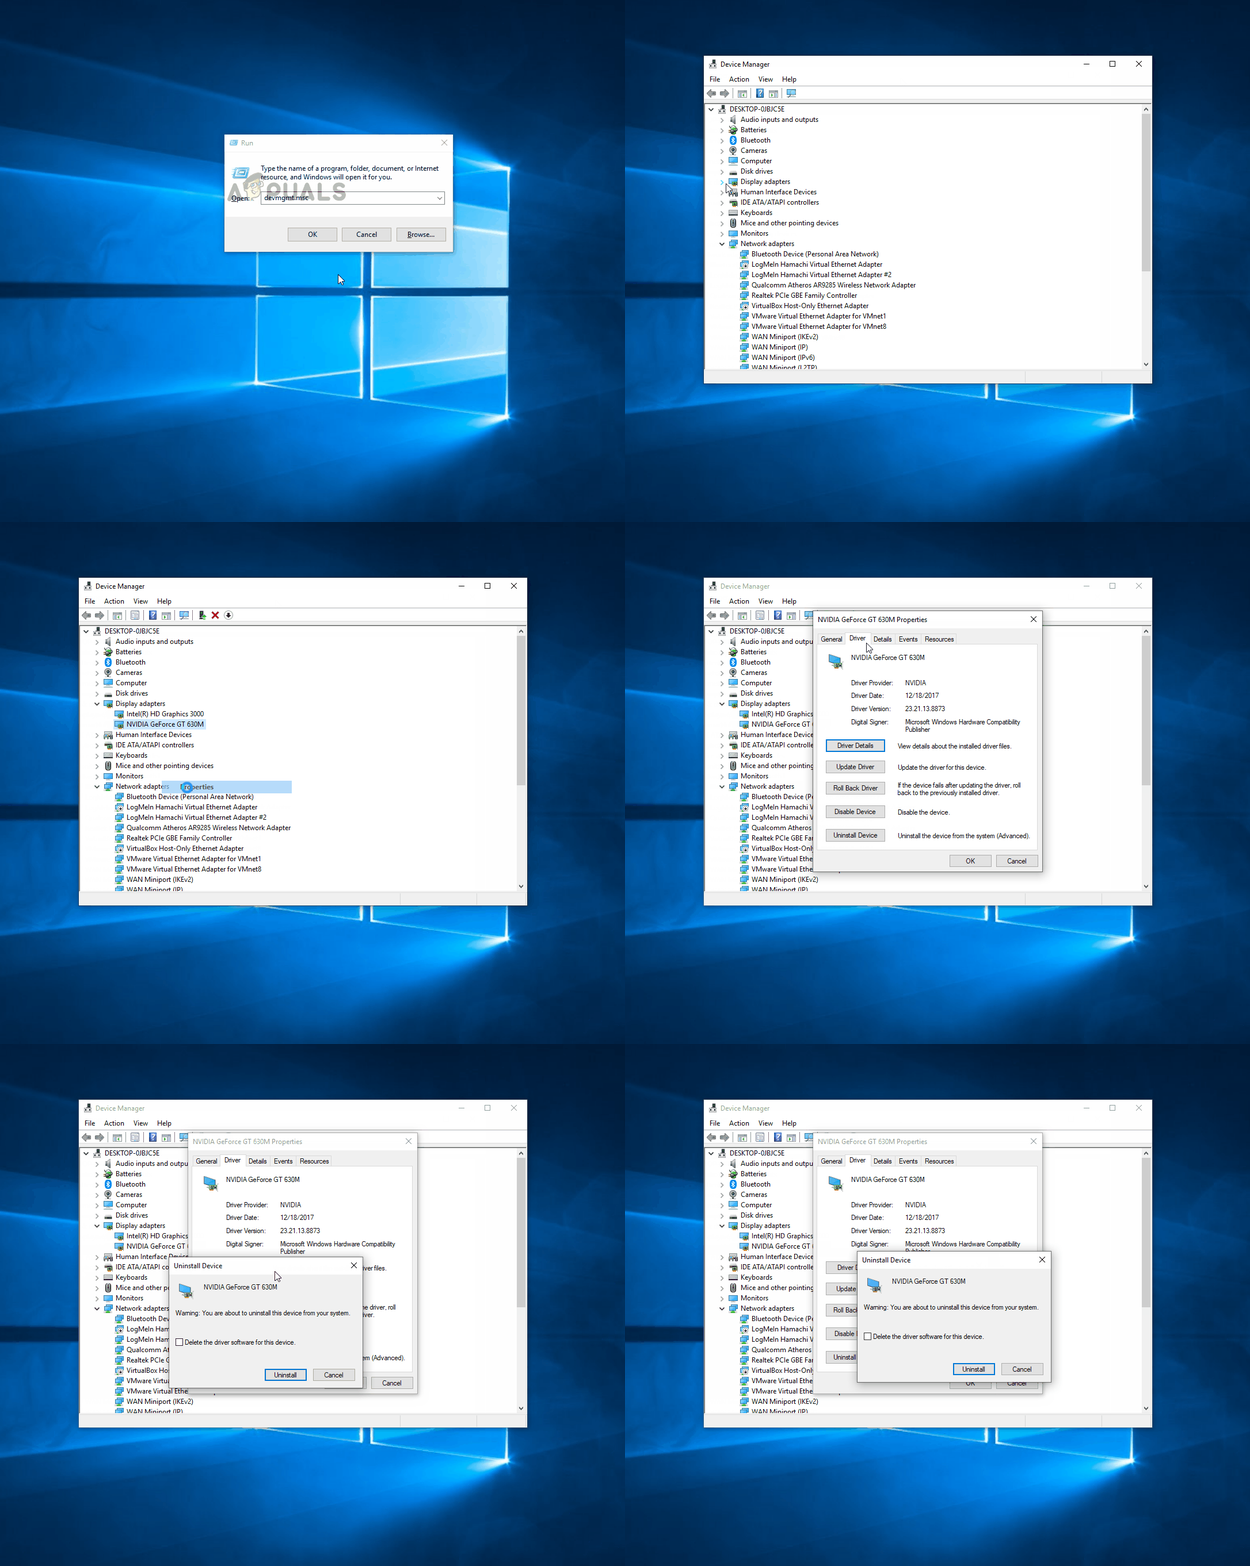
- Open up a Run dialog box by pressing Windows key + R. Next, type ‘devmgmt.msc’ inside the text box and press Enter to open up Device Manager.
- Once you get past Device Manager, scroll down through the list of devices, and expand the menu associated with Display Adapters.
- Keep in mind that if you have two types of GPUs (integrated and dedicated) you will see two different entries in this menu. Right-click on the GPU device entry and choose Properties from the newly appeared context menu.
Note: Even though games are typically run by the dedicated GPU, our recommendation is to update both GPU types (including the integrated solution). - From the Properties screen, select the Driver tab from the vertical menu at the top, then click on Uninstall device. Once you see the confirmation prompt, click Uninstall, but ensure that the box associated with Delete the driver software for this device is NOT Checked.
- After you remove the drivers for both the integrated and dedicated solution, you can close Device Manager and restart your computer. At the next system startup, your operating system will be forced to start with the generic set of drivers.
- Once the next startup is complete, you need to ensure that you are running the latest GPU driver versions. To do this, you will need to install the proprietary auto-update tool that your GPU manufacturer developed and install the latest drivers.
GeForce Experience – Nvidia
Adrenalin – AMD
Intel Driver – Intel
Note: If you have both a dedicated and an integrated GPU card, you should install Geforce Experience or Adrenaline + Intel Driver. - Install the utility, run it, and install every driver that gets recommended, then restart your computer and see if you are able to install and run Need for Speed High Stakes.
In case you are still encountering the same problem when attempting to run NFS High Stakes, move down to the next potential fix below.
Launching a Modified version of NFS via nGlide
As a lot of affected users have reported, depending on your GPU, you might need to use the nGlide workaround in order to make the game run on Windows 10.
Several users have confirmed that this method to be the only thing that allowed them to play the legacy NFS game. But keep in mind that you’ll need to mount the game using DAEMON tools and then install a modified version of the game + expansion in order to make the game playable on Windows 10.
If you want to move forward with this, here’s what you need to do:
- First things first, ensure that your computer is equipped with DAEMON tools. If you don’t have it installed already, access this link (here) and download the Lite version.
- Once the executable is downloaded, double-click on DTLineInstaller.exe, click Yes at the UAC (User Account Control), and follow the on-screen prompts to complete the installation of the free version.
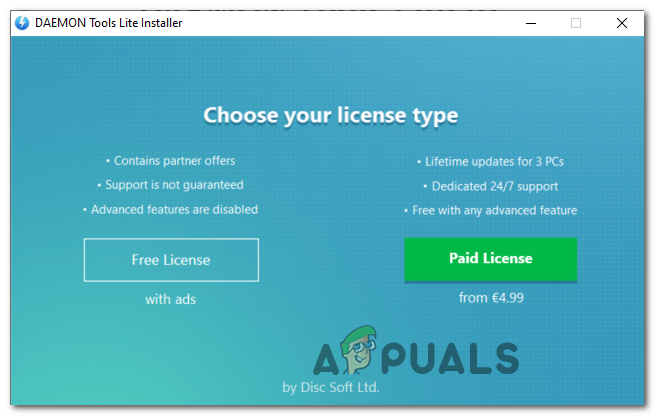
Installing the Free license - After the installation is complete, restart your computer and download this modified version of the game (here) that’s re-compiled to run on Windows 10.
- Once the download is complete, extract the contents of the Need for Speed High Stakes archive and mount the NFSHS CUE file with the DAEMON Utility that you previously installed at step 2.
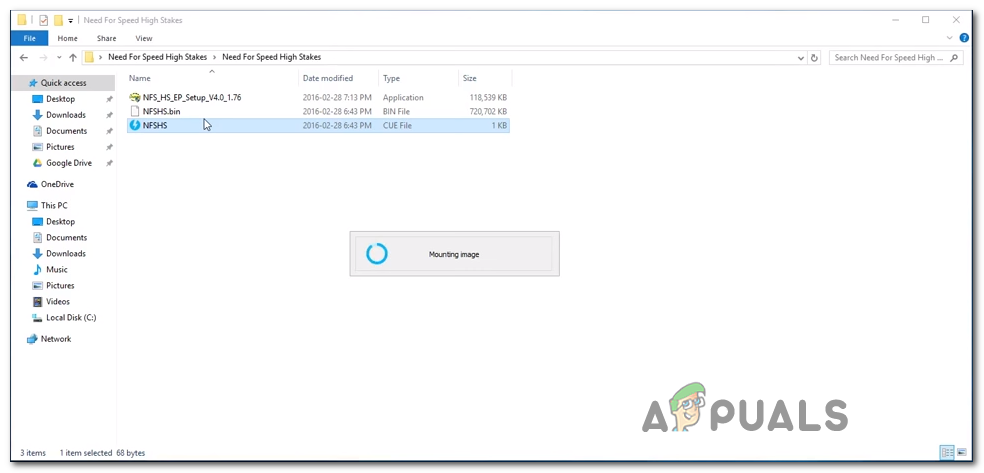
Mounting the Game - After you manage to successfully mount the game, click on the Re-install button, then follow the on-screen instructions to complete the installation.
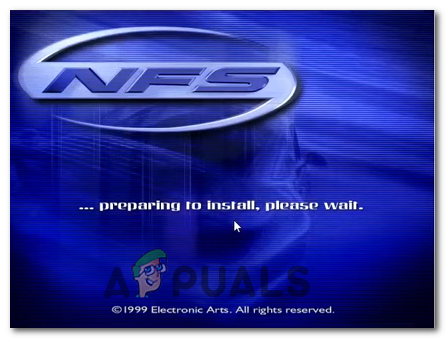
Installing the NFS High Stakes game - It’s very important that you choose Full Installation after you select the installation location; Otherwise, the expansion will not work. And the expansion is mandatory because it contains the fix that resolves the issue with the game shortcut.
- After the operation is complete and you are prompted if you want to add a shortcut to your desktop, click Yes.
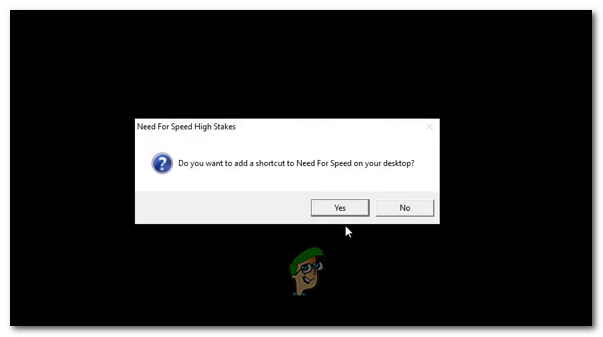
Adding the NFS HS shortcut on your desktop Note: If you get the 3dSetup.exe error, do not despair, it’s normal!
- At the EA Registration form, click on Register later.
- Now that the installation is complete, open up the Expansion installer (NFS_HS_EP_Setup_V4.0_1.76.exe) and follow the on-screen instructions to install that in the same location where you have previously installed the original game files.
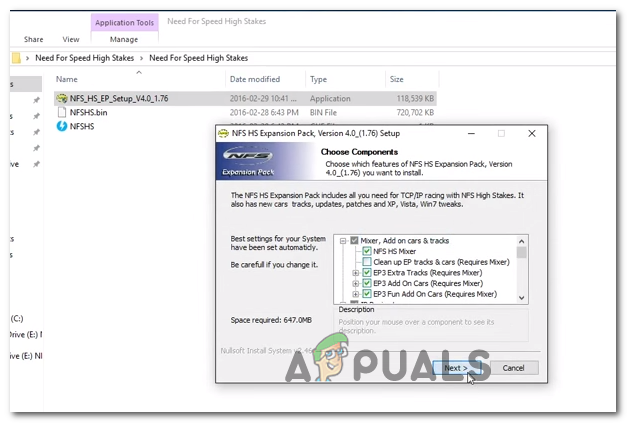
Installing the Expansion for Need for Speed High Stakes - When you are asked if you give permission for the Expansion Pack to copy the required files, click Yes at every prompt.
- at the end of the installation, you will see a different prompt asking you to run 3D-Setup. When you see it, click Yes and wait for 3D setup to load. Next, from the 3D Setup screen, select Glide (Voodo Card) and click Yes to confirm, then click yes at the confirmation window.
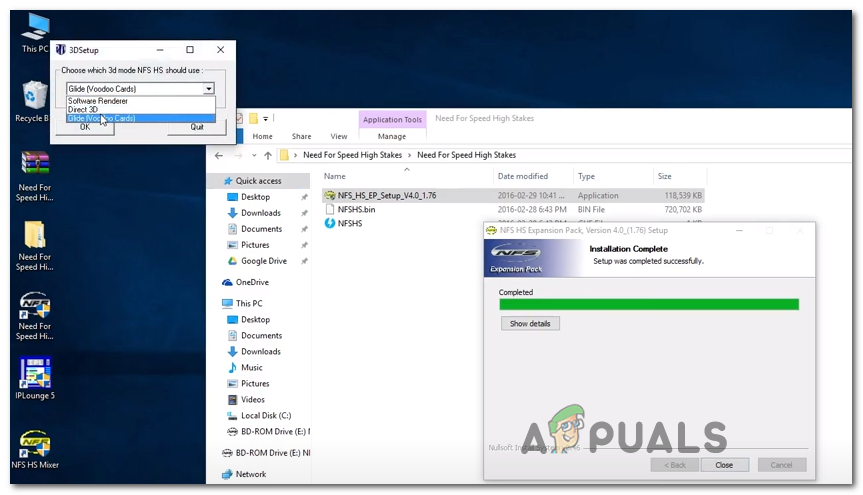
Launching the 3d Setup - Inside the nGlide Configuration utility, choose the default settings (resolution, aspect radion, and refresh rate) and ensure that the settings are correct since modifying graphics settings from the game’s menu will crash the game. Hit Apply when you are ready to move forward.
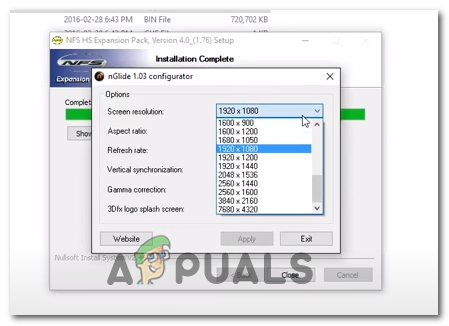
Configuring nGlide Configuration - Launch the game using the expansion shortcut and you should no longer encounter any issues.


