How to Fix Monitors Turning Off After Boot on Windows?
There are a lot of Windows users reporting that their monitor/s turn off unexpectedly shortly after boot without an apparent reason. This is an ongoing issue that is reported since Windows 7 and it’s still occurring on Windows 10 and Windows 11.

After we’ve investigated this particular issue thoroughly, we realized that there are actually multiple causes why you might see this behavior occurring with your Windows 10 PC. Let’s take a look at all the possible culprits that might be triggering this problem:
- Software conflict – As it turns out, a fairly common instance when you’ll see this behavior is some kind of software conflict that ends up affecting the rendering jobs that your GPU is currently dealing with. The easiest way to fix this problem is to boot in safe mode and update the display adapter driver manually.
- GPU driver inconsistency – Another scenario where you might notice your monitors turning off automatically is a GPU inconsistency. This problem often occurs after an upgrade to Windows 11 from Windows 10 and can typically be resolved by getting rid of your current GPU driver & dependencies and installing fully compatible equivalents from scratch.
- Fast Startup inconsistency – According to a lot of affected, another scenario where your monitor turns off unexpectedly can be related to the Fast Startup feature present on Windows 10 and Windows 11. To fix this problem, you’ll need to access the power options menu and disable this feature altogether.
- Bad monitor cable – You should also take the time to investigate a potential cable-related issue. A non-congruent HDMI or DVI cable (or even your power cable) might be in the process of going bad and might cause display interruptions on your monitor/s. In this case, the only way to check if this scenario is applicable is to use new cable equivalents and check if the problem is still occurring.
- PSU issue – As it turns out, you can also experience this problem in a scenario where your current PSU (Power Supply Unit) is not powerful enough to sustain all the currently connected components and peripherals. In this case, you should be able to fix the problem by disconnecting every non-essential device or by upgrading to a more powerful PSU.
- Corrupted Video controller drivers – According to some users affected by this problem, you might see this error occurring due to an inconsistency affecting your video controller drivers. In this case, you can fix the problem by rolling back the Video Controller driver.
- Incompatible display adapter driver – If you started to experience this error after upgrading to Windows 11 from Windows 10, chances are you’re dealing with this problem due to an incorrectly migrated driver. In this case, you can fix the problem by uninstalling the display adapter driver that’s currently active and migrating towards a generic equivalent.
- Custom power scheme – If you previously custom-tailored your power plan, there’s a chance one of the custom settings you previously established is causing this problem with your monitor/s. In this case, the most efficient way of fixing the problem is to revert back to the default power scheme.
- Bad HDMI / DVI port – If your monitor supports both DVI and HDMI and every other method you tried so far has failed you, it’s worth a shot to switch the default port that you use to connect your monitor to your PC. If you’re currently using an HDMI cable, use a DVI cable instead and vice-versa.
- Hybrid Sleep is enabled – Although this is a nice feature in theory, in reality, it brings much more issues than it’s worth (at least on Windows 10). If you currently have Hybrid Sleep enabled, try disabling it via the Settings menu and see if the problem stops occurring.
- RAM issue – An unlikely culprit that might cause these type of display issues is a scenario in which the RAM stick/s is beginning to fail and indirectly causing the monitor to stop receiving information. In this case, you should investigate your RAM and see if your memory hardware is beginning to fail.
- Other hardware issues – Once you’ve eliminated the RAM from your list of hardware culprits, the next thing you should do is check if your GPU and motherboard ports are working as intended. Unless you know how to do these investigations yourself, we recommend taking your PC to a certified technician to perform these investigations for you.
Now that we went over every potential reason why you might experience this problem, go over every confirmed fix and apply them locally until you found a method that resolves the issue for you for good,
1. Boot in Safe Mode & update the display adapter driver
As it turns out, a corrupt display adapter driver is often responsible for causing this particular issue on Windows 10 and Windows 11 installations.
If this scenario is applicable, you should boot your PC in safe mode and see if the issue stops occurring. In case your monitors operate normally while you boot in safe mode, chances are you’re indeed dealing with a corrupted display adapter driver.
In case you find that the problem doesn’t occur in safe mode (while the generic windows display driver is loaded), you should go ahead and uninstall the currently active display adapter driver in order to force your Windows installation to use a generic equivalent.
For step-by-step instructions on enforcing this method, follow the guide below:
- Restart your computer and start pressing the F8 key repeatedly as soon as you get to the initial screen. This action will open up the Advanced Boot Options menu.
- From the Advanced Boot Options menu, go ahead and use the arrow keys to select Safe Mode with Networking or press the F5 key.
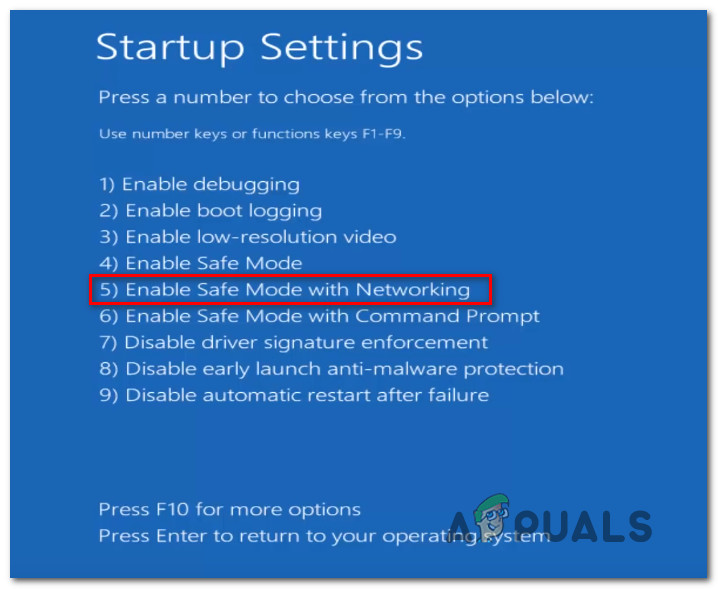
Safe Mode with Networking - Wait until the special boot operation is completed and your PC boots in Safe Mode with Networking options.
- Press Windows key + R to open up a Run dialog box.
- Inside the Run box, type ‘devmgmt.msc’ and press Enter to open up Device Manager.
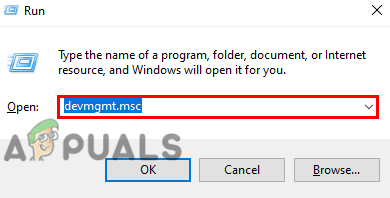
Open up Device Manager - At the User Account Control (UAC), click Yes to grant admin access.
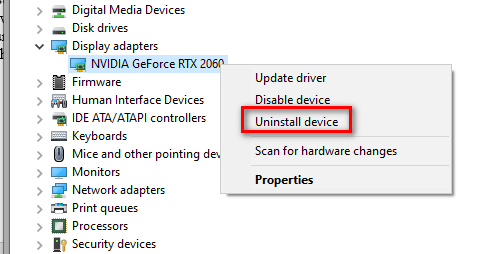
- From Device Manager, scroll down and expand the drop-down menu associated with Device Manager.
- Right-click on the active display adapter driver and choose Uninstall device from the context menu that just appeared.
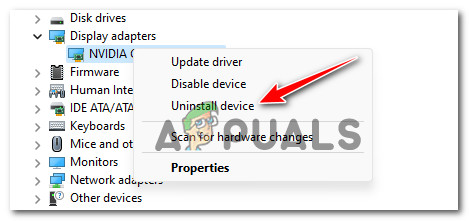
Uninstall the display device manager - Follow the on-screen instructions to uninstall the dedicated display adapter driver, then restart your PC.
- At the next startup, your Windows installation will notice that the display adapter driver is missing and will install a generic equivalent.
In case this method didn’t allow you to fix the issue and your monitor/s are still turning off after the initial boot, move down to the next method below.
2. Reinstall the GPU driver + dependencies
In case booting in safe mode and reinstalling the display adapter didn’t fix the issue, you should turn your attention toward the remaining components of your GPU driver. According to some affected users, this problem might also be caused by some associated graphic driver dependencies.
If this scenario is applicable, you should be able to fix the problem by completely uninstalling the GPU driver (along with every associated dependency) before reinstalling the latest version from scratch.
It’s important to ensure that you remove any remnant files from the old GPU driver installation before reinstalling it.
Follow the instructions below for specific instructions on how to do this:
Note: You can skip steps 1 to 6 if you already followed Method 1.
- To begin, open up a Run dialog box by pressing the Windows key + R.
- Afterward, type in ‘devmgmt.msc’ and hit Enter to launch Device Manager.
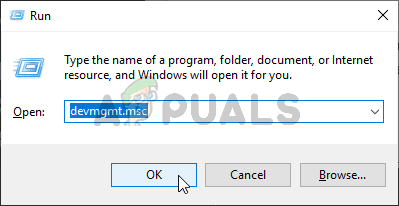
Open Device Manager - If you see a prompt from the UAC (User Account Control), click on Yes to continue.
- Once you’re inside Device Manager, find and click on the drop-down menu labeled Display adapters.
- From there, locate and right-click on every graphics driver one by one and select Uninstall from the context menu.
Uninstall every GPU driver Note: Your screen might flicker after you do the uninstallation. This happens because your OS will revert back to the generic drivers.
- After you have uninstalled all of the relevant drivers, close Device Manager and open up another Run dialog box by pressing Windows key + R.
- Next, type in ‘appwiz.cpl’ and press Enter to bring up the Programs and Features screen.
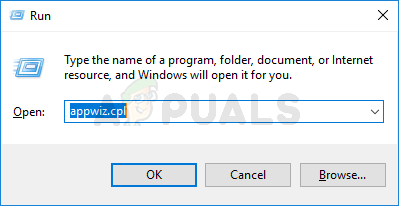
Accessing the Programs and Features menu - Once you’re inside of Programs and Features, take a look through the list of installed applications and begin uninstalling anything that is related to your GPU manufacturer (Nvidia AMD or Intel).

Uninstalling the GPU + dependencies Note: You can make sure that you don’t overlook anything by clicking on the Publisher column which will order the programs alphabetically. Simply right-click on each GPU-related dependency or driver one by one and select Uninstall from the context menu that appears.’
- Inside the uninstallation screen, follow the provided instructions to complete the process.
- Once every relevant driver is uninstalled, reboot your computer and wait for it to start up again before moving on.
- Afterward, visit one of the driver download pages below depending on your GPU manufacturer:
Nvidia’s Download Page
AMD’s Download Page
Intel Graphics Download Page
Note: Make sure to select the correct GPU model and the correct Windows version before initiating the download. - From there, download and install the latest driver version that’s available for your particular model of the graphics card.
- Finally, reboot your computer once more and see if the monitor issue is now resolved.
If the problem is still ongoing, move down to the next method below.
3. Disable Fast Startup (if applicable)
The Fast Startup feature on Windows 10 is notoriously known for causing this type of issue particularly when the CPU is left in idle mode for too long.
Dozens of users are reporting that they managed to fix this pesky issue by going into the Power Options menu and disabling the Fast Startup option.
Note: This method is confirmed to be effective on both Windows 10 and Windows 11.
If you currently have the fast startup option enabled, follow the instructions below to learn how to disable it from the Power Options menu and see if this addresses the monitor turning off issue:
- To open the Power Options menu, press Windows key + R to open a Run dialog box.
- Next, type “powercfg.cpl” inside the Run menu and hit Enter.
- In the Power Options menu, use the left-hand side menu to click on Choose what the power buttons do.
- In the System Settings menu, click on Change settings that are currently unavailable.
- Then, uncheck the box associated with Turn on fast startup (recommended) and click Save changes (at the bottom of this window).
- Reboot your PC and see check if your monitors are still turning off once the next startup is complete.
If fast startup was already turned off or disabling it didn’t fix the monitor issue in your case, move down to the next method below.
4. Use new monitor cables
If none of the methods above have proven to be effective in your case, you’ve already gone through the majority of driver-related issues that might cause this type of behavior to occur on Windows.
Before you move forward, you should take the time to ensure that all your monitor cables are working as intended.
- Start by checking your HDMI / DVI cable – Switch it with a replacement and see if the issue stops occurring.
- Proceed by replacing the power cable of your monitor/s – The vast majority of monitor and TV manufacturers use the same power cable, so you should have no trouble using a different power cable and checking if the problem is resolved.
Note: According to some affected users, in their case, the monitor display was interrupted due to a non-congruent cable.
If you already tried replacing your cables and the issue still occurring, move down to the next methods below.
5. Disconnect non-essential devices
This type of behavior on Windows 10 and Windows 11can also be associated with an inconsistency indirectly caused by devices connected via front-panel ports (wireless keyboards, hard drives, printers, USB hubs, etc.)
Some users have found that immediately after they disconnected certain unnecessary peripherals their monitors stopped turning off at random intervals. In some cases, the issue went away after they disconnected an external HDD / SSD, while others got success by disconnecting their USB-powered headset.
It seems that you might be dealing with an I/O (input/output) issue or it might be a classic case of an insufficient PSU (Power Source Unit) that’s unable to supply enough power for every component that’s currently connected to your PC.
You’d think that the monitor should not be affected by this since it has its own power cable connected externally. That’s true, but the display issues as almost likely caused by the fact that your GPU doesn’t have enough available power bandwidth.
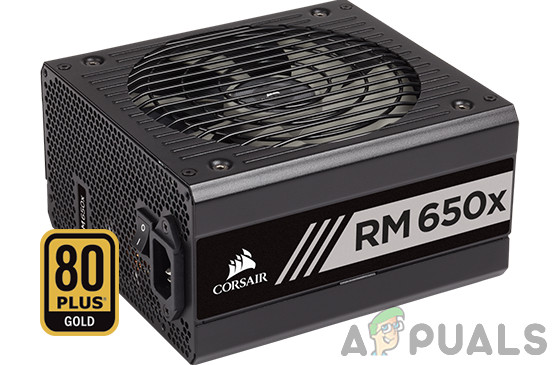
Important: If you don’t want to upgrade your PSU to a new unit with a bigger capacity, our only option is to disconnect every non-essential device that’s currently utilizing energy supplied by your PSU.
If you already tried removing every non-essential device that’s connected to your PC and you’re still facing the same issue with your monitors, move down to the next method below.
6. Restore default power schemes (if applicable)
If you previously modified the default power plans and customized them to fit your own needs, this might have the unintended consequence of interrupting power to your external monitors.
Several affected users dealing with the same kind of monitor issue have confirmed that in their case, the monitors turned off due to a power plan setting.
The best way of fixing this issue is to simply revert the changes you made to the default power scheme and only keep your custom settings that won’t affect your monitor.
But if that’s not an option for you, you can go for the nuclear option and open a CMD prompt from which you can run a ‘powercfg‘ command that will automatically restore the default scheme.
If you’re looking for specific instructions on how to do this, follow the steps below:
- Press Windows key + R to open up a Run dialog box.
- Next, type ‘cmd’ inside the text box and press Ctrl + Shift + Enter to open up an elevated Command Prompt.
Open up an elevated CMD window - When you’re prompted by the User Account Control (UAC), click Yes to grant admin access.
- Once you’re inside the elevated CMD window, paste the following command and hit Enter to reset back to the default power scheme:
powercfg -restoredefaultschemes
- After the command has been processed successfully, reboot your PC and see if your monitor issues have been resolved.
If the problem is still not fixed, move down to the next method below.
7. Use DVI instead of HDMI or vice-versa (if applicable)
If you’re using a monitor that has both HDMI and DVI prompts, try connecting it to your PC using the alternative slot.
Several affected users have confirmed that their monitors stopped turning off at random intervals after boot once they used the different connection option.
- In case you currently have it connected via HDMI, use the DVI option instead.
- If you’re using a DVI connection, connect it using a HDMI cable instead.
Note: In case your monitor only supports HDMI or DVI, skip this method altogether and move down to the next method below.
8. Disable hybrid Sleep (if applicable)
Another power option that is often reported for causing monitor issues like this one is hybrid sleep.
Note: Hybrid sleep is a power state that combines sleep and hibernate. When you utilize this feature, your OS will write all it’s RAM to the hard drive or SSD, then goes into a low-power state that keeps the RAM refreshed.
While this option is good in theory, a lot of Windows users are reporting that it ends up cutting the display to their secondary monitors whenever their PC is left is idle mode for too long. Once this problem occurs, the only way to get the display back is to restart the PC.
If you want to prevent this from occurring in the future, you’ll need to access the Power Options screen and modify the default power settings in order to disable hybrid sleep.
For step by step instructions on how to do this, follow the instructions below:
- Start by pressing Windows key + R to open up a Run dialog box.
- Next, type ‘control’ inside the run box and press Enter to open up the classic Control Panel menu.
Accessing the classic Control Panel menu - Once you’re inside the classic Control Panel menu, go under ‘Preffered Plan’, then click on Change plan settings.
- From the next menu, click on Change advanced power settings.
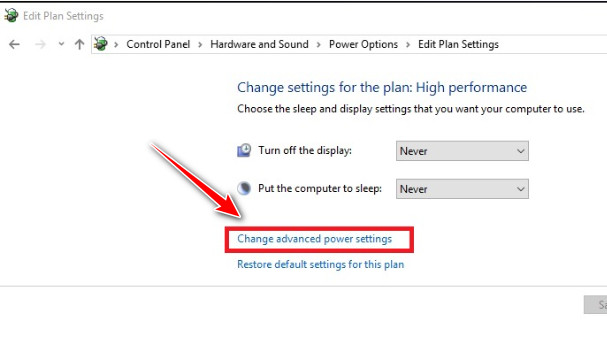
Change advanced power settings - From the menu that just appeared, expand the Sleep tab, then open the Allow hybrid sleep option and set it to Off.
- Click on Ok to save the changes, then reboot your PC and see if your monitor issues are now fixed.
If the problem is still ongoing or hybrid sleep was already disabled, move down to the next method below.
9. Performing a Memtest
According to other affected users, this monitor issue might also be related to your RAM component.
It’s possible that one or both of your RAM sticks are beginning to fail – in this case, our recommendation is to perform a MemTesy86 stress test and see if you’re currently dealing with some hardware issue affecting your memory.
In case you suspect that you memory might be causing this issue, follow the instructions below to deploy a MemTest86 stress test:
- To download MemTest86, open your default browser and navigate to the download page.
- Once you’re on the right page, click on the Download button to get the free version of MemTest86.

Downloading the MemTest utility - Once the download is finished, use an extraction program like 7 Zip, WinZip, or WinRar to unpack the memtest86-usb archive.
- After that, follow the directions in the official documentation to create a USB drive that will be used for stress-testing your RAM.
- Use MemTest86 according to the instructions and see if your RAM stick/s is/are causing the problem.
If the stress test came out clean, move down to the final method below.
10. Take your PC to a technician
If none of the methods above have proven to be effective in your case, it’s clear that you’re dealing with some kind of hardware issue.
If you don’t have the know-how to investigate each component individually, the best course of action is to take your PC or laptop to a certified technician and ask him/her to investigate.
Additionally, if you have a spare monitor, you should also replace the one that’s causing issues and see if the display interruption stop.


