How to Fix “Microsoft Windows App Runtime DDLM” Error?
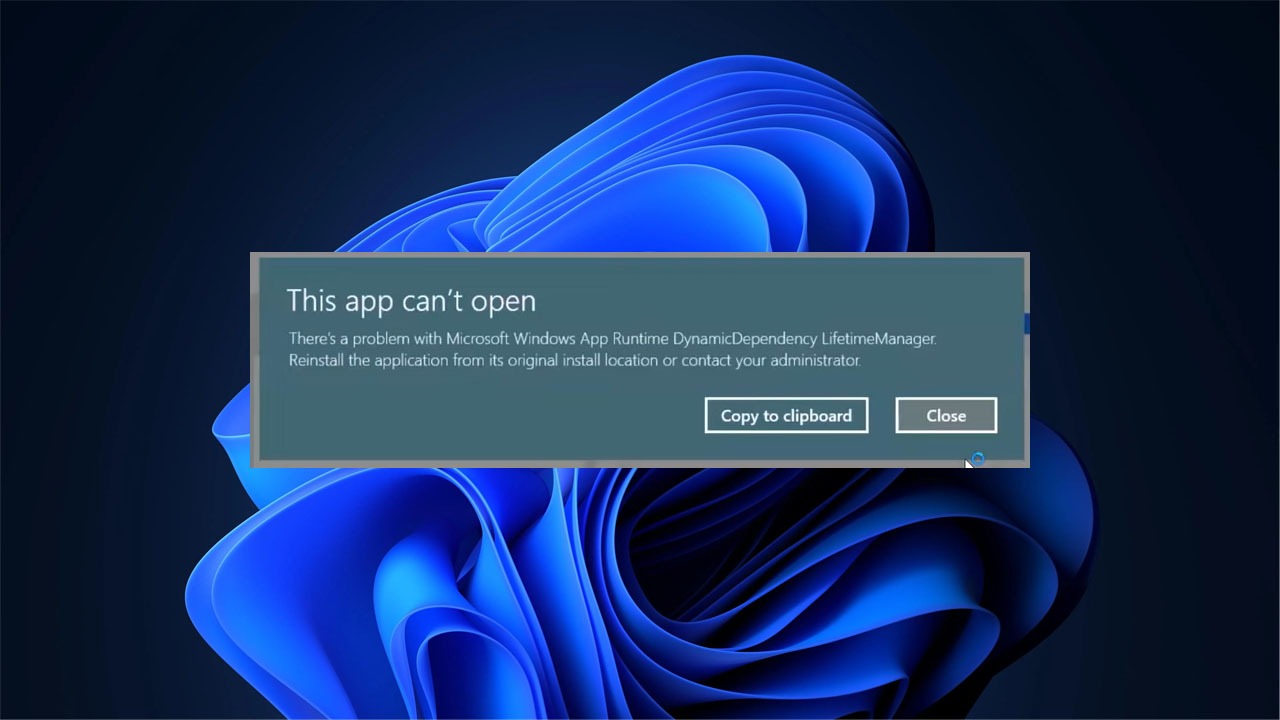
The “There’s a problem with Microsoft Windows App Runtime DynamicDependency LifetimeManager” error can appear randomly or when trying to open specific applications. The affected apps vary from user to user, making it challenging to identify the exact cause.
 This error can prevent access to apps that previously worked without issues.
It often occurs after a Windows update, which may introduce compatibility problems or disrupt the DynamicDependency LifetimeManager (DDLM)—a core component responsible for managing app dependencies and runtime resources.
Below are several solutions to help you resolve the error.
Before we begin, restart your PC.
A simple restart can often resolve temporary glitches caused by the Windows update.
This clears the system’s memory and reloads essential services, including the DDLM.
Let’s proceed.
1. Reset or Repair Windows App Runtime DDLM
This step is often the most effective solution and should be attempted before exploring other fixes.
Resetting or repairing the DDLM can resolve the issue, restoring functionality to all affected applications.
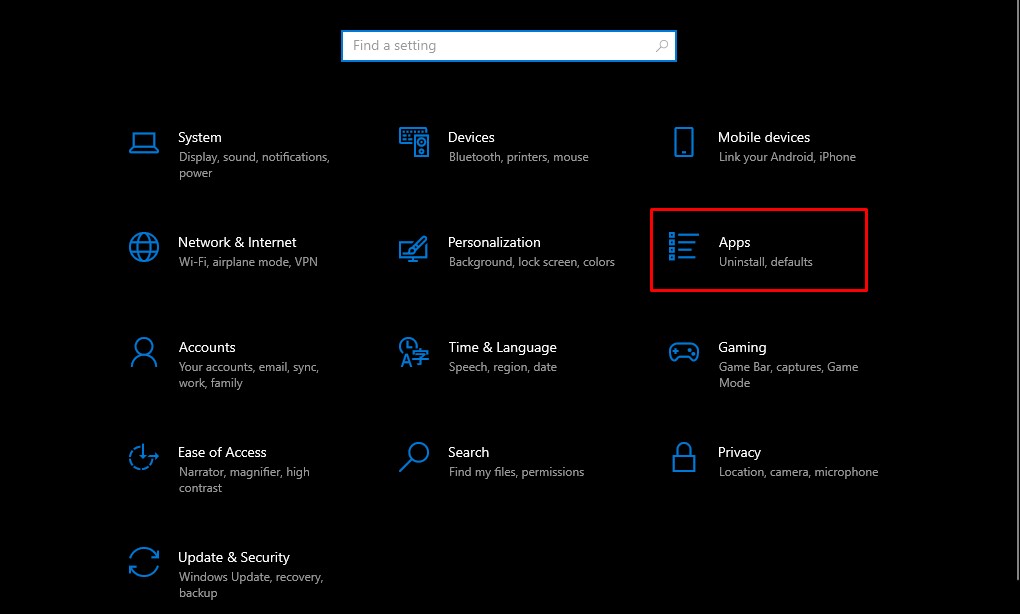
- Press the Windows key on your keyboard.
- Open Settings.
- Navigate to Apps > Apps & Features.
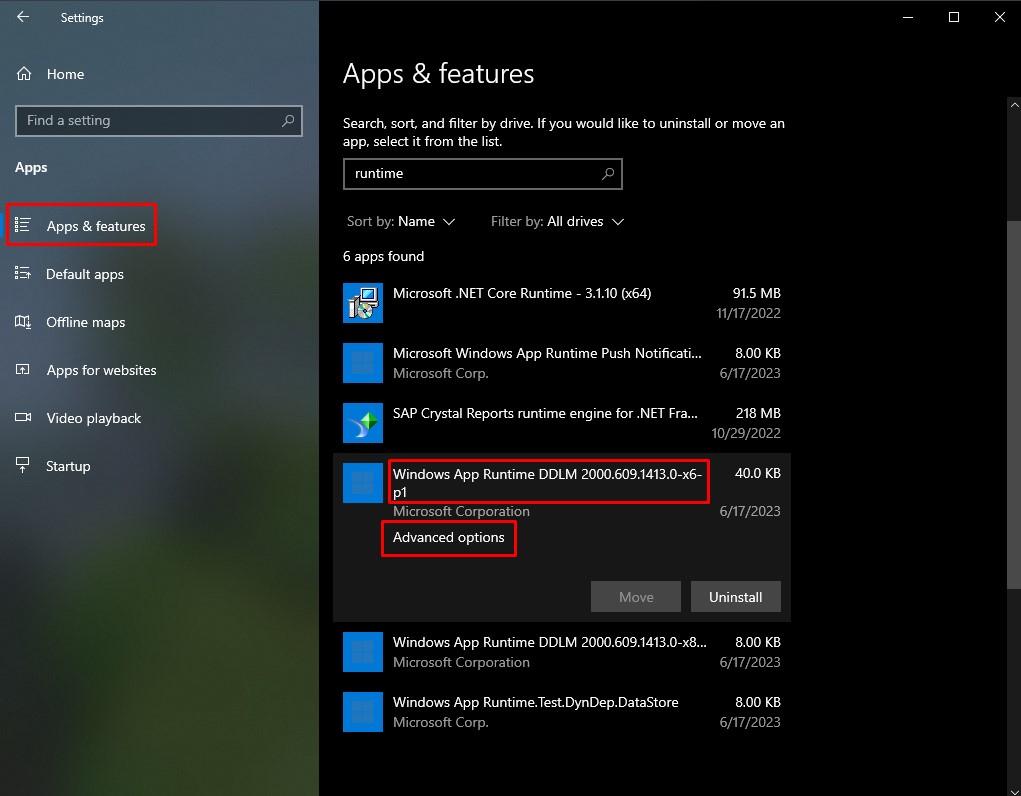
- In the search bar, type Runtime.
- You should see two versions listed: x6 and x8.
- Click on x6, then select Advanced options.
- Click the Repair button and wait for the process to complete.
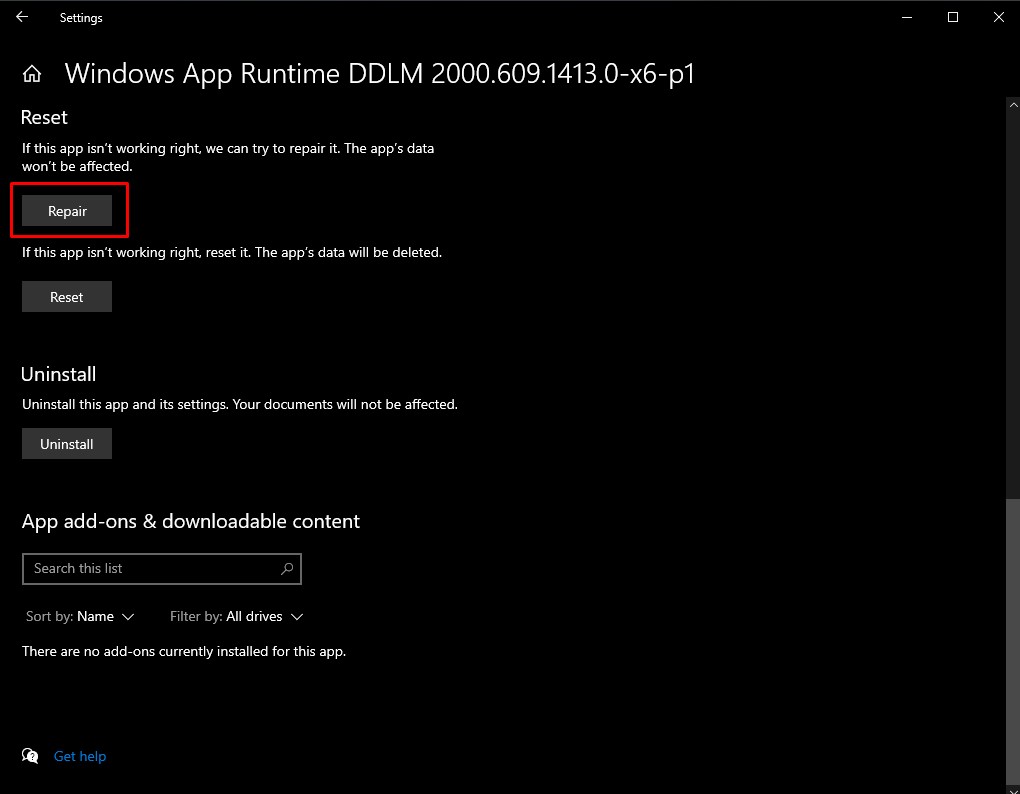
- Repeat the same steps for x8.
- If the issue persists, go through the steps again, but this time click the Reset button instead of Repair.
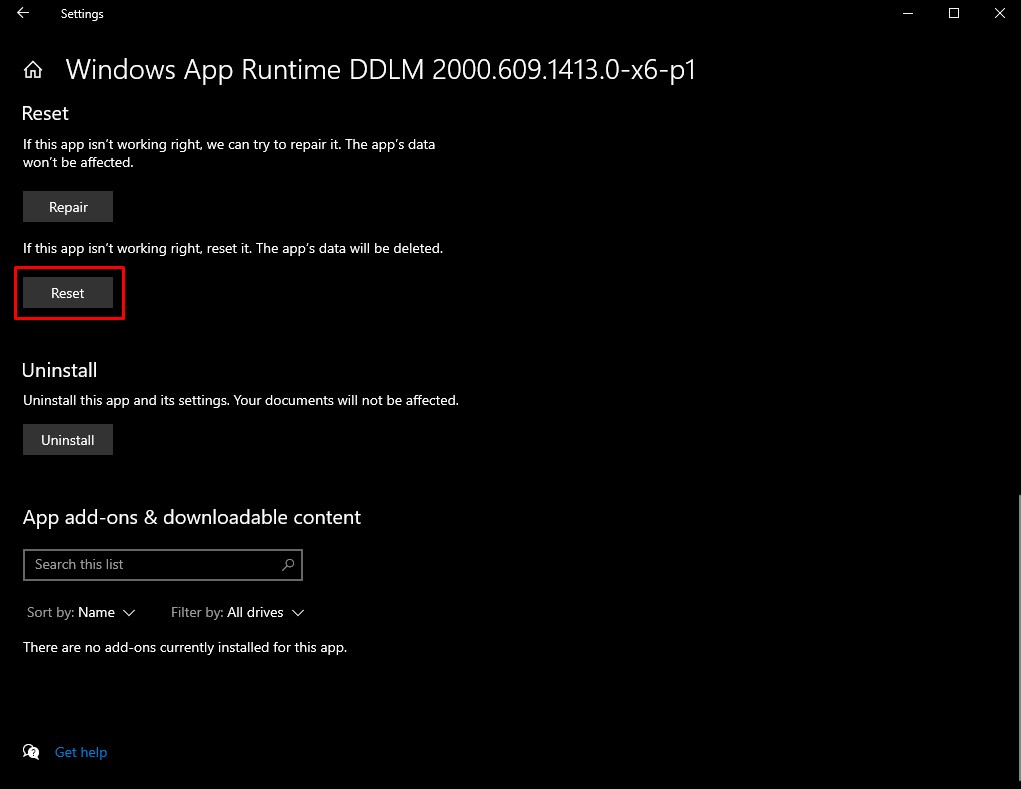
- Once completed, check if the issue is resolved and your applications are working properly.
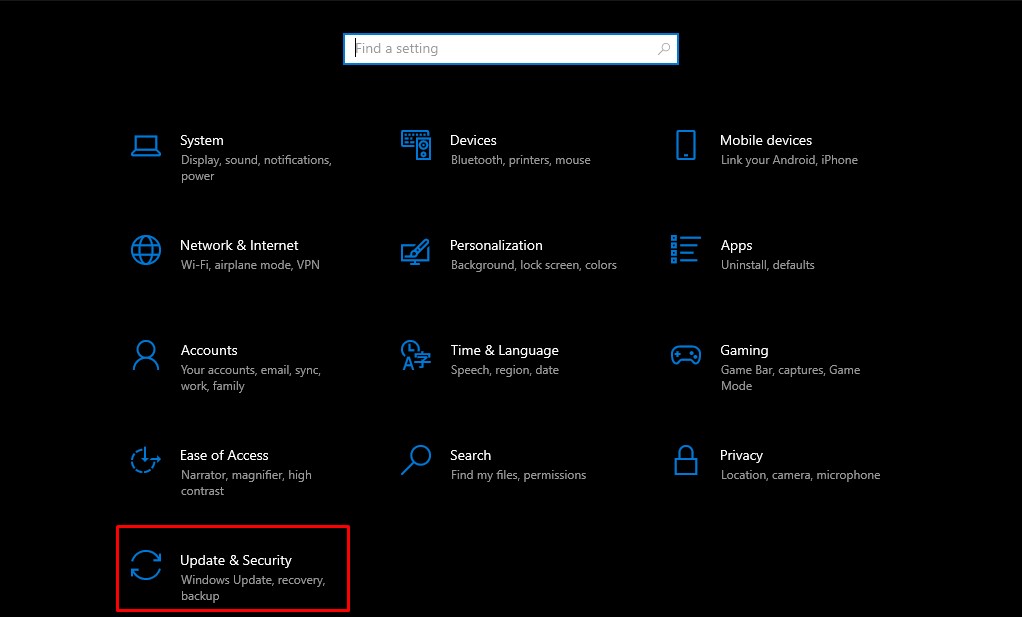
2. Uninstall the Windows Update
While it may not be the ideal solution, uninstalling the problematic Windows update can help resolve the issue. Sometimes, updates contain faulty or corrupted system files that interfere with normal operations, leading to errors like this one. By reverting to the previous version of Windows, you can avoid the issue until Microsoft releases a new update that fixes the problem.
- Open Start and click on Settings.
- Go to Update & Security.
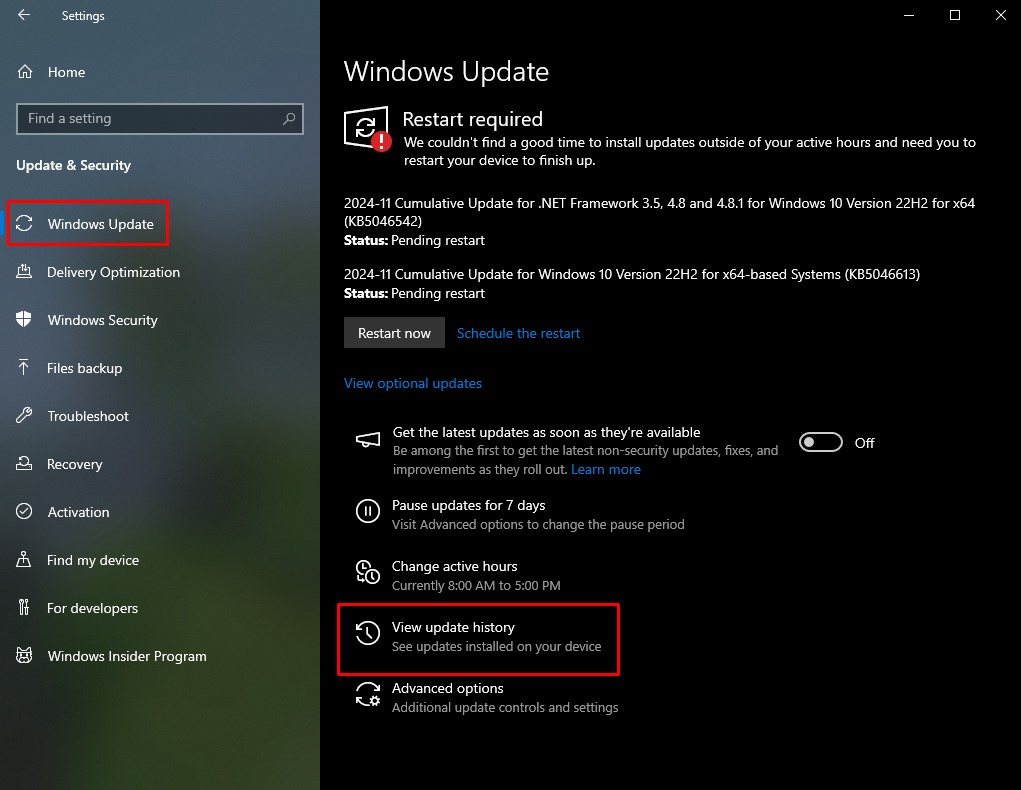
- Click on Windows Update from the left-hand menu.
- Select View Update History.
- Click on Uninstall Updates.
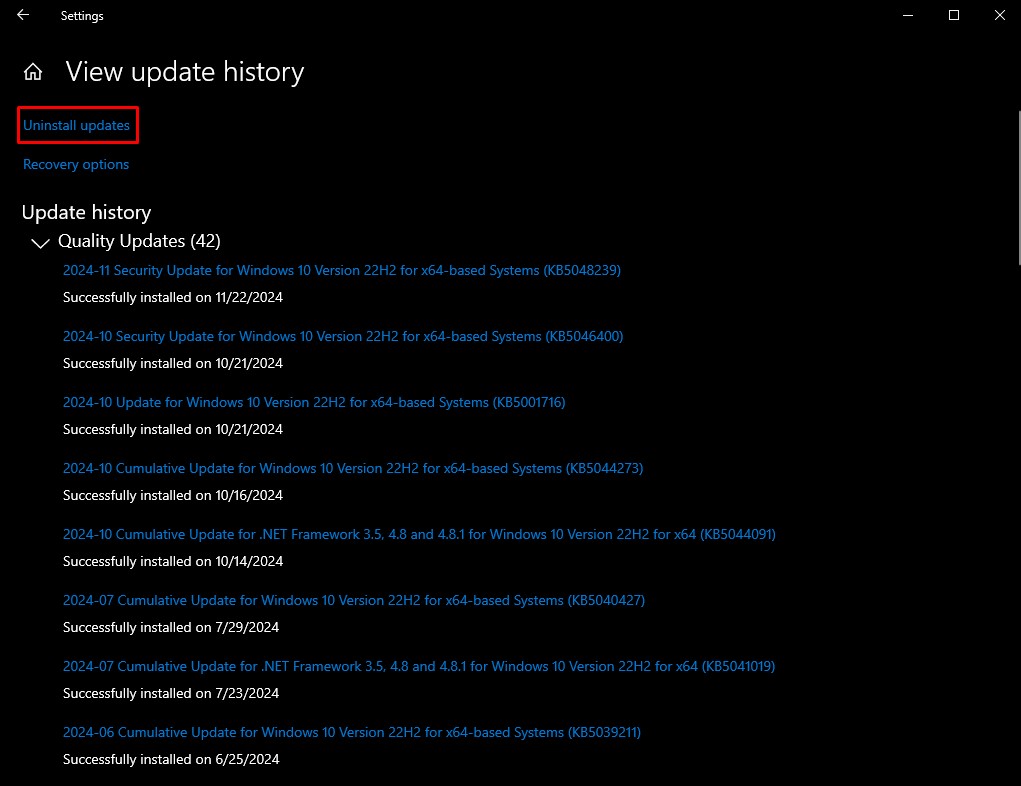
- From the list, locate the update you want to remove by its name, date, or time.
- Once uninstalled, your computer will restart and revert to the previous version of Windows.
3. Repair the System Files
During a Windows update, certain system files may become corrupted or go missing, which can lead to the “DynamicDependency LifetimeManager” error. To resolve this, you can use the Command Prompt to scan and repair these files. This process is safe and won’t affect your personal data.
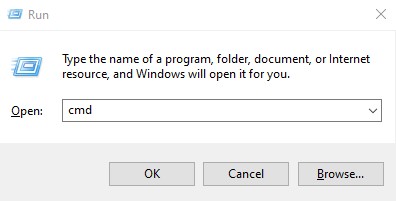
- Press the Windows key on your keyboard.
- Type cmd, then right-click on Command Prompt and select Run as administrator.
- Once Command Prompt opens, enter the following commands one by one:
DISM /Online /Cleanup-Image /ScanHealth
DISM /Online /Cleanup-Image /CheckHealth
DISM /Online /Cleanup-Image /RestoreHealth
SFC /Scannow
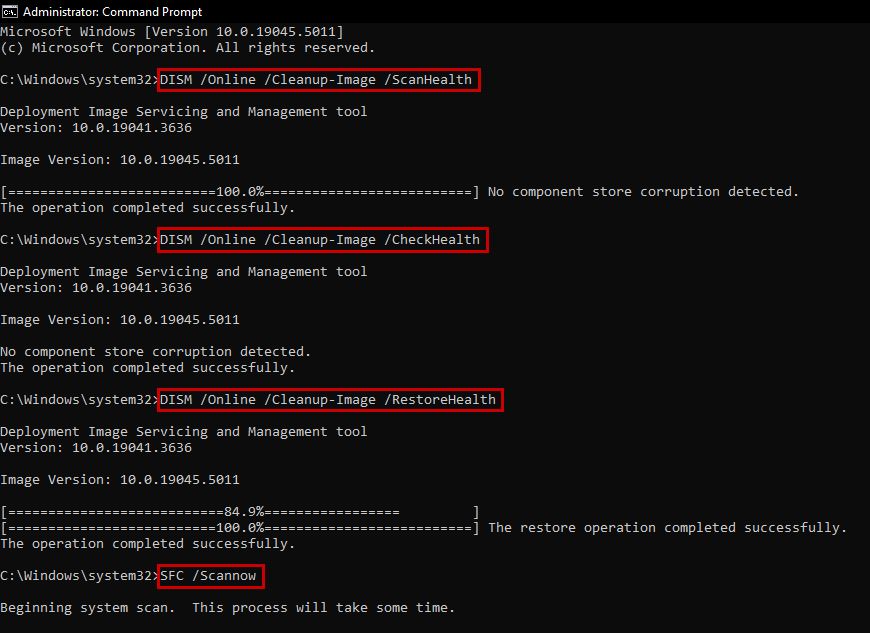
After completing the process, restart your computer and check if the error persists. If it does, repeat the steps a couple of times to ensure the issue is resolved.
4. Perform a Clean Boot
A clean boot starts Windows with a minimal set of drivers and startup programs, which can help determine if background applications are causing the issue.
- Sign in to your PC as an administrator.
- Click Start, type msconfig, and press Enter.
- Select System Configuration from the search results.

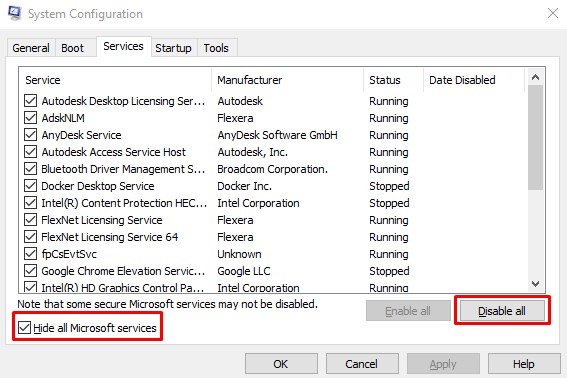
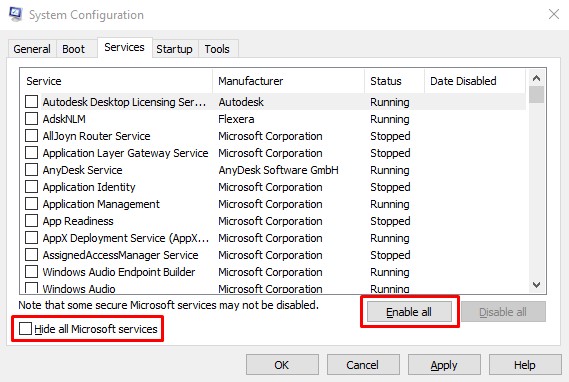
- Go to the Services tab.
- Check the box for Hide all Microsoft services.
- Click Disable all, then Apply.
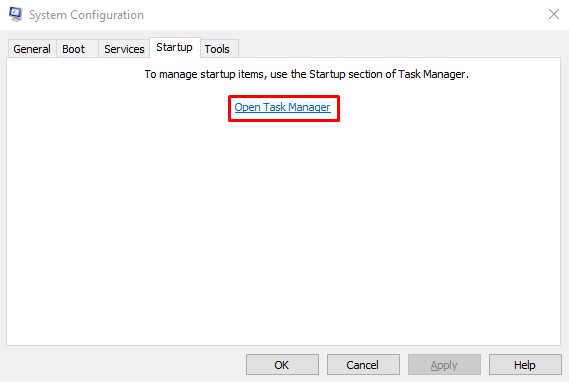
- Navigate to the Startup tab.
- Click Open Task Manager.
- In Task Manager, go to the Startup tab and disable all enabled items.
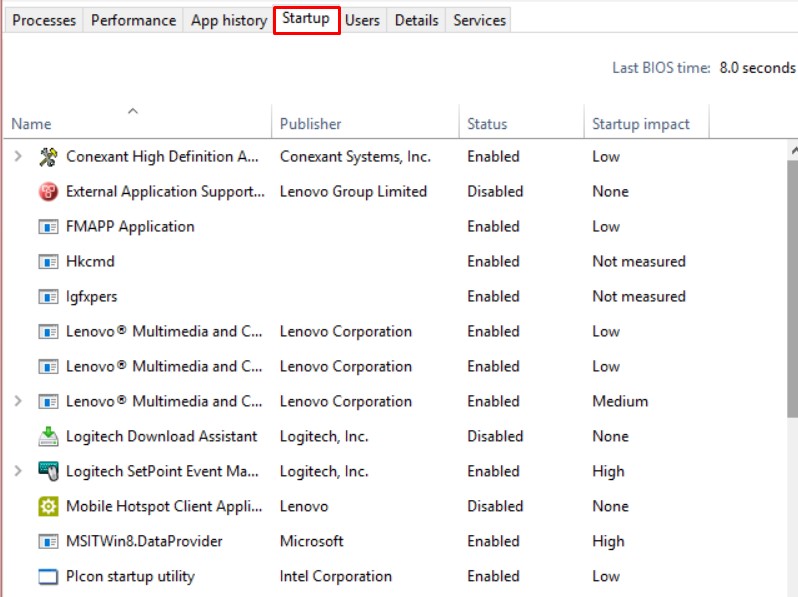
Note: Make a note of the programs you disable so you can re-enable them later if needed.
- Close Task Manager.
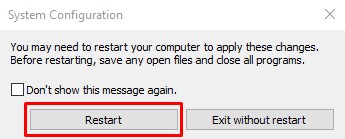
- In the System Configuration window, click OK and then Restart.
- Your computer will restart in a clean boot environment.
After the restart, try opening the applications that were showing the DDLM error.
- If the error persists, it means the issue isn’t caused by third-party applications or services.
- If the applications open without the error, a background program or service was likely causing the issue.
To identify the specific program or service responsible:
- Repeat steps 1 to 4, but this time, enable half of the services you previously disabled.
- Restart your computer.
- Check if the error reappears:
- If the error returns, the problematic service is among those you re-enabled. Disable half of these services and test again.
- If the error doesn’t return, repeat the process with the remaining disabled services.
- Once you’ve identified the specific service causing the issue, you can choose to keep it disabled or contact its manufacturer for support.
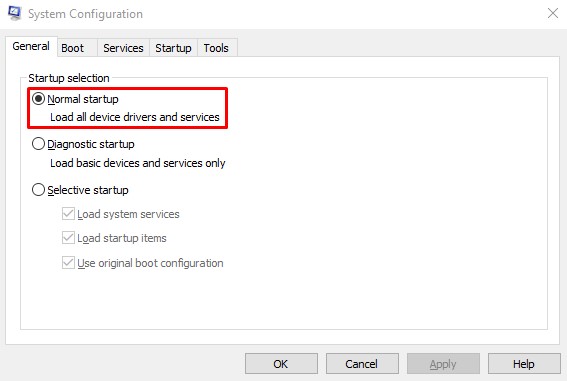
After completing these steps, restore your computer to its normal startup configuration:
- Click Start, type msconfig, and press Enter.
- Select System Configuration.
- Go to the General tab and choose Normal Startup.
- Navigate to the Services tab.
- Uncheck Hide all Microsoft services and click Enable all.
Note: If you identified a service causing the error, keep it disabled.
- Go to the Startup tab.
- Click Open Task Manager.
- Enable all the disabled programs in the Startup tab.
Note: If a startup program was causing the error, keep it disabled.
- Click Restart when prompted.
If the error persists after these steps, consider contacting Microsoft Support for further assistance.


