Fix: “There is a problem with Microsoft Windows App Runtime Dynamic Dependecy Lifetimemanager”
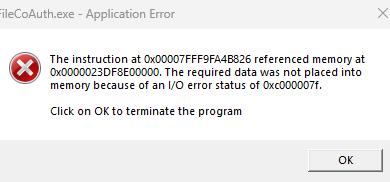
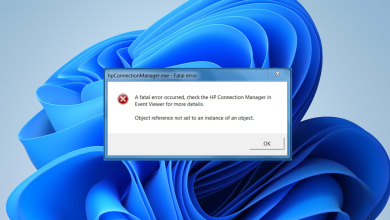
The error “There is a problem with Microsoft Windows App Runtime Dynamic Dependency LifetimeManager” typically occurs when launching applications that rely on the Windows App SDK.
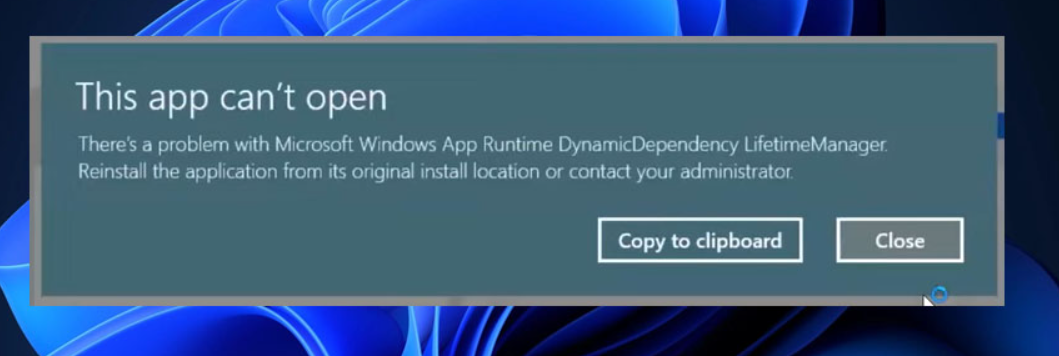
This issue often occurs after a Windows update, indicating a failure in how Windows manages runtime dependencies needed by certain applications. Updates may unintentionally break internal components or introduce conflicts that affect how apps load these dependencies.
The methods below will guide you through resolving this error so your applications can launch and function properly again.
1. Reinstall the Windows App SDK
This error often occurs due to corrupted or missing system dependencies required by certain apps. One of the key components is the Windows App SDK, which provides essential APIs and tools that some applications depend on. Reinstalling the Windows App SDK can restore these dependencies and ensure compatibility, making it a good first step in troubleshooting the issue.
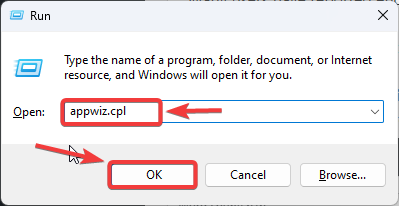
- Press Win + R to open the Run dialog, type appwiz.cpl, then click OK to open Programs and Features.
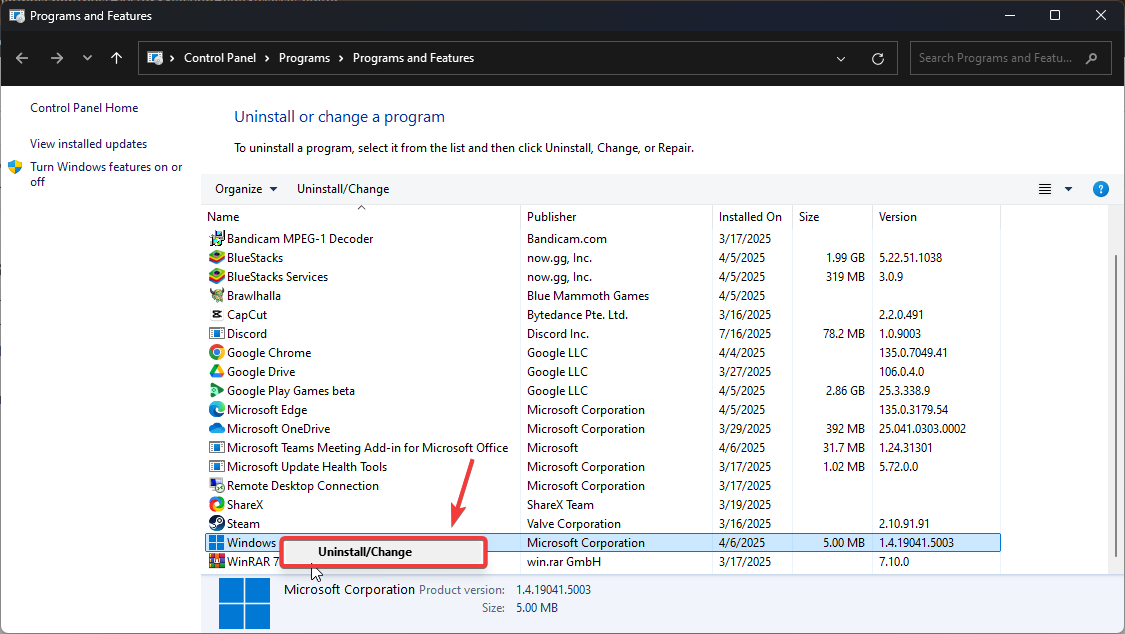
- In the list of installed programs, locate Windows App SDK, right-click it, and select Uninstall to remove the current version.
 Note: If you don’t see Windows App SDK in Programs and Features, open Settings → Apps → Installed apps or run
 winget list Microsoft.WindowsAppRuntime.*
and remove every listed runtime package before installing the latest version.
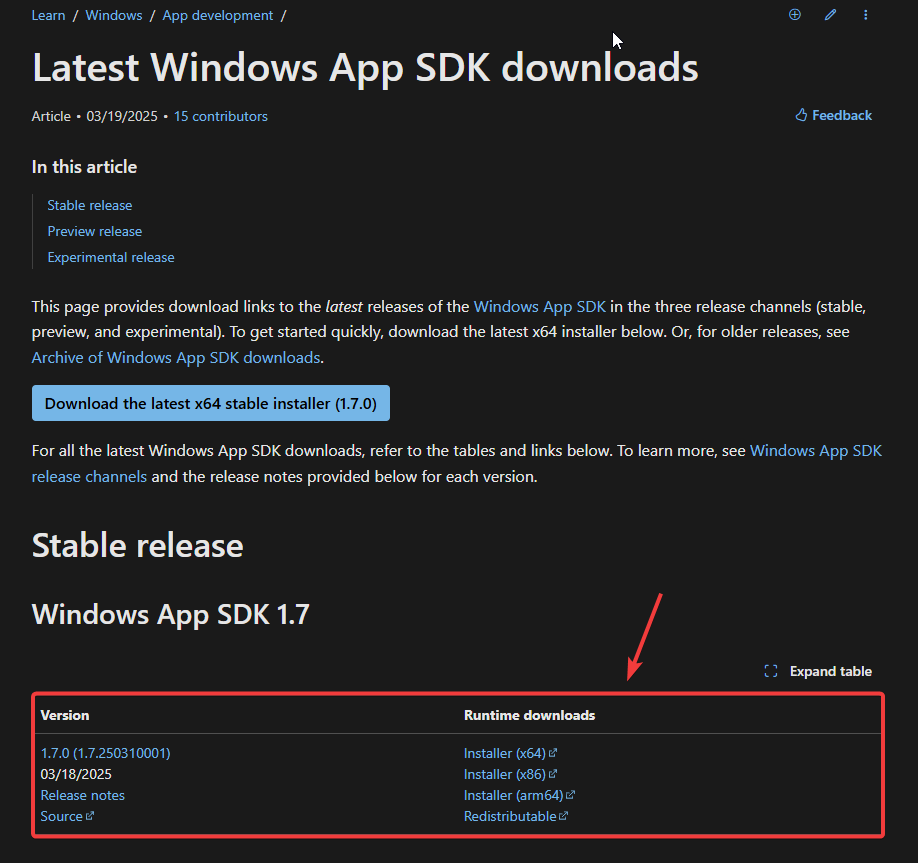
- Visit the official Windows App SDK download page in your web browser.
- Download the latest stable version, making sure to select the correct package for your system architecture (x64 for most modern PCs, x86 for 32-bit systems, or ARM64 for ARM-based devices).
- Run the downloaded installer and follow the installation wizard prompts to complete the setup.
- Restart your computer to finalize the installation and ensure all components are properly registered.
- Verify the installation by opening PowerShell and running this command to check the installed runtime version:
Get-AppPackage -Name "*WindowsAppRuntime*"
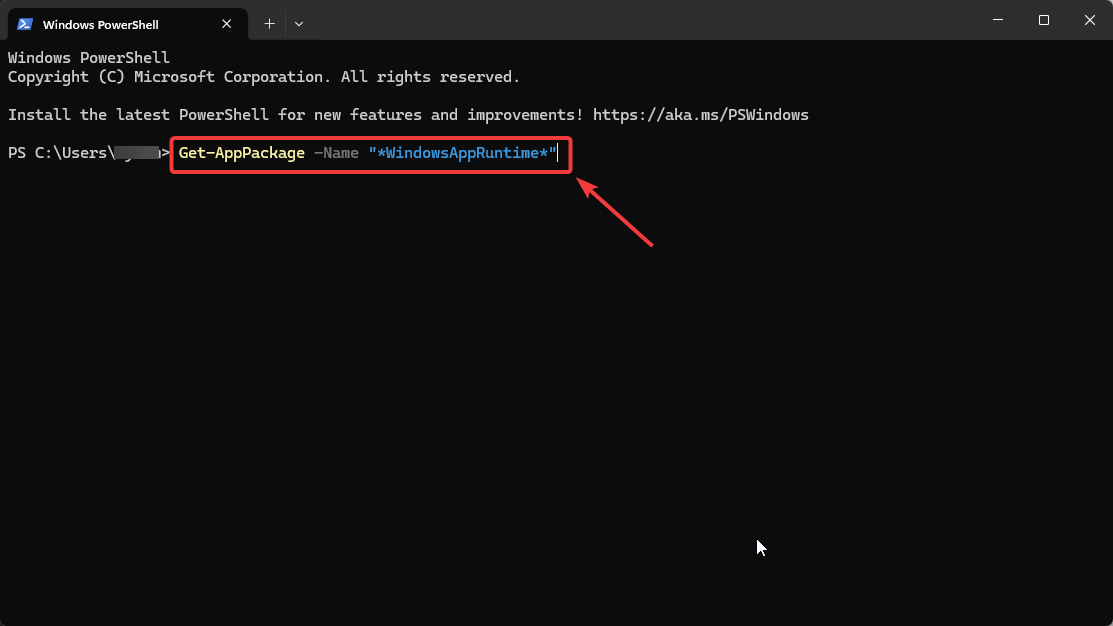
- Confirm the output shows the new version you just installed.
2. Uninstall Recent Windows Update
Many users report this issue occurring after a recent Windows update. Updates may introduce compatibility issues or bugs that affect how Windows handles app runtime dependencies. If you started experiencing the error after a specific update, uninstalling that update may resolve the problem.
- Press Windows + I to open Windows Settings.
- Navigate to Windows Update in the left sidebar, then click Update history.
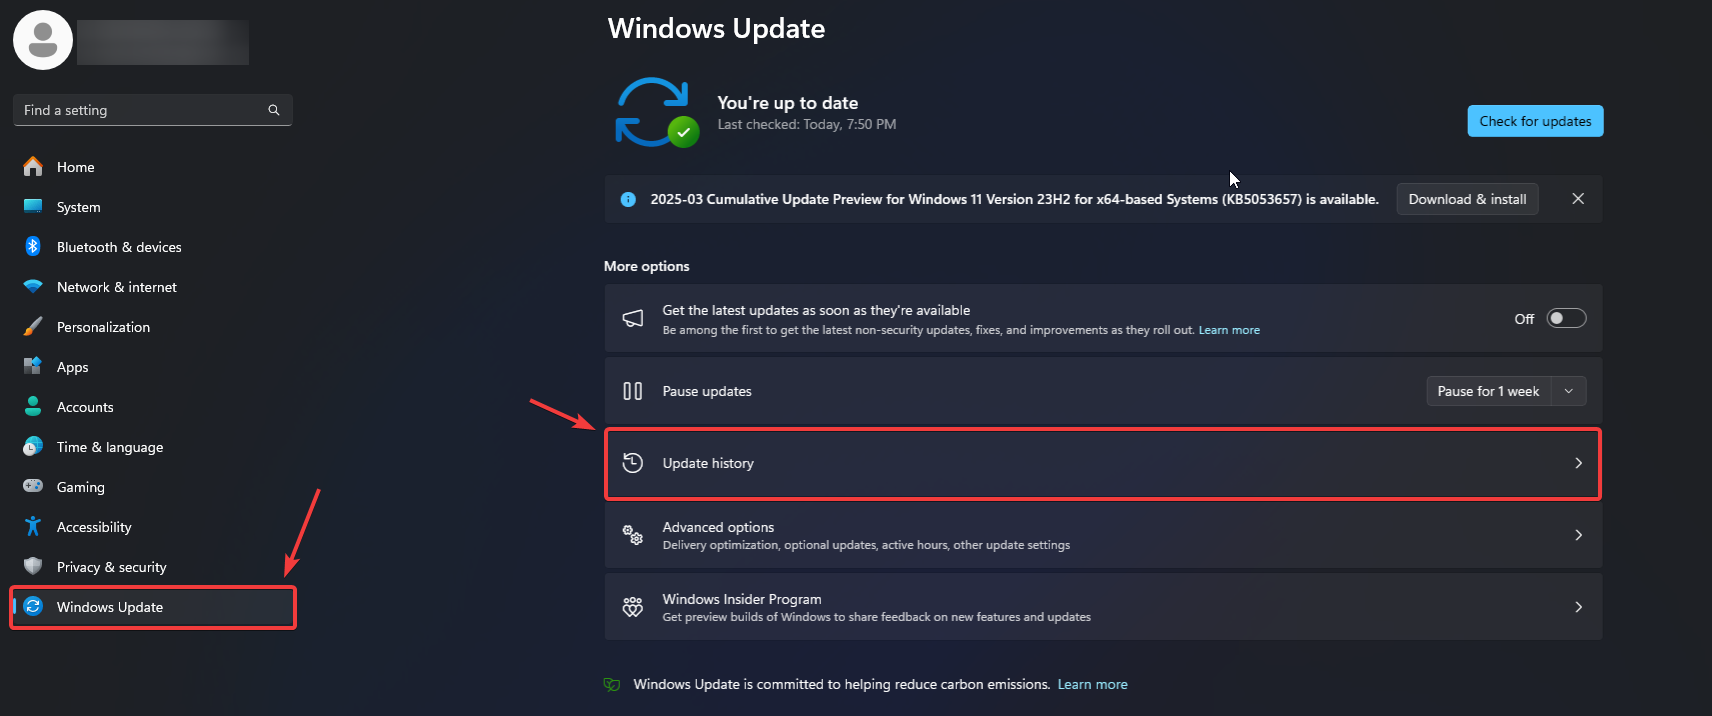
- Under Related settings, click Uninstall updates to view installed updates.

- Locate the most recently installed update in the list and click Uninstall next to it.
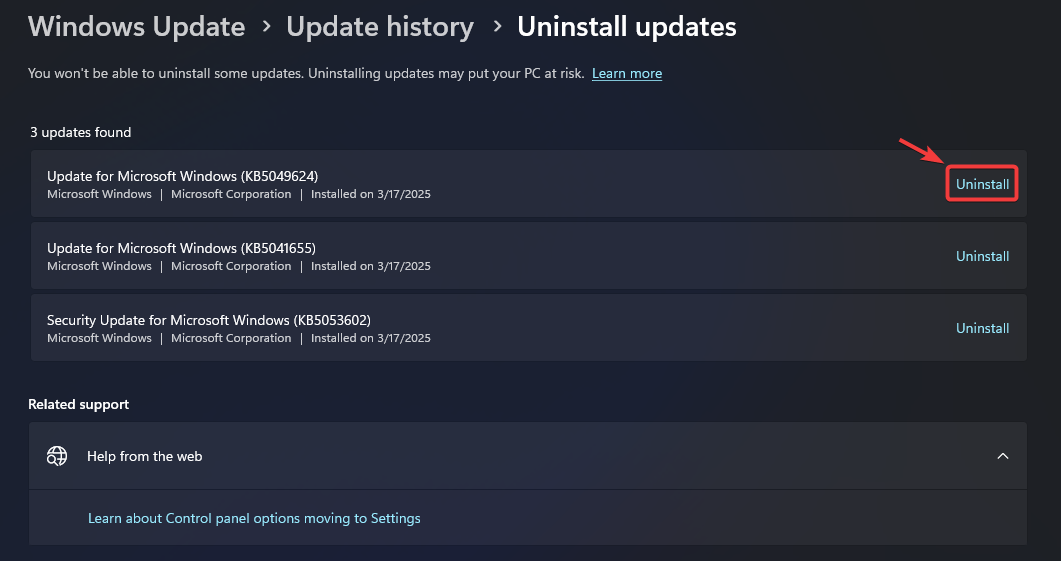
- After the uninstallation completes, restart your computer to finalize the changes.
- Once rebooted, open your application again to verify if the issue is resolved.
3. Reinstall the Application
Reinstalling the affected application can help reestablish its link with the Windows App Runtime SDK. This process re-registers necessary dependencies, restores any missing or corrupted files, and ensures the app is using the correct version of the Windows App SDK.
If the issue started after a Windows update or SDK change, it’s possible that the application’s installation files became incompatible or corrupted. In such cases, a clean reinstall can resolve the conflict and restore normal functionality.
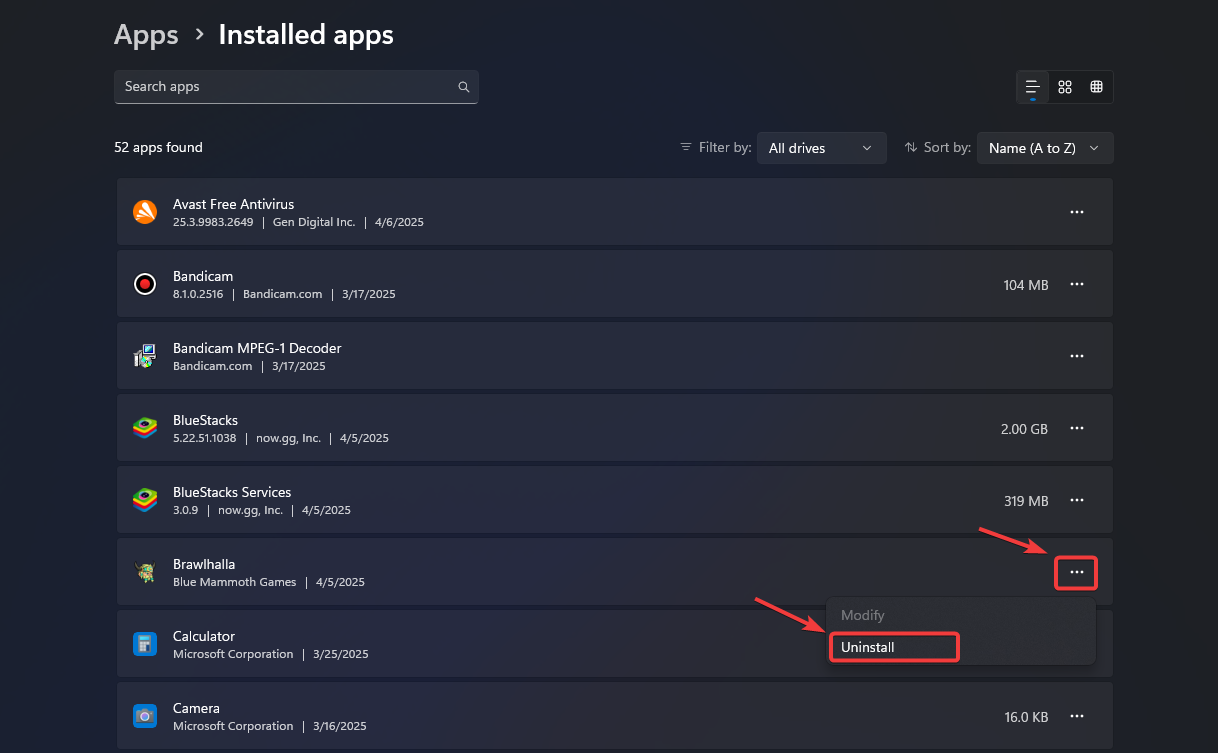
- Press Windows key + I to open Windows Settings.
- Navigate to Apps in the left sidebar, then select Installed apps.
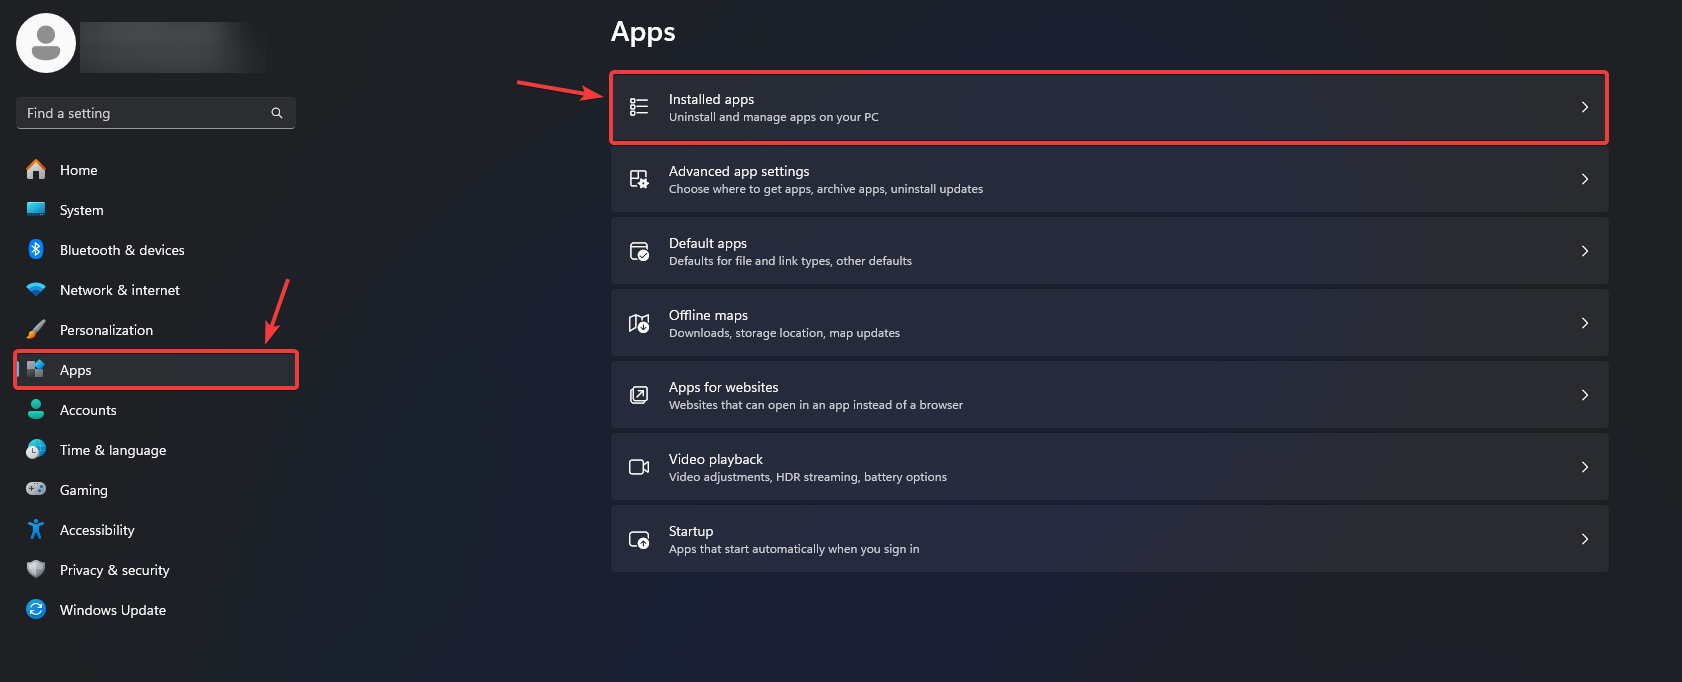
- Scroll through the list or use the search bar to locate the problematic application.
- Click the ⋮ (three dots) menu next to the app and choose Uninstall.
Note: For Store apps, users can also try “Repair” or “Reset” before a full uninstall.
- After uninstallation completes, download a fresh copy of the application:
- For Microsoft Store apps: Reinstall directly from the Store
- For other apps: Download from the developer’s official website
- Run the installer and follow the setup prompts to complete installation.
- Launch the application to verify if the issue has been resolved.
4. Perform an In-Place Upgrade
An in-place upgrade reinstalls your current version of Windows while keeping your personal files, installed applications, and most settings intact. Because it replaces core system files and refreshes Windows components, it’s an excellent repair method for stubborn issues caused by corrupted files, failed updates, or registry errors—especially when simpler troubleshooting hasn’t worked.
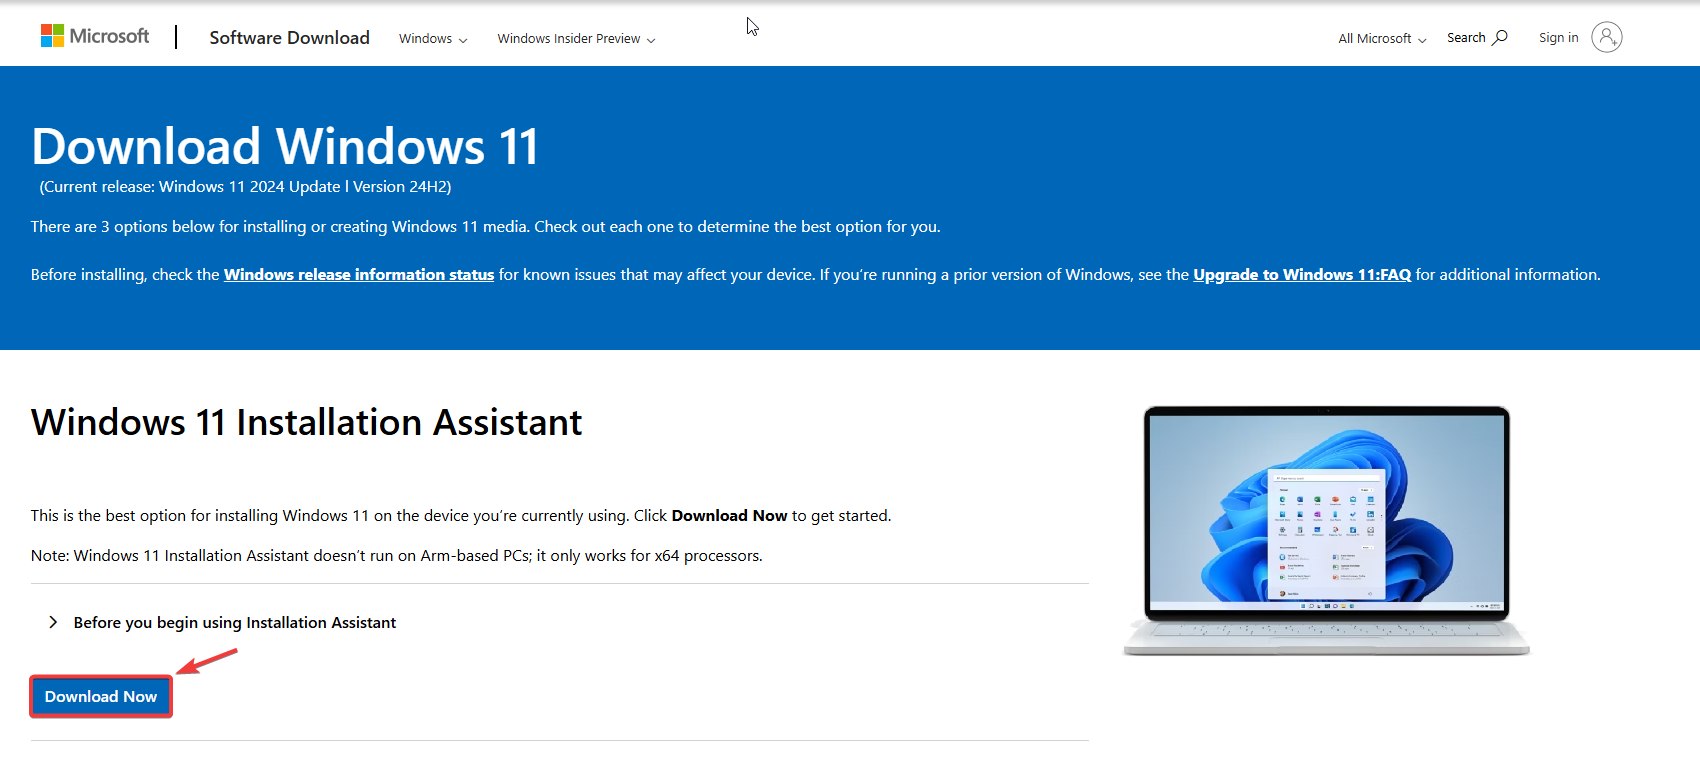
- Visit Microsoft’s official Windows 11 Installation Assistant page and click the Download now button.
- Run the downloaded installation assistant and follow the step-by-step prompts that appear.
- The tool will automatically verify your system compatibility before downloading Windows 11 updates.
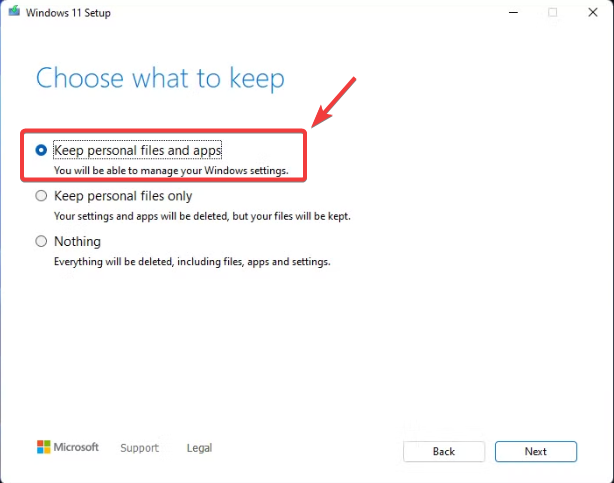
- When prompted, ensure you select Keep personal files and apps to preserve your data during the upgrade.
- The upgrade process may take 30-60 minutes and will require multiple automatic restarts – don’t interrupt this process.
- After completion, your PC will be running the latest Windows 11 version with all your files intact.
- Finally, relaunch the application that was experiencing issues to verify if the problem is resolved.
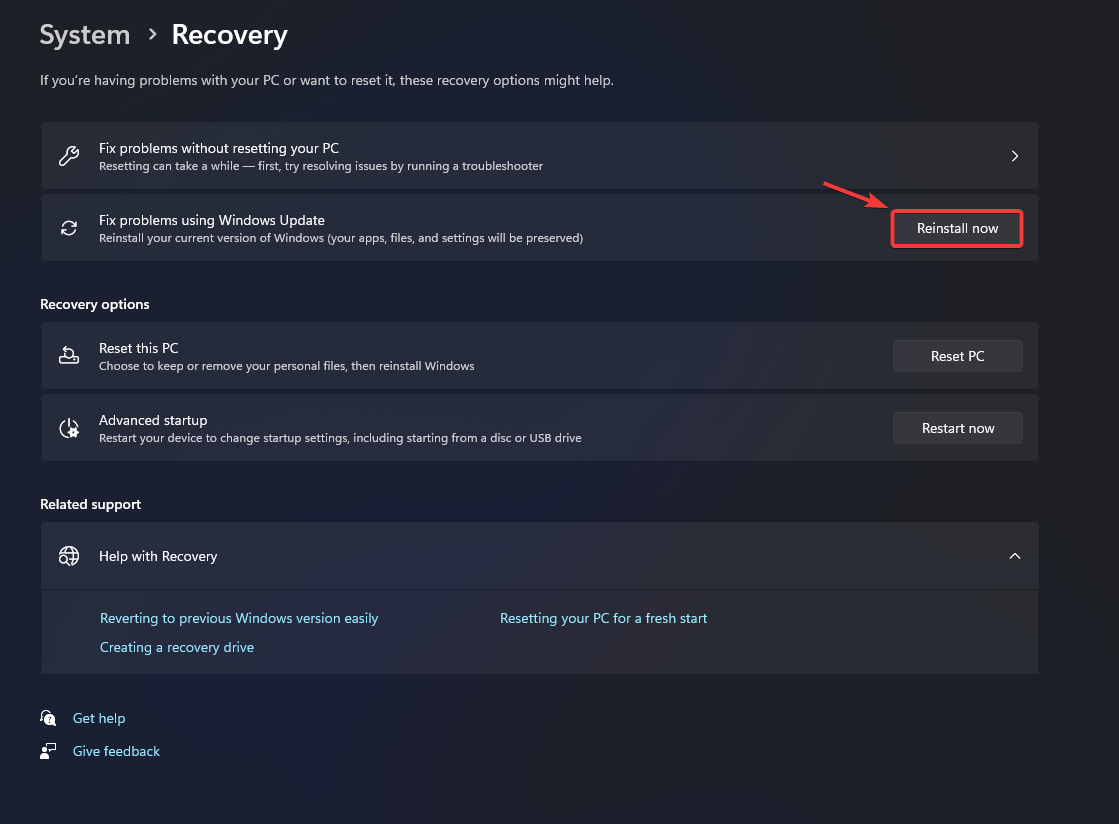
Alternatively, you can refresh Windows while keeping your files through these steps:
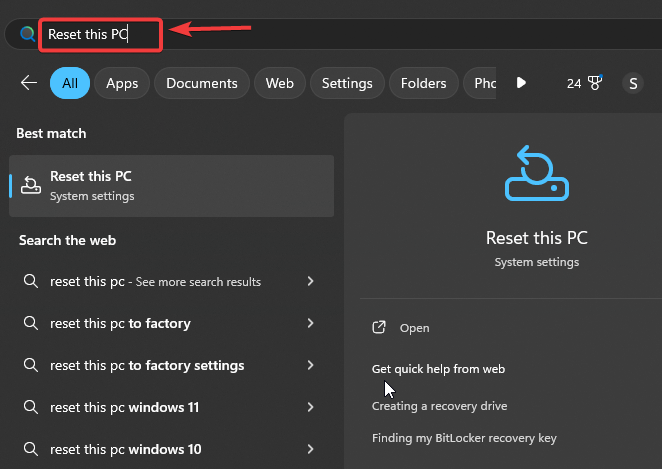
- Open the Start Menu and search for Reset this PC, then select the matching system setting.
- Choose Reinstall Now under the “Fix problems using Windows Update” option.
- After the reset completes (typically 20-40 minutes), check if your original issue persists.