Fix: Memory_Management Error (Blue Screen of Death) Windows
BSOD or blue screen of death error messages are not anything new if you have been a Windows user for quite some time. BSOD is often triggered by fatal system errors that can have several causes. One of these BSODs is the stop code MEMORY_MANAGEMENT error which does not exactly tell you where the issue is and thus the stop code in such a scenario is really helpful. Stop codes are used to pinpoint the source of the problem since they are linked to specific errors. You might face this error while opening a certain application or at times even when your computer is sitting idle. Upon receiving the error message, your computer reboots and the process continues.

First things first, what exactly is the memory management error? As it turns out, memory management is actually very vital to your computer and specifically the operating system, Windows in this case, so that your system runs without any issues. As obvious from the name itself, memory management is basically responsible for managing your system memory. This includes a whole lot of things like your RAM, your GPU’s RAM and much more. When your operating system is not able to manage the memory of your system properly, you will have to deal with issues like the MEMORY_MANAGEMENT blue screen of death here. Memory management keeps track of your memory, whether it is being used or is free.
With that said, before we proceed with showing you the different workarounds that can help you get rid of the blue screen of death error, let us first understand why this issue actually occurs so that you can isolate the issue source which would help in ultimately resolving the issue. So, without further ado, let us get started.
- Faulty RAM — As it turns out, the most apparent cause of the issue in question would be your RAM sticks. If your RAM sticks are faulty or not seated properly on your motherboard, it can cause the memory management error which is why you will have to check your RAM sticks and make sure that they are working fine.
- Faulty Drivers — Another cause of the error message here can be faulty drivers on your system. In such a scenario, you will have to update your drivers on your system and then check if the issue persists.
- Third-Party Software — Third-party software on your system can also contribute to the error message that you are facing here. In such a scenario, we would recommend to start your Windows 10 in safe mode to see if the blue screen of death error occurs there. In case it doesn’t, that would verify your suspicion and you will have to uninstall the software that is causing the issue.
- Disk or System Errors — Finally, another reason that you might be facing the issue here could be due to any disk or system errors. Such errors can arise sometimes and they can be easily fixed using builtin Windows utilities for the very purpose.
Now that we have gone through the possible causes of the error message in question, it is time to take you through the different solutions that can help you resolve the issue. It is important to note that the memory management error is not linked to something specific and you will have to try a range of fixes to actually resolve the issue as the cause of the problem can vary in different cases. With that said and out of the way, let us get started without any delay.
Verify System Files
The first thing that you should do when you face the error message in question is to verify that your system files are fine. This will remove the possibility of any corruption or damage to your system files which can sometimes be a factor in triggering the memory management error. To do this, we will be using the System File Checker tool, also known as SFC, that comes with every version of Windows. With the help of this utility, we will run an SFC scan on your system. The tool will scan your system files for any corruption and then try to repair them. To do this, follow the instructions given down below:
- First of all, you will have to open up an elevated command prompt. To do this, search for cmd in the Start Menu and then right-click on it. Choose Run as administrator from the drop-down menu.

Running Command Prompt as an Admin - Once the command prompt has opened up, type in “sfc /scannow” in the prompt without the quotes and then hit the Enter key.

Running System File Checker Tool - Wait for it to complete the scan and repair process. In addition, you can also use DISM to repair Windows,which is an additional utility that checks the health of your Windows machine and then repairs it.
Update your Drivers
As it turns out, if you have faulty drivers on your system, that can trigger the problem that you are facing as well. In such a scenario, it is recommended that you make sure all your drivers are up to date. It may even be a good idea to uninstall the drivers and then reinstall them so that you are running on the latest version. Instead of using the Device Manager, you can also refer to your manufacturer’s website to download the drivers of your product and then install them. This includes your GPU drivers and more. To update your drivers, you can follow our guide that takes you through the process step by step here.
Perform Memory Diagnostic Test
The memory management error can, more often than not, be associated with bad RAM sticks. You can check and improve your RAM health very easily via a built-in utility in Windows or with the use of a third-party tool, whichever suits you. Windows comes up with a built-in Memory Diagnostic tool that checks the memory on your computer and reports issues if any. To do this, follow the instructions given down below:
- First of all, open up the Start Menu and then search for Windows Memory Diagnostic. Open it up.
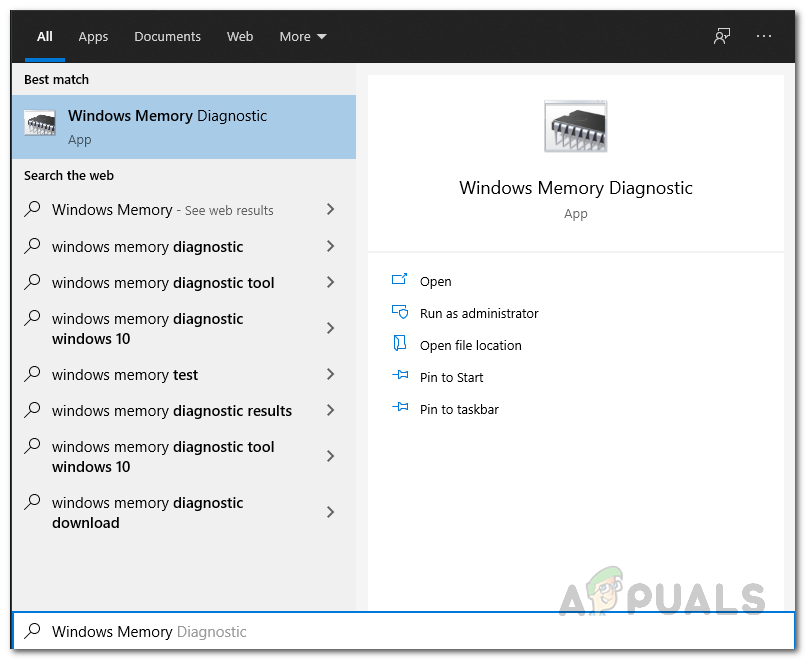
Searching for Memory Diagnostic Tool - On the dialog box that appears, click on the Restart now and check for problems (recommended) option to start the process.
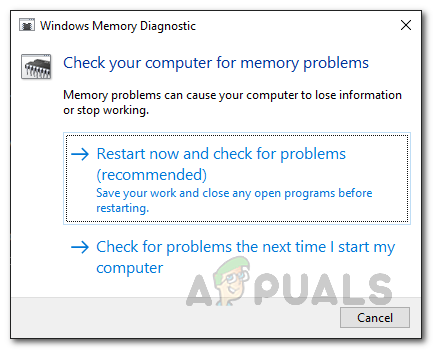
Running Memory Diagnostic Tool - Wait for your system to restart automatically. Once it restarts, it will start the diagnostic automatically so wait for it to complete.
- Once it has completed, your system will restart and you will be shown the result in a notification.
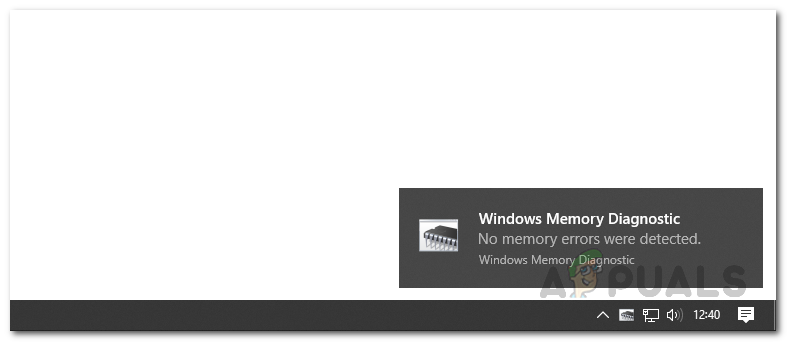
Windows Memory Diagnostic Results
You can also use a third-party tool like Memtest86 to check the memory on your system. You will need a USB for this so make sure you have one. To do this, follow the instructions given down below:
- First of all, go to Memtest86 website by clicking here.
- There, click on the Download button to download the application. Extract the zip file and then navigate to the extracted folder.

Downloading MemTest86 Tool - Before running the app, go ahead and insert your USB into your computer. Then, run the imageUSB.exe file to start the application.
- Choose your USB under the Step 1 section on the application. Make sure you have selected the correct disk because everything on it will be formatted.
- Once you have done that, go ahead and click the Write button.
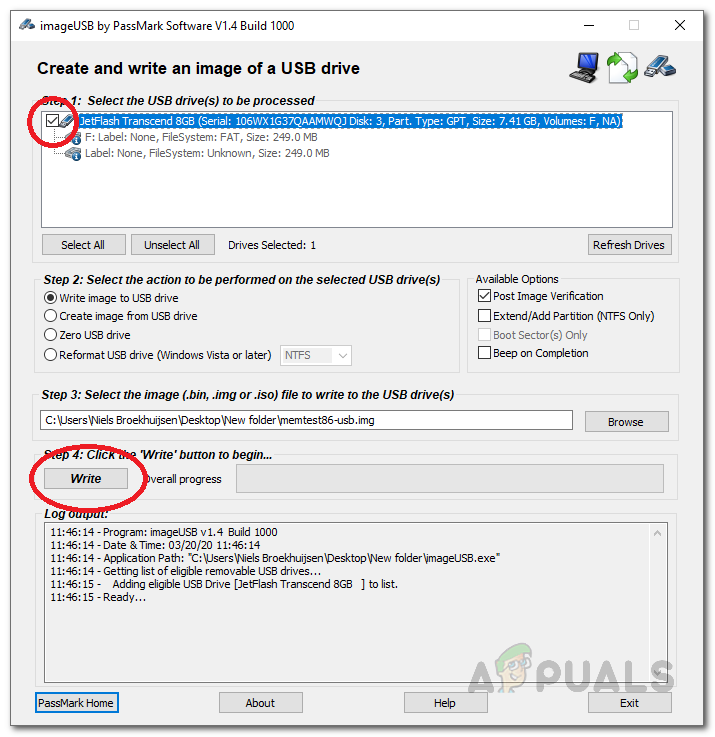
MemTest86 Writing Tool - Wait for the writing process to complete. It can take a while so be patient.
- After it has completed, go ahead and restart your computer. As your computer, enter the boot menu by pressing F2, F8, F10, DEL or whichever key is appropriate for your computer.
- Then, boot into the inserted USB drive.
- Click on the Config button once taken to the Passmark MemTest86 screen.
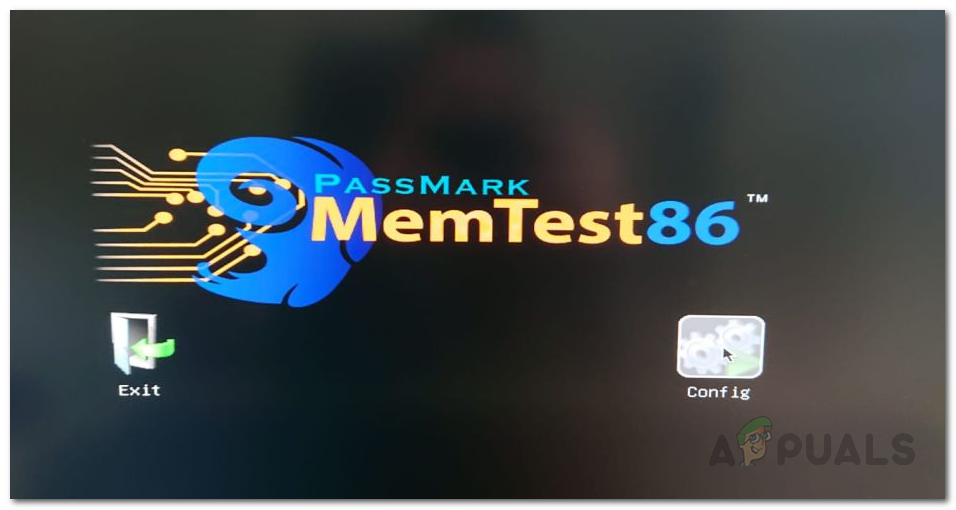
MemTest86 Boot Screen - After that, click on the Start Test option to start the diagnostic test.
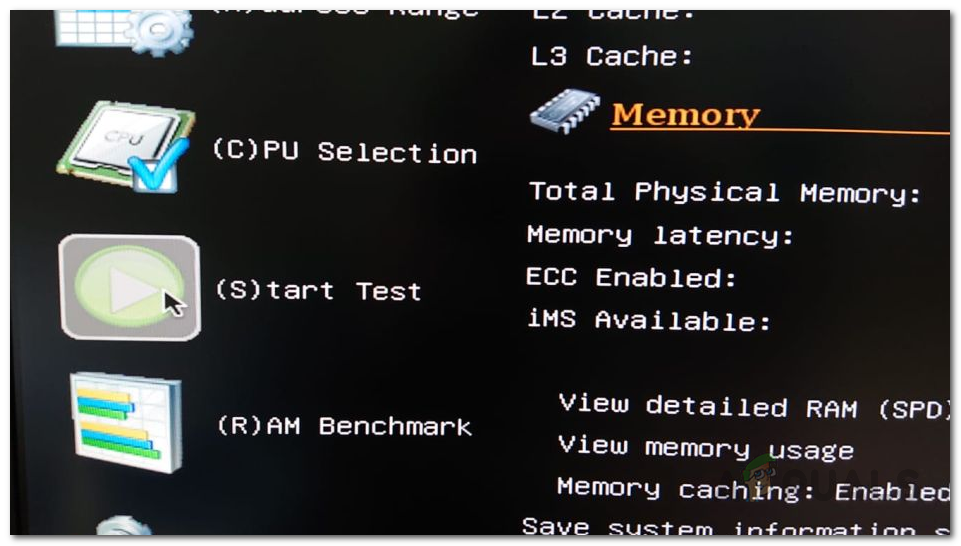
Starting Memory Test - Wait for the test to complete as it can take some time depending on your memory size.
Once you have the results of the test and they are negative, that means your RAM sticks are working fine and something else on your system is causing the issue. In such a case, move to the next solution. However, if there were any issues detected with your RAM, you will have to check which stick exactly is causing the issue assuming you have multiple sticks. This can be done by opening up your PC case and removing the case. Once you have removed them, put one stick back in and boot up your computer to check if you encounter any issues. Then, remove the currently seated RAM and put it in a different one. This way, you will be able to pinpoint the RAM stick that is actually triggering the issue. Unfortunately, once you have found the problematic RAM stick, you will have to simply replace it as it can’t be used anymore.
Boot in Safe Mode
As it turns out, the third-party software that you have installed on your system can also cause the memory management error that you are facing. In such a scenario, the optimal way of dealing with this would be to boot Windows in safe mode and then see if the blue screen of death error appears. In case it doesn’t, then it is pretty obvious that the issue is being caused by a third-party software on your system. If this case is applicable, you will have to uninstall any applications that you might have installed recently that could potentially be resulting in the error message. To boot Windows in safe mode, follow the instructions given down below:
- First of all, open up the Run dialog box by pressing the Windows key + R combination.
- Then, in the Run dialog box, type in msconfig and hit the Enter key.
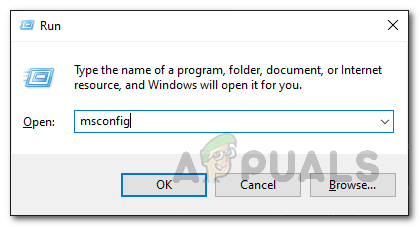
Opening up System Configuration App - This will open up the System Configuration window. Here, switch to the Boot tab.
- On the Boot tab, under Boot options, check Safe boot, click Apply and then finally click OK.

Enabling Safe Boot - Once you have done that, go ahead and restart your system. Your computer should now start in Safe mode. See if the error persists.