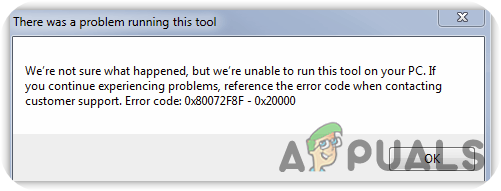
How to Resolve Windows Media Creation Tool Error Code: 0X80072F8F – 0X20000
The error may arise due to essential services not starting correctly, various application conflicts, and interference from third-party antivirus software, which prevents the installation of Windows. The most common contributing factors that can trigger the 0X80072F8F – 0X20000 error are as follows:
Further reasons contributing to this issue include:
- Lack of Administrator Privileges – Without appropriate administrator privileges, you may be unable to install Windows, as significant changes to the system cannot be made without these privileges.
- Disabled TLS 1.1 and TLS 1.2 – TLS safeguards data sent to internet applications. If TLS 1.1 and TLS 1.2 are disabled, you may encounter Error Code 0X80072F8F – 0X20000 when updating Windows.
- Incompatible System Requirements – Conflicting system requirements can also lead to this issue; ensure your system meets all necessary requirements to avoid problems.
- Non-Startup of Essential Services – If crucial Windows services fail to start properly at startup, it may result in issues including this error code.
- Unstable Internet Connection – An unstable internet connection can cause errors like this. If an internet issue is at fault, you should wait until the connection is stable before proceeding.
1. Check Minimum Requirements
This error may occur due to incompatible system specifications. Confirm that your system meets the minimum requirements for the operating system you are trying to install. You can find the minimum requirements by searching online.
2. Ensure the Internet Connection is Stable
An unstable or slow internet connection can trigger this error. Check your internet speed using a web browser; if it is below 2 Mbps, the network connection is poor. Once the speed is acceptable, you may proceed with other solutions; otherwise, wait until the internet connection stabilizes.
3. Run as Administrator
Significant changes to a computer system require administrator privileges. When users do not have administrator rights on their accounts, they may be unable to complete critical tasks.
To run the programs in administrator mode, follow these steps:
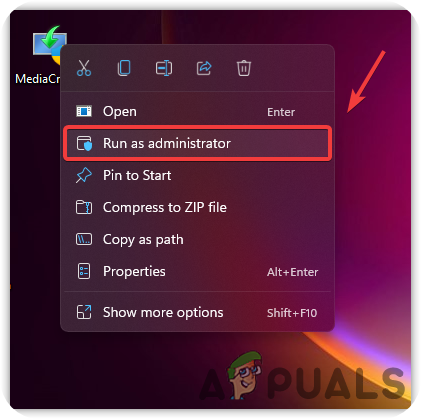
Right-click on the Media Creation Tool and select Run as Administrator from the listed options.
4. Edit Registry File
Editing registry files is a potential fix for eliminating Error Code 0X80072F8F – 0X20000, according to forum discussions. To do this, you must navigate to the Registry Editor—a database for the operating system’s low-level settings. It’s best to create a registry backup before making changes, ensuring you can restore the previous state if necessary. Follow these steps:
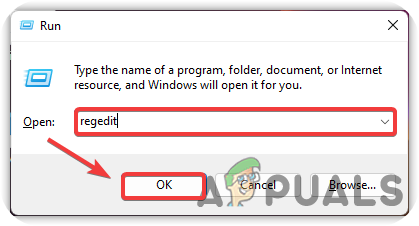
- Press Windows + R keys simultaneously to open the Run dialog.
- Type regedit and press Enter.
Launching Registry - Once the Registry Editor opens, navigate to the path:
Computer\HKEY_LOCAL_MACHINE\SOFTWARE\Microsoft\Windows\CurrentVersion\WindowsUpdate\Auto Update
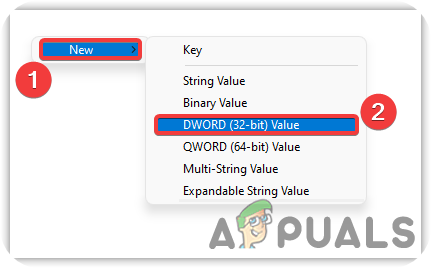
- Right-click on the empty space, hover over New, and select DWORD (32-bit) Value
- Name the new value AllowOSUpgrade and double-click it to modify its value data to 1.
Select DWORD (32-bit) - Set the value data to 1 and click OK to save changes.
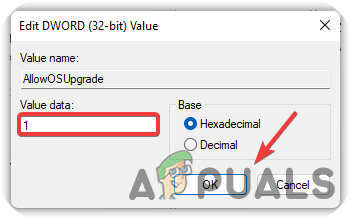
Change Value Data to 1 - After these steps, restart your computer and check if the issue persists.
5. Perform Clean Boot
A clean boot helps eliminate software conflicts and starts Windows with the necessary services and minimum drivers. This process can help resolve Error Code 0X80072F8F – 0X20000. Here’s how to perform a clean boot:
- Click the Start Menu and type msconfig in the search bar.
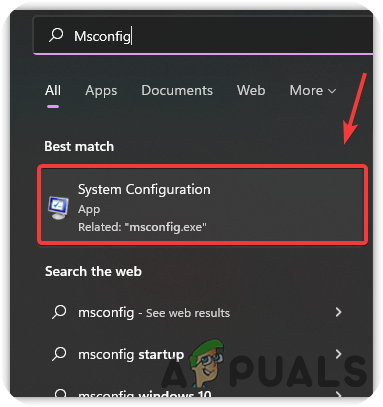
Open System Configuration - In the System Configuration window, select the Selective Startup option and untick Load startup items.
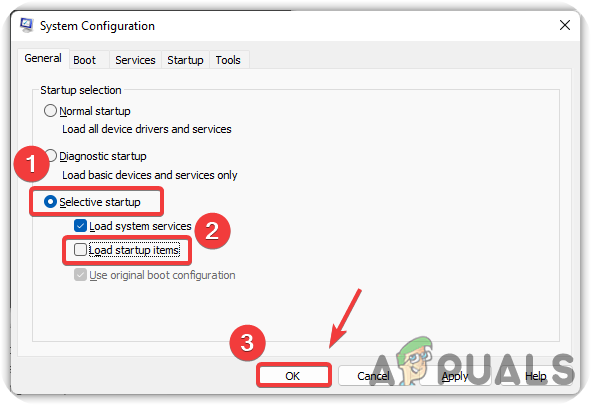
Performing Clean Boot - Go to the Services tab, tick the Hide all Microsoft services checkbox, click Disable all, then press OK.
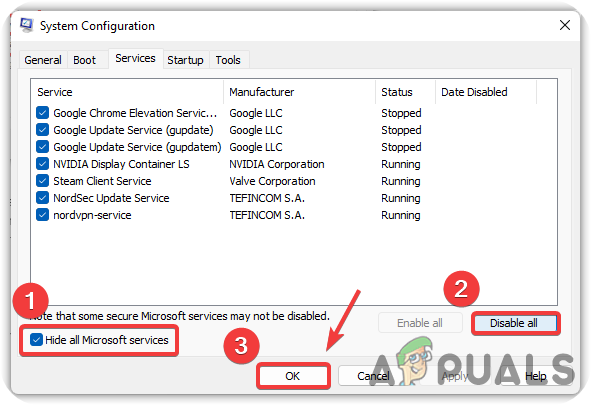
Disabling Irrelevant Services at Startup - Restart your computer and verify if the issue has been resolved.
6. Clear the Software Distribution Folder
The Software Distribution folder stores temporary Windows files necessary for installing Windows updates. If the system cannot access these files, Error Code 0X80072F8F – 0X20000 may occur. Clearing the Software Distribution folder may help resolve the issue. Follow these steps:
- Press the Windows + R keys at the same time to open the Run dialog.
- Type or copy and paste the following path:
C:\Windows\SoftwareDistribution\Download
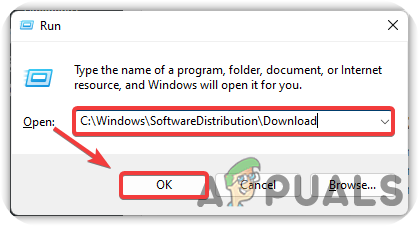
Launching Software Distribution Folder - Select all files with Ctrl + A and delete them using the Delete key.
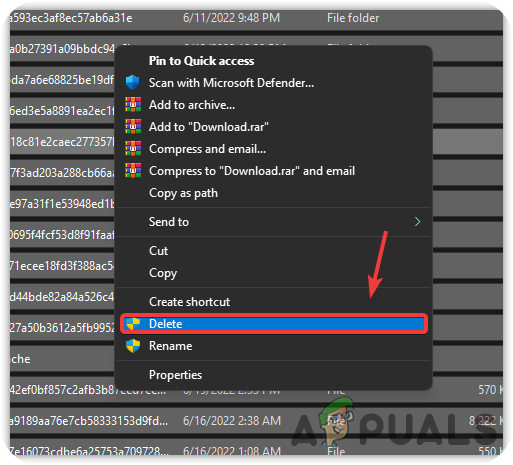
Removing Software Distribution files - Open the Start Menu, type Command Prompt, right-click it, and select Run as Administrator
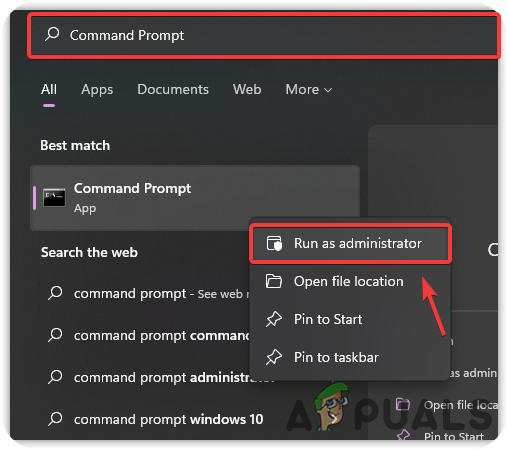
Running Command Prompt with Administrator Privileges - Enter the command
wuauclt.exe /updatenow
and hit Enter.
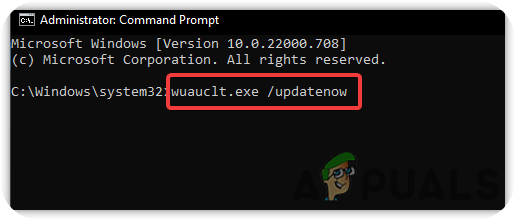
Forcing Windows to update - Restart your computer and check if the Media Creation Tool Error Code 0X80072F8F – 0X20000 persists.
7. Enable TLS 1.1 and TLS 1.2
TLS or Transport Layer Security 1.1 and 1.2 are the security protocol versions used to establish encrypted connections to send data into the applications over the network. It has been seen that the error can occur due to disabled TLS 1.1 and TLS 1.2. To fix this, you must enable it by following the instructions below:-
- Create a Registry Backup first, then open the notepad and paste the code mentioned below
Windows Registry Editor Version 5.00

[HKEY_LOCAL_MACHINE\SOFTWARE\Microsoft\Windows\CurrentVersion\Internet Settings\WinHttp]
"DefaultSecureProtocols"=dword:00000a00

[HKEY_LOCAL_MACHINE\SOFTWARE\Wow6432Node\Microsoft\Windows\CurrentVersion\Internet Settings\WinHttp]
"DefaultSecureProtocols"=dword:00000a00

[HKEY_LOCAL_MACHINE\SYSTEM\CurrentControlSet\Control\SecurityProviders\SCHANNEL\Protocols\TLS 1.1\Client]
"DisabledByDefault"=dword:00000000
"Enabled"=dword:00000001

[HKEY_LOCAL_MACHINE\SYSTEM\CurrentControlSet\Control\SecurityProviders\SCHANNEL\Protocols\TLS 1.2\Client]
"DisabledByDefault"=dword:00000000
"Enabled"=dword:00000001
- After copying the code, click File from the top then click Save As
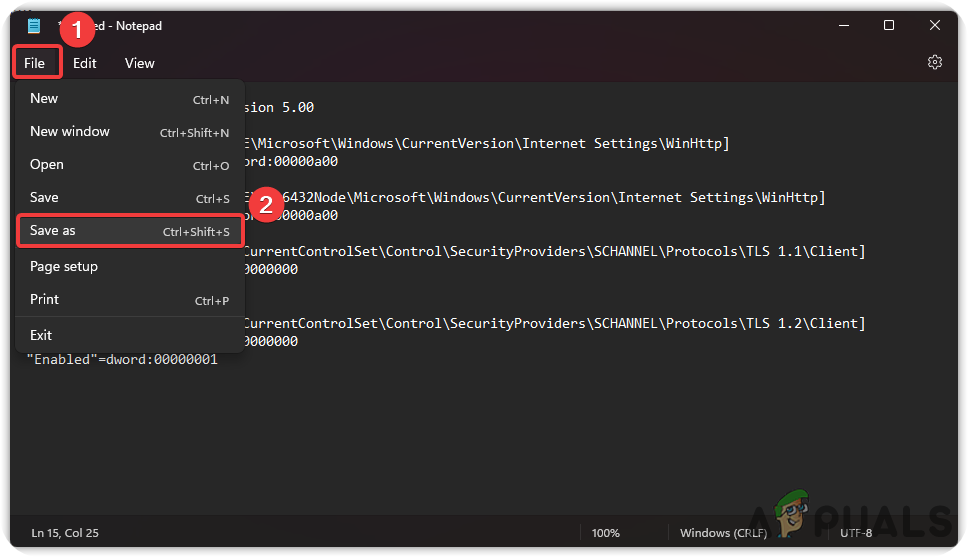
Saving File - Save the file with the .reg extension.
- Once done, double-click on the file to apply the settings in the Registry
Run the Registry File to Apply changes - Click Yes if asked for confirmation and restart Windows, then check if the issue gets resolved.
- For Windows 7 users, download the KB3140245 package from Microsoft that comes with TLS 1.1 and 1.2
8. Restart Relevant Windows Services
Another solution for this is restarting the Windows update service. If the Windows Update service gets stopped due to a conflict of services, this error may appear on the screen. Below are the steps to restart the Windows update:-
- Press Windows + R keys to open the Run Dialog Box
- Type services.msc and press Enter
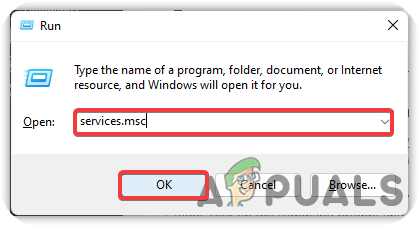
Open Services - Once the service page opened, please scroll down to Windows Update service and right-click on it to select Properties
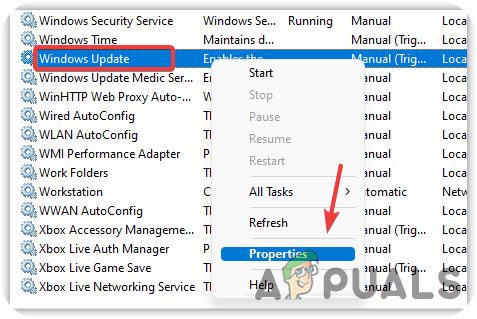
Opening Service Properties - Now change the startup type from Manual to Automatic
- If the service is stopped, click on the Start button, then click Apply and press OK
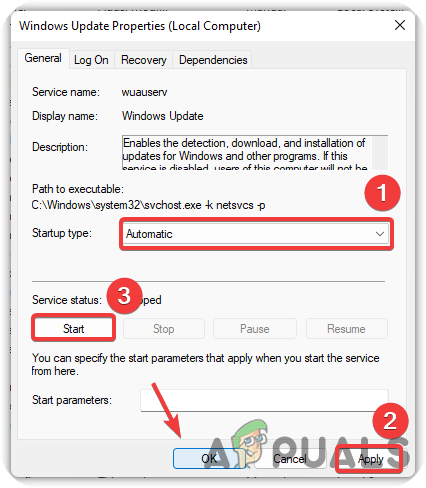
Change Service Startup Type to Automatic - Now repeat the same process for the mentioned services below
Background Intelligent Transfer Service
Server
Workstation
TCP/IP NetBIOS Helper
IKE and AuthIP IPsec Keying Modules
9. Reset Windows Update Component Services
If none of the methods worked, you could try resetting the Windows Update Component, which is used to update the operating system. Follow the steps to reset Windows component services:-
- Click Start Menu, and type Command Prompt
- Right-click on the command prompt and choose Run as Administrator
Running Command Prompt with Administrator Privileges - Now insert the following commands to reset Windows services
net stop bits
net stop wuauserv
net stop appidsvc
net stop cryptsvc
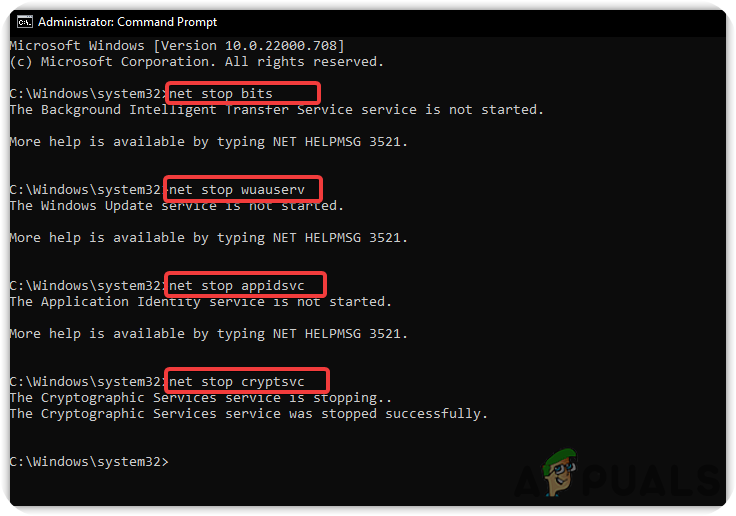
Reset Windows Update Component Services
10. Run Disk Cleanup
Disk Cleanup is a utility introduced to counter any corruption in Windows that may lead to errors. It is also used to free up the space by removing the unnecessary files, cache files and the files you rejected, which end up in the recycle bin. Below are the steps to run the Disk Cleanup utility.
- Open File Explorer and right-click on C Drive
- Select Properties from the options menu
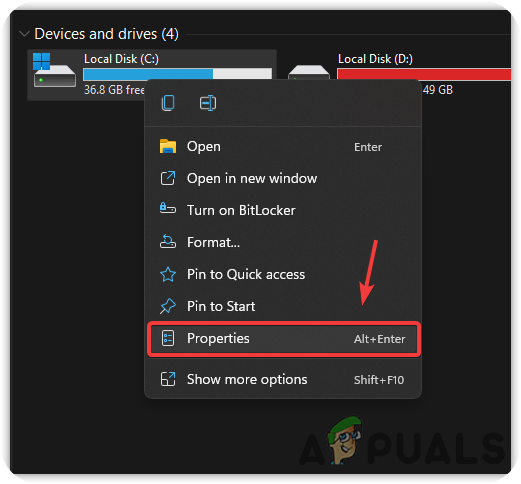
Launching Disk Properties - Click Disk Cleanup and wait for the page to load up
- Check mark all the files and press OK to delete
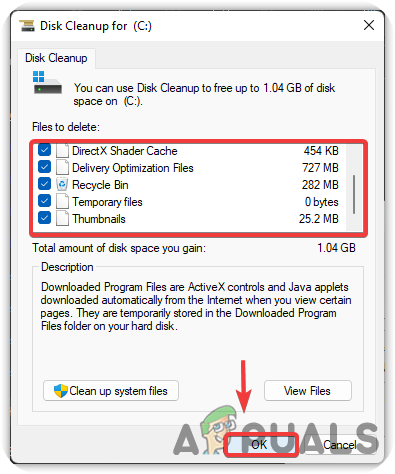
Removing Unnecessary Files From System - Once done, check if the issue persists.
11. Download Windows ISO File
Another solution for this issue is downloading the ISO file from the official website. Downloading the Windows IS0 file will fix this issue. below are the steps that will help you in this:-
- Download the ISO file of the operating system from the Windows Media Creation Tool
- Once the download is finished, right-click on it and select Mount

Mount ISO Files - Now run the Windows setup as an administrator, and this will start upgrading Windows to the latest.
12. Install Windows Using External Device
You can install Windows from an external device such as a mobile, laptop or computer. We have mentioned the steps for both devices, that may help you to install Windows through external devices.
12.1. Install Windows Using Mobile Phone
- Download Windows Media Creation Tool
- Once the downloading is finished, run the media creation tool
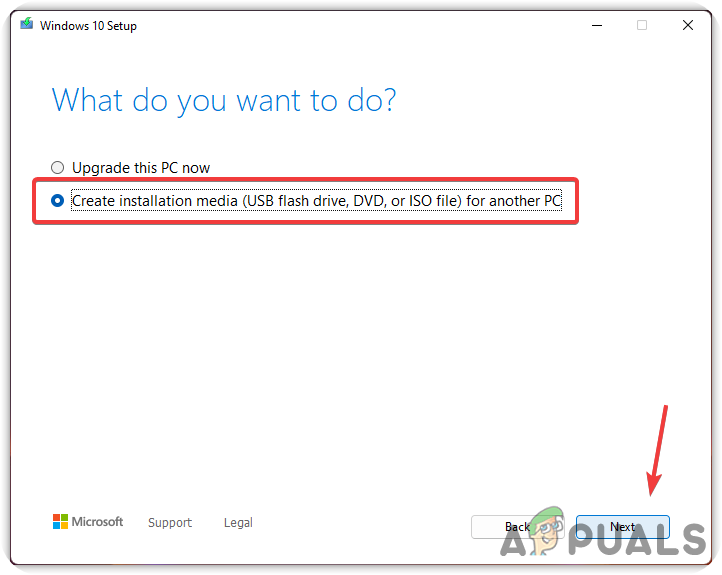
- Accept the notices and license terms, then select the radio option named Create Installation Media for Another PC and press Next
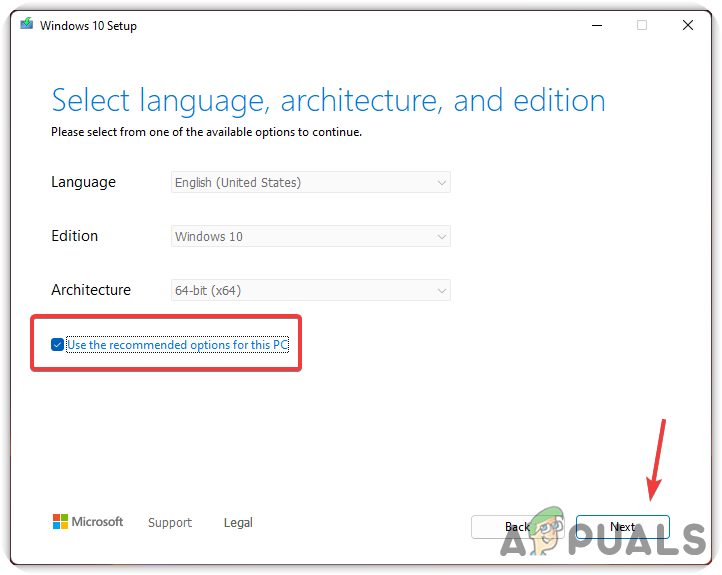
configuring Windows Setup - On the next screen, make sure the option Use the recommended options for this PC is checked, then click Next
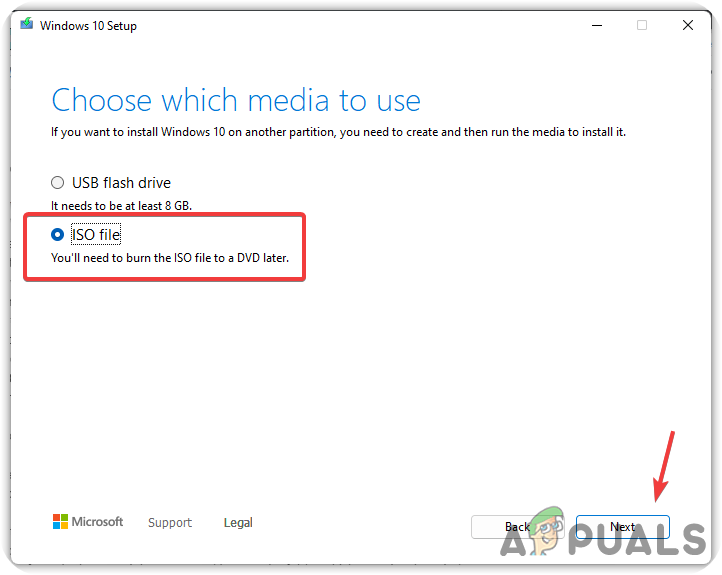
Leave the Recommended option selected - Select the option named IOS File and click Next
Select ISO - Choose the destination where you want to install Windows ISO File
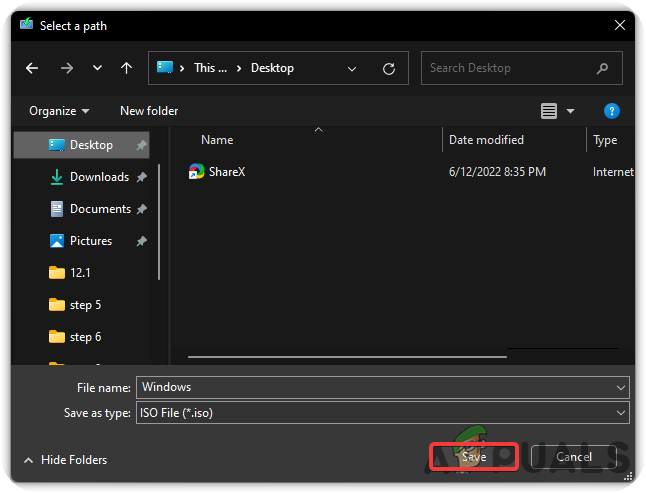
Downloading ISO File - Once done, click Save, and it will start creating Windows ISO.
- Now it’s time to transfer the Windows ISO file to your mobile phone. Use the USB cable to transfer the file to an easily remembered folder.
- Once you transfer it, download DriveDroid
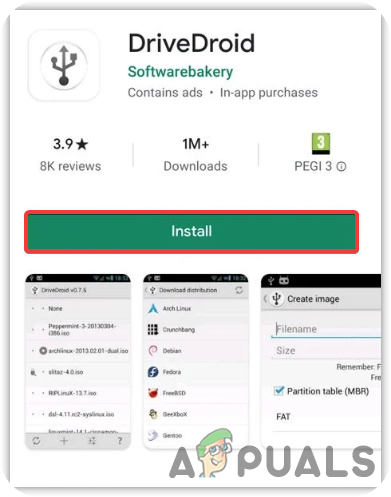
Install DriveDroid - Open the DriveDroid, and it will request the root access that you will grant
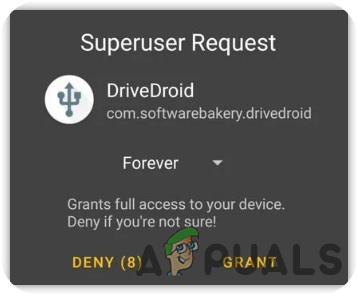
Grant the Root Access - Now tap on CONFIGURE IMAGE DIRECTORY and select the folder where you copied the Windows ISO file

Configure Image Directory - Now connect your mobile phone to your computer and choose the Standard Android Kernel
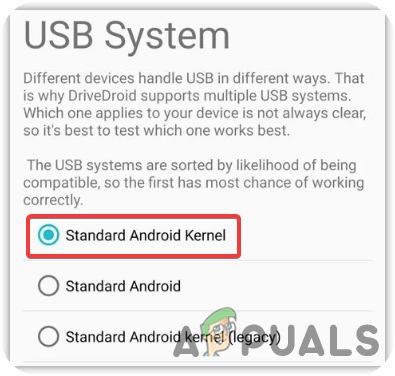
Selecting Standard Android Kernel - On the next screen, select Android Shows Up On OS and click Next
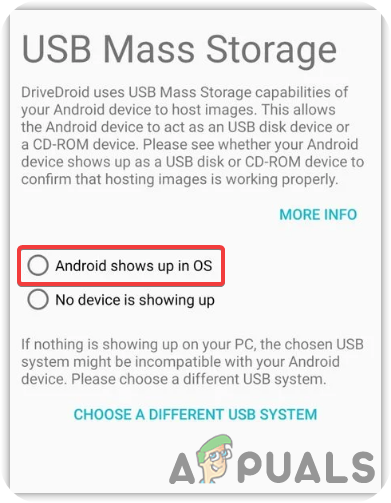
Select Android Shows Up On OS Note: If the device does not appear on your computer, then select Choose a Different USB System and try again
- Select Booted Successfully using DriveDroid then click Next. Again click Next to finish the process
- Now go back to the homepage where Windows 10 ISO might already feature. If not, then tap the Gear Icon from the top right corner and select Image Directories
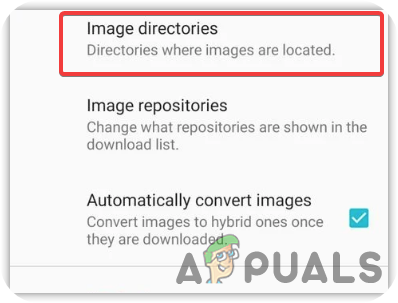
Select Image Directories - Select the last directory and tap the red circle icon from the bottom right corner then browse the folder which contains the ISO file. Select ISO file.
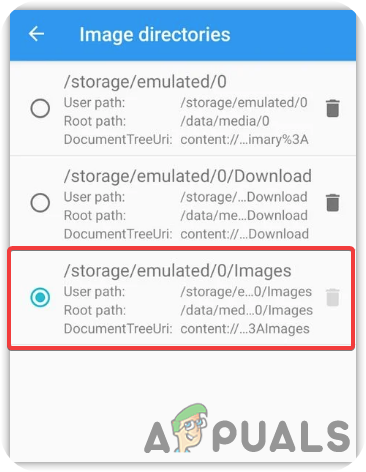
Configure DriveDroid - Go back to the DriveDroid homepage
- Then, select the Windows ISO file and choose Host Image Using CD-ROM
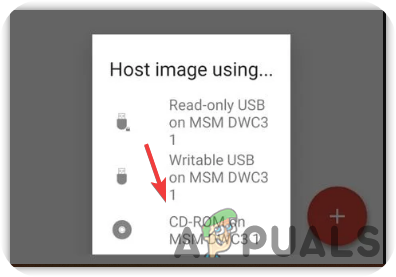
Host Image Using CD-ROM - After that, connect your device to the computer with the USB cable and shut down your computer
- Now turn on the computer and enter a boot menu by pressing the shortcut keys. Usually, F10, F11, F12, and Delete keys are used to access the boot menu
- Note: If you cannot find it, you may need to visit the manufacturer’s website.
- When the boot menu opens, select the boot device named similar to Linux File-CD Gadget, or it can be named as your mobile name
- After that, Windows will boot normally, and you can install a clean version of your Windows.
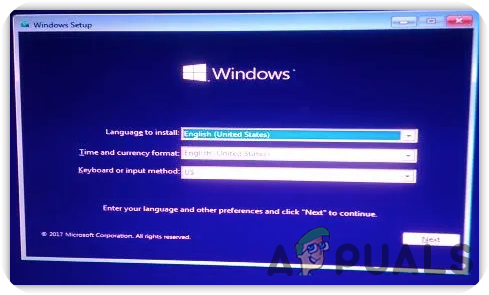
Installing Windows
12.2. Install Windows from the other Computer
- Download Windows Media Creation Tool and run it on your computer
- Accept the terms and conditions and select Create Create Installation Media for Another PC and press Next
Create Installation Media for Another PC - Make sure the option named Use the recommended options for this PC is checked
- Leave the USB Flash Drive is selected and press Next
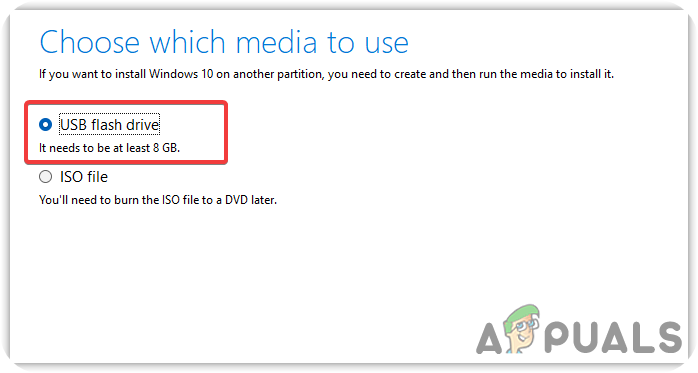
Select USB Flash Drive - It should Start downloading Windows OS. Once done, unplug the USB flash drive from the computer and plug it into the problematic computer
- Shutdown, the computer, then turn it on
- Once the loading screen appears, press the Boot Menu keys on the keyboard, such as F12 and Delete. If you are not sure, you can go to your manufacturer’s website
- Once the boot menu loads up, select the USB pen driver
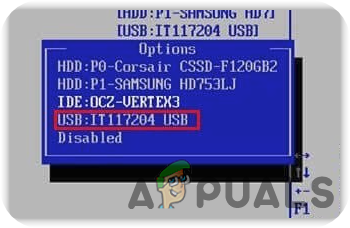
Select USB Pen Drive - Then Window will boot, and you can install a clean version of the Windows OS.
13. Disable Third-Party Antivirus Software
Third-party antivirus programs can sometimes interfere with Windows updates or the Media Creation Tool. Try disabling your antivirus temporarily before attempting the update again.
- Right-click the antivirus icon in the system tray and look for the option to disable or turn it off temporarily.
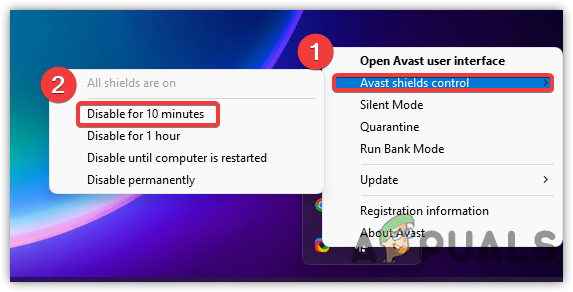
Disabling third-party antivirus temporarily - Choose the time frame for which you want the antivirus disabled (if prompted).
- Attempt the Windows update or the use of the Media Creation Tool once more.
- If the update is successful, remember to re-enable your antivirus software to keep your system protected.
14. Adjust Date and Time Settings
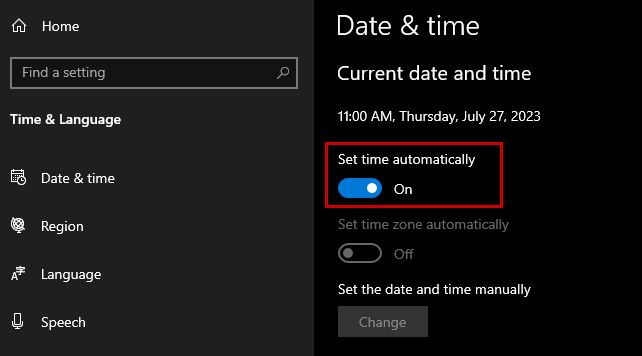
Incorrect date and time settings can lead to synchronization issues and may cause the 0X80072F8F – 0X20000 error. Make sure your computer’s date and time are accurate.
- Right-click on the date and time displayed on your taskbar and select Adjust date/time.
- Ensure the Set time automatically and Set time zone automatically options are turned on.
- If the error persists despite correct settings, try turning these options off and then back on again to force a synchronization.
- After adjusting the settings, try updating Windows or running the Media Creation Tool again.
15. Use the Windows Update Troubleshooter
Windows has a built-in tool to troubleshoot and resolve update-related issues. Running the Windows Update Troubleshooter might help fix the error.
- Go to Settings > Update & Security > Troubleshoot.
- Click on Windows Update and then select Run the troubleshooter.
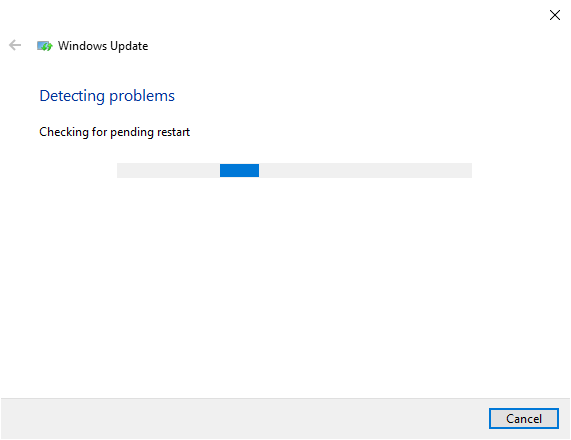
- Follow the on-screen prompts to let the troubleshooter detect and fix issues.
- Once completed, attempt the Windows update or Media Creation Tool process again.
16. Reset Windows Update Components Manually
If the previous methods have not succeeded, manually resetting the Windows Update components might resolve the problem.
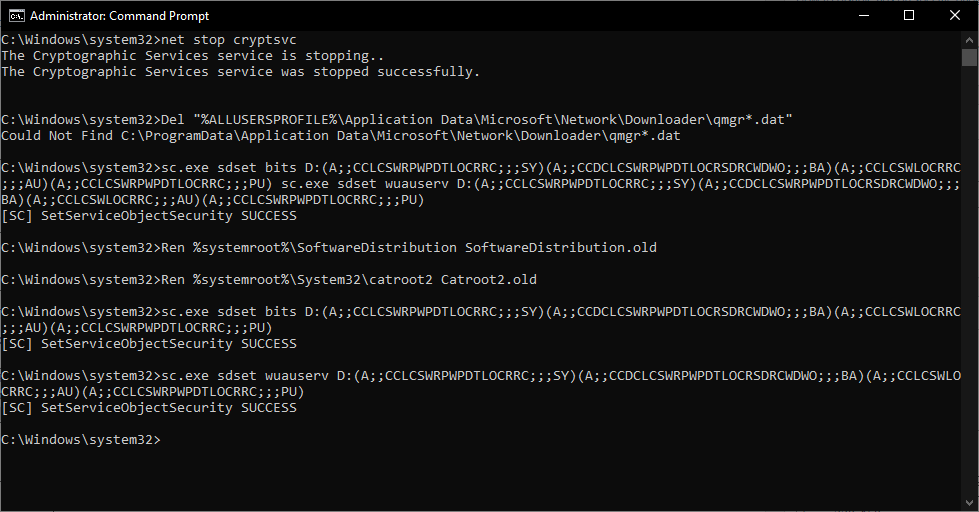
- Launch Command Prompt as an Administrator.
- Stop the BITS service, the Windows Update service, and the Cryptographic service using the following commands:
net stop bits
net stop wuauserv
net stop appidsvc
net stop cryptsvc
- Delete the qmgr*.dat files by typing:
Del "%ALLUSERSPROFILE%\Application Data\Microsoft\Network\Downloader\qmgr*.dat"
- Next, reset the BITS service and the Windows Update service to their default security descriptors using:
sc.exe sdset bits D:(A;;CCLCSWRPWPDTLOCRRC;;;SY)(A;;CCDCLCSWRPWPDTLOCRSDRCWDWO;;;BA)(A;;CCLCSWLOCRRC;;;AU)(A;;CCLCSWRPWPDTLOCRRC;;;PU)
sc.exe sdset wuauserv D:(A;;CCLCSWRPWPDTLOCRRC;;;SY)(A;;CCDCLCSWRPWPDTLOCRSDRCWDWO;;;BA)(A;;CCLCSWLOCRRC;;;AU)(A;;CCLCSWRPWPDTLOCRRC;;;PU)
- Rename the SoftwareDistribution and Catroot2 folders using:
Ren %systemroot%\SoftwareDistribution SoftwareDistribution.old
Ren %systemroot%\System32\catroot2 Catroot2.old
- Reset the BITS service and the Windows Update service to the default security descriptor. Use the following commands:
sc.exe sdset bits D:(A;;CCLCSWRPWPDTLOCRRC;;;SY)(A;;CCDCLCSWRPWPDTLOCRSDRCWDWO;;;BA)(A;;CCLCSWLOCRRC;;;AU)(A;;CCLCSWRPWPDTLOCRRC;;;PU)
sc.exe sdset wuauserv D:(A;;CCLCSWRPWPDTLOCRRC;;;SY)(A;;CCDCLCSWRPWPDTLOCRSDRCWDWO;;;BA)(A;;CCLCSWLOCRRC;;;AU)(A;;CCLCSWRPWPDTLOCRRC;;;PU)
- Restart the BITS service, the Windows Update service, and the Cryptographic service with the following commands:
net start bits
net start wuauserv
net start appidsvc
net start cryptsvc
- Finally, restart your computer and try updating once again.
By executing these steps, you will have manually reset the components related to Windows Update, which might resolve any persistent issues you’ve been facing.


Verrey good !!! Thank You so much Bro !!!