How to Fix MapleStory 2 ‘Error Code 10053’
Some MapleStory 2 players are reporting getting constant disconnects with the 10053 error code. Most affected users have reported that this behavior typically occurs while inside a dungeon.
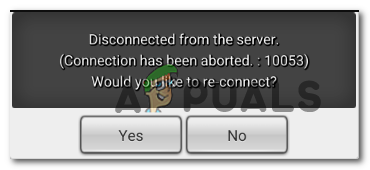
After investigating this particular issue, it turns out that there are several different scenarios that might cause this error code. Here’s a shortlist of potential culprits:
- Corrupted DNS cache – As it turns out, this problem can very well occur due to corrupted data inside the DNS cache. To resolve this problem, several affected users have flushed their DNS cache from an elevated CMD prompt.
- Bad DNS range – According to some affected users that also dealt with this issue, you might see this error code if you get assigned a bad DNS range that’s not compatible with the game server. In this case, you’ll need to make the switch to Google DNS or utilize a public Level 3 range.
- Antivirus or Firewall interference – In some cases, this problem might also occur due to some type of antivirus or firewall interference that’s inhibiting the connection between the game server and the local installation. In this case, you have 2 options – you can either whitelist the game executable or disable the overprotective antivirus while playing the game.
Method 1: Flushing the DNS cache
According to a lot of affected users, this type of MapleStory 2 error is often type related to an inconsistency with the DNS (Domain Name System). If your network device assigned a bad range, this might end up affecting communications between your local installation of MapleStory 2 and the game server.
In case this problem is still applicable, you should be able to fix this problem by using an elevated Command Prompt co clear the current DNS cache. Several affected users encountering the same problem have confirmed that they managed to get rid of the issue by flushing the current DNS cache.
If you don’t know how to do this, follow the instructions below to reset your DNS Cache:
- Press Windows key + R to open up a Run dialog box. Next, type ‘cmd’ inside the text box and press Ctrl + Shift + Enter to open up an elevated Command Prompt. When you see the User Account Control (UAC), click Yes to grant administrative privileges.

Running the Command Prompt - Inside the elevated Command Prompt, type the following command and hit Enter to flush the DNS cache:
ipconfig/flushdns
Note: Flushing your DNS cache will remove the vast majority of information stored about your DNS cache. This will force your router to assign new DNS information.
- After the operation is complete and you receive the success message, you can safely close the Command Prompt.

Example of a successfully flushed DNS Resolver Cache - Once you do this, open MapleStory 2 again and repeat the action that was previously causing the error code.
If the same 10053 error code is still occurring, move down to the next potential fix below.
Method 2: Changing the DNS
If flushing your DNS didn’t work in your case, you might be dealing with a bad DNS range. Most of the time, this is reported in instances where the default DNS allocation method is being used.
If this scenario is applicable and you suspect that you are facing this problem due to a DNS inconsistency, you should be able to fix this problem by making the switch to a different set of Domain Name Addresses (either google’s DNS or the Level 3 range open for public use).
Several affected users have managed to fix this problem by using the Network Connections window to change the default DNS values.
If you’re unsure on how to do this by yourself, follow the instructions below to change the default DNS to a controlled range and resolve the 10053 error code:
- Press Windows key + R to open up a Run dialog box. Next, type ‘ncpa.cpl‘ inside the text box, then press Enter to open up the Network Connections menu.
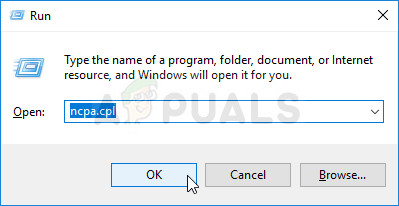
Opening Networking Settings in Control Panel - Inside the Network Connections menu, select the connection that you want to configure using the Level 3 free-range or Google’s Public DNS. If you’re currently connected to a wireless network, right-click on Wi-Fi (Wireless Network Connection) and choose Properties from the context menu.
Note: On the other hand, if you’re connected via an ethernet cable, right-click on Ethernet (Local Area Connection) instead. - Once you finally manage to get inside the Wi-Fi or Ethernet Properties screen, select the Networking tab and click on the settings box under This connection users the following items. Next, select Internet Protocol Version 4 (TCP / IPv4) and access the Properties button.
- Inside the Internet Protocol 4 (TCP / IPv4) Properties window, click on the General tab. Then, check the toggle associated with Use the following DNS server and replace the values for Preferred DNS server and the Alternate DNS server with the following values to make the switch to Google DNS:
8.8.8.8
8.8.4.4
Note: If you want to set up the level 3 public range instead, use the following values instead:
4.2.2.1
4.2.2.2
- After you save the changes that you enforced above, return to the Wi-Fi or Ethernet Properties screen and repeat step 3 and 4 again with Internet Protocol Version 6 (TCP / IPv6). However, this time, change the values for the Preferred DNS server and Alternate DNS server to the following values:
2001:4860:4860::8888
2001:4860:4860::8844
- After this last change is enforced, reboot your network connection, and wait for the next startup to complete. Once internet access is restored, open up MapleStory 2 again and see if the issues now resolved.

In case you are still seeing the 10053 error code, move down to the next potential fix below.
Method 3: Disable Windows Antivirus / Firewall
According to some affected users, this problem can also occur due to some antivirus interference that ends up inhibiting communications between your game installation and the game server. In most cases, this will happen due to a false positive.
If this scenario is applicable and you’re using a 3rd party suite like Kaspersky or Avira, disabling the real-time protection before launching the game should ensure that you’re no longer getting disconnects with the 10053 error code.
With most 3rd party AV / Firewall suites that are installed at a system level, you will be able to disable the real-time protection simply by right-clicking on the tray-bar icon and look for an option that allows you to disable the real-time protection.

However, in case this scenario is not applicable because you’re using the default security suite (Windows Defender / Windows Firewall), you’ll need to disable the real-time protection from the Windows security menu before launching the game. Here’s how to do this:
- Press Windows key + R to open up a Run dialog box. Next, type ‘windowsdefender‘ inside the run box and press Enter to open up the Windows Security menu.
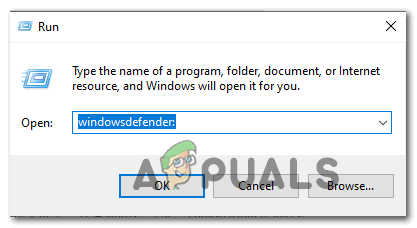
Opening Windows Defender - Once you’re inside the Windows Security menu, click on Virus & threat protection, then click on Manage settings hyperlink (directly under Virus & threat protection settings)
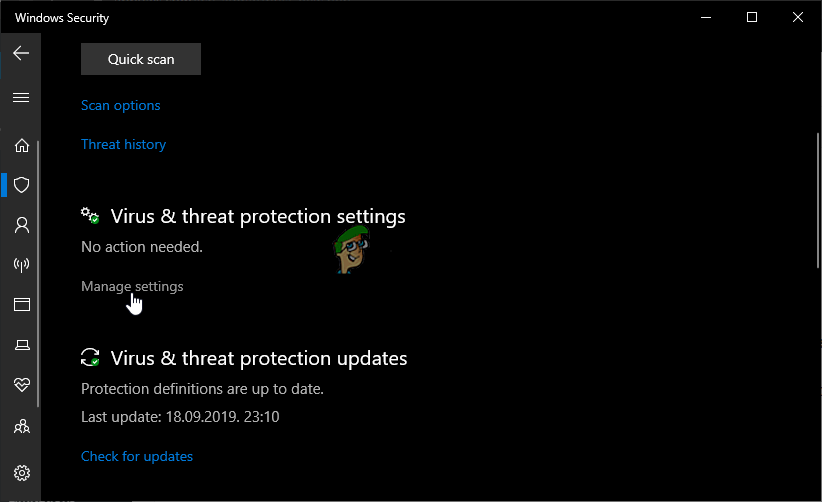
Manage Virus & Threat Protection Settings - Once you advance to the next window, go ahead and disable the toggle associated with Real-time protection and save the changes.
- Next, go all the way back to the first Windows Security window, then click on Firewall & Network Protection.
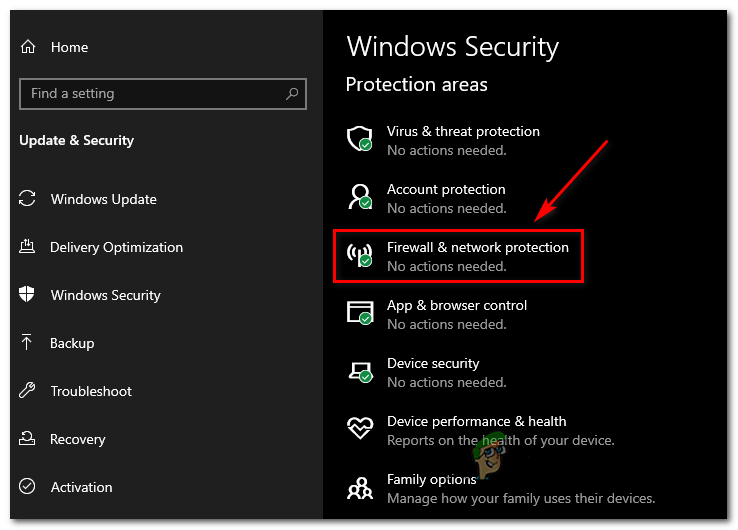
Accessing the Firewall and Network Protection menu - After you get to the next screen, click on the network that is currently active, then disable the toggle associated with Windows Defender Firewall.
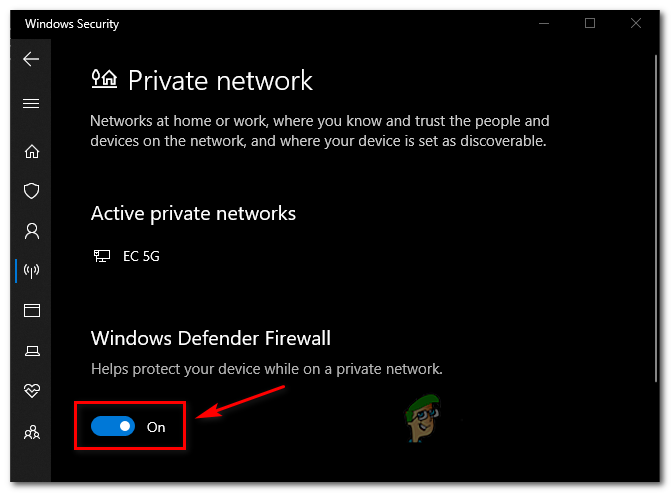
Disabling the Firewall component of Windows Defender - After you disabled both components, restart your computer, then launch MapleStory 2 and see if the problem is now resolved.
In case the same problem is still occurring, move down to the next potential fix below.
Method 4: Excepting maplestory2.exe from your firewall
If you’re not comfortable with disabling the real-time protection of your antivirus, there’s also the option of whitelisting the game’s executable in your firewall/ antivirus settings.
Note: In case you’re using a 3rd party firewall, search online for specific steps on whitelisting the executable.
If you’re still using the native Windows Firewall, follow the instructions below to ensure that you stop it from interfering with the communications between the game and the game server. Here’s what you need to do:
- Press Windows key + R to open up a Run dialog box. Once you’re inside the text box, type ‘control firewall.cpl‘ and press Enter to open up the Windows Firewall interference.
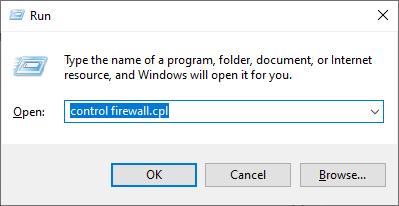
Accessing the Windows Defender Firewall - Once you’re inside the settings menu of Windows Defender, use the menu on the left to click on Allow an app or feature through Windows Defender firewall.
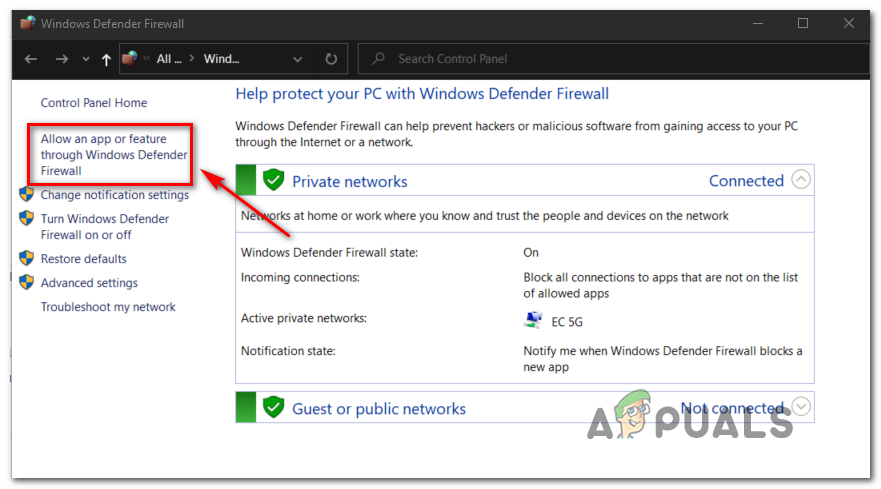
Allowing an app or feature through Windows Defender - Once you’re inside the allowed apps menu, click on the Change Settings button, then click Yes at the User Account Control.
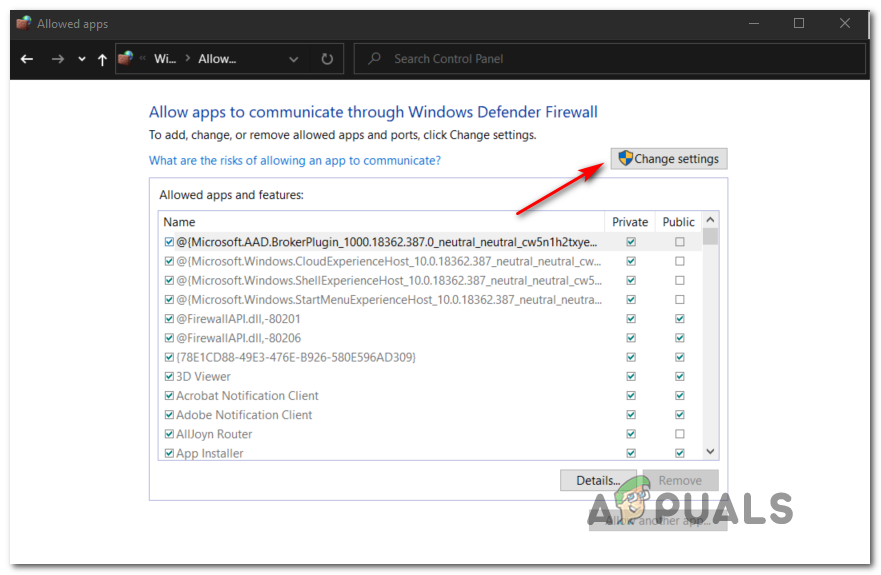
Changing the Settings of the Allowed Items in Windows Firewall - After the list becomes fully editable, use the menu below to click on Allow another app, then click on Browser and navigate to the location where you installed your MapleStory 2 application.
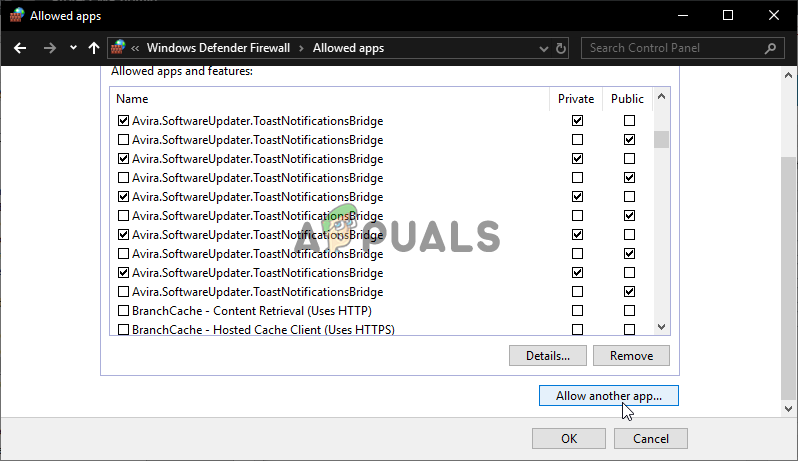
Allow another app - Next, go ahead and add maplestory2.exe to the list of allowed items.
- Once the executable is successfully added to the excepted list, find the entry inside the list of Allowed apps & features and check the boxes for both Private and Public.
- Restart your computer, launch the game once the next startup is complete and see if the problem is now resolved.


