How to Make a Discord Channel Read-Only?
Discord channels have many different permissions settings that the owner of the server can modify. The permissions can be set for everyone or for specific roles. Server owners can disable the send message permission for a specific channel to make it a read-only channel. In this article, we will show you the method through which you can easily create a read-only channel on your discord server.

Creating a New Read-Only Channel
Making a new read-only channel on discord is pretty easy. There are many permissions that you can disable for the members on your server. One of them is sending a message in the channel. Make sure you have created a role for moderators to allow them to message in the channel.
Note: If you already have a channel, then start from step 4.
- Open your Discord application and head over to the server where you want to create a read-only channel.
- Click on the Server name at the top left corner and choose the Create Channel option.
Note: If you have multiple categories on the server, you can simply click the “+” sign to create a channel in that specific category.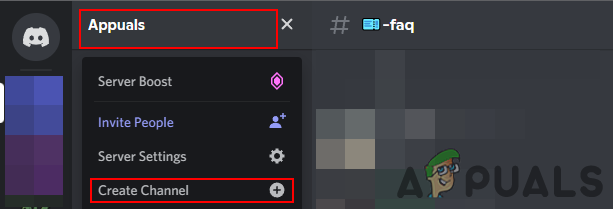
Creating a new channel - Now choose the Text Channel in channel type and provide a name for the channel. Then click on the Create channel to create a new channel on your server.
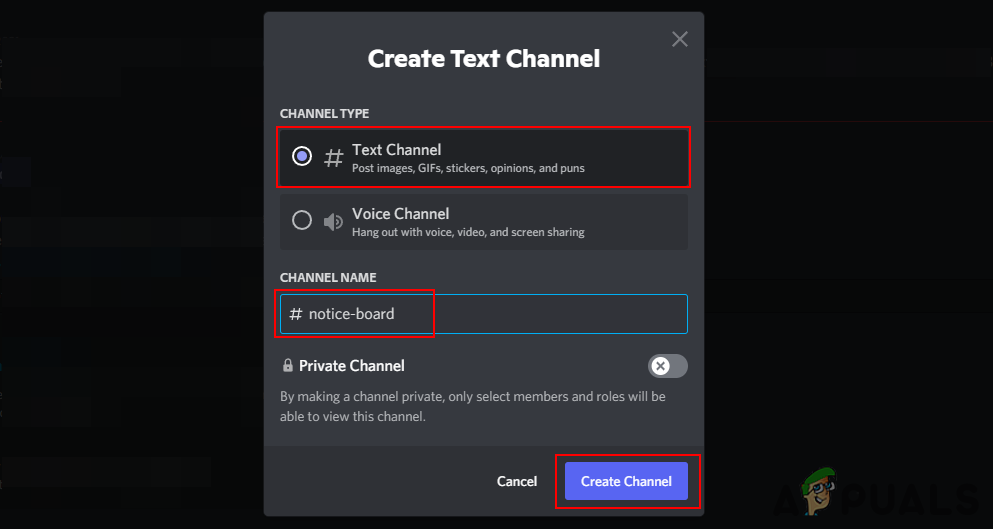
Naming the new text channel - Move the mouse over the new channel name and click on the Edit Channel icon for that specific channel.

Editing new channel - Now select Permissions and expand the Advanced permissions option. Select the “Everyone” role or any other role you give to your members, then disable the Send Messages permission for that role. Click on the Save changes to apply the new settings.
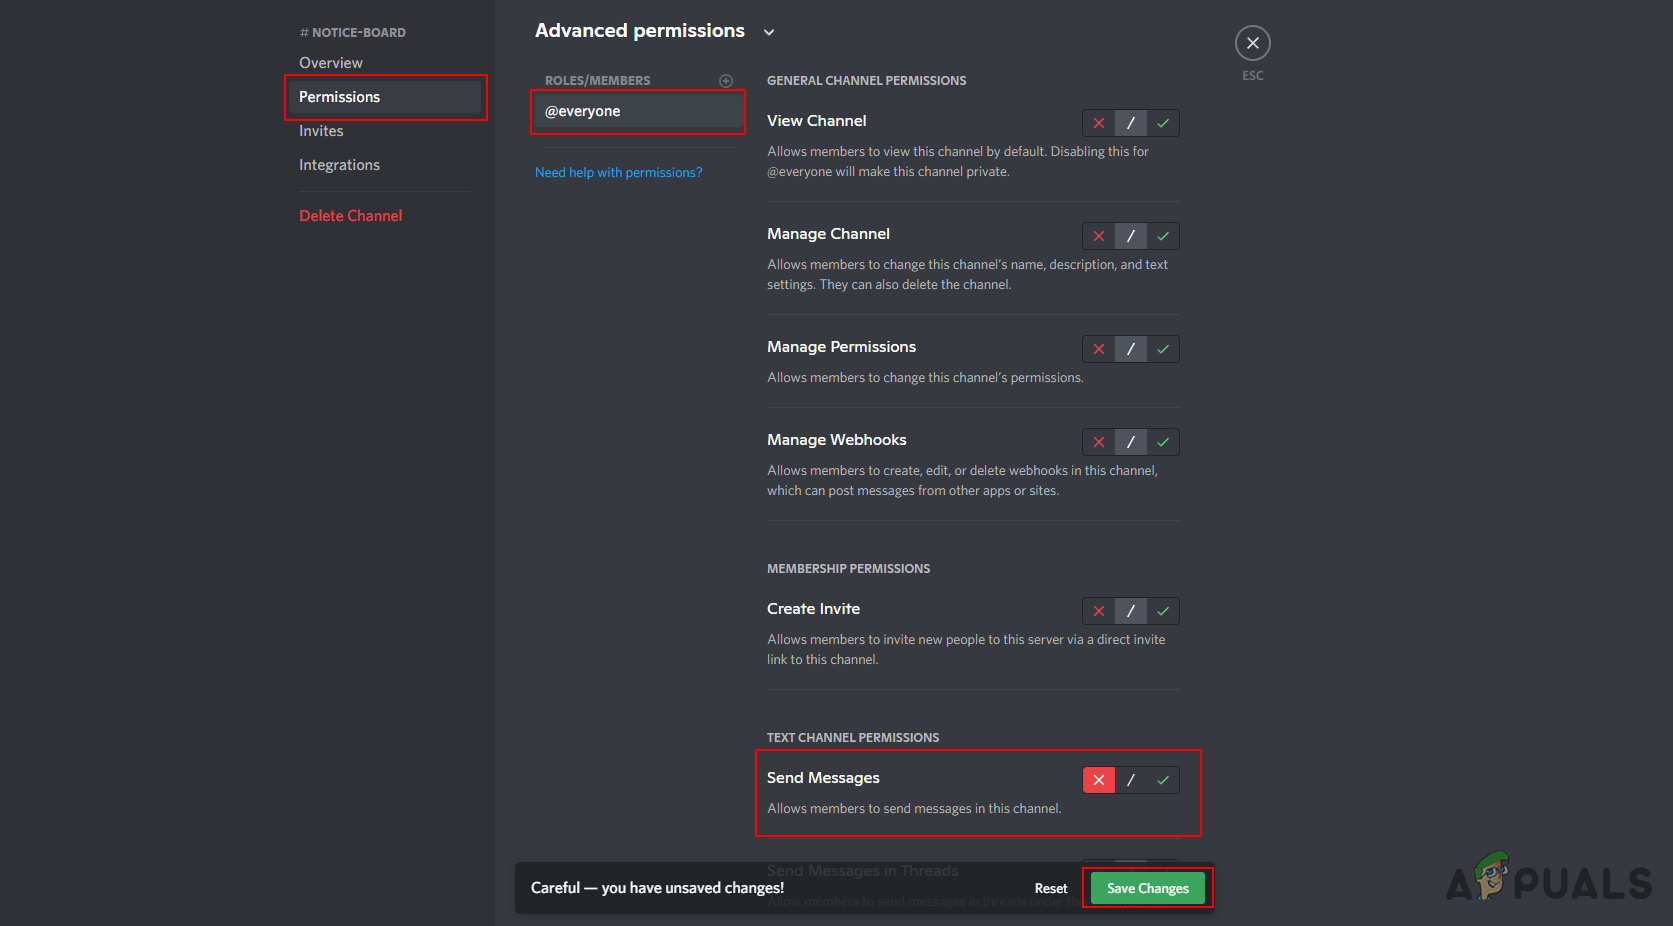
Disabling send message for everyone - Now the members on your server will not be able to send any message in this channel. You can add admins/moderators roles and allow them to send messages in this channel. This way only moderators can send messages and members will have a read-only channel.
Note: If you don’t have that type of role, then check the other method in this article. - Make sure you also disable the new thread feature for the member’s role. Otherwise, they can still create and message in the threads. You can also enable or disable the emoticons in this specific channel.
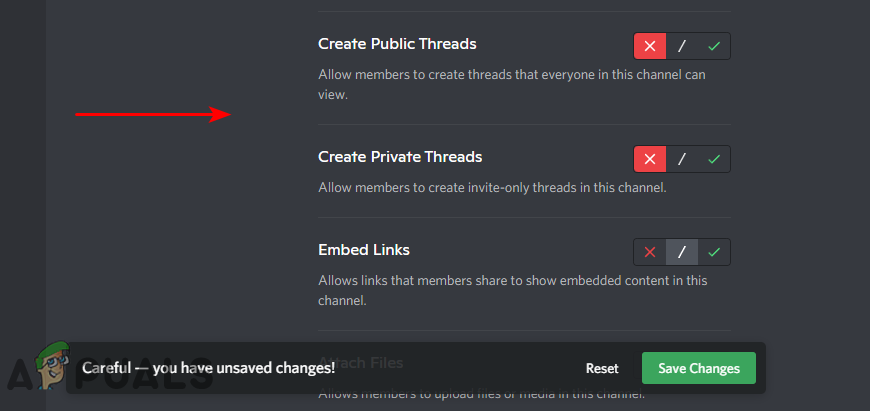
Disabling threads
Creating and Adding Moderator Role in Read-Only Channel
This method will provide the steps for creating a role that will be allowed to post in the read-only channel. The moderators and admin should be added to this role, so only they can message in the read-only channel. Follow the below steps to check it out:
- Open your Discord application and navigate to your server.
- Click on the Server name at the top left and choose the Server Settings option.
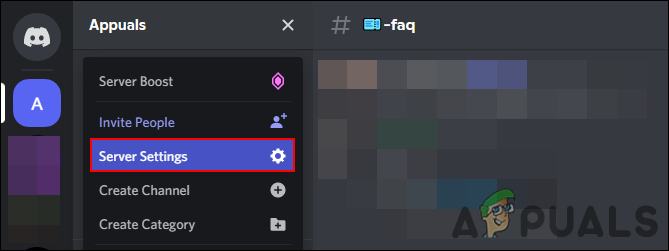
Opening server settings - Click on the Roles option in the left pane and then click on the Create Role button.
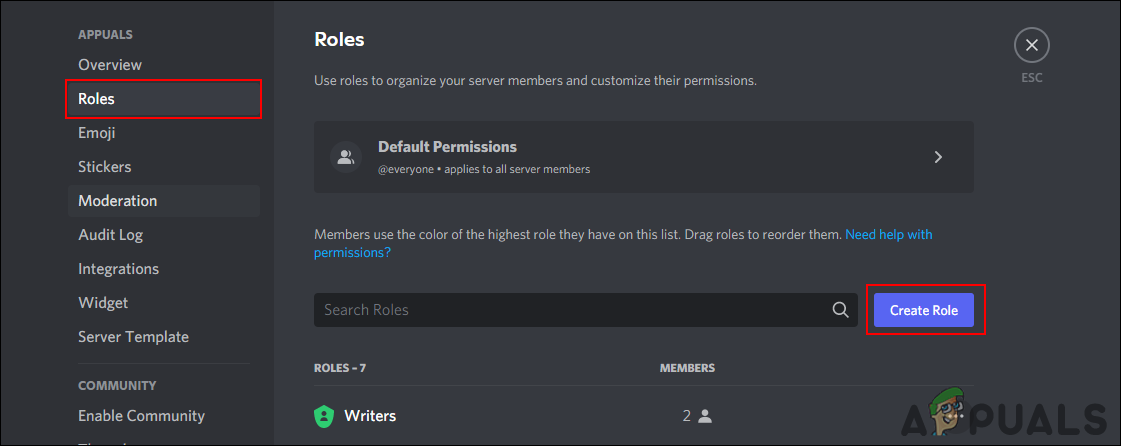
Creating a new role - Provide the name and color for the role. You can also change the role priority among other roles by moving it up and down in the roles list. You can also add the moderators in this role or you can give them the role later.
Note: You can also right-click on users, choose Roles > Select Role to give them a role.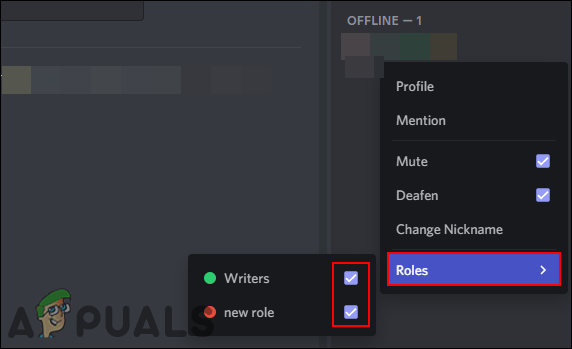
Giving a role to the user - Now head over to the read-only channel and click on the Edit Channel icon.
- Select the Permissions option and then in Advanced permission click on the “+” icon for Roles/Members. Select the newly created role to add.
- Now select the role and change the Send Message option to Allow. Make sure this role is above the member’s role in the Roles settings.
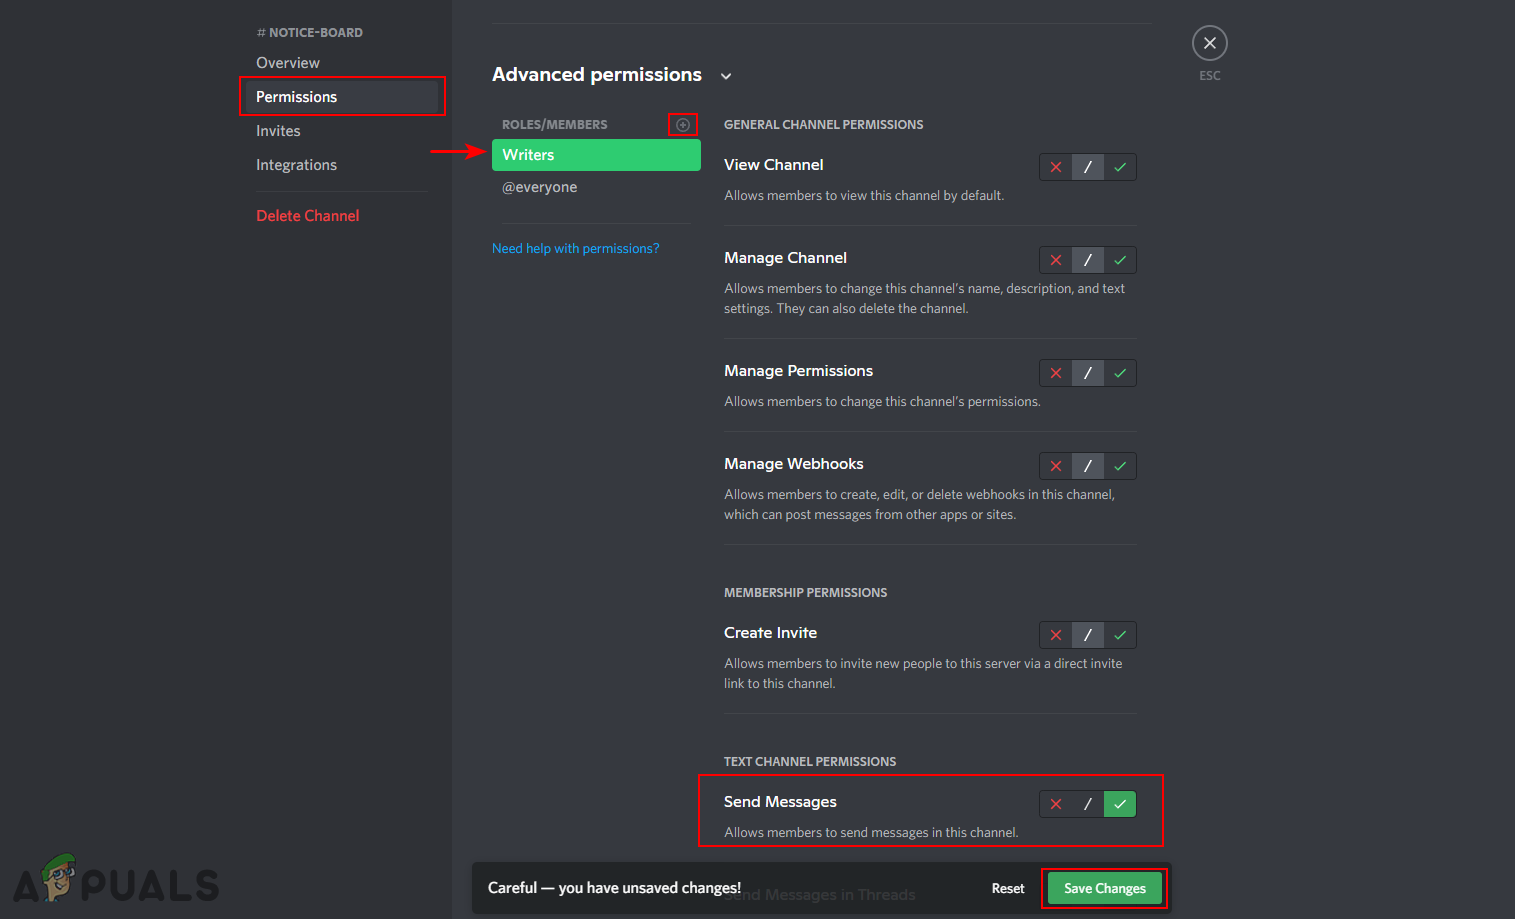
Allowing send message permission for a specific role - After that, only this role can message and all other members can view the channel as read-only.


