How to Install macOS Big Sur Public Beta
With the public betas for iOS 14 and iPadOS 14 now out, Apple has also made the new macOS known as Big Sur available to the public. The new version 11 of the macOS contains a ton of features that includes a refreshed user interface and much more. With the positive feedback that has been coming for the iOS 14, users are expecting a similar experience with the new macOS as well. It is important to note that the operating system is in public beta right now, which means that bugs are to be expected.

In order to install the new major release, you will need to have a Mac that is compatible with the new version – more on this down below. So, without further ado, let us get started.
What do you need?
To start off, the following are the prerequisites before installing the public beta of macOS Big Sur.
Big Sur Compatible Macs
As it turns out, the Big Sur update can not be installed on all of Macs which is to be expected. In order to be eligible for the update, you will need to have one of the following devices:
- MacBook 2015 or newer
- MacBook Air 2013 or newer
- MacBook Pro 2013 or later
- Mac Mini 2014 or later
- iMac 2014 or newer
- iMac Pro 2017 or newer
- Mac Pro 2013 or later
System Backup
If you have one of the above-mentioned devices then you are good to go with the update. However, before you proceed with downloading and installing the update, it is important to know that the Big Sur operating system is in a public beta. That means that you should not install it on devices that you use for work or other important stuff. The beta is not really intended for widespread use.
With that said, you should really consider installing on a secondary device if you really want to try out the new features first hand. In case you go with your primary device, it is important to create a backup of your device beforehand. Thus, in case of any issues, you can roll back to the stable release and your data won’t be lost.
Creating a Backup
Creating a backup of your Mac device is extremely easy. This is due to the built-in Time Machine app that enables users to create a backup. In order to create a backup, all you need is an external storage device such as a USB. Once you have that, you are ready to begin.
- First of all, connect your external storage device to your Mac.
- Now, in most cases, the Time Machine app will automatically ask you if you wish to create a backup with it. If you are prompted the dialog box, just click Use as Backup Disk.
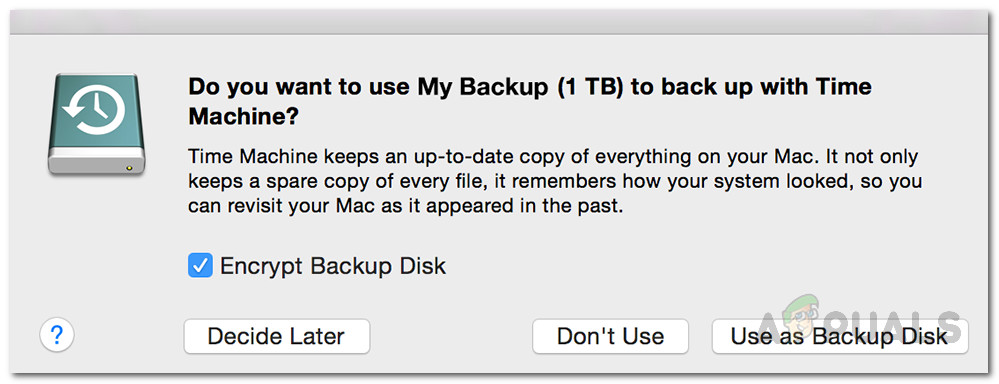
Time Machine Backup - In case you don’t get the said dialog box, no need to worry. There’s a manual way of doing it as well. To do so, open up Time Machine by searching for it in the Spotlight.
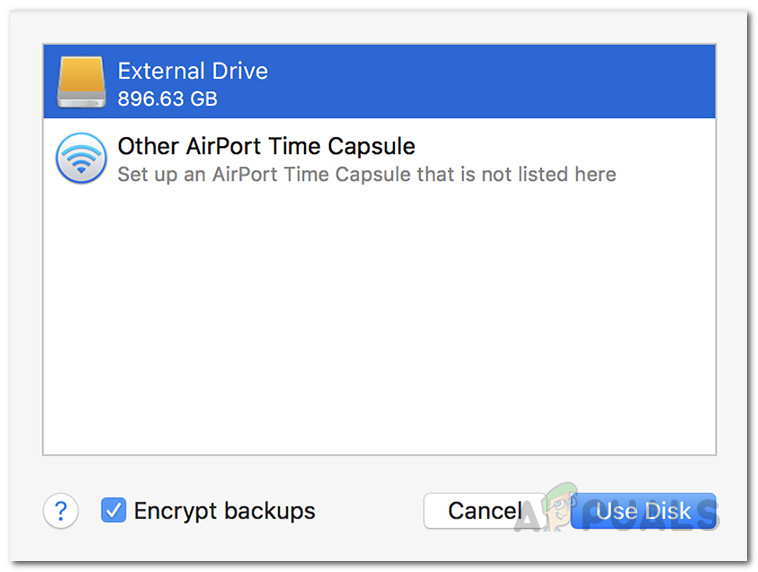
- Once Time Machine is launched, click on the Select Backup Disk option.
- Then, select the external device storage that you connected and click Use Disk.
Creating Backup - Now, if the disk isn’t formatted properly, Time Machine will prompt you to format it. Once you have done, the Time Machine app will automatically start creating a backup on your external storage device.
- Wait for it to complete.
Downloading the Big Sur Public Beta
Now that you have created a backup of your data, you are ready to download the Big Sur public beta without any worries. As it turns out, you have to first enroll for the beta in order to download it. This can be done very easily, just follow through.
- First of all, head to Apple’s public beta website. Once you are there, make sure you are logged in.
- After you have logged into your account, click on the Enroll Your Devices option at the top-right corner.

Enrolling Device - Then, from the options provided, click on the macOS option.
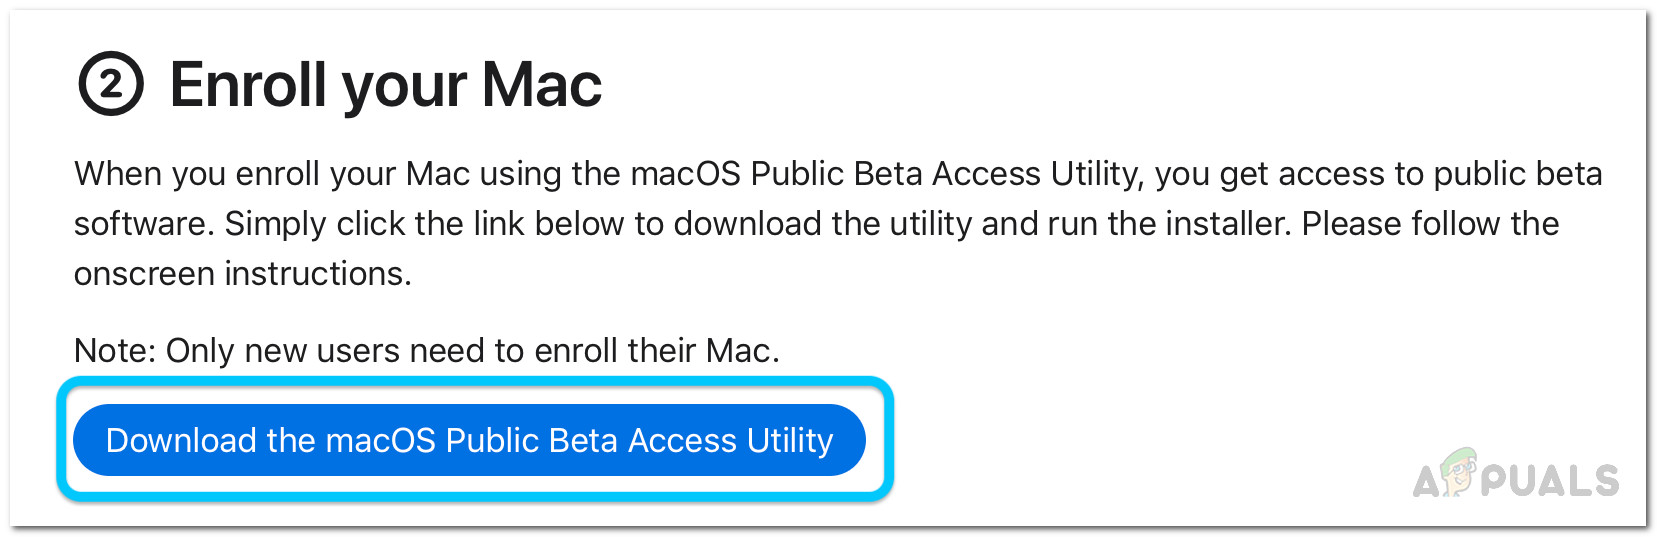
- Now, you will have to scroll down a bit. You should be able to see the Download the macOS Public Beta Access Utility button. Click on it.
Downloading Public Beta Utility - On the prompted dialog box, click the Allow option.
- After that, wait for the utility to be downloaded.
- Once the installer has finished downloading, head to your Downloads folder and double-click on the downloaded installer.
- You will be shown a warning if you haven’t already created a Time Machine backup.
- Since we have already created a backup, just click OK and then hit Continue.
- Now, click on Continue again and then agree to Apple’s license agreement.
- Finally, on the Installation Type tab, click the Install button.

Public Beta Installer - You will be prompted to enter your admin password and click Install Software.
- After that, the System Preferences Update panel should open up automatically.
- You will be taken to the Software Update tab where the macOS Big Sur Beta option will be shown.
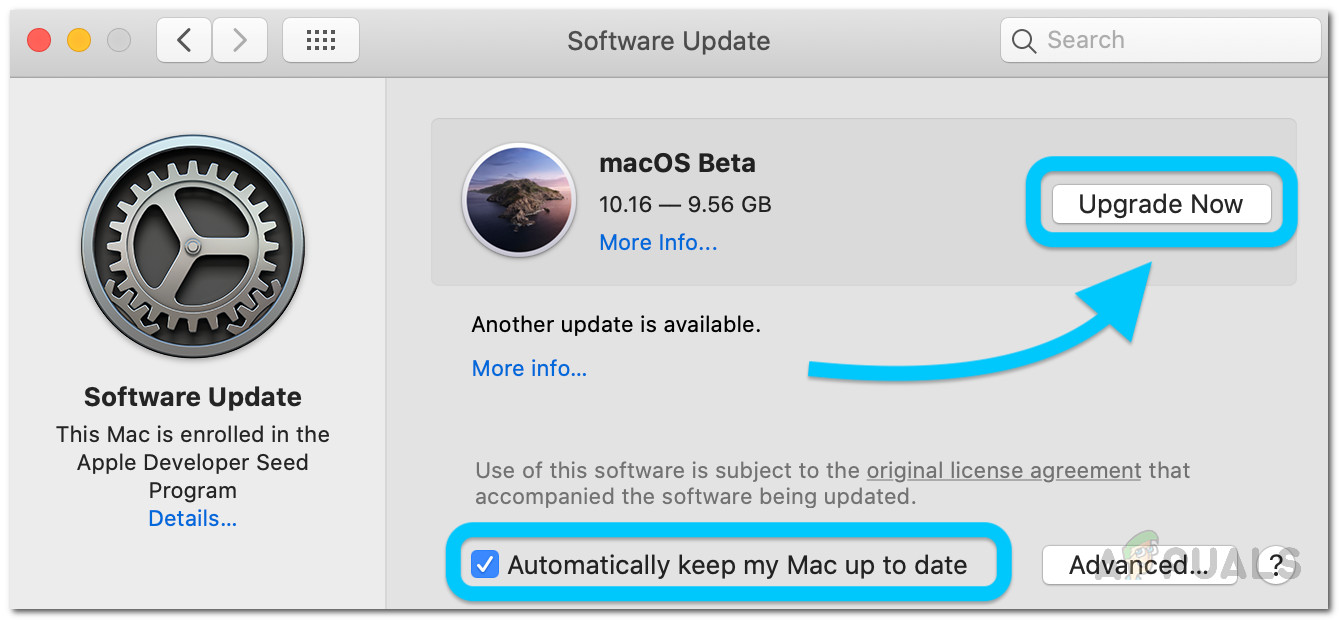
Software Update - Click on the Upgrade Now button to begin downloading the public beta. This will take some time as the download size is around 12 gigs. Your Mac will automatically restart once the download is complete.
Installing the Big Sur Public Beta
At this point, we have successfully downloaded the Big Sur public beta. Once your Mac restarts, you will be prompted the Big Sur installer automatically. Follow the instructions below to complete the installation:
- On the installer, click the Continue button at the bottom.
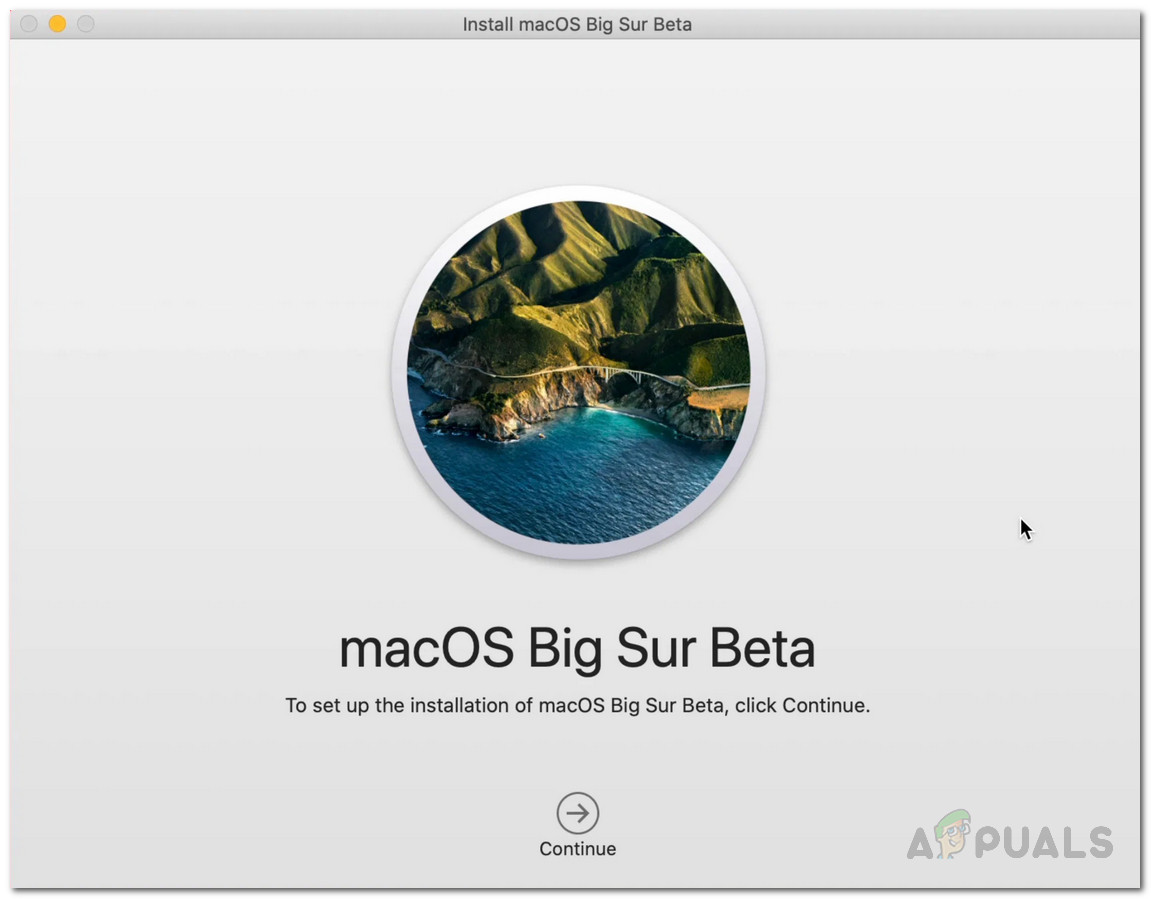
Big Sur Installer - Now, you will be asked to create a backup again. Just click the Continue button again at the bottom.
- Agree to the terms and conditions and then hit Agree.
- Now, you will have to choose the drive where you wish to install the public beta. Here, you can either choose your primary drive or another partition that you have created.
- Once you have selected your drive, click on the Install button.
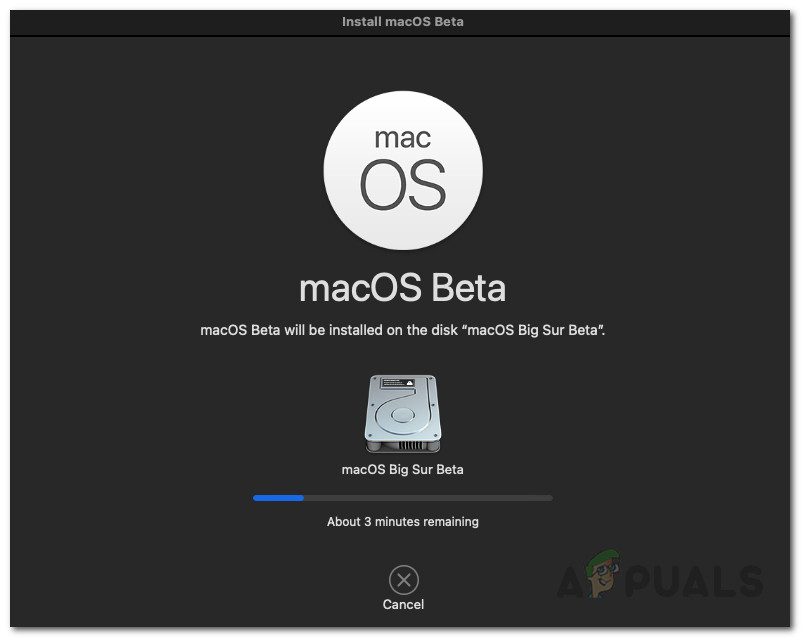
Big Sur Installation - You will be prompted for the admin password. Provide the credentials and then click OK.
- Wait for the installation to complete. Your Mac will restart automatically.
Uninstalling the Big Sur Public Beta
If you choose to uninstall the public beta after a while for whatever reason, you can do so easily. This is thanks to the Time Machine backup that you created earlier. To restore to the stable release, you will first have to unenroll from the public beta. Once you have done that, you will have to restore the stable release via the backup.
Unenrolling from the Public Beta
To unenroll from the public beta, follow the instructions down below:
- First of all, launch System Preferences and then go to Software Update.

System Preferences - Click the Details… option at the bottom-left corner.
- On the new dialog box, click on the Restore Defaults option. This will unenroll your device from public beta.
Restoring to Stable Release
In order to remove all the public beta files, you will have to restore to the stable release through the time machine backup. Here’s how to do so:
- First of all, you will have to turn off Find My Mac. To do so, go to System Preferences and then go to Apple Account.
- From there, uncheck the Find My Mac option and when prompted, provide your Apple ID password.
- After that, restart your Mac. You will have to boot into macOS Recovery.
- To do this, hold down the Command + R keys as your Mac is booting up. When you see the Apple logo on the screen, release the keys.
- Here, you will have to erase your disk before restoring from the backup.
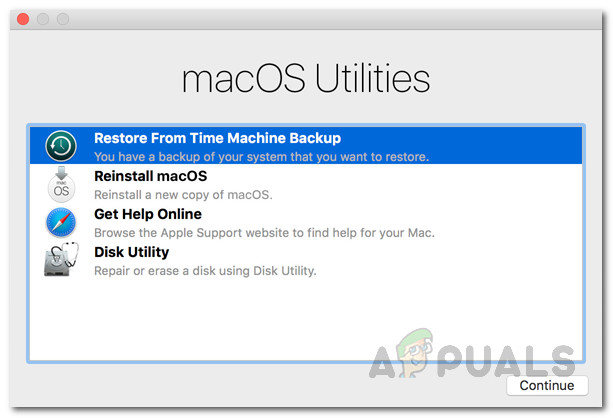
- Choose Disk Utility on the macOS Utilities screen.
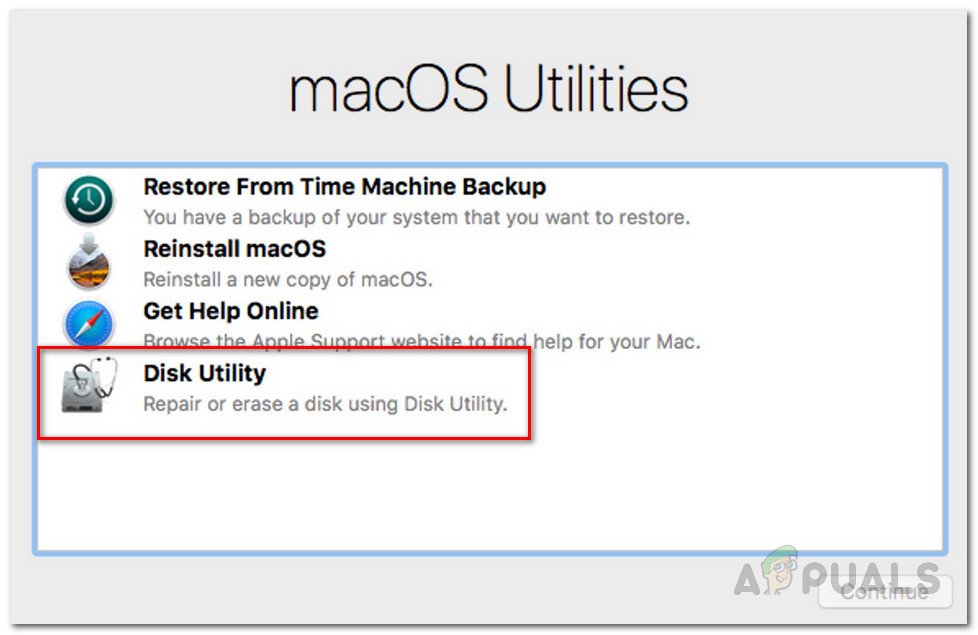
macOS Utilities - On the Disk Utility screen, select your startup disk. Make sure that you are selecting the entire disk and not just a volume. After that, choose the Partition option.
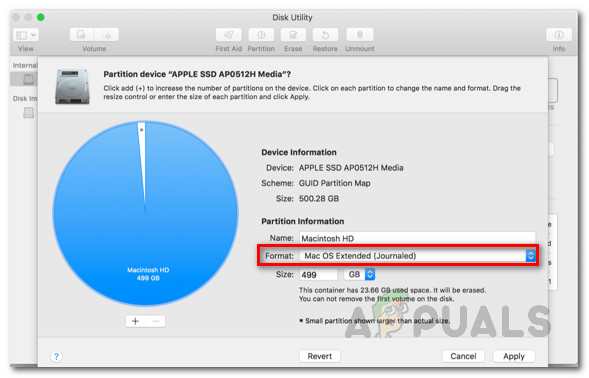
Disk Partition - Change the Format type to APFS since we are restoring a Time Machine backup.
- After that, click on Apply.
- Once the disk has finished partitioning, exit Disk Utility and restart your Mac.
- Now, hold down the Command + R keys again to go back to macOS Recovery.
- On the macOS Utilities screen, choose the Restore From Time Machine Backup option.
macOS Utilities - Select the backup that you created and then click Continue.
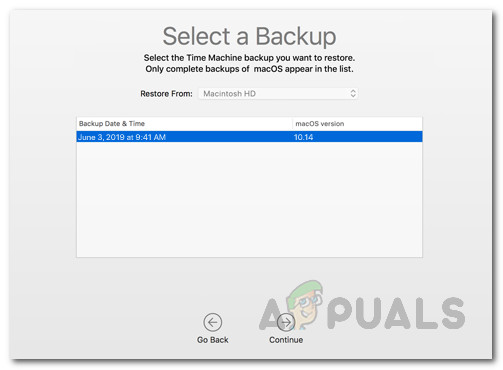
Restoring From Backup - Finally, click the Restore option to begin restoring.
- Once this is done, your system will be back to the stable release state.