Your MacBook Air Won’t Turn On? Try These Fixes!
Your MacBook Air won’t turn on due to issues with its power modules or as a result of an OS issue. To start with, you can try resetting your SMC and see if this does the trick. Resetting the SMC resets all temporary modules in your MacBook.
The issue of a MacBook failing to power on can arise from various factors. These can include a recent operating system update, changing the battery or charger, or physical damage, such as from a fall or exposure to liquids.
Severe weather conditions like extremely low temperatures can also be a trigger – for example, if the MacBook is accidentally left in a car in -30 degrees Celsius weather.
Symptoms
Symptoms of this issue can vary. For some users, the MacBook may show no signs of activity or emit the usual startup chime when the power button is pressed.
Others may encounter a black screen, or hear only the MacBook’s fan running. There have been cases where the charger’s light turns green upon connecting it to the MacBook, indicating that the battery is charging, but the MacBook still fails to power on.
Alternatively, there may be no charging light at all. In some situations, the MacBook’s keyboard may light up, but the system itself does not power up.
1. Press the Power Button and Shake the Device
If your MacBook Air isn’t turning on, a potential cause might be a loose internal connection. In such a case, lightly shaking your MacBook while holding down the power button may help. This can jostle any loose connections into the correct position.
Additionally, shaking the MacBook can also activate its Sudden Motion Sensor, which could potentially assist in powering the device. However, please be gentle when shaking your MacBook to avoid causing any additional damage.
- Firstly, press and hold the power button of the MacBook for 30 seconds and check if that does the trick. You may need to try twice or thrice.
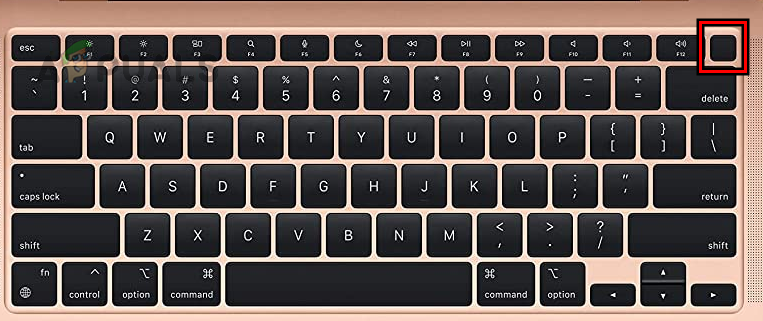
Press the Power Button on the MacBook Air - If not, release the button and again, press the power button (but do not hold) and check if the MacBooks Air has turned on.
- If that also does not work, keep on pressing the Power and Enter buttons simultaneously for a minute or two.
Check if the MacBook Air has powered on.
2. Force Restart or Try Other Boot Methods
The MacBook Air will not turn on if it is stuck in a deep sleep. Here, force restarting the MacBook will do the trick. Moreover, if due to OS issues, you are not able to boot the MacBook in the normal mode, then booting into the other modes like Safe, Recovery, or Diagnostic Modes will solve the problem.
- Press and hold down the following keys on the MacBook:
Command

Control

Power
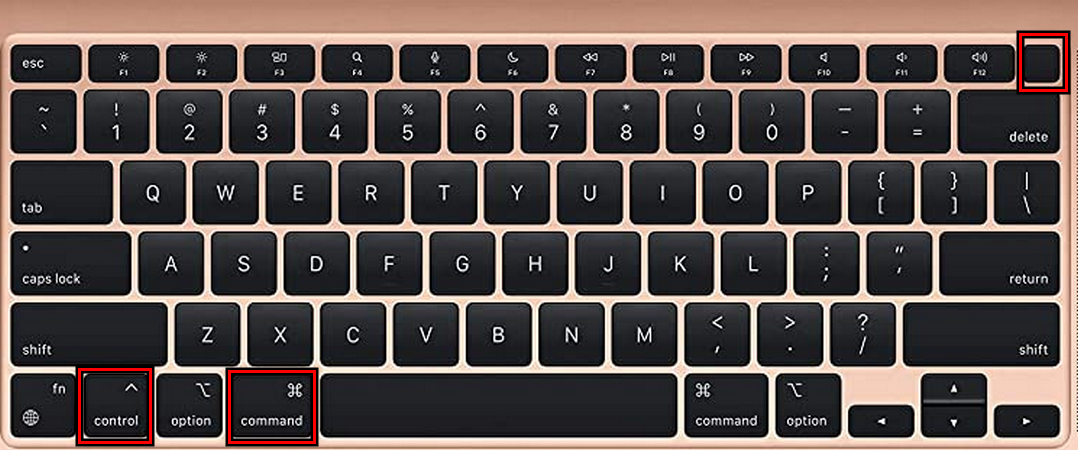
Force or Hard Restart the MacBook Air - Hold the buttons for 20 seconds and check if the MacBook has turned on.
- If not, press the following buttons on the MacBook to boot it into Recovery Mode:
Power

Command

R
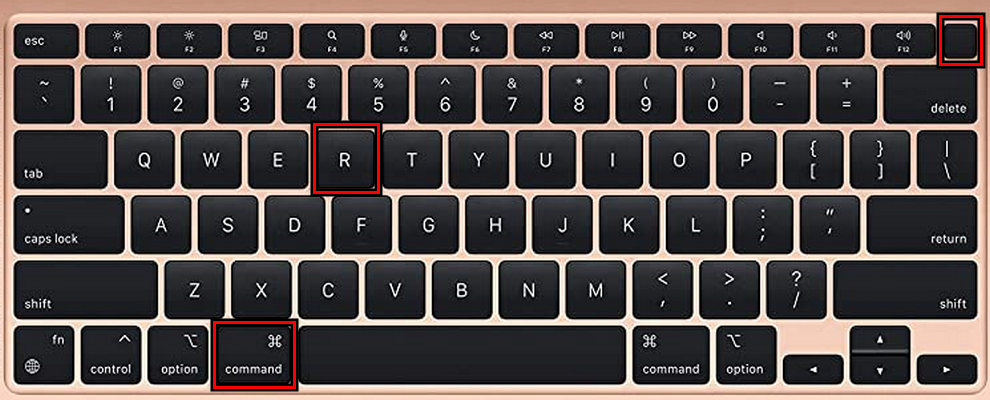
Boot the MacBook Air into the Recovery Mode - If the laptop gets booted in recovery mode, then you may use it to rectify the problem or check if the MacBook can be booted in normal mode.
- If the issue persists, press and hold the power button for 10 seconds.
- Release the button and immediately press the following buttons till the Apple logo is displayed:
Command

R
- Afterward, check if the MacBook Air has turned on.
- If that does not work, boot the MacBook into Safe Mode by using the following buttons:
Shift

Power
- Once done, check if the MacBook can be booted in its normal mode.
If these steps don’t work, connect another display unit to the MacBook and check if the display is shown.
3. Try Another Charging Method or Port
You will not be able to turn on the MacBook Air if its battery has died and the charger is failing to charge the unit. This can happen if the charger is not working or the charging port or the socket is faulty.
Here, trying another charging method or socket/port will do the trick.
- Firstly, use the genuine Apple charger and lead to charge the MacBook.
- If that doesn’t work, rotate the charging pin 180 degrees in the charging port and see if the charging indicator is shown.
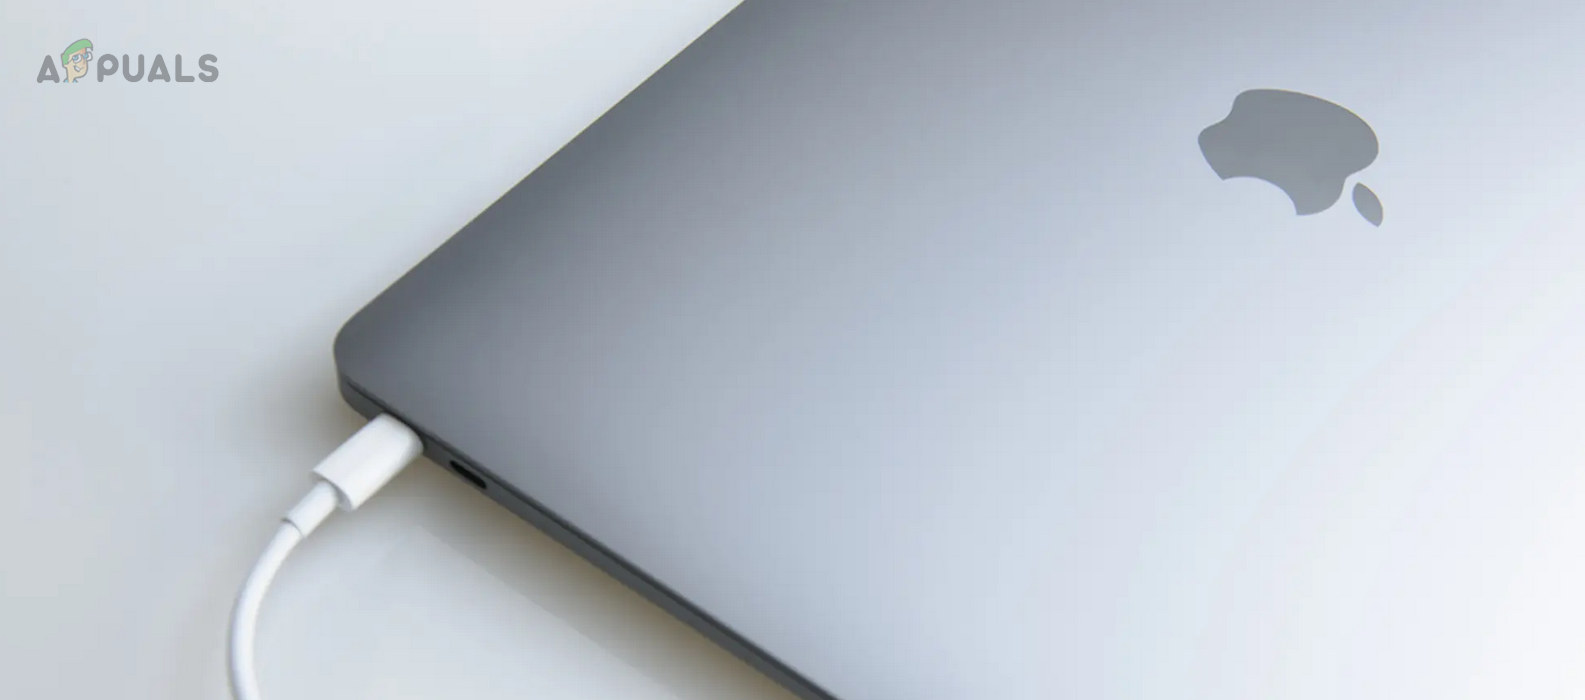
Try Another Charger with the MacBook Air - If the problem persists, disconnect the charger from the power source and remove any peripherals from the MacBook.
- If even that doesn’t work, use another socket or power source to charge the MacBook and leave it for an extended period of time (overnight).
Additional tips:
- Use another charger that you know works with other Macbooks
- Disregard using surge protectors & extensions when connecting the charger to your computer.
4. Heat or Cool the laptop
Extreme temperatures badly affect any electronic device and the MacBook is not an exception. You will face the issue under discussion if your MacBook is either too cold or too hot. Here, normalizing the temperature can help.
Firstly, check if your MacBook Air is heated or cold.
- If the device is heated, cool it down.
You can also put the MacBook in front of an air conditioner or a fan to cool it down. Alternatively, you can wait for a few hours till the device comes to room temperature.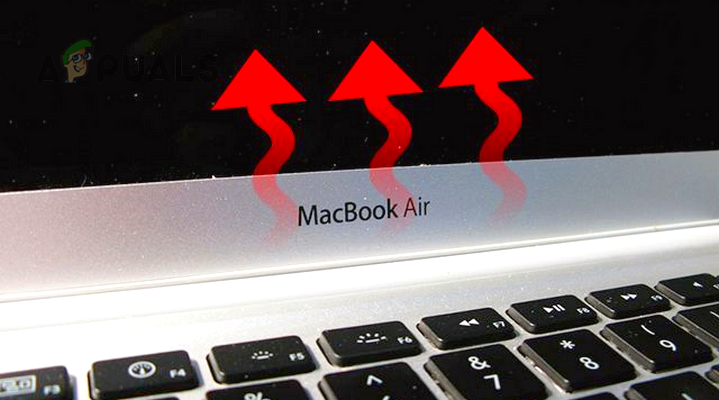
MacBook Air Too Hot - If the device is too cold, try to heat it to room temperature.
You can cover it with a blanket and keep it in your room instead of outdoors. - Wait for 15 minutes and then check if the MacBook can be powered on again.
5. Perform a Thorough Cleaning
You will fail to power on a MacBook Air if its charging point is not clean. If this is true, this will not let the charger properly connect with the device and thus the charging will fail. Moreover, if dust/debris has accumulated around the power button or vents of the machine, then that will cause similar issues.
Here, properly cleaning the device will make sure issues like these are resolved and proper connections are made.
- Firstly, disconnect the charger from the power source and then clean it. You may use a toothpick.
- Make sure the MacBook’s charging port is also clean.
- Open the lid of the MacBook and get a compressed air can. You can also use a vacuum cleaner, hairdryer (lowest heat mode possible if humidity levels are higher in your area), or air blower.

Clean the MacBook Air - Do short bursts of air onto the keyboard, vents, around the power button, around fans, etc.
- Move the MacBook to face its backside and afterward, do short bursts of air on the seam that connects the body with the lid.
- Once done, check if the MacBook Air can be powered on.
- If not, keep on throwing air onto the MacBook’s seam, and at the same time, keep the power button pressed for some time (such as a minute). Check if the device has turned on.
6. Try to Power on after Disconnecting the Battery
Another possibility is that your MacBook’s battery may be faulty. Moreover, if the device’s power button is not functioning, that could also cause the problem at hand.
In both these cases, powering on the MacBook after disconnecting the battery will solve the problem as the MacBook will automatically turn on bypassing the power button and battery.
First, we will try to reconnect the batteries only. This will rule out any potential connection issues.
- Remove the charger from the MacBook.
- Unscrew the screws from the back of the MacBook and unplug the battery connector for 5 minutes.
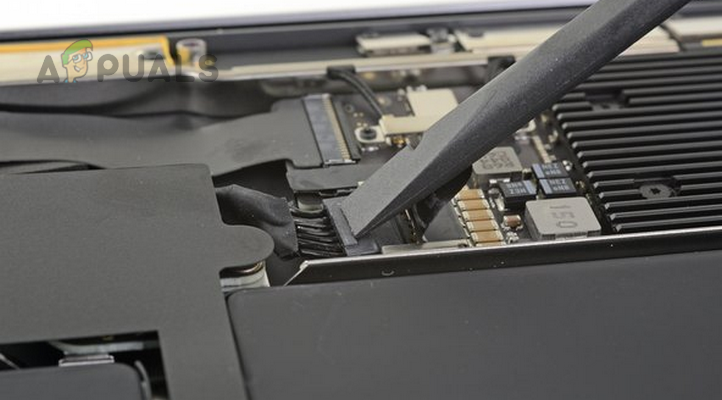
Disconnect the Battery’s Connector on the MacBook Air - Press/hold the power button and wait for 5 seconds. This will remove all static charges.
- Plug back the connector and reconnect the charger to the MacBook.
- Press the power button of the MacBook and check if it turns on.
If this doesn’t work, you can move forward and disconnect the battery from the device.
- Remove the charger and disconnect the battery from the MacBook.
- Hold the power button for 5 seconds and plug back the charger while holding the power button.
- Check if the MacBook powers on. If so, then hot-plug the battery and let it charge to 20%.
7. Perform an SMC Reset of the MacBook Air
The System Management Controller (SMC) manages important physical components of your MacBook. These hardware functions include status lights, cooling fans, system performance, and most importantly, the power supply configuration which is responsible to turn on the system.
If the configuration on this chip has become invalid, then that will not let it power on the MacBook Air. In this scenario, performing an SMC Reset on your MacBook will resolve the issue.
- Unplug the charger from the MacBook and press/hold the following keys for 7 seconds:
Right Shift Key

Left Options Key

Left Control Key
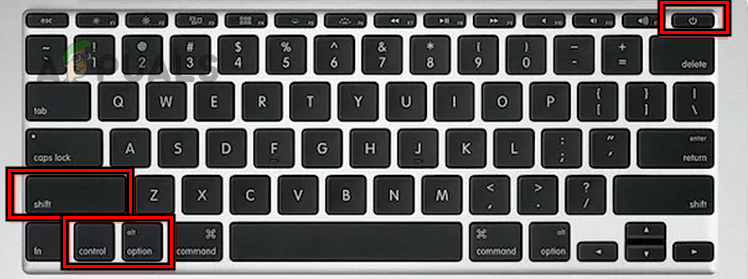
Perform an SMC Reset on the MacBook Air - While holding these three keys, press and hold the Power button for another 7 seconds.
- Release all 4 buttons and wait for 10 seconds.
- Press the power button and check if the MacBook Air has turned on.
- If this does not work, plug the charger into the MacBook and repeat the above steps.
- If the issue persists, remove the battery from the MacBook Air and repeat the above steps (1 to 4) while the charger is plugged into the MacBook.
8. Reset the PRAM or NVRAM of the MacBook Air to the Defaults
Parameter Random Access Memory (PRAM) or Non-Volatile Random Access Memory (NVRAM) are types of memory in your MacBook that retain crucial system settings. These settings range from the time and date to display properties and speaker volume.
If your MacBook isn’t booting up, it could be because these settings in the PRAM or NVRAM are incorrect or have become corrupt. This malfunction can prevent your MacBook from turning on as it should. To remedy this, a reset of the PRAM or NVRAM could do the trick, bringing the system settings back to a correct state.
- Plug the charger into the MacBook Air and press the following four keys together:
Option

Command

P

R
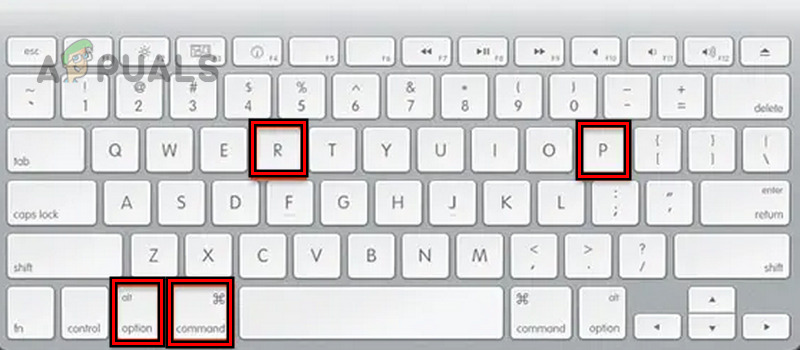
Perform a PRAM Reset on the MacBook Air - Wait for 20 seconds or till you hear the startup sound for the second time (whichever occurs first), and then release the keys.
- Press the power button and check if it has powered on.
9. Revive or Restore the MacBook
Your MacBook may fail to power on if its operating system (OS) has been corrupted. This could occur, for instance, if an update didn’t apply correctly to your current OS installation. If this is the case, reviving or restoring the MacBook might be the solution.
This process will require another MacBook, and potentially result in data loss (if a restoration is performed), so it’s crucial to ensure your data is backed up elsewhere or retrievable online. Also, be aware that this operation is currently supported only on MacBook Air models from 2018 to 2020.
To revive or restore your MacBook, you’ll need the following:
- A host Mac with the latest version of macOS installed.
- Internet access on the host Mac.
- A USB-C to USB-C cable that supports both power and data transfer. Please note that Thunderbolt 3 cables don’t support this function.
- Apple Configurator 2 is installed on the host Mac.
- Restart the host Mac and connect it to the charger.
- Then, without launching Apple Configuration, connect both Macs using a USB-C to USB-C cable. Make sure to plug the cable into the right port which will be on the left side of the MacBook.
- Launch the Apple Configurator on the host Mac.
- Press the power button on the Target Mac for 1 second and then while keep holding the power button, press/hold the following buttons for 8 seconds:
Right Shift

Left Control

Left Option
- Release the keys but there will be no indication on the target Mac. Keep an eye on the Apple Configuration on the host Mac.
- Once the target Mac boots into the DFU mode, you will see a Connect Devices and DFU mode screen on the host Mac.
- On the Apple Configurator on the Host Mac, open the Actions menu and expand Advanced.
- Select Revive and follow the prompts on the screen to complete the process. Usually, it may take around 4 to 10 minutes. An Apple logo will appear and disappear on the second Mac’s screen.
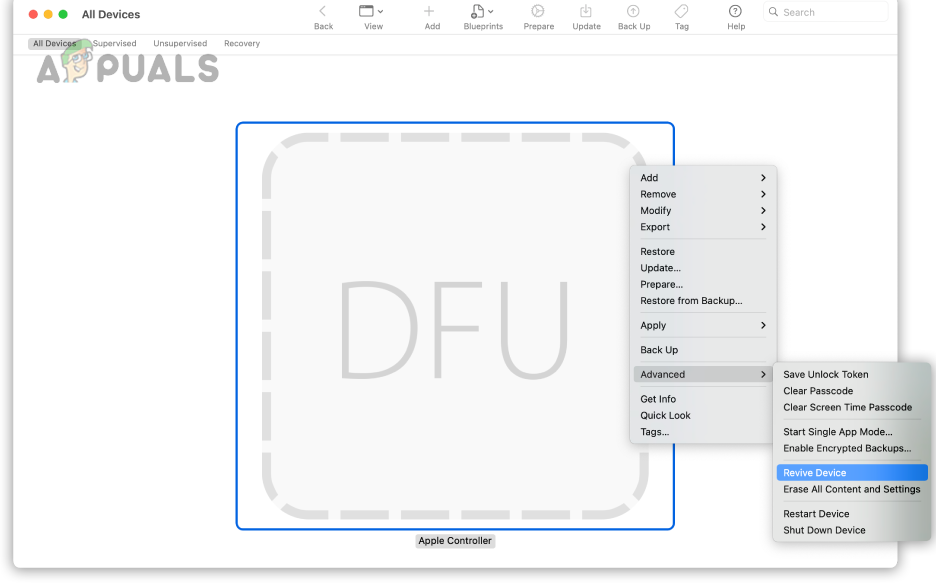
Revive the MacBook Air in the Apple Configurator - Once done, Quit the Apple Configurator on the Host Mac and power it off.
- Disconnect the USB-C cable from both Macs.
- Power on the problematic MacBook Air and hopefully, it will turn on. You may need to reinstall macOS through Recovery.
- If not, repeat the above steps but this time, do not revive, instead try Restore.
If the issue persists, contact Apple Support or visit a Genius Bar to rectify the issue. If under warranty, you may ask for a replacement.
 Reviewed by


