How to Fix Mac Black Screen on Wake After Sleep
Sleep mode is often used when you wish to save power along with not losing your unsaved data. While this is a great feature, there can be times when it can turn out to be frustrating. Many users have been reporting that they were facing a black screen issue. As it turns out, this appears to occur whenever the Mac would go to sleep. Thus, every time they tried to wake up their Mac, the screen wouldn’t return and they would be left with a black screen. The screen would remain black even after several keys.

Users are able to hear the Mac startup as the fans start and the keyboard lights turn on. However, the display would remain black and nothing would happen. In such a case, to get the display back, users were forced to perform a hard reboot after which the Mac would start up normally. Now, this is not the intended behavior and this could either be caused by an operating system bug or in rare cases, your external hardware.
As it turns out, in some cases, the issue would appear to be caused by a bug with the macOS Catalina which would prevent the device from waking up normally after sleeping. However, that is not it. It also happens to be caused by external hardware at times. Especially, if you have been using the J5create Dock. The extensions of the dock stored on your Mac can cause the issue as well, therefore, you will have to delete them. With that said, let us go through the different methods that you can use to get rid of the problem. So, without further ado, let us get started.
Method 1: Delete J5create Drivers Extensions
If you have used the J5create dock (or any other hardware from J5create) or are still using it, chances are that your issue could be because of the extensions of the dock stored on your Mac. Often external hardware stores their extensions in your Mac’s library folder. Therefore, in such a case, what you have to do is simply remove the extensions and then try waking up your Mac to see if the issue persists. To do this, follow the instructions down below:
- First of all, open up Finder and go to the Home directory. This is usually represented by a home icon with your username in front of it.
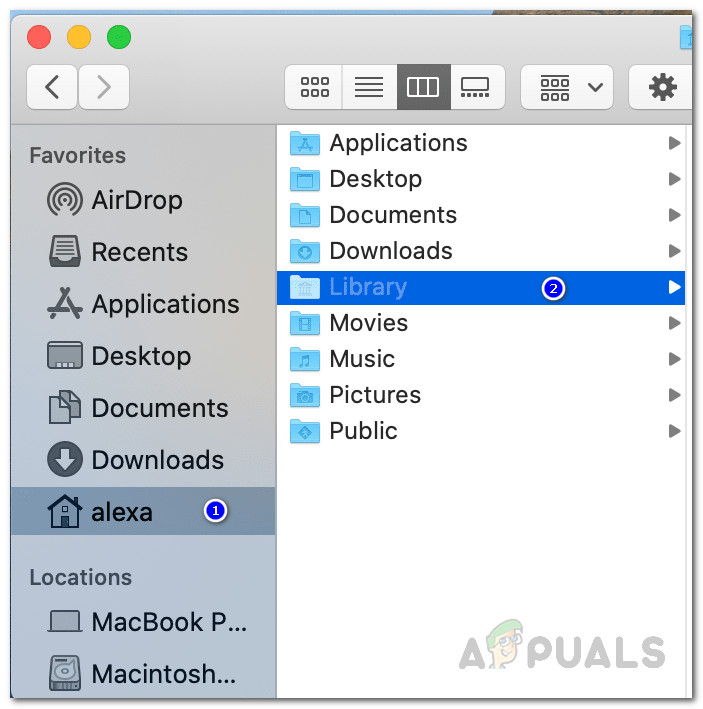
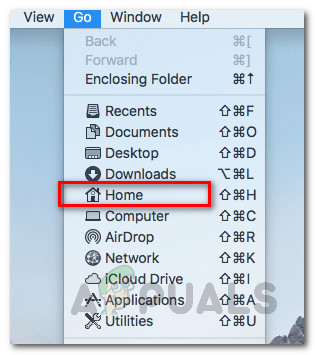
Home Directory - Alternatively, you can go to Finder > Go and then from the drop-down list, select Home.
Finder Go - Once you are in the Home directory, go to the Library folder.
- In the Library folder, locate and open up the Extensions folder.
- Then, once you are there, you will have to look for the Trigger5Core.kext, MCTTrigger6USB.kext, MCTTriggerGraphics.plugin and DJTVirtualDisplayDriver.kext files. In some cases, the names might be a bit different but, so if the name starts with MCT, chances are that they belong to J5create drivers.

Extension Files - Remove these files and then restart your Mac.
- Once your Mac has booted up, let your Mac sleep and then wake it up to see if the issue has been resolved.
Method 2: Reset NVRAM
As it turns out, NVRAM is a small amount of non-volatile memory that is used by Mac devices to store some specific settings so that they can be accessed quickly. In some scenarios, black screen issues can be caused by the NVRAM as well in which case you will have to reset it. This is completely safe and you won’t be losing any data so no need to worry. To reset NVRAM, follow the below instructions:
- First of all, power off your Mac.
- Once the Mac has powered off completely, turn it on again but immediately press and hold down the Option + Command + P + R keys.
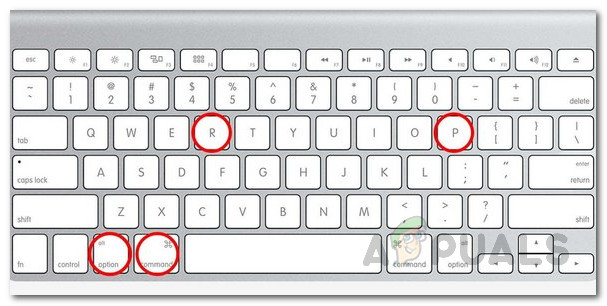
Resetting NVRAM - Hold the keys down for around 20 seconds as you will notice your Mac restart.
- On some Mac devices, a startup sound is played. You can let go of the keys when you hear the startup sound for the second time.
- Once you do this correctly, your NVRAM will reset.
- After that, log in to your Mac and see if the issue has been resolved.
Method 3: Update your Mac
As we have mentioned above, in some cases the issue can be due to an operating system bug. This has been reported by several users and thus updating your Mac to the latest version available often fixes the issue. Therefore, you will have to check if there are any updates for your Mac. This can be done pretty easily from System Preferences. Follow the instructions down below to check for any updates:
- First of all, open up the System Preferences window by selecting it from the Apple menu.
- After you have opened up the System Preferences window, click on the Software Update option.
- On the Software Update window, you will be shown if you have an update available.
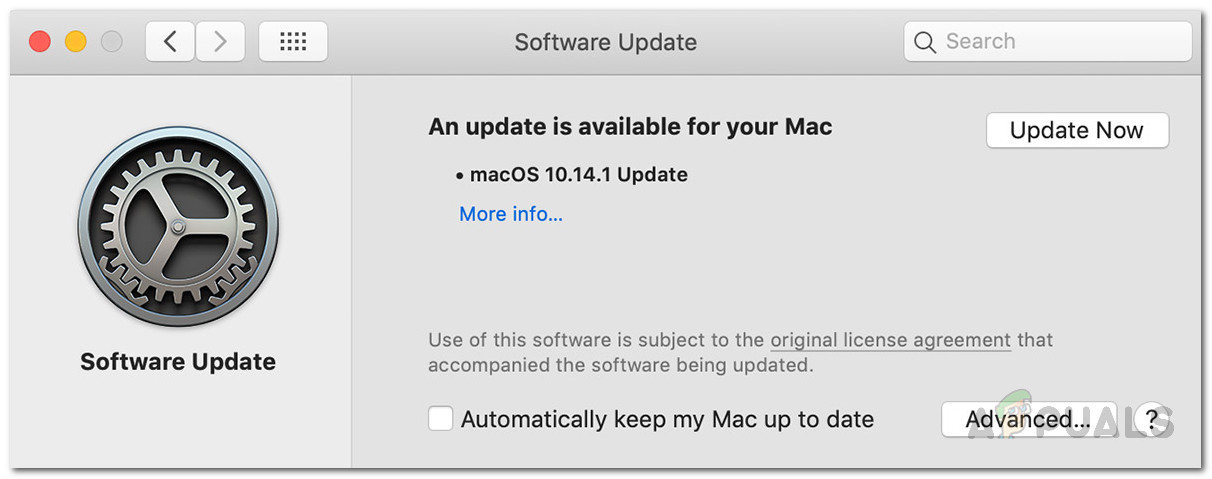
Software Update - In case there’s an update available, you will be shown an Update Now button. Click on it to begin downloading the update.
- Once the update has installed, reboot your system and then check if the issue still exists.
Method 4: Boot into Safe Mode
As it turns out, if the above methods do not work out for you, what you can do is launch your Mac into Safe Mode and then let it sleep in Safe Mode. It should wake up normally in safe mode. Once you have done that, reboot your system normally without getting into the safe mode. Hopefully, that will fix your issue and you won’t experience it anymore. This has been reported by a user who was facing a similar issue on macOS Catalina. Follow the instructions down below to know how to do all of this:
- First of all, power off your Mac.
- Then, you will have to boot into safe mode. This is pretty easy to do. Boot up your Mac and hold down the Shift key as your Mac boots up.

Booting into Safe Mode - Once your device boots up, you will be in Safe mode. This can be seen from the color of the menu which is red in safe mode.

Mac Safe Mode - After that, let your Mac go to sleep in safe mode. Then, wake it up and it should do so normally.
- Finally, reboot your Mac again and boot into it normally. Let it sleep and then wake it up to see if the issue has been resolved.


