Why does “Locate Link Browser” dialog box appear on Outlook?
The “Locate Link Browser” dialogue box usually pops up on your screen when using Outlook. This error occurs each time you open a web link in an email. This prevents you from opening any email on Outlook. This error occurs when Outlook is removed from its default email client state. This disallow you from clicking on any given link on Outlook.
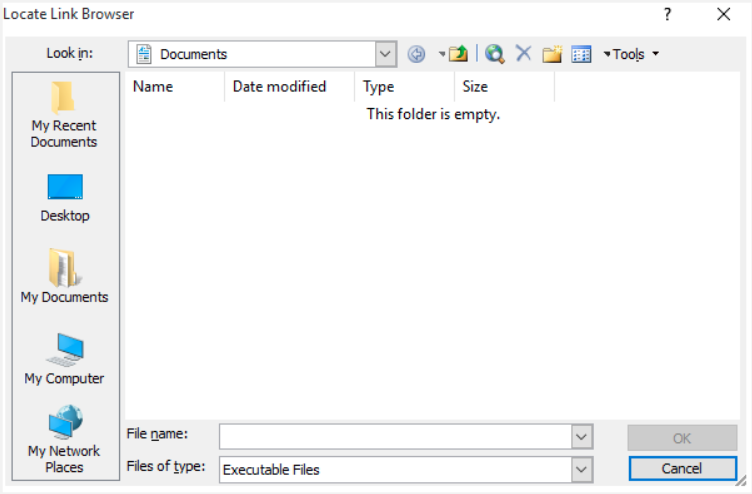
In this guide, we will show you the methods you must follow to prevent Outlook from showing the “Locate Link Browser” dialogue message.
1. Make Outlook the default email client
The primary reason certain emails on Outlook cannot open is that the Outlook program is not set as the default email client. Therefore, make sure that you make Outlook the default program for all emails to prevent this error from occurring. You can follow the instructions below to set Outlook as the default email client on Windows:
- Press the Win + I keys to open the Windows Settings.
- Navigate to Apps > Default Apps.
- Under “Email” click on the default Email program.
- Select “Outlook” on the “Choose an app” menu.
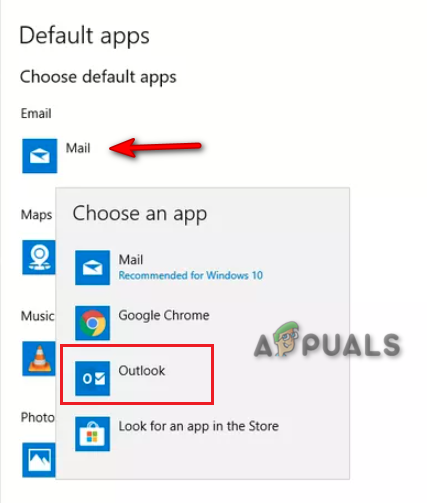
Choosing Outlook as the default email program - Once you have set Outlook as the default program for emails, you can run Outlook again.
2. Set Internet Explorer as the default browser
Additionally, this issue is known to occur when Internet Explorer is removed as the default browser on your Windows. Therefore, make sure that you temporarily set it as the default browser. Although the configuration reverts back as you restart your computer this method is known to fix this issue. Below are the instructions to set Internet Explorer as the default browser on Windows:
- Press the Win + I keys to open the Windows Settings.
- Navigate to Apps > Default Apps.
- Under “Web Browser” select the default program.
- Select “Internet Explorer” as the default web browser on the “Choose an app” menu.
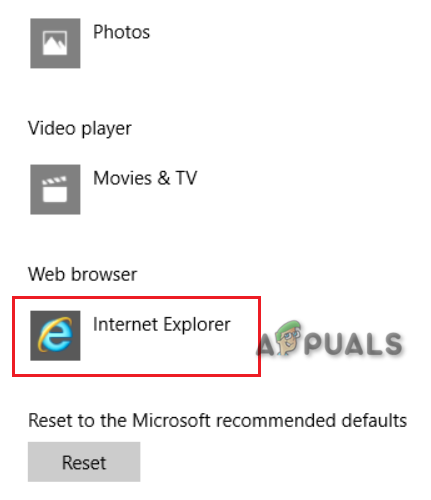
Selecting the default web browser - Lastly, after selecting the new default browser, restart your Outlook.
- After using Outlook, you can switch back to using your default browser.
3. Change the registered file type (Windows XP Only)
Changing the registered file for the URL:HyperText Transfer Protocol file type to use Internet Explorer is also known to fix this issue with Outlook. You can follow the steps below to perform this method in a step-by-step sequence.
- Open your My Computer from the Desktop shortcut.
- Click on the Tool option above and select the Folder options.
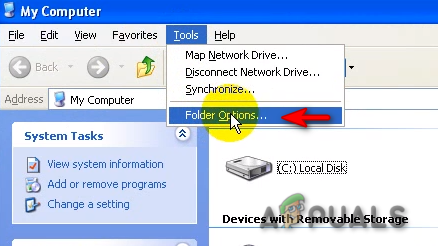
Opening Folder Options - Navigate to the File types tab.
- Under the “Registered file types” section, open the Advanced options of ” URL:HyperText Transfer Protocol” and click “Edit”
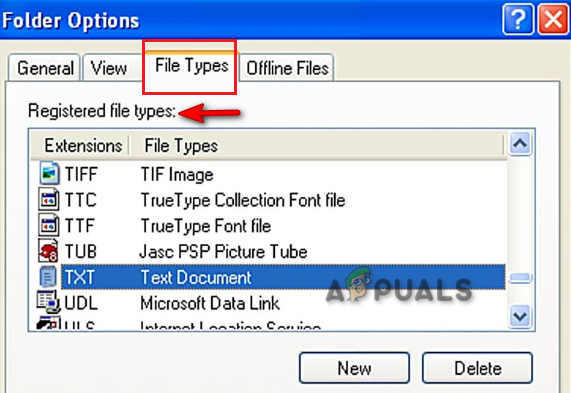
Registered file types - Type “Open” in the Action box.
- Locate and open Internet Explorer (Iexplore.exe) in the Application used to perform action box.
- Lastly, type “IExplore” and click OK in the Application box.
- This will change the registered file type to use Internet Explorer.
4. Manually add the IE.Protocol CommandID
When Outlook fails to open the IE.Protocol CommandID, causes Outlook to face issues with its links. Therefore, you can manually include the missing CommandID on your windows with the instructions listed below.
- Open your main Desktop screen.
- Right-click and select New > text Document to create a document file on your Desktop.
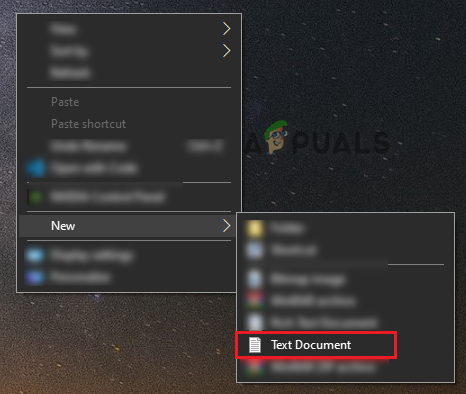
Creating a text document - Press Win + E to open the File Explorer.
- Click on the View tab at the top.
- Check the “File name extension” box to show the hidden viral attachments.

File name extensions - Open the document file you created on your Desktop.
- Paste the following text into the document file:
Windows Registry Editor Version 5.00 [HKEY_CLASSES_ROOT\htmlfile\shell\opennew] @="&Open" "MUIVerb"="@C:\\Windows\\System32\\ieframe.dll,-5731" "CommandId"="IE.Protocol" [HKEY_CLASSES_ROOT\htmlfile\shell\opennew\command] @=""C:\\Program Files\\Internet Explorer\\iexplore.exe" %1" "DelegateExecute"="{17FE9752-0B5A-4665-84CD-569794602F5C}" - Save the document file.
- Right-click on the saved file and select “Rename”
- Rename the file and replace “.txt” with “.reg.”
- Confirm the action if Windows asks for permission.
- Double-click on the file to open it (changed to green cubes).
- Allow entries to be imported to your registries.
- Confirm the action on the confirmation prompt and fix the Outlook issue.
5. Update Outlook to the latest version
Having an outdated Outlook that is not supported by Windows will also cause issues with the application. Therefore, you must check for any available updates and install the latest version of Outlook to repair any issues you are facing. You can do that as below:
- Open your Microsoft Outlook.
- Navigate to File > Account (Office account).
- Click on “Update options” under Product Information and select “Update Now.”
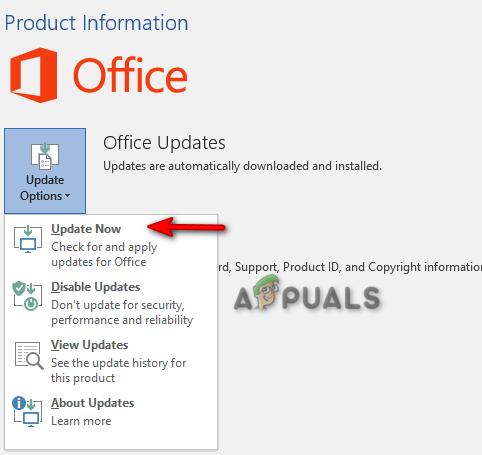
Updating Outlook - After the update is installed, you will have the latest version of Outlook.
If Update Now is unavailable
In case you are not able to see the “Update Now” option, make sure that you click on “Enable Updates.”
If Update Options is unavailable
If the “Update Options” is not available, then you must follow the steps below:
- Press the Win + R keys to open the run command.
- Type “control panel” and click OK.
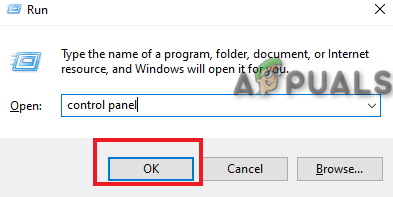
Opening the control panel - Open the “Uninstall a program” option.
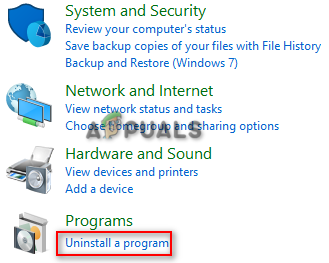
Uninstall a Program - Select the Microsoft Office application
- Select the “Change” option above.
- Select Quick Repair > Repair and get the Update Options on your product information.
- Press the Win key to open the start menu.
- Type “Microsoft Store” and open the application.
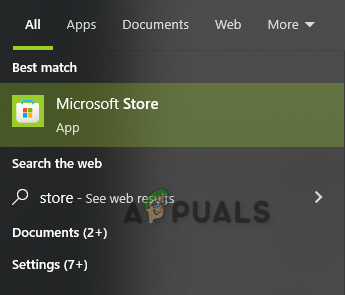
Opening the Microsoft Store - Sign in to your Microsoft Account.
- Open your Microsoft Library.
- Select “Get Updates” and install the latest Outlook update.

Getting update


