How to Fix ‘Live Kernel Event Code: 193’ on Windows?
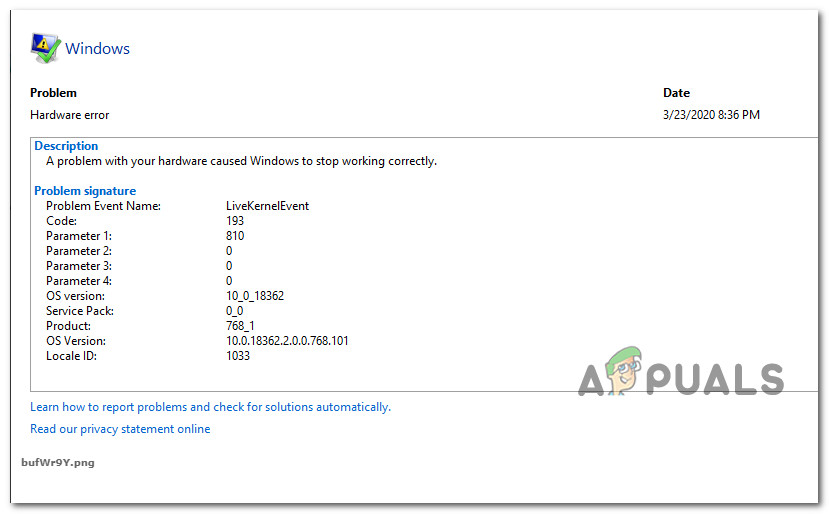
Some Windows users are reporting a weird issue where the PC will hang indefinitely once they leave it in idle mode for a few minutes. The screen remains off (as if the computer is in Sleep mode) but won’t wake up regardless of what they do. Upon investigating the crash dump inside Event Viewer, most affected users are discovering a cryptic hardware error (LiveKernelEvent 193).
After we’ve investigated this issue thoroughly, it turns out that this particular issue is not exclusive to a certain Windows version. We’ve seen user reports of the LiveKernelEvent 193 error occurring on Windows 7, Windows 8.1, Windows 10, and even on Windows 11.
As it turns out, there are several common causes that are often responsible for this system crash. Here’s a list of potential culprits:
- Outdated or corrupted Intel Wi-Fi Driver – One of the most common causes that might be behind this behavior is an inconsistency with the dual-band wireless driver. Some users that we’re experiencing crashes with the LiveKernelEvent 193 error have confirmed that the issue was resolved completely after they’ve updated their Intel Wi-Fi driver with the latest compatible iteration.
- Common hardware inconsistency – It’s not uncommon to start facing this issue immediately after you connect a new peripheral. This issue is mostly reported to occur with new external drives that are just connected to a Windows 11 computer. You can typically resolve these by running the Hardware and Devices TroubleShooter and applying the recommended fix to enable your PC’s ability to auto-update with the newest drivers on all devices that are just connected.
- NordVPN incompatibility – If you have NordVPN installed and configured to open every time you boot up your Windows 11 computer, keep in mind that this unexpected system interrupts can be caused by an incompatibility between NordVPN and a kernel sub-process. In this case, the only viable fix is to uninstall the conflicting software (there might be other similar VPN tools that will produce the same behavior on Windows 11).
- Outdated chipset driver – Another indirect cause that might be a potential cause of these unexpected system crashes is an outdated chipset driver. If you only updated to Windows 11 recently and you started experiencing this issue immediately, you should update your chipset driver to the latest release compatible with Windows 11 – the instructions will be different depending on if you need the AMD or Intel drivers.
- System file corruption – In more serious circumstances, you can expect to see this error code occurring due to some type of system file corruption that is affecting the stability of your operating system. Several affected users have confirmed that the issue was finally resolved after they initiated a clean install or repair install (in-place repair) operation.
Now that you are familiar with every potential culprit that might be responsible for this issue, let’s go over some of the methods that other affected users have successfully used to get to the bottom of this issue.
Update the Intel Wi-Fi Driver (Windows 10 ONLY)
If you’re using Windows 10, the first thing you need to check is if you are using the latest version of the Dual-Band Wireless driver. Crashes of this kind happening during idle periods are typically associated with a legacy dual-band wireless driver. This issue is almost exclusive to laptops and ultrabooks.
In case you’re using a generic dual-band wireless driver, our recommendation is to install the latest stable version of the Intel Dual-Band Wireless-AC 3160 driver and see if the stability of your system improves.
Several users dealing with the same kind of issue have confirmed that after they’ve installed this Wireless driver the LiveKernelEvent 193 system crashes have completely stopped.
Follow the instructions below to install the Intel Wi-Fi Dual-Band driver:
- Open your default browser and visit the official download page of the Intel® Dual Band Wireless-AC driver.
- Once you’re inside this page, click on the View details button associated with the Family & Intel Dual-Band Wireless-Ac 3160 driver.
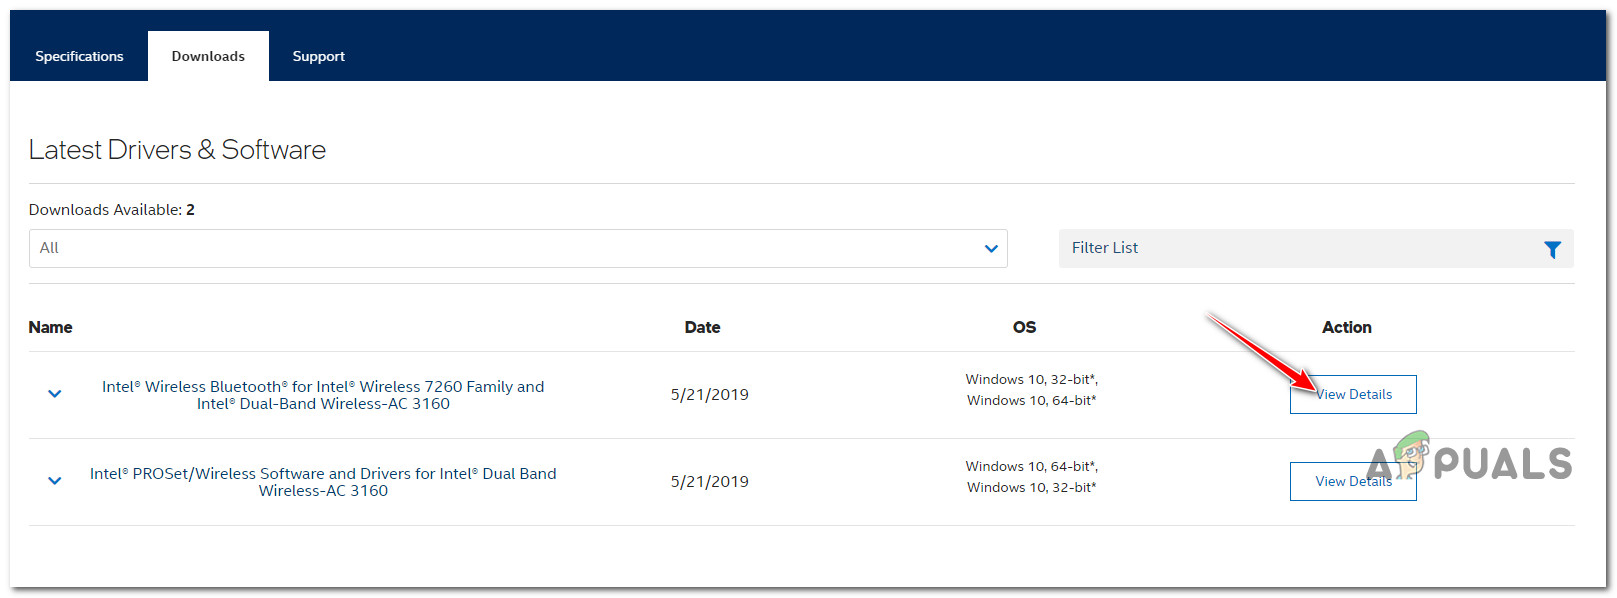
Accessing the View Details page of the driver - Inside the download page, click on the Download button associated with the architecture compatible with your operating system (32-bit and 64-bit).
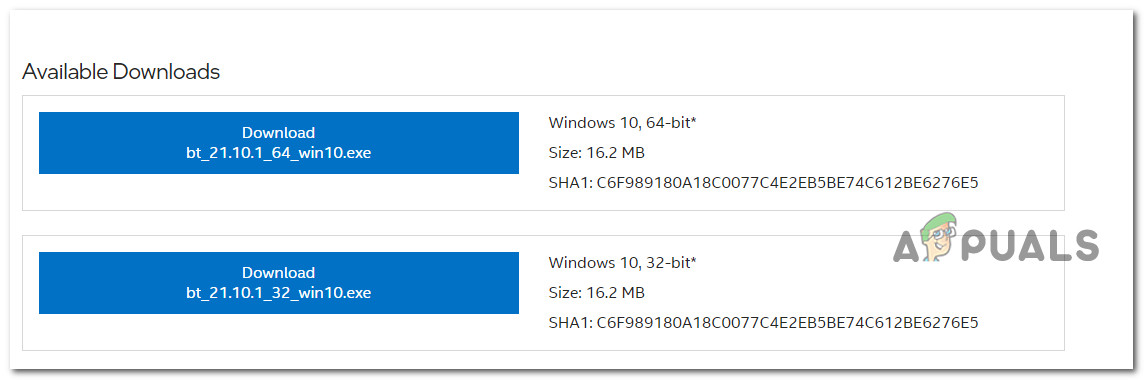
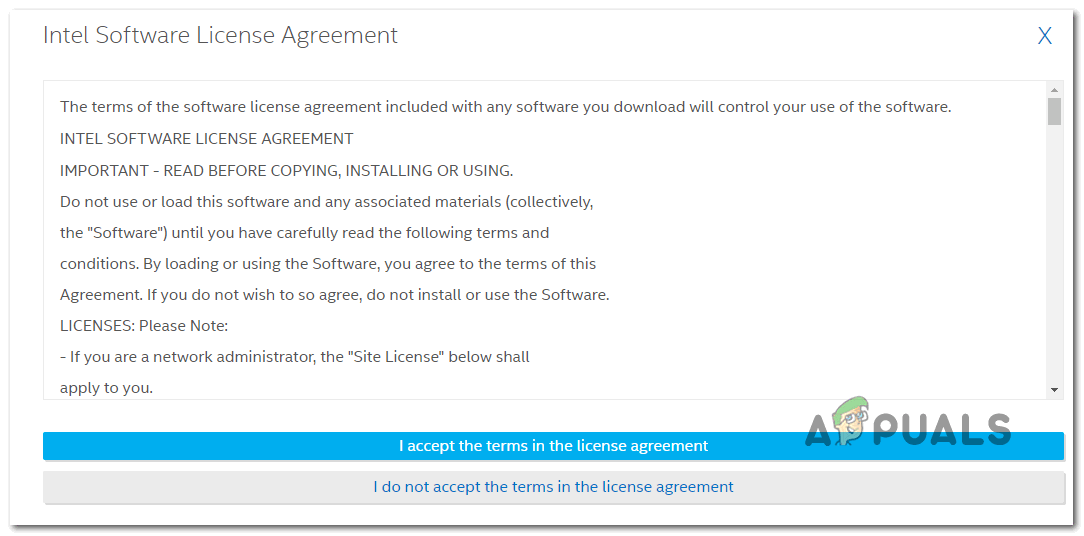
Downloading the compatible bit driver version - At the next screen, click on I accept the terms in the license agreement, then wait until the download is complete.
- Once the driver is downloaded locally, double-click on it, then click on it, then click Yes at the User Account Control window to grant admin access.
- Follow the on-screen instructions to install the driver, then reboot your PC and see if the problem is fixed once the next startup is fixed.
If the problem is still not fixed or you were already using the latest driver version, move down to the next method below.
Run the Hardware and Devices troubleshooter
Keep in mind that the reason behind the apparition of this LiveKernelEvent 193 error is a scenario in which your Windows installation is not currently configured to check the most up-to-date drivers of any devices that get installed.
In case you recently connected an additional peripheral or a new external drive, chances are this is the reason why you are seeing the LiveKernelEvent 193.
In this scenario, the easiest way to fix the issue (plus a couple of additional possible scenarios) is to run the Hardware and Devices troubleshooter and apply the recommended fix.
Note: This tool is equipped with reelection of automated fixers that can be auto-applied in case a familiar scenario is identified.
Follow the instructions below to Run the hardware and devices troubleshooter:
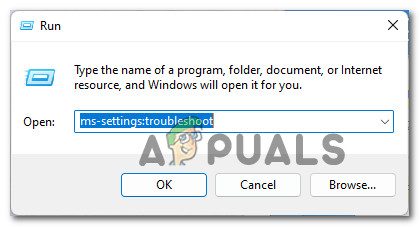
- Open up a Run dialog box by pressing Windows key + R. Next, type ‘ms-settings:troubleshoot’ inside the text box and press Enter to open up the Hardware and Device Troubleshooter.
Accessing the Troubleshoot menu - Once you’re inside the Troubleshooting tab, click on Other troubleshooters from the menu on the right-hand pane.
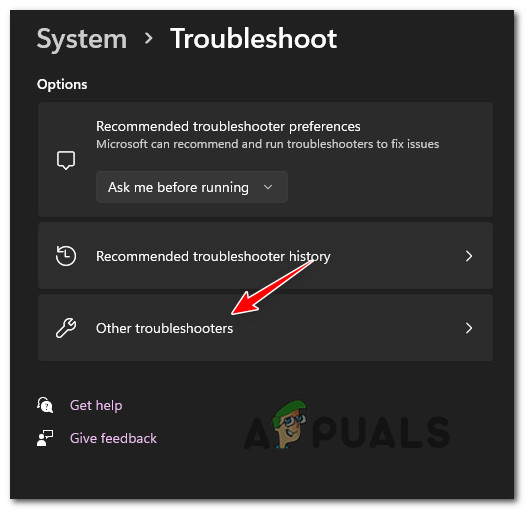
Accessing the Other Troubleshooters tab - Next, once see the entire list of additional troubleshooter, scroll under Find and fix other problems, then expand the listing associated with Hardware and Devices, then click on Run the troubleshooter.
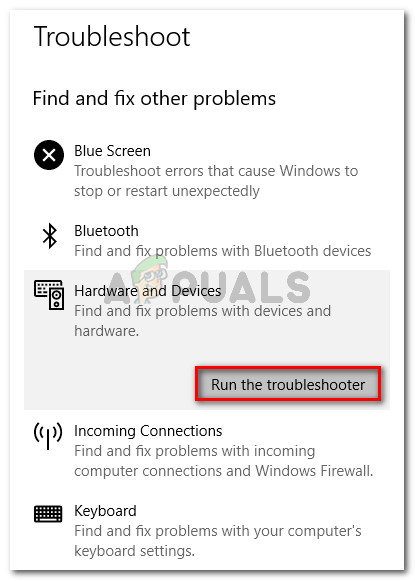
Run the Hardware troubleshooter - Inside the Hardware and Devices troubleshooter, wait patiently until the initial scan is complete.
- If the utility discovers the same problem that we’re suspecting, you’ll need to click on Enable in order to configure your Windows installation to always search for new driver signatures when new hardware is connected.
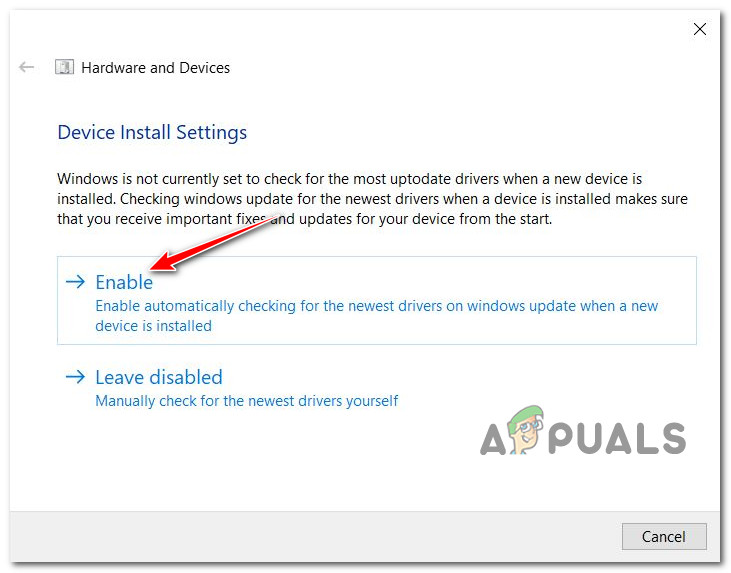
Enable the Hardware and Devices menu Note: If a different solution is recommended, click on Apply this fix or follow the on-screen instructions to enforce the fix.
- After the fix is successfully applied, reboot your computer and see if the issue is fixed after you restart your PC again.
In case you’re still dealing with the same LiveKernelEvent 193 error, move down to the next method below.
Uninstall NordVPN (if applicable)
As it turns out, you can also expect to face the LiveKernelEvent 193 type of crash in a scenario in which your network driver conflicts with a background process of NordVPN. This problem is typically associated with a 100% CPU usage of the System Interrupts process while the computer hangs indefinitely.
In case the scenario above sounds familiar and you have NortVPN installed and configured to open along with every system startup, chances are you’re dealing with the same kind of conflict.
To fix this issue, you will need to uninstall your current version of NordVPN and install the latest version (after a system reboot):
- Press Windows key + R to open up a Run dialog box. Next, type ‘appwiz.cpl’ inside the text box and press Enter to open up the Programs and Features menu.

Open up the Programs and Features menu - Once you’re inside the Programs and Features menu, scroll down through the list of installed programs and locate the entry associated with NordVPN.
- After you locate the correct listing, right-click on NordVPN and choose Uninstall from the context menu.
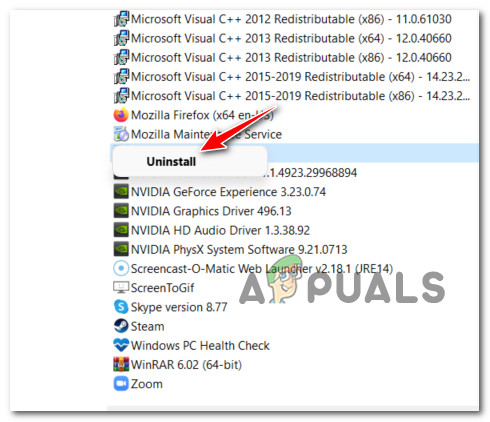
Uninstalling the NordVPN - Follow the uninstallation prompts to uninstall NordVPN and get rid of the custom network settings, then reboot your PC.
- Once your Windows computer boots back up, see if the same LiveKernelEvent 193 error is still occurring.
If the problem is still not fixed or this method was not applicable, follow the next instructions below.
Update the Chipset drivers
Another potential culprit that might indirectly cause the LiveKernelEvent 193 error is an incompatible or outdated chipset driver.
Note: Chipset drivers are mainly responsible for controlling and managing the communications between the processor, the GPU, the hard drive, and the system memory.
Improper chipset drivers can make your system unstable to resource-intensive tasks which might end up causing the LiveKernelEvent 193 error. As it turns out, this problem is mostly reported to occur with laptops, ultrabooks, and notebooks.
Fortunately, if this scenario is applicable and you’re actually dealing with an improper chipset driver, you should be able to fix the issue by updating your chipset drivers to the latest compatible version.
But keep in mind that the process of updating your chipset drivers will be different depending on if you’re using hardware compatible with AMD or Intel.
To cover both potential scenarios, we’ve created two separate guides that will walk you through the process of updating your chipset driver with AMD or Intel equivalents.
Update the AMD Chipset driver
- Start by opening your default browser and accessing the download page of AMD Drivers and Support page.
- Next, scroll all the way down to the Search for your product section.
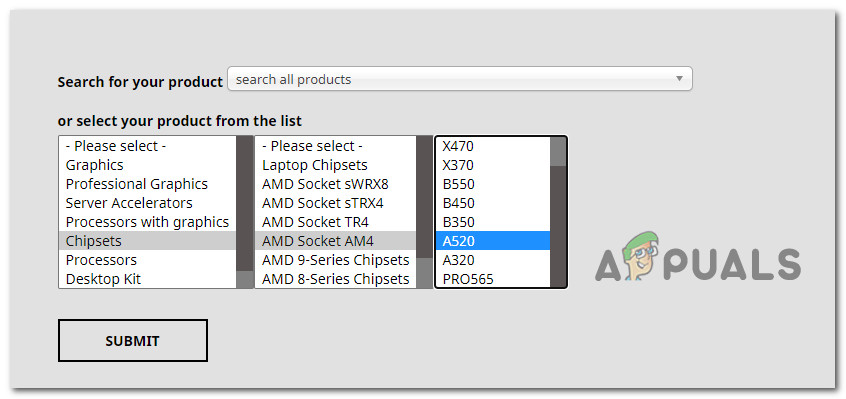
- Once you’re inside the Search for your product section, choose Chipsets from the column on the left, then pick the appropriate processor socket from the column on the right.
- Select your processor from the third column, then click on Submit to get a list of the compatible chipset drivers.
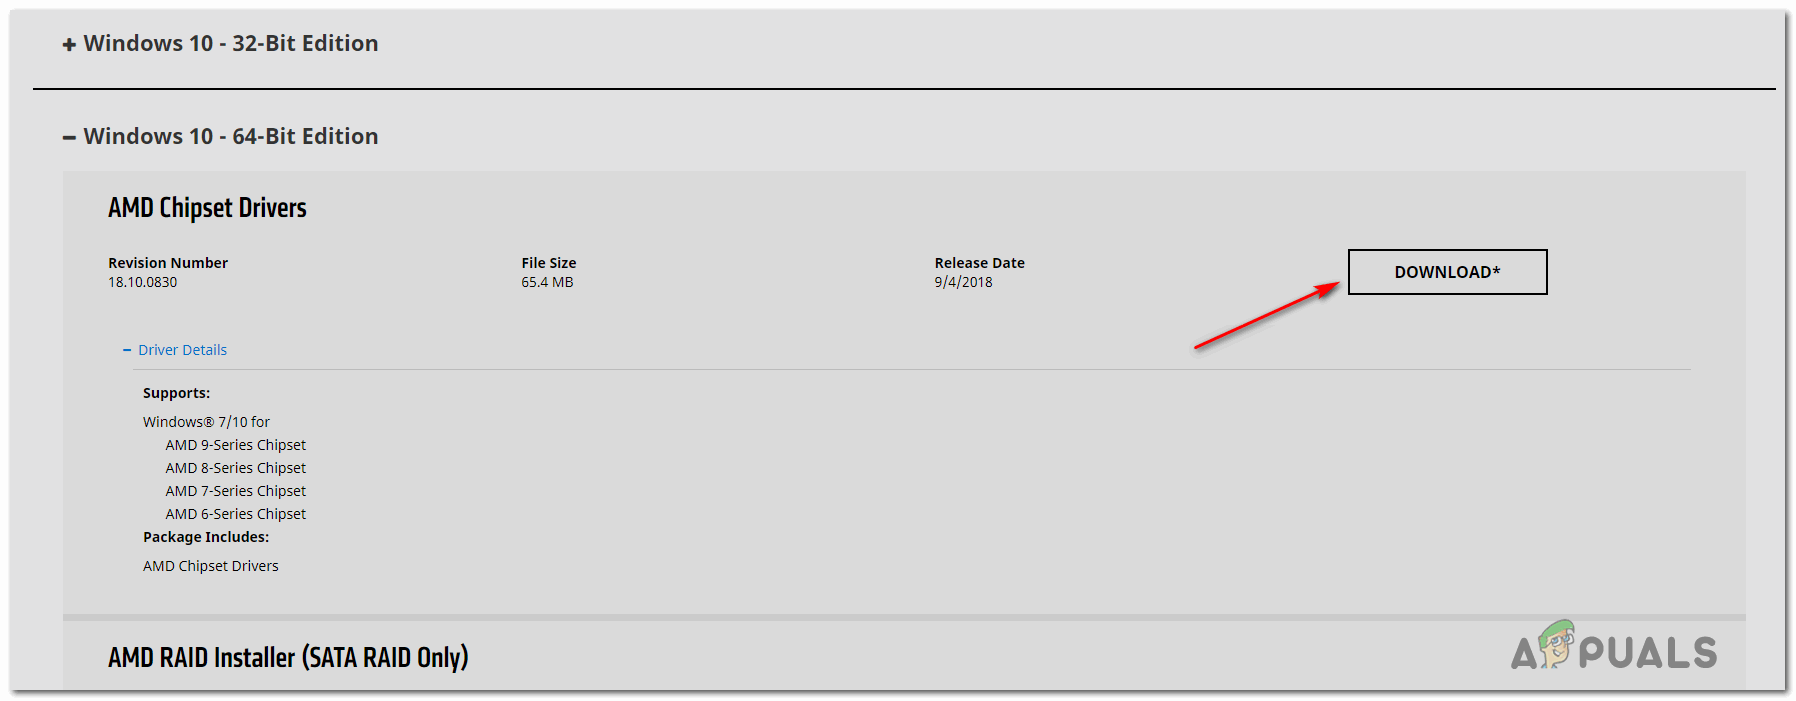
Finding the correct AMD chipset driver - After you hit the Submit button, you will be redirected to a page where you can download the chipset driver. Once you’re inside, expand the drop-down menu associated with your compatible OS architecture and click on the Download button from the newly appeared menu.
Downloading the latest chipset driver - After the download is finally complete, go ahead and double-click on the chipset driver installer, then click on Yes once you’re prompted by the User Account Control window.
- Inside the chipset driver installer window, follow the on-screen instructions to update your chipset drivers to the latest version available.
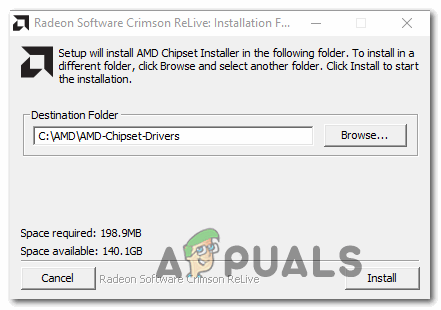
Install the latest Chipset Driver - Follow the on-screen instructions to complete the installation, then reboot your computer one final time and see if the LiveKernelEvent 193 error is now fixed.
Update the Intel Chipset driver
- Open your browser and visit the download page of the Chipset INF Utility.
- Inside the correct download page, click on the Download button (top-right corner of the screen).
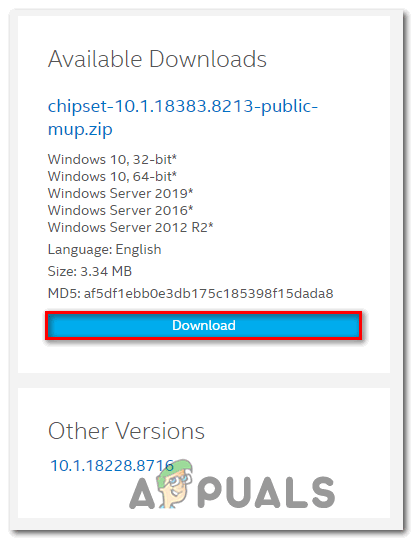
Downloading the chipset utility - Once you get to the next screen, click on I accept the terms in the license agreement to agree with the Terms of Licensing.
Accepting the Terms of Licensing - After a few seconds, the download should start automatically – wait until the archive is downloaded locally, then use an extraction utility (like 7Zip, WinZip or Winrar) to extract the contents of the chipset driver updater software.
- Once the contents of the archive are extracted, double-click on the SetupChipset.exe executable, then follow the on-screen prompts to install the latest chipset driver.
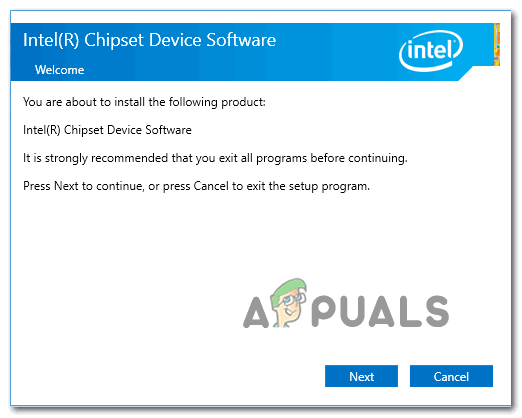
Installing the chipset driver - Once the chipset driver has been installed, reboot your PC and see if the error is fixed starting with the next system startup.
In case you’re still experiencing system crashes pointing towards the same LiveKernelEvent 193 error, move down to the next method below
Update BIOS drivers
Another possible scenario (particularly if you’ve just recently upgraded to Windows 11) is an outdated BIOS driver that is not yet updated to accommodate the new OS.
System instability caused by an outdated BIOS version is not that uncommon, especially on legacy motherboards.
Keep In mind that updating the BIOS version on your motherboard is not that hard as it used to be – as of now, every major motherboard manufacturer has developed a flashing utility that will help you update your BIOS without getting too technical.
The best course of action is to head over to your motherboard manufacturer’s website and check the Drivers Download page for a BIOS updating utility – ASUS has E-Z Flash, MSI has MFlash, Gigabyte has @BIOS Live Update, etc.

Note: Regardless of your BIOS manufacturer, make sure you read the official documentation thoroughly before starting the operation of updating your BIOS. Doing this process incorrectly might result in you bricking the hardware which will require the intervention of a skilled technician.
Follow the on-screen instructions to update your BIOS version to the latest, then reboot your PC and see if the LiveKernelEvent 193 error is fixed.
In case you already had the latest version of BIOS for your motherboard or this method was not applicable, move down to the final fix below.
Clean install or Repair install
If none of the methods above have proven to be effective in your case and you’ve ruled out the possibility of a hardware issue, the only possible explanation for this LiveKernelEvent 193 error leading to a system crash is underlying system file corruption.
Since there are literally tens of thousands of possible culprits, the most efficient way of ensuring that your system doesn’t crash with this error due to system file corruption is to replace every Windows file with a healthy equivalent.
When it comes to doing this, you have two ways forward:
- Clean install – This operation is the easiest out of the bunch, but you’ll need to be prepared to lose any personal data present on the operating system drive. This is the equivalent of installing Windows from scratch, so make sure to back up your data if you’re currently storing any sensitive drive on the OS drive before starting this operation.
- Repair install – If you have the time to go for this method you should – this operation will only replace your Windows system files while allowing you to keep everything else. By repair installing (in-place repairing) you get to keep your personal files, applications, games, and even some user settings that are currently stored on the OS drive.


