Fix: Lenovo Touchscreen not Working
Lenovo has come up with its line of all in one monitor and touchscreen laptops such as Yoga. These products have given a run for their money if compared to other competitors such as Surface by Microsoft. However, no matter how giant a company might be, there are always problems surfacing each day when it is abDisqusout technology.
One such problem is the touchscreen not working in Lenovo. This problem can occur due to many reasons such as the touch driver corrupted, or some Windows update conflicting with module, etc. We have listed various workarounds for you to try. Start with the first one and work your way down.
Solution 1: Running Hardware and Device Troubleshooter
Hardware Troubleshooter is a utility present in the Windows operating system. It detects problems with your existing hardware and tries to resolve it after following a series of steps. We can try running the hardware troubleshooter and check if this does the trick.
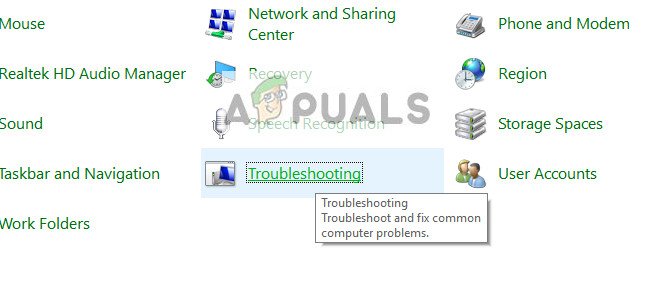
- Press Windows + R, type “control” in the dialogue box, and press Enter.
- Now on the top right side of the screen, click on View By and select Large Icons from the list of options available.

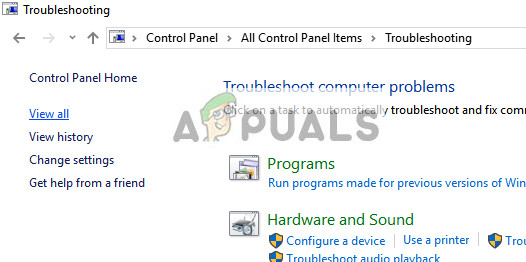
- Now select the option of Troubleshooting from the control panel.
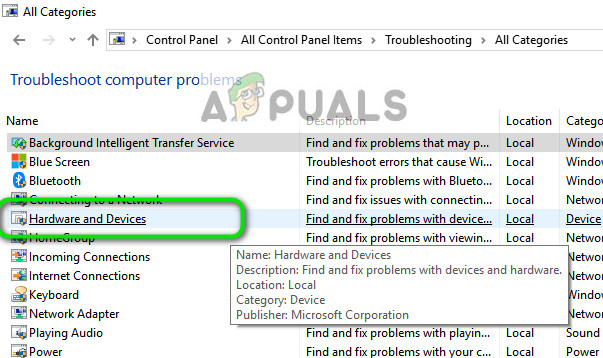
- Now on the left side of the window, select “View all” option to list all the troubleshooting packs available on your computer.
- Now select “Hardware and Devices” from the list of options available and click it.
- Now select Next to the new window that pops up in front of you.
- Now Windows will start searching for hardware problems and fix them if it finds any. This process can take some time as all of your hardware is being checked. Be patient and let the process complete successfully.
- Windows might prompt you to restart your PC in order to fix problems. Don’t delay the request, save your work, and press “Apply this Fix”.
Solution 2: Uninstalling Latest Windows Update
It is not new to anyone using Windows to know that Windows Updates break different components very often. It was noted frequently that there were several Windows updates that were conflicting with the touch module. Windows update is designed to fix various bugs and introduce new capabilities to the operating system. But sometimes, when the update is rolled out, it conflicts with another thing.
You can try uninstalling the Windows Update and see if this does the trick. Make sure that you backup all your important data before following this solution.
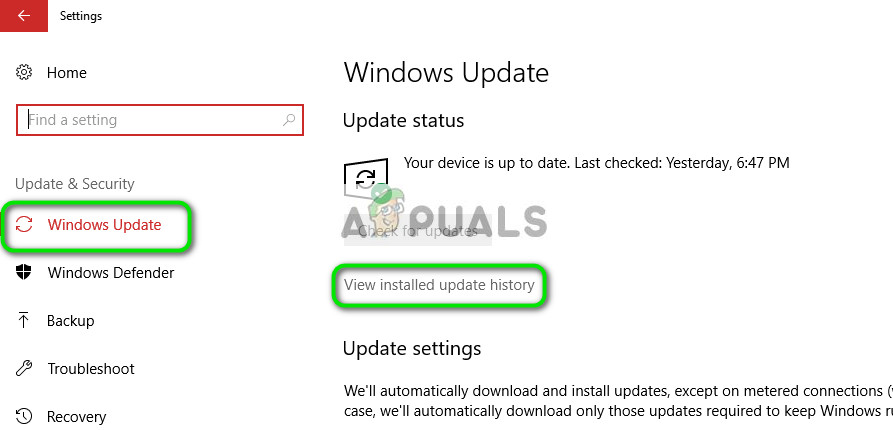
- Press Windows + S, type “settings” in the dialogue box, and open the application.
- Once in Settings, click on “Update and security”. Here, under the heading of Update status, click “View installed update history”.
- Click “Uninstall updates” present at the very top of the screen.
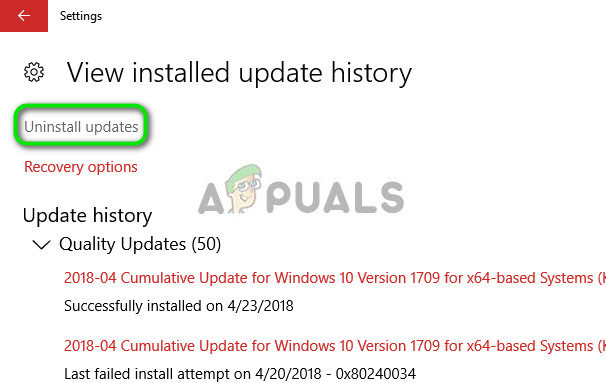
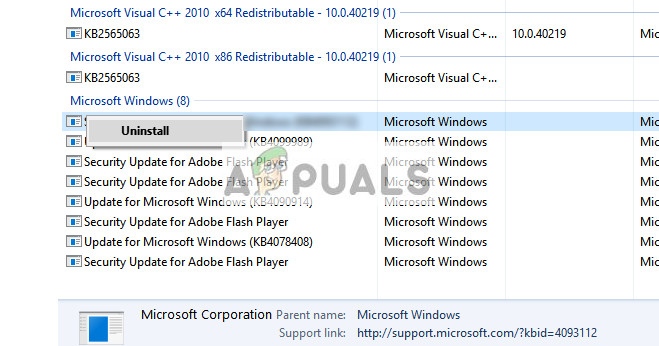
- A new window will be brought in front of you consisting of all the updates installed on your computer. Right-click on the one which was recently installed and click “Uninstall”.
- After uninstalling the update, power cycle your computer and check if the problem at hand got solved.
Solution 3: Doing a Full Power Cycle
Another workaround that works for a lot of users is power cycling your computer. Power cycling is an act of turning off a device completely off and then on again. Reasons for power cycling include having an electronic device reinitialize its set of configurations parameters or recover from an unresponsive state or module. It is also used to reset all the network configurations as they are all lost when you turn the device completely turned off.
After the computer, take out the main power cable and let them stay idle for a couple of minutes (~5). After the required time, plug in the cables and turn on your computer. Now check if the touchscreen works again.
Solution 4: Uninstalling USB Touchscreen Controller and Updating Drivers
If both the above methods don’t work, it is safe to assume that the problem might lie with your touch drivers. Drivers are the main force behind the working of your touchscreen. They are the interface between any hardware and the operating system. It is possible that the latest drivers installed on your system might not be working correctly with your hardware or they might have gotten corrupt. We can try uninstalling the drivers and restarting the computer in hopes that this will install the default drivers.
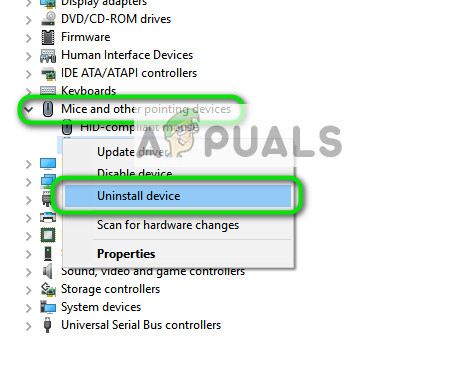
- Press Windows + R, type “devmgmg.msc” in the dialogue box, and press Enter.
- Once in the device manager, expand the category of “Mice and other pointing devices”. If the hardware “USB Touchscreen Controller” is listed here, it is likely that the touchscreen will be fixed if we install the default drivers. Right-click on it and select “Uninstall device”.
- Restart your computer. Now head back to the device manager and confirm that the touchscreen is now listed under Human Interface Devices. Hopefully, the problem will be solved.
- If the entry doesn’t go away from the category “Mice and other pointing devices”, it means you have to manually set the driver. Right-click on it and select “Update driver”. After you choose to update manually, you will have the option to “Let me choose”. From there, select “USB input device” instead of “Touchscreen controller”.
If this method doesn’t work, follow the instructions below. This solution will target the case where you cannot exactly locate where your touchscreen is located in the device manager.
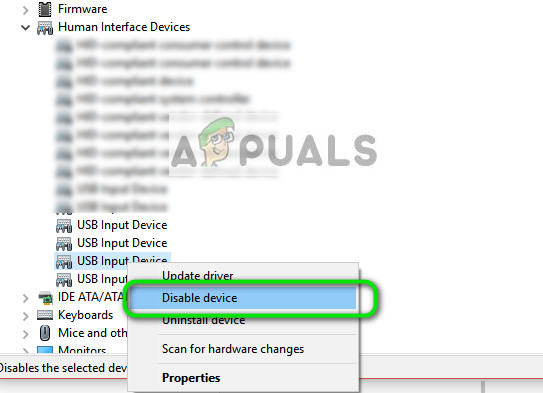
- Navigate to the device manager and expand “Human Interface Devices”. Now one by one remove all USB connected devices to your computer. You will notice that a lot of different devices will be removed.
- Now select the remaining, right-click on it and select “Disable device”.
- Restart your computer and check if the touchscreen is working as expected. If it is, you may insert other USB devices back in and the touchscreen will still work.
If disabling or installing the drivers don’t work, you can try updating them to the latest build and see how things turn out. Once you locate the device in your device manager, right-click it and select “Update driver”. You may choose “Search automatically for updated driver software” or you can select the latter “Browse my computer for driver software” and navigate where you download the driver.
Tips: If there is a red cross next to the hardware, it means that the device is disabled. You can enable it again and see if this solves anything. If it has a yellow exclamation mark, it means you have to update its drivers.
Solution 5: Editing the Registry
If updating the drivers also don’t work out, you can update some registry values. Registry editor contains keys that are of core importance to the computer and it refers to these keys when trying to set parameters. However, you should also backup your registry before attempting to change any values. Appuals will not be responsible for any damage whatsoever.
- Press Windows + R, type “regedit” in the dialogue box, and press Enter.
- Once in the registry editor, navigate to the following path.
HKEY_LOCAL_MACHINE\SYSTEM\CurrentControlSet\Enum\ACPI\ATML1000\3&233a31a5&0\Device Parameters
- Now look at the right panel of the screen and set the dword “EnhancedPowerManagementEnabled” to the value “00000000”.
- Restart your computer and check if the touchscreen started working again.
If after following all the above methods, the touchscreen still doesn’t work, you can perform a system restore if it was working prior to a windows update. If the touchscreen was not working from the start, it probably means that there is a hardware fault.
Solution 6: Checking for Hardware Problems
If none of the above methods work for you, it probably means that there is a problem with the touch-screen itself. According to several users, their screens were working when the laptop was taken out from the box. However, after recent updates or due to faulty hardware itself, the screen stopped working.
Here, what you can do is locate the nearest Lenovo service shop and physically show the issue to their technicians. This is a known problem (especially with 720s). If you have a warranty, you will not be charged as well.


None of the mentioned things solved my problem for Yoga 260, the touchscreen was working and suddenly failed as I flipped it back to normal laptop mode. I could see an “Unknown Device” (in Device Manager). When I try to update it via Device Manager, it (expectedly) fails however it comes up with it’s name, which was Wacom (something). I installed Driver Easy (not free), it failed to install the Wacom driver for me, however it did mention the version number. I looked for it on the internet and got a similar version number, this fixed my issue. You can find the driver here:
https://us.wacom.com/en/feeldriver/index.php?dlid=93b9f9
Or direct link:
https://us.wacom.com/en/feeldriver/get.php?dlid=93b9f9&file=Wacom_Components_7.7-13.13.24_LEN_win64.exe