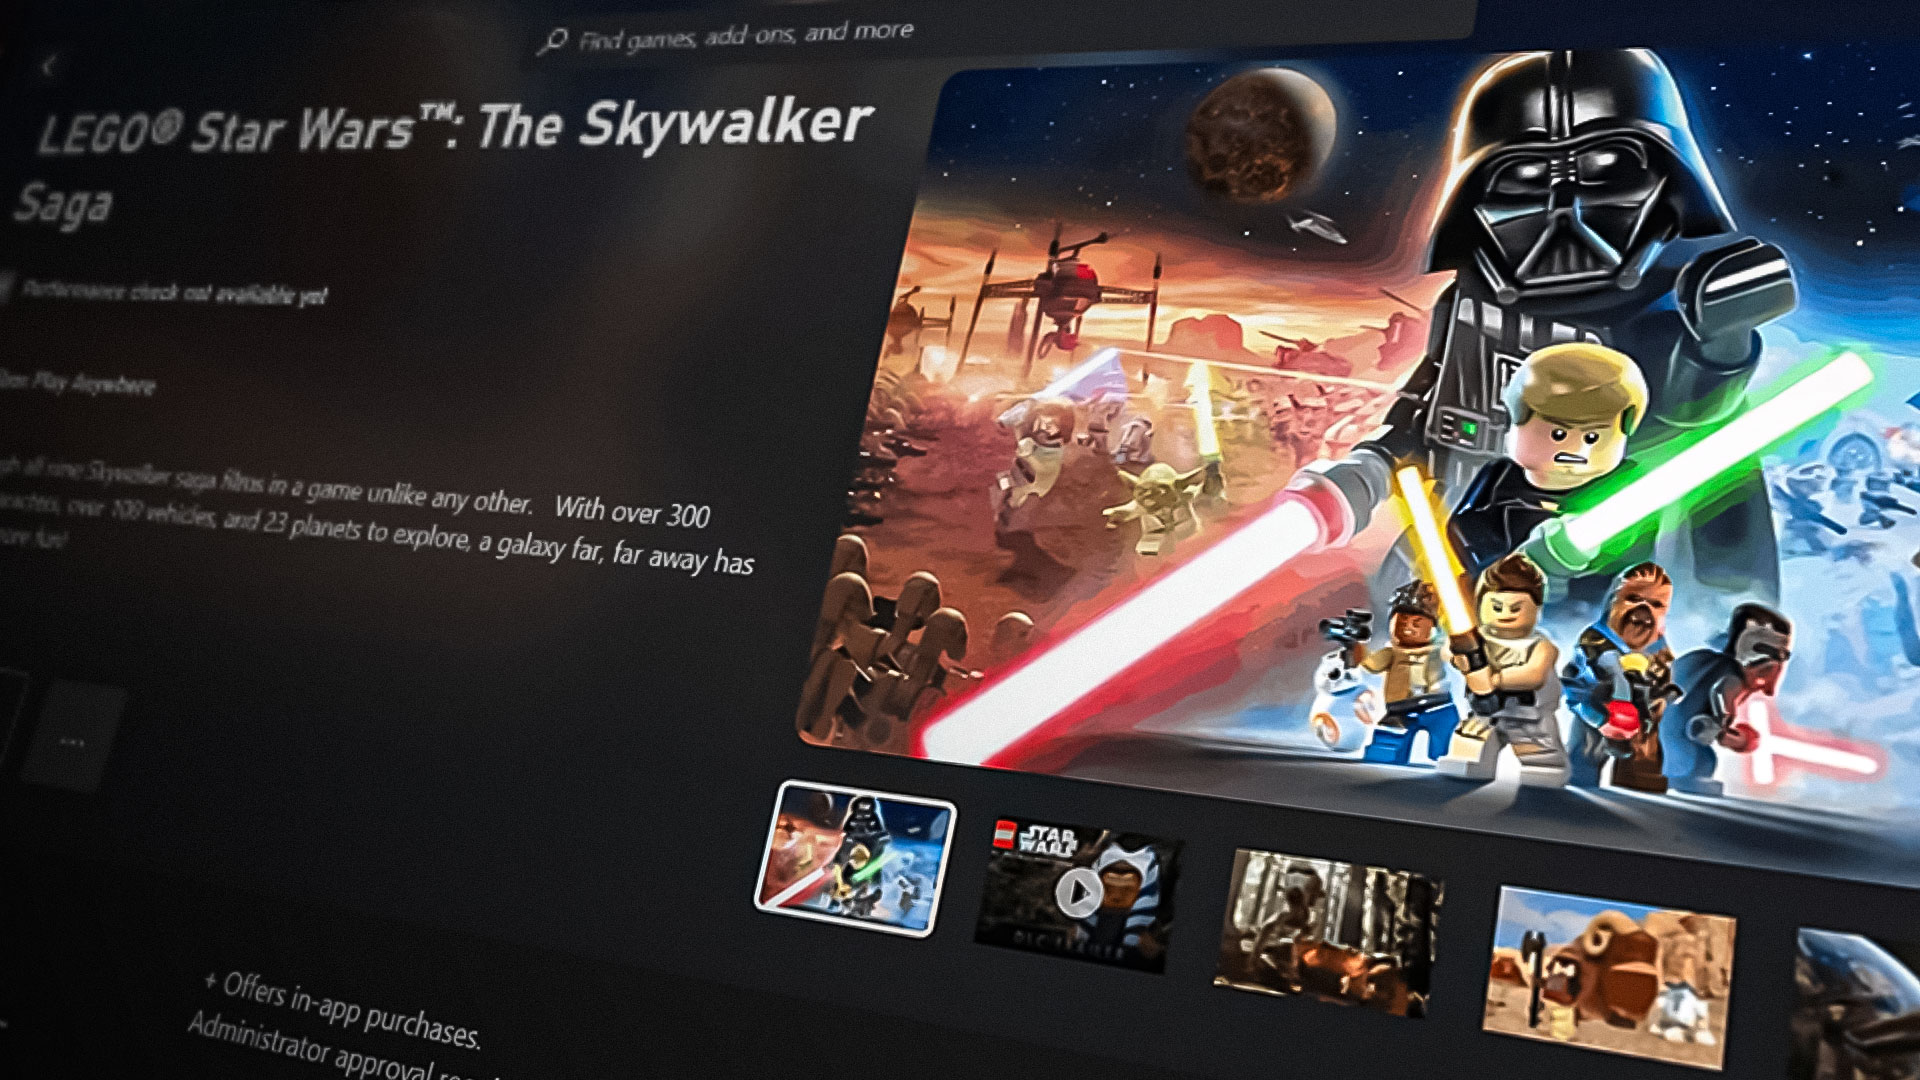
Fix: LEGO Star Wars The Skywalker Saga Not Installing
LEGO Star Wars The Skywalker saga won’t be able to install appropriately if the Microsoft store or the Xbox App isn’t functioning correctly, this could be due to a bad cache or disabled services of the Microsoft launcher. However, this could also be due to problems related to outdated windows.
Outdated windows may cause your computer to encounter several problems such as the one in the discussion, in such a case it is advised to update your windows.
If updating the Windows did not fix the problem. Here are several troubleshooting methods that’ll aim at fixing the LEGO Star Wars: The Skywalker Saga not installing issue.
1. Login with the same account on Xbox App and Microsoft store
A mismatch in logged-in accounts on both the Microsoft store and the Xbox gaming application can lead to issues such as the user not being able to install games off of either platform. It’s a good practice to log on to both platforms via a mutual account to avoid this issue. Here are the steps to do so:
- Open the Microsoft store.
- On the top-right, Click on the Profile icon.
- Click on the Signout button.
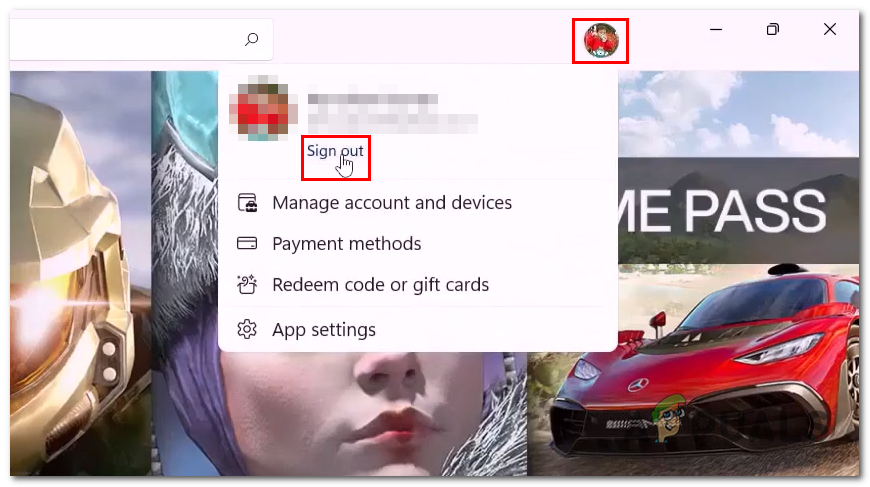
Logging out of the Microsoft store - Log in to any account you wish to use.
- Open the Xbox gaming application.
- On the Top-left, Click on the Profile icon and then on the Signout button.
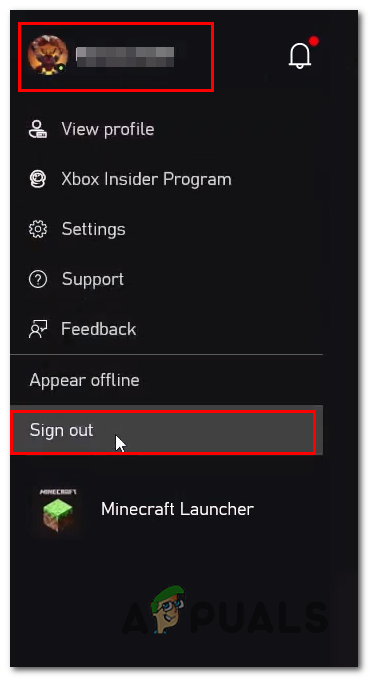
Logging out of the Xbox app - Once, Logged out, log in via the same account as the Microsoft store.
2. Re-register Microsoft Store
Re-registering the Microsoft store is a troubleshooting technique you can utilize when the Microsoft store is unable to launch, install new applications, not update or other bugs. Re-registering means restoring the application to its default settings. Follow these steps to do so:
- Press the Windows + R keys simultaneously to open the Run dialogue box and type Powershell and hit the enter key.
- Now, Paste the following command in the terminal and hit the enter key.
Get-AppxPackage -AllUsers| Foreach {Add-AppxPackage -DisableDevelopmentMode -Register “$($_.InstallLocation)\AppXManifest.xml”} - Wait for a while
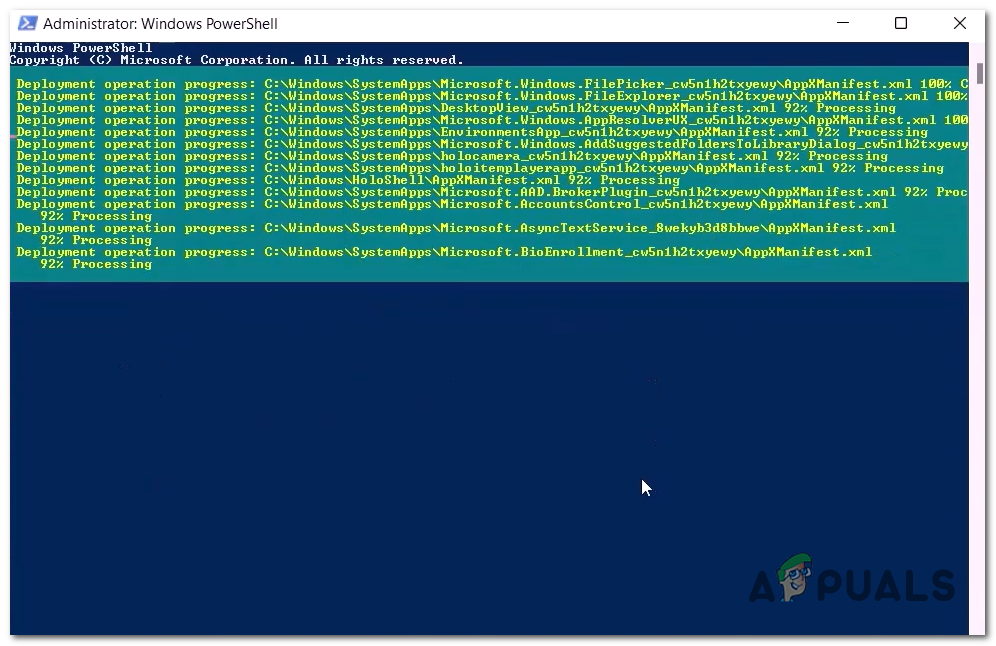
Re-Registering the Microsoft store
3. Delete Microsoft Store local cache
The local Microsoft Store cache is a collection of temporary files and data that are stored on a user’s computer when they use the Microsoft Store app to download or update apps.
These files are used to speed up the process of downloading and installing apps, as well as to enable the app to work offline in some cases.
The cache is stored in a specific location on the user’s computer, and its size can vary depending on the number and size of the apps that have been downloaded or updated.
Clearing the local Microsoft Store cache can sometimes help resolve issues related to the app’s performance or functionality, such as slow downloads or failed installations.
Here are the steps to delete the Microsoft store local cache:
- Open the File Explorer.
- Navigate to Local Disk C: > Users > Your user profile.
- In your user profile folder, Click on AppData. If you can not locate the folder, it’s possible that the folder is hidden. Here are the steps to access hidden folders/files on windows.
- Click on the “View” option in the menu bar.
- Now, click on “Show”
- Check the “Hidden Items” option as shown in the image below.
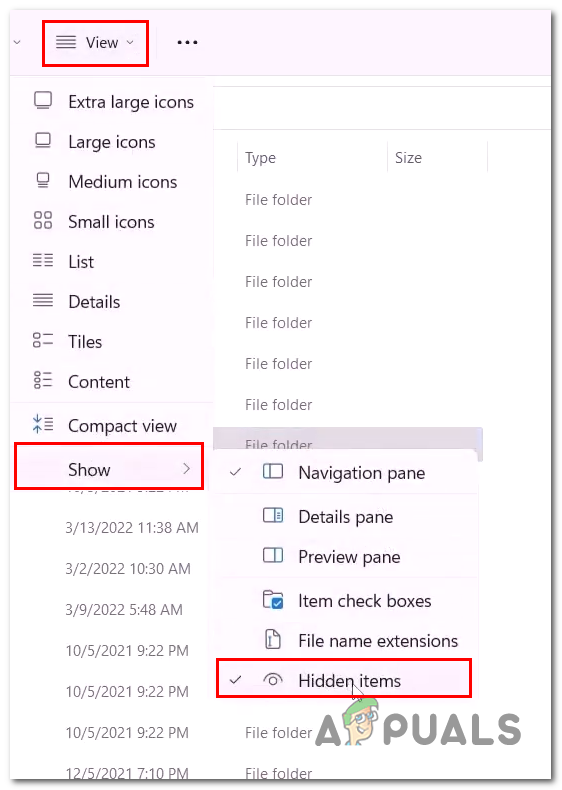
Checking the Hidden items option to view the hidden folders
- In the AppData folder navigate to Local > Packages > Microsoft.WindowsStore_8wekyb3d8bbwe.
- Right-Click on the LocalCache folder and click on the Delete button.
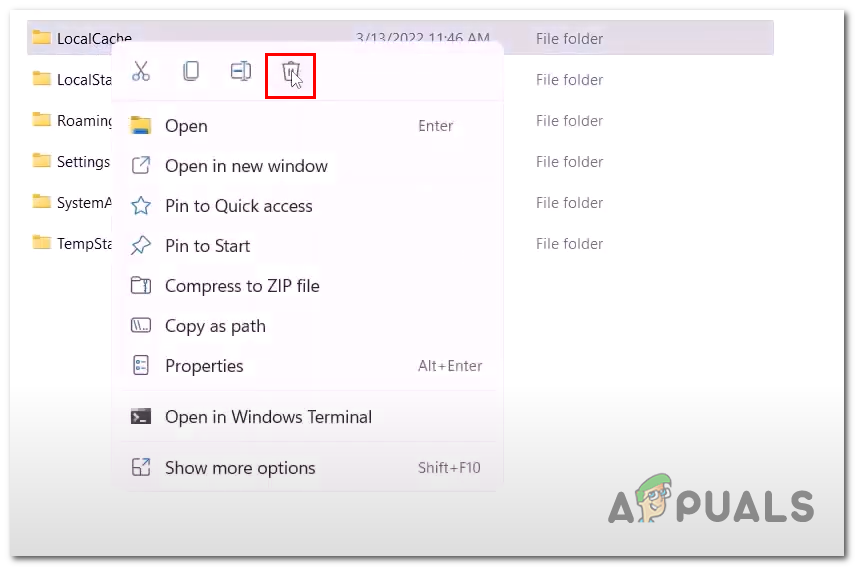
Deleting the Microsoft store LocalCache
4. Install Xbox Identity provider
If the Xbox Identity Provider is unavailable on your Windows 10 device, it may prevent you from signing in to certain Microsoft applications and services that require Xbox Live credentials for authentication.
This could cause issues when trying to access gaming-related features or content within those applications or services.
Here is how you can install the Xbox Identity provider:
- Click here to open the Xbox Identity provider download page.
- Click on the Get in Store app button.
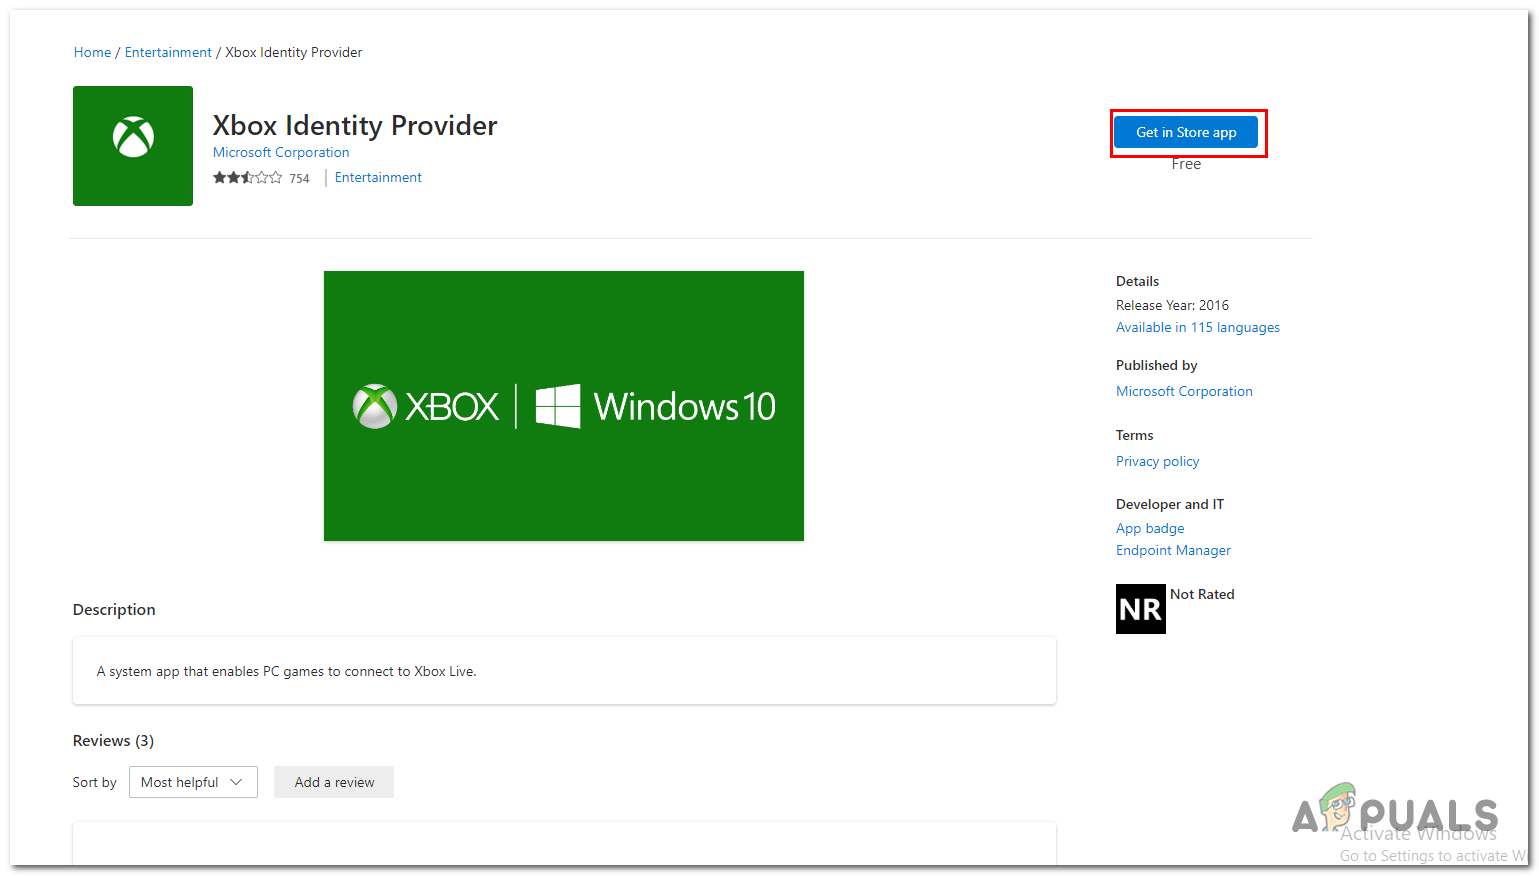
Installing the Xbox identity provider - Now, Click on the Install button and wait for a while.
Once, Installed. Try launching the Microsoft store and try installing the LEGO Star Wars.
5. Restart Necessary services
Several services run in the background to facilitate the smooth working of the Microsoft store and the Xbox gaming application.
If these services aren’t functioning as they are supposed it will cause problems such as the user not being able to install a game. In such a case, it is advised to restart these necessary services.
Here are the steps to do so:
- Press the Windows + R keys together to open the Run dialogue box.
- Type “Powershell” in the text field and hit enter.
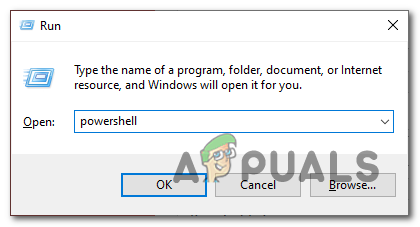
Opening PowerShell Via the Run dialogue box - Paste the following commands one by one to automatically force restart the necessary services.
net stop iphlpsvc
net start iphlpsvc
net stop XblAuthManager
net start XblAuthManager
net stop XblGameSave
net start XblGameSave
net stop Installservice
net start Installservice
net stop wuauserv
net start wuauserv
- Once you have restarted all the services. Try Installing the game. If the problem presumes continue to the next step.
6. Use WsReset to Reset Cache
“Wsreset” is a console application in the Windows operating system that can be used to reset the Windows Store cache. Sometimes, users may encounter issues with the Windows Store, such as apps not installing or updating correctly. These issues can be caused by a corrupted Windows Store cache. To fix the issue, the “WsReset” command can be used to reset the cache and clear out any corrupt data.
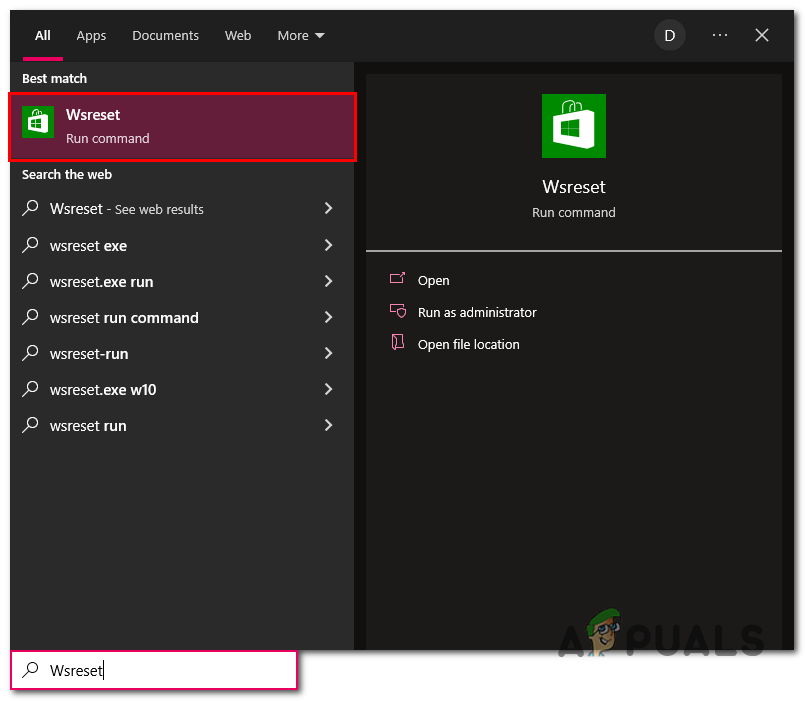
- Press the Window + Q keys simultaneously and in the search bar type WsReset.
Opening WsReset via the start menu - Wait for a while on the blank command prompt screen.
- Once the console automatically closes, this means that the cache has been successfully deleted.
7. Try installing it on a different drive
Changing the install directory can sometimes help to work around certain installation errors. For example, if the error is due to a lack of space on the system drive, changing the install directory to a drive with more space could allow the installation to proceed.
Similarly, if the error is caused by a corrupt file or folder, changing the install directory to a different location could allow the installation to bypass the corrupt file or folder.


