How to Fix KB5012643 Update Installation Problem on Windows 11?
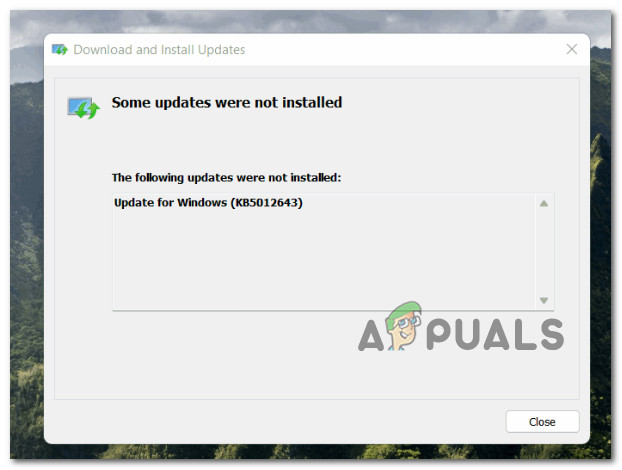
It’s been a while since Microsoft released a bad update for their latest operating system (Windows 11), but KB5012643 seems to be one of them. A lot of users are experiencing issues while attempting to install it. Some are finding that the update becomes stuck at 51% while others get the ‘Some updates were not installed‘ error.
After investigating this particular issue, we realized that there are actually several different reasons why you might be experiencing this issue on Windows 11. Here’s a list of potential culprits that might be responsible for this issue:
- Common WU inconsistency – If the reason you can’t install the KB5012643 update is already covered by one of Microsoft’s repair strategies in the Windows Update Troubleshooter, repairing the problem is as simple as running the tool and following the on-screen instructions.
- Windows Update service dependency is disabled – Oftentimes, the reason why only certain Windows Updates are refusing to install is that an associated service dependency used for the download or the installation of the update is actually disabled. To fix this, open the Services screen and ensure that every involved service is enabled.
- Corrupted Windows Update component (or dependency) – Corrupted Windows Update component (or dependency) – If you can’t install any Windows update (not only the KB5012643 update), it’s likely that you’re dealing with corruption in the WU component or one of the associated dependencies. In this instance, we propose using a series of CMD commands to reset every WU component as well as the WU management folders.
- Recent system change broke the Windows Update component – According to several affected users, you can expect to deal with this issue after a recent system change (like the installation of an infrastructure update, a driver update, or a cleanup procedure performed by an antivirus). In this case, you can mitigate most of the damage by using System Restore to return your system back to a healthy state before attempting to install the KB5012643 once again.
- WU component is busted – If you’re noticing that every new pending update is failing (not just the KB5012643 update), chances are you’re dealing with some kind of issue affecting the entire Windows Update component. In this case, your options are to attempt to install the pending updates manually or perform an in-place upgrade. Additionally, you can also try reverting your WU component to a healthy state and re-try the installation of the update.
- 3rd party interference – There are certain scenarios where the installation of pending Windows Updates will be inhibited by a 3rd party process of service (most commonly belonging to a resource optimization suite). To avoid this issue, boot in Safe Mode with Networking and install the update while in this mode.
- Underlying system file corruption – Your PC’s failure to install some pending updates could be caused by an underlying system file corruption issue in some cases. If none of the other repairs have worked, run SFC and DISM scans, run a Startup Repair, or perform a clean or repair install if all else fails.
- The update is not compatible – As it turns out, if you’re part of the insider’s circle, there’s a chance you get recommended this optional update even though it’s not fully compatible with your system. In this case, you can simply use a utility to hide it and ensure that your system doesn’t try to install it in the future.
Now that we went over every potential cause of this issue, let’s go over all the potential methods that other affected users have successfully used to fix the issue.
1. Run the Windows Update Troubleshooter
If a Microsoft repair plan offered in the Windows Update Troubleshooter already addresses the cause of the error, then addressing the issue is as simple as running the program and implementing the recommended remedy.
If you’ve never used it before, the Windows Update Troubleshooter is designed to automatically detect and fix common issues. You’re in luck if you’re using Windows 11 because the tool is significantly more comprehensive than prior versions. If an identifiable cause is found, Microsoft has incorporated a slew of new automated repair options that can be activated in a matter of seconds.
Follow the instructions below to run the Windows Update Troubleshooter and have the suggested fix deployed automatically if you haven’t already:
- Open the Run dialog box by pressing the Windows key + R, and then try to fix the Windows Update component.
- Type ‘control’ into the text box in the newly appeared dialog box and press Enter to open the Control Panel interface.

Access the Control Panel menu Note: If the User Account Control prompts you to grant administrative access, select Yes.
- In the Control Panel window, use the search function to look for ‘troubleshoot.’
- Select all of the Troubleshooting categories from the list of results.

Accessing the Troubleshooting tab - Navigate to System and Security and select Fix difficulties with Windows Updates once you’ve arrived at the Troubleshooting tab.
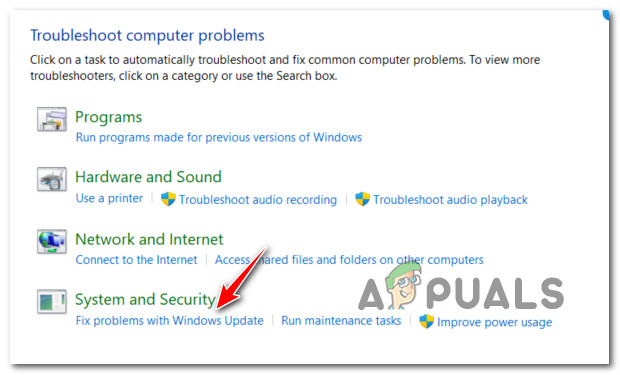
Fixing problems with Windows Update - When prompted by the Windows Update Troubleshooter, select Next and wait for the initial scan to complete.
- When you’ve identified a solution that works, click Apply this Fix to apply it to the present situation.
- With some types of recommended solutions, it may be necessary to perform a number of manual operations.
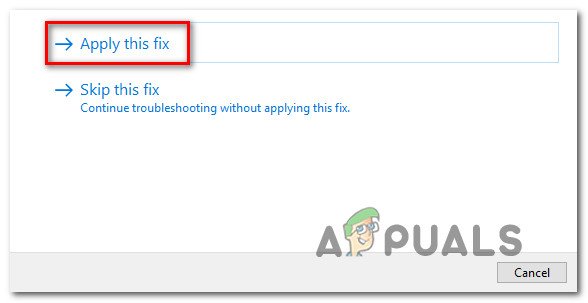
Apply the recommended fix - After you’ve completed the fix, restart your computer and attempt installing the failed update again.
If you’re still unable to install the KB5012643 even after running the Windows Update troubleshooter, move down to the next potential fix below.
2. Start every Windows Update service dependency
Windows Update, contrary to popular belief, is reliant on a large number of services. These services must be set up so that they may be contacted whenever the WU component needs them.
Some of these service requirements may have been modified to remain disabled in order to optimize the efficiency of your system if you’re using performance-optimizing technologies.
You must change the following services to AUTO to guarantee that Windows Update has everything it needs to finish the installation of available feature updates:
- BITS (Background Intelligent Transfer Service)
- CryptSvc ( Cryptographic Services)
- TrustedInstaller
You’re effectively ensuring that every WU service requirement is accessible by utilizing an elevated Command Prompt to ensure that the starting type of each of these services is set to Auto.
To ensure that the installation of KB5012643 is permitted, follow the procedures below to change the behavior of these services to AUTO:
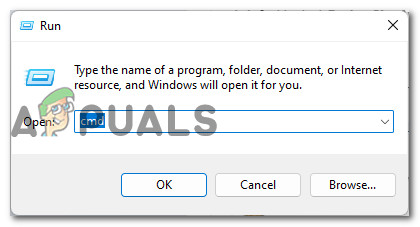
- To launch the Run dialog box, press Windows + R.
- Next, put ‘cmd’ into the newly displayed run prompt and hit Ctrl + Shift + Enter to launch an elevated Command Prompt window.
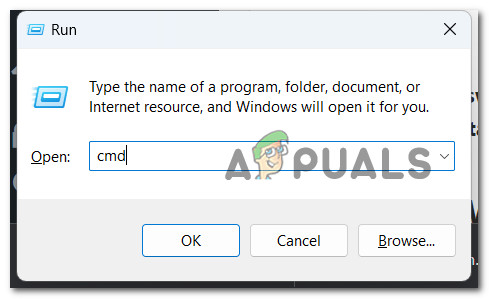
Open up the Command Prompt window - When the User Account Control prompt appears, click Yes to grant admin access.
- Type or paste the following commands into the elevated CMD prompt, then press Enter after each one to modify the startup type of each required dependency:
SC config wuauserv start=auto
SC config bits start=auto
SC config cryptsvc start=auto
SC config trustedinstaller start=auto
- Once all of the commands have been properly executed, restart your computer normally and attempt to install the failed update when the next startup has completed.
If the problem is still not fixed, move down to the next method below.
3. Reset every Windows Update component
It’s likely that you’re dealing with corruption in the WU component or one of its connected dependencies if you can’t install any Windows update (not only the KB5012643 update). In this case, we recommend resetting every WU component as well as the WU management folders with a sequence of CMD instructions.
The most common cause of this type of issue is one or more WU (Windows Update) components that are currently trapped in limbo (neither open nor closed). If this is the case, you can fix the problem by resetting all WU components involved in the update process.
If you find yourself in this situation, follow the steps below to reset every Windows Update component:
- Press the Windows key + R to bring up the Run dialog box.
- Next, type “cmd” in the text box and press Ctrl + Shift + Enter to open an elevated Command Prompt.
Open a CMD window - When the UAC (User Account Control) screen comes, click Yes to grant administrator capabilities.
- Type the commands below in order, hitting Enter after each one to stop any WU-related services:
net stop wuauserv
net stop cryptSvc
net stop bits
net stop msiserver
Note: You should remember that these commands will suspend Windows Update Services, MSI Installer, Cryptographic services, and BITS services, just to make sure you understand what you’re ordering the terminal to do.
- After halting all appropriate services, use the following commands to empty and rename the SoftwareDistribution and Catroot2 folders:
ren C:\Windows\SoftwareDistribution SoftwareDistribution.old
ren C:\Windows\System32\catroot2 Catroot2.old
Note: The revised files for the WU component are stored in these locations. Your operating system will be forced to create new, healthy equivalents that will not be corrupted if you rename these directories.
- Now that the directories have been emptied, run the following commands to re-enable the services that were previously disabled:
net start wuauserv
net start cryptSvc
net start bits
net start msiserver
- Once these commands have all been processed successfully and you have essentially restarted every involved dependency, attempt to install the KB5012643 update again and see if the problem is fixed.
If you get the same error when trying to install the faulty KB5012643 update, click on to the next possible solution below.
4. Perform DISM and SFC Scans
As it turns out, one of the most common causes of this issue when the KB5012643 update refuses to install is a system file corruption that affects the auto-updating function of Windows installation.
If this condition appears to be relevant, do a scan using two built-in tools: System File Checker (SFC) and Deployment Image Servicing and Management (DISM).
While SFC and DISM are similar in some aspects, we recommend running them both in quick succession to improve your chances of restoring corrupted system files.
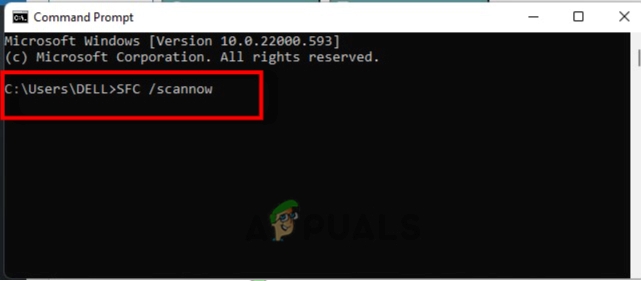
If this is the case, start with a simple SFC scan.
Keep in mind that this tool is entirely local, and you do not need to be connected to the internet at all times to use it.
IMPORTANT: Even though the utility appears to have frozen, it’s crucial not to close the CMD window after initiating this procedure. Wait for the operation to complete without disturbing it, as disrupting it could cause logical errors on your HDD or SSD.
Reboot your computer after the SFC scan has been performed successfully, and check to see if the problem has been resolved following the next computer startup.
If the KB5012643 update still won’t install, do a DISM scan and finish the process using the on-screen instructions.
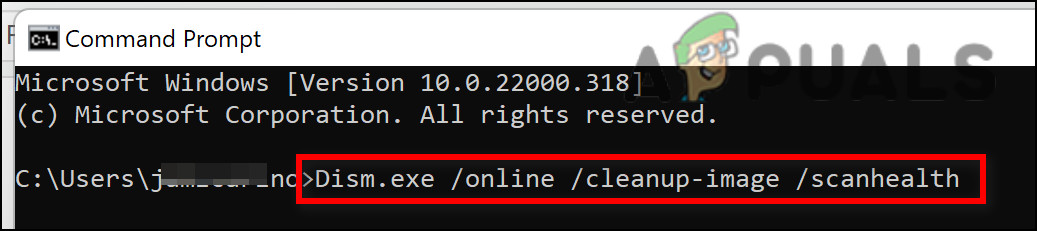
Note that DISM downloads healthy replacements to replace faulty system files using a sub-component of Windows Update, but SFC does not. As a result, before starting this step, make sure you have a stable Internet connection.
If the KB5012643 update is still refusing to install after the DISM scan has been performed successfully, read down to the next possible option.
5. Perform a Startup Repair
File corruption in your system files can cause this type of problem in rare cases. In this situation, the first thing you should do is do a startup repair to verify if the problem has been repaired.
If this is the case, a startup repair should be able to resolve the problem.
Note: Startup Repair is a Windows recovery solution that can resolve the great majority of typical system issues that prevent your Windows installation from launching. If a problem is discovered, this tool (like every other Windows automated troubleshooter) includes a range of automatic repair options that can be used.
You’ll need to use the Recovery Menu to start a Startup Repair operation because you’re unlikely to be able to start up normally.
If this circumstance applies to you, use the steps below to launch a Startup Repair operation:
- Start your computer and wait until you reach the login screen, where the problem displays.
- Then, while holding down the Shift key, click on the power sign and then on Restart.
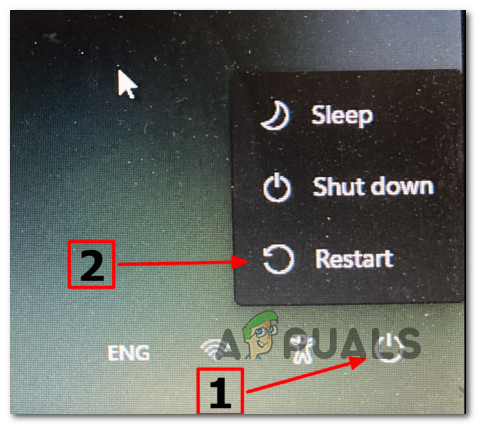
Reboot inside the Recovery menu Note: Keep in mind that you’ll need to restart your computer in recovery mode for this to work.
- Select Troubleshoot from the context menu that appears when your Windows 11 PC restarts from the Recovery Menu.
- Select Startup Repair from the list of options after entering the Troubleshoot menu.
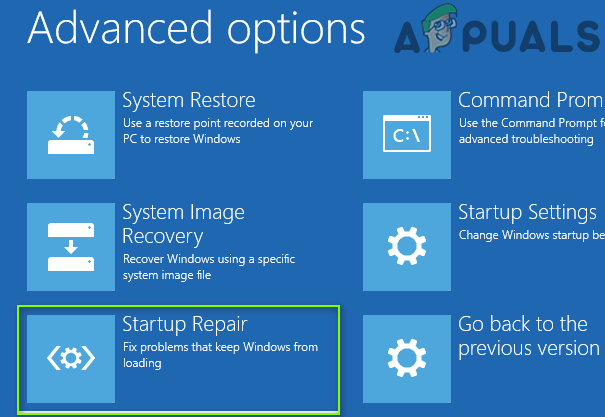
Deploy a startup repair - To begin and complete a Startup Repair procedure, go to the Startup Repair page and follow the on-screen instructions.
- Restart your computer after the operation is completed to determine if the problem has been resolved.
If you’re still unable to install the KB5012643 update, move down to the next method below.
6. Use System Restore, then re-install the update
You may anticipate dealing with this issue after a recent system modification, according to multiple impacted individuals (like the installation of an infrastructure update, a driver update, or a cleanup procedure performed by an antivirus).
In this situation, the majority of the damage can be mitigated by using System Restore to restore your system to a healthy state before attempting to reinstall the KB5012643.
Remember that using this procedure will wipe out all modifications made since the system restore point was established.
Everything will be gone, including all apps installed, system preferences altered, and everything else.
If you’ve opted to restore your system, follow these steps:
- Open a Run dialog box and type ‘rstrui’ to launch the System Restore wizard.
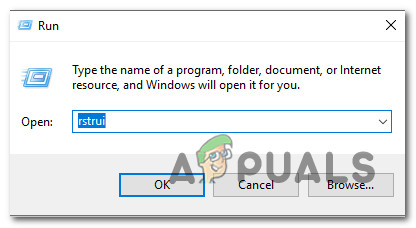
Accessing the System Restore Utility - If the User Account Control prompts you, select Yes to grant admin access.
- To proceed, click Next on the first screen of the System Restore process.
- Enable Show more restore points by checking the box next to it, then choose a suitable restore point before clicking Next.

Show more Restore Points - To begin the recording, click Finish. Your computer will restart and revert to a previous state.
- Once this operation is complete, attempt to install the update that was previously failing and check if the problem is now resolved
If the same problem is still occurring, try the next method below.
7. Install the update in Safe Mode with networking
A third-party service process may prevent the installation of pending Windows Updates under certain circumstances (most commonly belonging to a resource optimization suite). To avoid this problem, start your computer in Safe Mode with Networking and install the update there.
Note: This method will only work in those situations where there’s nothing wrong with the Windows Update component.
Follow the instructions below to restart your computer in Safe Mode with networking, then attempt to install the update once again:
- Press the Windows key to open up the Start menu, then hold the Shift key and press on the power icon, then click on Restart (while keeping the Shift key pressed).
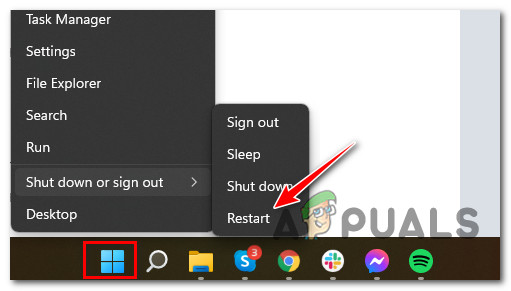
Restarting in safe mode - Your computer will then restart and go straight to the Recovery menu.
- When you’re finally inside the recovery menu, select Troubleshoot from the drop-down menu.
- From the Advanced Options menu, select Startup Settings from the drop-down menu.
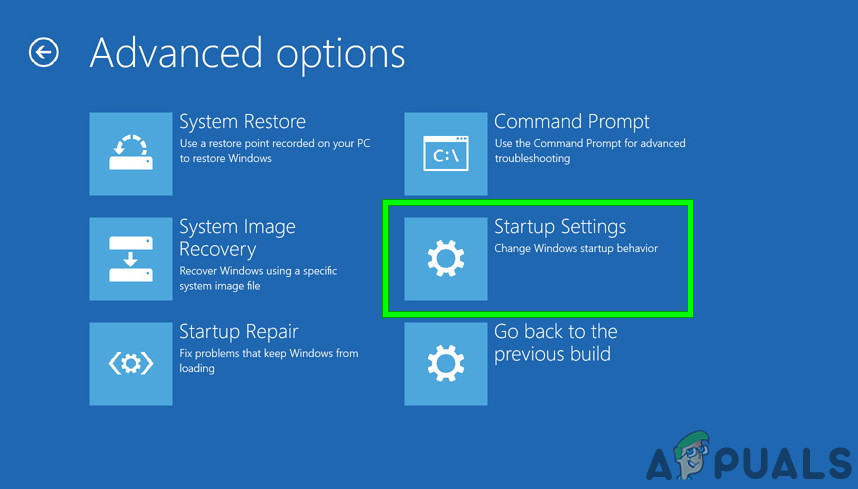
Accessing the Startup settings menu - Press F5 on the following screen to start your computer in Safe Mode with Networking.
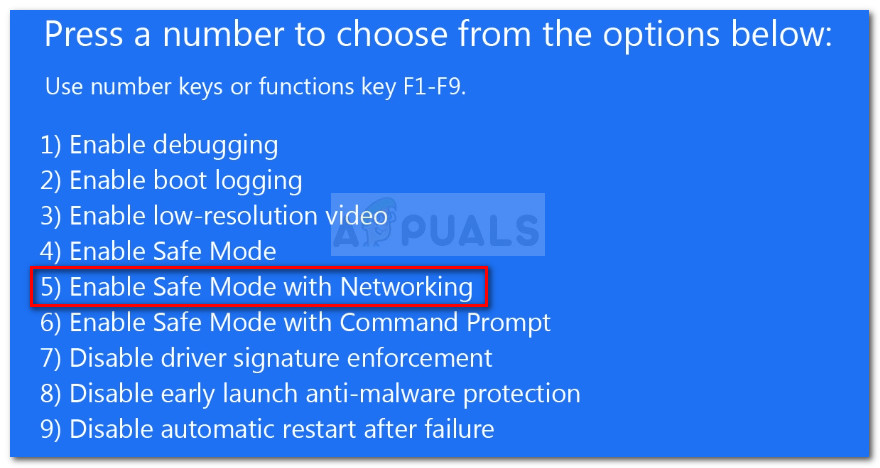
Start in Safe Mode with Networking Note: You’ll need Internet connectivity to download and install the failing update, so booting in Safe Mode with Networking is essential.
- Once your Windows 11 PC successfully boots inside the Safe Mode with Networking, attempt to install the KB5012643 Windows update once again and see if the problem is now fixed.
8. Install the KB5012643 Windows update manually
When Windows Update is damaged beyond repair, none of the solutions in this article will assist. If you don’t want to reinstall your operating system, you can manually install the failing Windows Update using the Microsoft Update Catalog.
If the Windows Update component isn’t working properly and the WU Troubleshooter can’t fix the problem, you can manually install the update from the Microsoft Update Catalog.
This directory can be used to manually obtain and install the compatible update version that isn’t working on your computer using the .ini file.
It’s important to note that this approach will not address the root source of the problem (in case the KB5012643 update is refusing to install due to some kind of corruption affecting the Windows Update component).
It will, however, allow you to get around a corrupt Windows Update by skipping the download and instead of using MUC’s external servers.
For full information on how to manually install the pending KB5012643 Windows update, see the steps below:
- Go to the Microsoft Update Catalog (MUC) directory’s main page in your preferred browser.
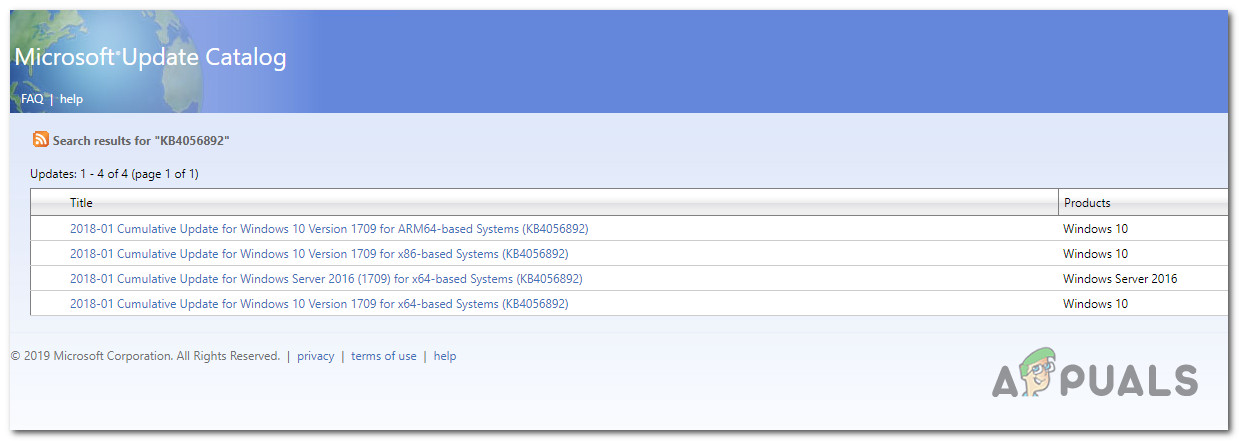
- Look for the update that is failing in your situation using the MUC root directory’s search option (KB5012643 in our example).

Searching for the KB5012642 - Review the results and choose which update versions to install based on your current OS architecture and Windows versions.
Download and install the correct update - Once you’ve found an update that’s compatible with your machine, click the Download icon next to it.
- Once the download is complete, open File Explorer and navigate to the update’s location (most likely in the Download folder).
- Right-click the .ini file and pick Install from the context menu once you’ve found the relevant folder.
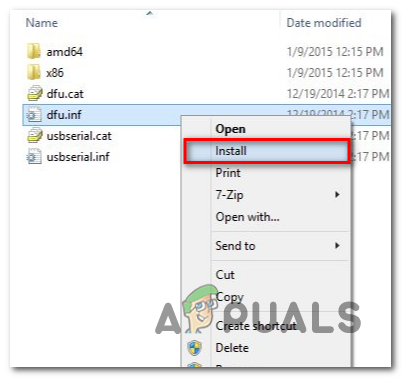
Install the pending update from via the .ini file - Follow the remaining steps on the screen to finish installing the Windows Update that had previously failed to install.
- Check to see if the problem has been repaired by restarting your computer one last time.
If the issue remains and you’re still getting an error when trying to install the pending KB5012643 update using the Microsoft Update Catalog, try the next method below.
9. Hide the KB5012643 update
Microsoft has a history of releasing updates that interfere with security components that have already been installed. Since the KB5012643 is entirely optional and in no way essential to the functioning of your PC,
However, unless you go the extra mile, the Windows Update component will reinstall the incorrect update. As a result, you’ll need to use the Microsoft Show or Hide troubleshooter to conceal the problematic update.
Note: This operation will not solve the underlying issue causing the problem. All this will do is hide the KB5012643 update in the eye of Windows Update so it doesn’t get installed again.
Follow the instructions below to hide the KB5012643 update using the Microsoft Show or Hide troubleshooter utility:
- Go to the Microsoft Show or Hide troubleshooter’s official download website to get started.
Note: It is important to note that the download should begin automatically. - Once the download is complete, open the .diagcab file, and at the first prompt, select Advanced. Then, before clicking Next, check the option next to Apply Repairs Automatically.
- Wait for the application to complete a scan of your system to determine which pending updates have not been deployed. When the next screen appears, select Hide Updates from the drop-down menu.
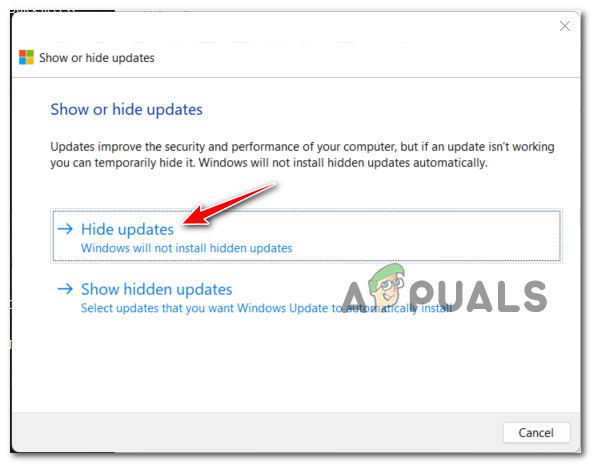
Hiding the updates - On the next screen, check the box next to the faulty update, then click Next to conceal it; this will prevent Windows Update from trying to install it again.
- Reboot your computer one final time to see if the KB5012643 is still listed as a pending Windows Update.
If the problem persists or this process hasn’t worked, move on to the last option stated below.
10. Perform a repair install or clean install
If none of the alternatives given above have helped you install the KB5012643 update conventionally or unconventionally, you can presume that your issue is caused by an unfixable system corruption problem (with DISM and SFC scans).
Several clients who had a similar problem said they were able to solve the problem after updating all Windows components. This can be accomplished with either an in-place fix (repair install) or a clean install.
A clean install is a simpler choice, but it has the drawback of preventing you from maintaining your personal files (apps, games, personal media, and so on) unless you back them up first.
The process takes a bit longer if you choose a repair install, but the main benefit is that you get to keep all of your personal stuff, including apps, games, personal media, and even some user preferences.


