[FIX] iOS and iPadOS 14 WiFi Connectivity Issues
iOS 14 and iPadOS 14 are the current major release of the mobile operating system developed by Apple. Everyone is always excited for a new major release as it comes packed with a lot more features and in some cases, a new or cleaner user interface. However, with a new release, there are some unwanted things as well. Bugs and problems are often experienced on new updates and the same is the case here. iOS and iPadOS users have been facing issues with their WiFi connectivity after the new update.
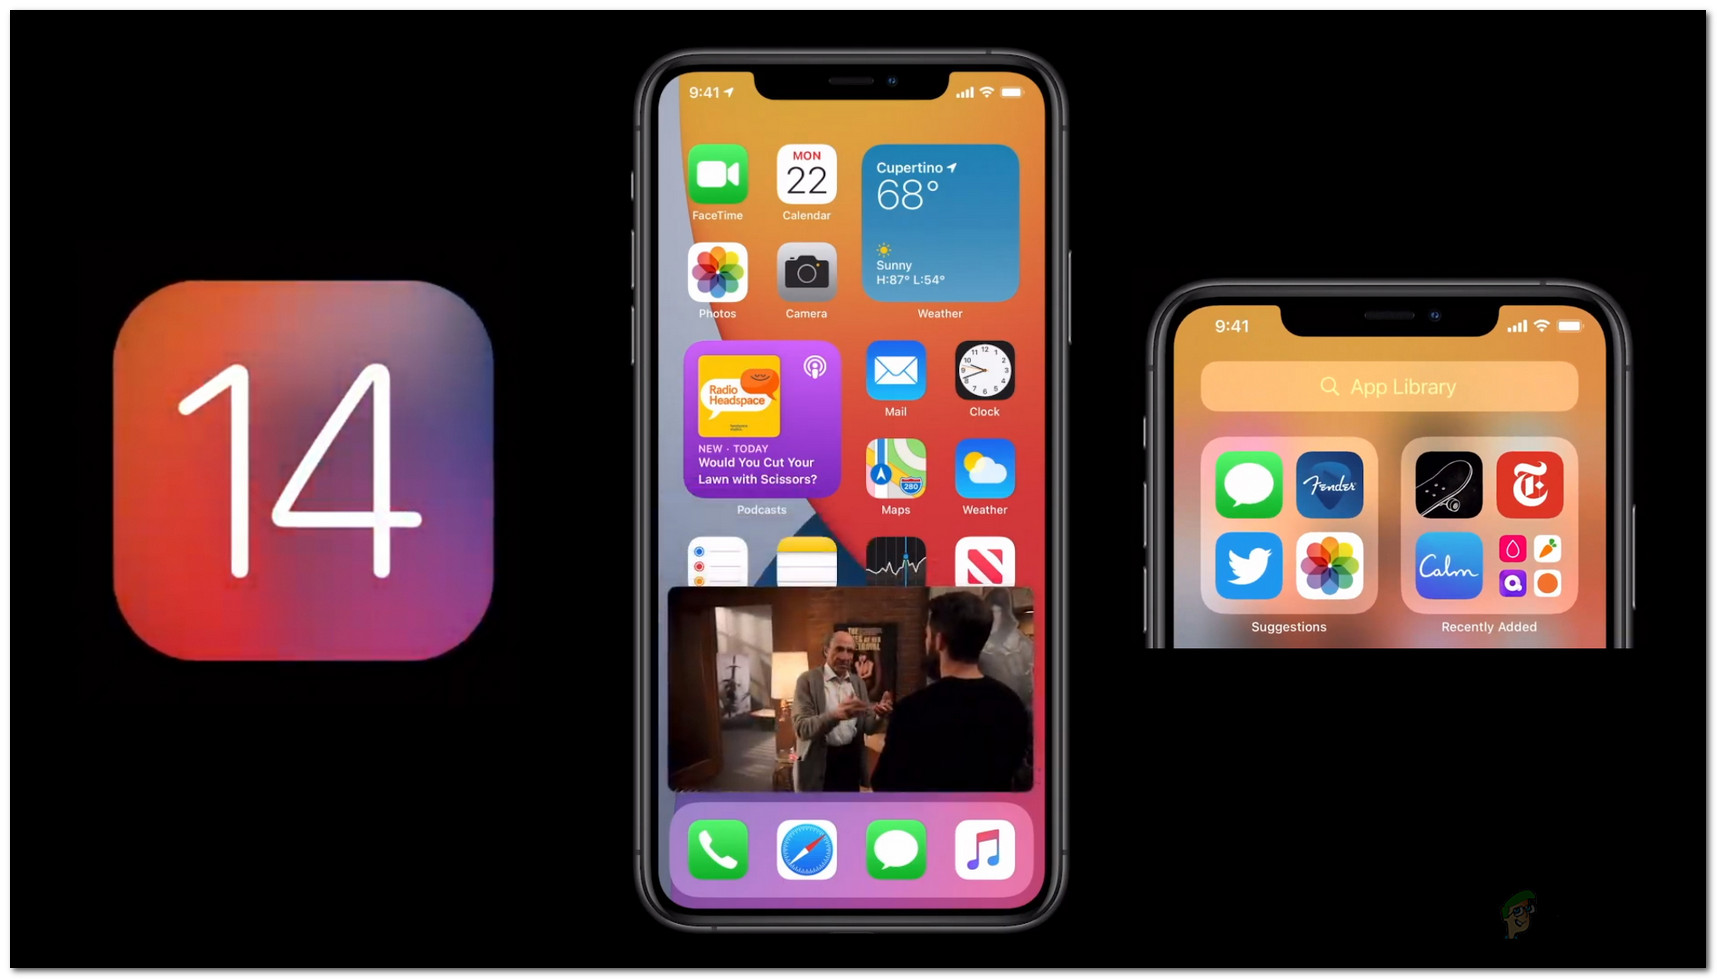
As it turns out, the WiFi does not work properly on iOS 14 and iPadOS 14. For some users, cellular data is enabled automatically over the existing WiFi connection and thus they are not able to access the internet. For others, the WiFi either does not connect or in case it does, fails to work at all. There are a few common reasons known so far that cause the said problem. We will go through them down below. So, without further ado, let us get started.
- Private Address — As it turns out, the most common cause of the said issue turns out to be a new feature of the iOS and iPadOS, known as Private Address. The feature is supposed to provide improved security, however, in most cases, it actually stops your phone from connecting to the WiFi. Therefore, to fix the issue, you will have to turn the feature off.
- Third-Party VPN — Another common cause of the said issues happens to be any third-party VPN that you have installed on your system. Since the operating system is new, some VPN software are not yet compatible with the new version and thus results in you being not able to use the WiFi at all. Thus, you will have to uninstall the software to resolve the issue.
Now that we have gone through the potential causes of the issue, let us get started with the various methods that you can follow to get the issue fixed. Please follow through.
Method 1: Turn off Private Address
The new major release seems to have focused on your privacy and security over the network you are connected to. For this reason, Apple has come up with the Private Address feature. In order to communicate with a WiFi network, the devices connected must identify themselves using a unique address that is known as the MAC or Media Access Control address. Now, the problem is, if a device uses the same address over a network, an observer can easily notice it and thus endanger your privacy. Therefore, the Private Address feature has been introduced to reduce the privacy risk of the users. With the Private Address, you are forced to use a unique and different MAC address with each WiFi network.
This has thus far caused the majority of the WiFi issues. In order to tackle this, you have to disable the feature until the issue has been solved as suggested by Apple Engineers as well. Here’s how to turn off the Private Address feature:
- First of all, on your iPhone or iPad, go to the Settings and then tap on the Wi-Fi option.
- Once you are in the Wi-Fi menu, tap the information icon (i) next to the network that you are connected to.
- On the Network settings screen, tap the Private Address option to turn it off.
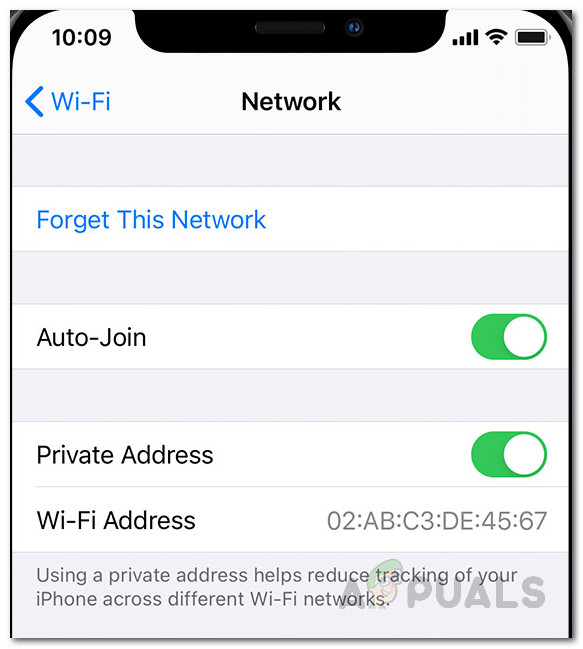
Network Settings - Finally, turn off your Wi-Fi and then turn it back on.
- Make sure that the Private Address feature is still disabled. See if that fixes the issue.
Method 2: Uninstall Third-Party VPN
As it turns out, the third-party VPN software on your device can also cause the issue to emerge. Various users have reported that they were facing the issue because of a third-party VPN that they had installed on their system. This often happens when a new major release comes out. In some cases, applications are not compatible with the newly released version, and therefore, they do not operate properly. You will have to wait for an update from the developers.
Nonetheless, for the most part, it seems Norton VPN has been the root cause of the issue. However, it is not only limited to Norton but rather if you have another VPN on your phone, chances are it could be causing the issue. Therefore, in order to fix the issue, you will have to get rid of the issue. Here’s how to uninstall the VPN app:
- First of all, on your iPhone or iPad, go to your device Settings.
- On the Settings screen, tap on the General option.
- There, make your way to the device Storage.
- From the list of applications, locate your VPN and then tap on it.
- Finally, click the Delete App option to remove the application from your device.
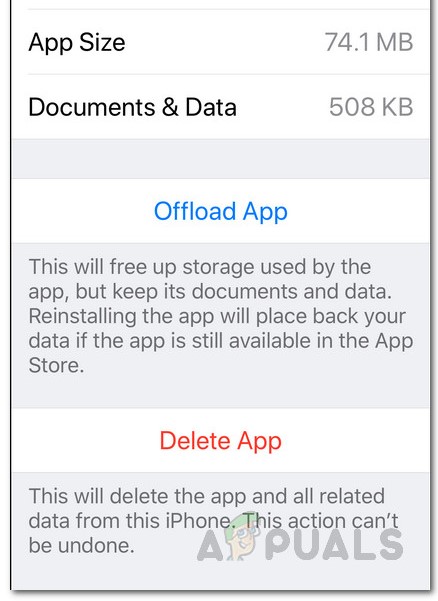
Deleting App - In case you have set up a VPN in your settings, you will have to remove it from there.
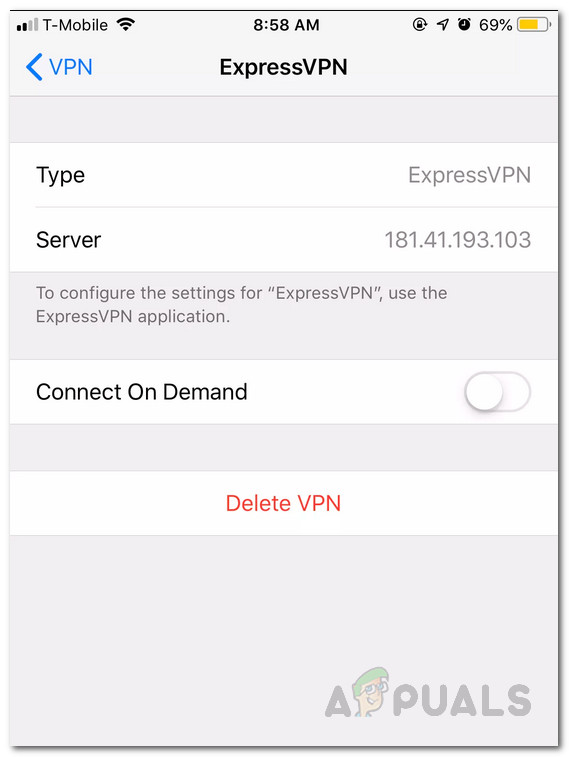
Deleting VPN - Once the device has been removed, turn your Wi-Fi off and then on to see if that fixes the issue.
Method 3: Reset Network Settings
Finally, if none of the above solutions pan out for you, you will have to reset network settings on your phone. As it turns out, oftentimes resetting your network settings can fix various network connectivity issues. This has been reported by a user who was facing a similar issue. Therefore, it is worth a shot. To do this, follow the instructions down below:
- First of all, go to your iPhone or iPad Settings.
- On the Settings screen, go to General and then tap on the Reset option.
- Finally, on the Reset screen, tap on the Reset Network Settings to do so.
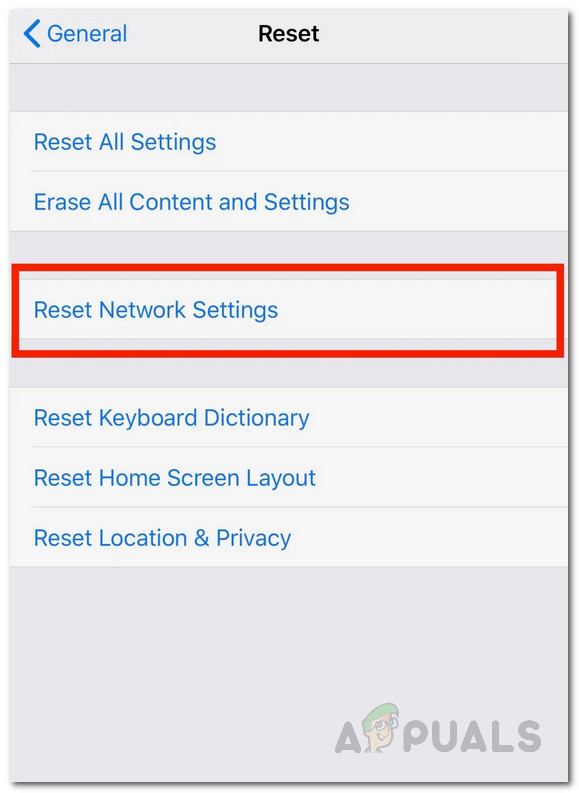
Resetting Network Settings - Confirm the action. This will reset your network settings.
- After that, try toggling your Wi-Fi to see if the issue persists.
You might also want to reset your router in case the issue still persists. A user reported that resetting their router twice fixed the issue, so it might fix yours as well.


