Guide: Install WireGuard (Android, iOS, Windows, Linux)
 Reviewed by Muhammad Zubyan
Since its release in 2019, WireGuard has quickly become a popular choice among users due to its secure protocols and seamless interface. Unlike many other VPN protocols that seldom offer the freedom to access sites safely without posing a threat to your privacy, WireGuard has become a lifestyle for more consumers, not just for the tech-geeks.

To find out what makes this VPN Client stand out from the crowd and how you can get started with it, read ahead!
What is WireGuard?
WireGuard is an open-source VPN protocol with state-of-the-art cryptography and algorithms for data protection. Although it was originally designed for the Linux kernel, it has come a long way and can now be downloaded on Windows, iOS, macOS, and Android.
The application uses public and private keys for peers to establish secure point-to-point connections among them. Unlike other VPN protocols, WireGuard doesn’t rely on TLS or Transport Layer Security which makes configuration of a VPN more time-consuming and error-prone.
For all these reasons, WireGuard is streamlined, simple, and easy to use, offering high performance and security to users.
Before proceeding, you must already have a WireGuard configuration file obtained from your VPN service provider. The file contains all the necessary settings to establish a VPN connection like keys, IP addresses, connection preferences, and so on.
Install WireGuard VPN Client on Windows
Installing the WireGuard VPN Client on Windows is fairly easy. The only prerequisite here is that your system runs on a compatible OS i.e. Windows 7, 8, 10, 11. Other than that, you must have administrative access to the computer.
Here’s what you must do:
- First, download the Windows client by visiting the official WireGuard website.
- Once you have downloaded the installer file, open it and follow the on-screen instructions to install the Windows client.
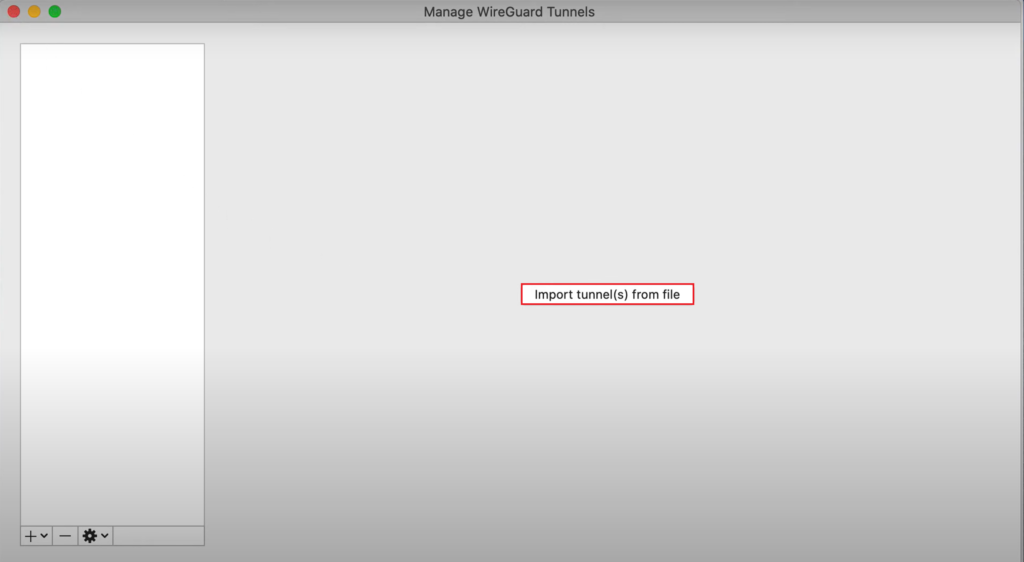
- Then, open WireGuard.
- Click on the Import tunnel(s) from file option.
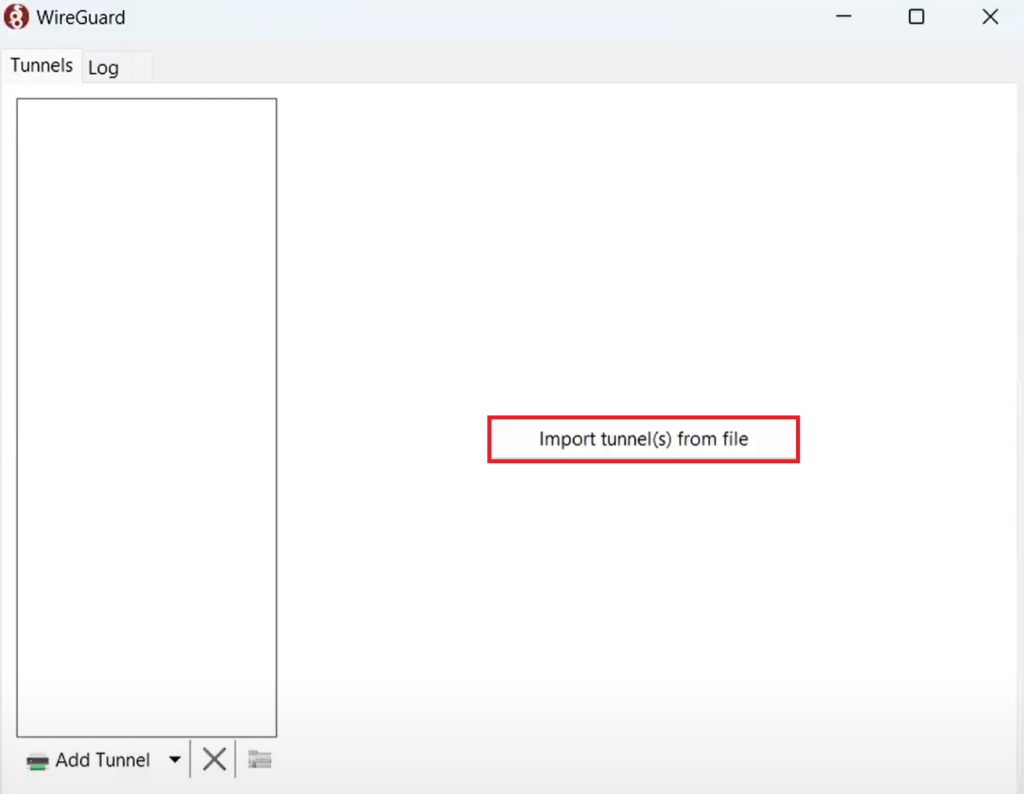
- Select your WireGuard server’s configuration file.
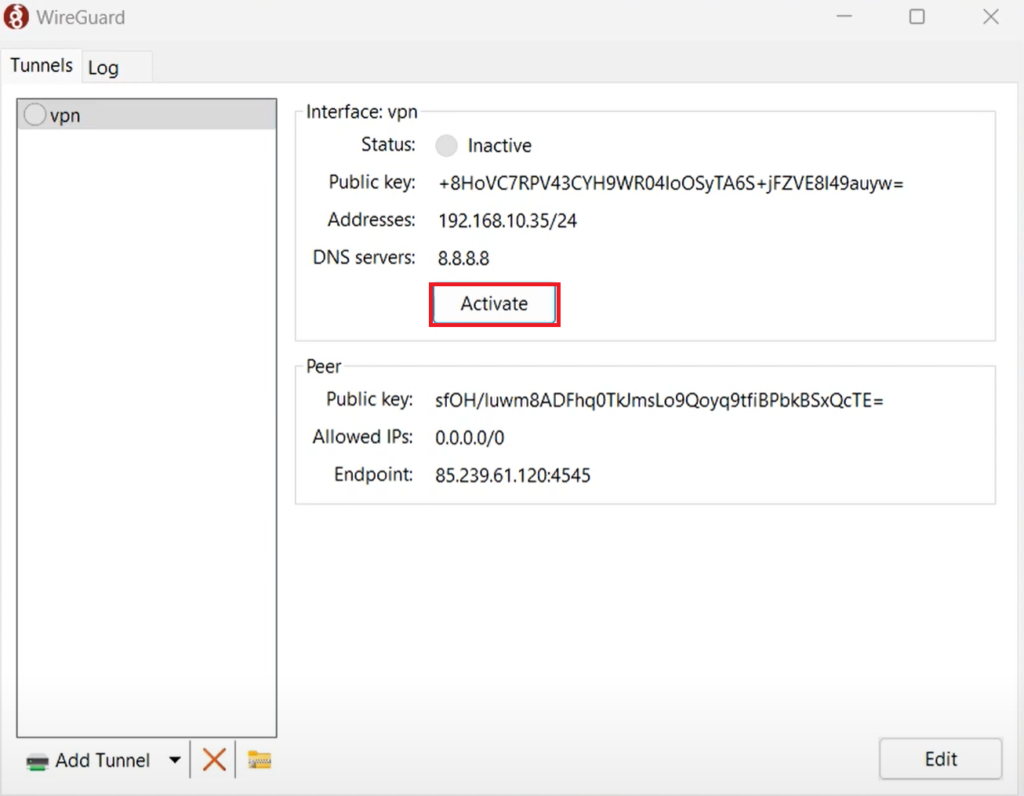
- After it has been imported, click on Activate.
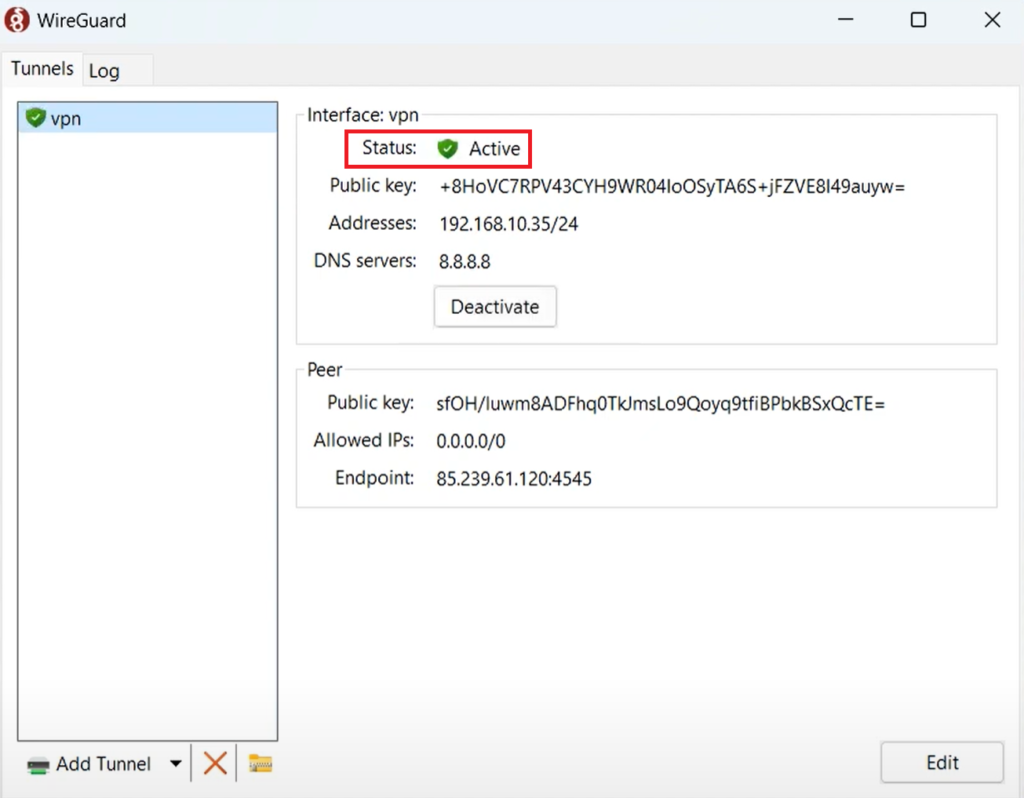
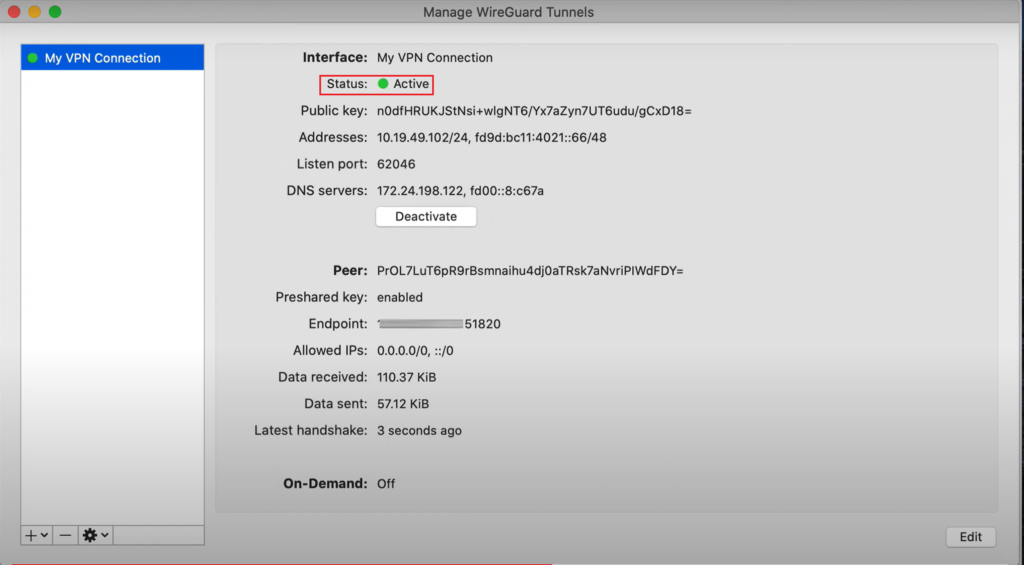
- Once the status reads Active, it means you have managed to establish a connection to the WireGuard server.
Install WireGuard VPN Client on Ubuntu Linux
Installing WireGuard VPN Client on your Linux system also requires administrative privileges. Additionally, Linux WireGuard Client exclusively demands the configuration file name to be under 15 characters. If the limit exceeds in your case, the file will not be read by the client. So, rename the file before you begin.
Here’s what you need to follow:
- Launch the terminal and run the following command to first get the Ubuntu security update:
sudo apt-get update && sudo apt-get upgrade
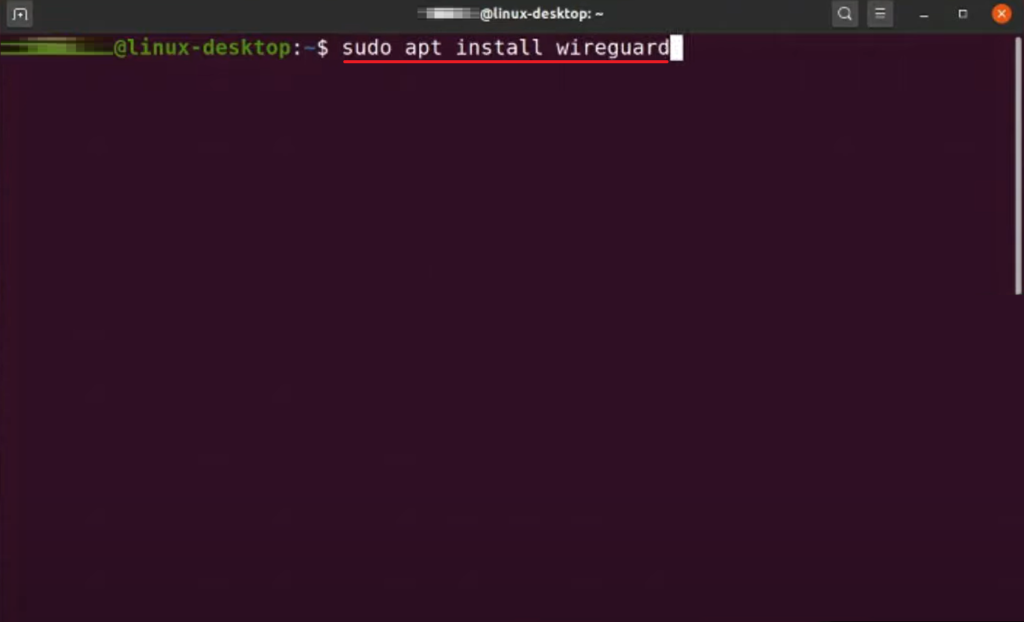
- Next, install WireGuard by executing the following command:
sudo apt-get install wireguard
- You will then be asked if you want to continue. Simply type Y for yes and hit the Enter key.

Install WireGuard VPN Client on macOS
Installing WireGuard on macOS can be done directly from the Apple Store. The process eliminates the need for command-line operations as it utilizes the WireGuard configuration file to set up the VPN connection.
Follow the steps below:
- Launch the Mac Apple Store and search for WireGuard.
- Download the required WireGuard client.
- Once installed, open Wireguard and click on the Import tunnel(s) from file button.
- Locate the configuration file and click on the Import option.
- Now, click on Activate.
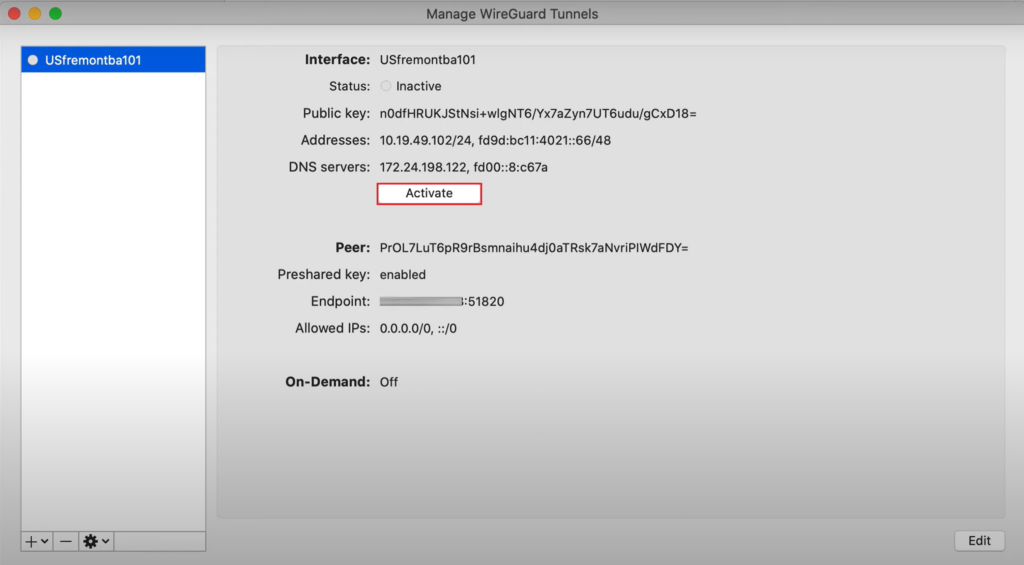
- If the status is Active and green, you have been successfully connected to the server.
Install WireGuard VPN Client on iOS
Since your phones hold almost the same private data as your computer, if not more, it’s essential to use a secure VPN connection on them as well. Fortunately, you can now install the WireGuard VPN Client on an iOS device too.
Here’s how:
- First, go to the Apple Store.
- Download WireGuard and launch it on your iPhone.
- Then, tap on Add a tunnel.
- From the options that appear, select Create from file or archive.
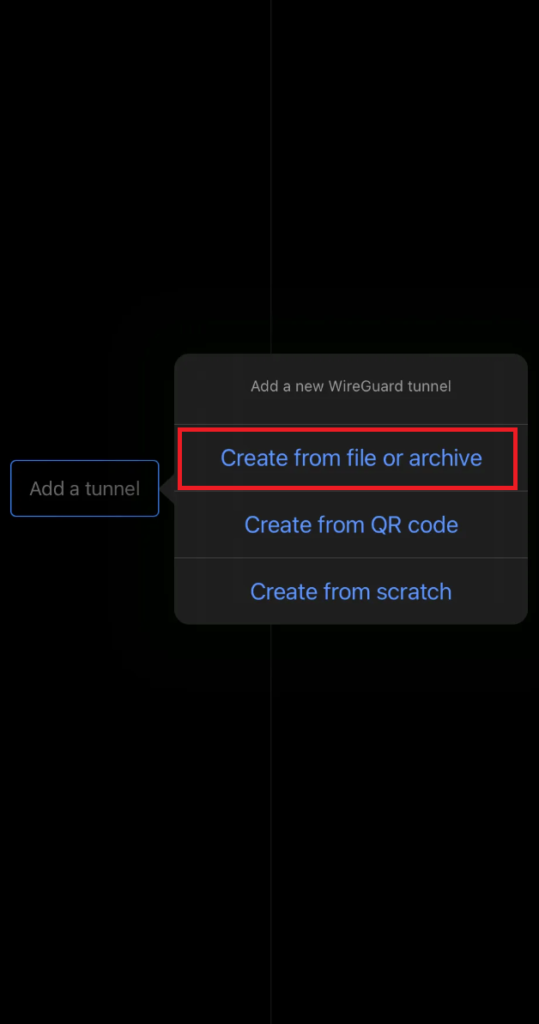
- Now, search for the configuration file on your device and select it.
- After it has been imported, switch on the toggle for VPN activation. To confirm its active status, you should see a VPN icon on your device’s status bar.
Install WireGuard VPN Client on Android
To secure your online activities on your Android, you need a secure VPN connection obtained via WireGuard VPN Client. To proceed, make sure you have an active Google Play Store account as you’ll need to download the WireGuard application from it.
Then, follow the steps below:
- Open the Google Play Store on your device.
- From there, download WireGuard.
- After installation, open the WireGuard client and tap on the + icon.
- Then, choose Import from file or archive.

- Browse for your WireGuard server’s configuration file and tap on Select.
- Now, turn on the toggle to activate the VPN. A key icon will also appear on the status bar of your device.
wsf title=”Install WireGuard VPN Client – FAQs” show=”1″] [wsfq]Is setting up WireGuard VPN an easy process?[/wsfq] [wsfa]Setting up WireGuard VPN on your device is a simple task. All it requires is the download and installation of the client. Then, launch WireGuard and direct it to your particular network. Once done, activate the VPN and the setup is complete.[/wsfa] [wsfq]Is the WireGuard client free?[/wsfq] [wsfa]Yes, WireGuard is an open-source software and can be used for free. It can be accessed through multiple free VPNs as well as subscription-based ones to establish secure connections.[/wsfa] [/wsf]
Reviewed by Muhammad Zubyan


