How to Install a VPN on a School Computer?
Using a proper VPN service can have numerous benefits. This can be especially helpful when you are in a restricted network, such as at your school. In most cases, schools implement custom firewalls and network policies to restrict activity on the school’s network. This limits the websites that you can access on the internet and much more.

In such a scenario, using a VPN service can help you bypass these network restrictions that have been put in place. This allows you to access websites and content on the internet that might have been blocked otherwise. Often, school networks block gaming platforms, such as Steam and others. As a result, using a VPN will enable you to access the website, along with many more.
Before you proceed, it is important to note that installing a VPN on your computer might violate the policies of certain schools. We do not condone the violation of such policies; therefore, make sure you are within your rights before installing a VPN on the computer.
1. Can VPNs mask your online activity?
In addition to allowing you to access blocked websites on the Internet, VPNs can also be helpful when you need to hide your online activity. School networks often monitor activity on the network, usually for security purposes. However, if you are someone who does not want your online activity monitored or logged, using a VPN is a viable solution.
With that said, the network operators in your school will be able to distinguish the VPN connection that is being established from within the network. Therefore, they will know when you use a VPN network. However, the connection will act as a wall, and they will not be able to see the other side of the wall, thus ensuring your online presence is not tracked.
2. Select a VPN Service.
In this modern era, numerous VPN services are available on the internet. As such, choosing a VPN service can be a challenging decision. However, there are a few factors to consider while selecting a VPN service.
First of all, make sure to choose a reputable and trusted VPN service. In most cases, VPN services require payment, and you will need to purchase a monthly subscription. Free VPNs can be questionable, to say the least, as there is no verification available, which can lead to potential security risks. This is because using a VPN service discloses your network activity to the VPN provider, which could be used to track you. As such, opting for a trusted service in the industry like NordVPN or ExpressVPN would be a better choice than the free VPNs available.
In addition, the uptime of the VPNs can also make a difference. If the VPN service that you choose to use often faces issues and downtimes, you will not be able to browse the internet because your packets are not reaching the host. Therefore, reliability plays a significant role when selecting a VPN service.
We would recommend choosing either NordVPN or ExpressVPN. They are both quite trusted in the market and have been around for a while.
3. Download a VPN.
Once you have selected a VPN service, the next step is to head to the official website for the VPN service and download the setup client from there. Here, you need to make sure the setup file is from the official website and not from anywhere else. This is because third-party unofficial sources can tamper with the file, which can lead to security risks.
After downloading the setup file for the VPN client, simply run it and wait for the VPN client to be installed. In some cases, you may be prompted to restart your PC to complete the installation process. This is normal behavior, and you will be able to use the VPN client on your PC after a restart.
4. Setting up a VPN.
Finally, the last step is to connect to your VPN client and start browsing the internet. If you have opted for a well-known VPN service, such as NordVPN, which comes with its own client, this step is rather easy. Simply open the client on your computer and choose a server location within the VPN client. This is the location to which you will be connected, and your IP address will be masked to that location.
Once you have chosen a server location, you will be able to connect without any issues. However, if you have the VPN server details, such as the IP address of the server and the connection type, you will need to manually add the VPN client to your operating system.
This can be done through the Settings app on Windows. To accomplish this, follow the instructions below:
- First of all, open the Settings app by pressing the Windows key + I on your keyboard.
- In the Settings app, navigate to Network and Internet > VPN.
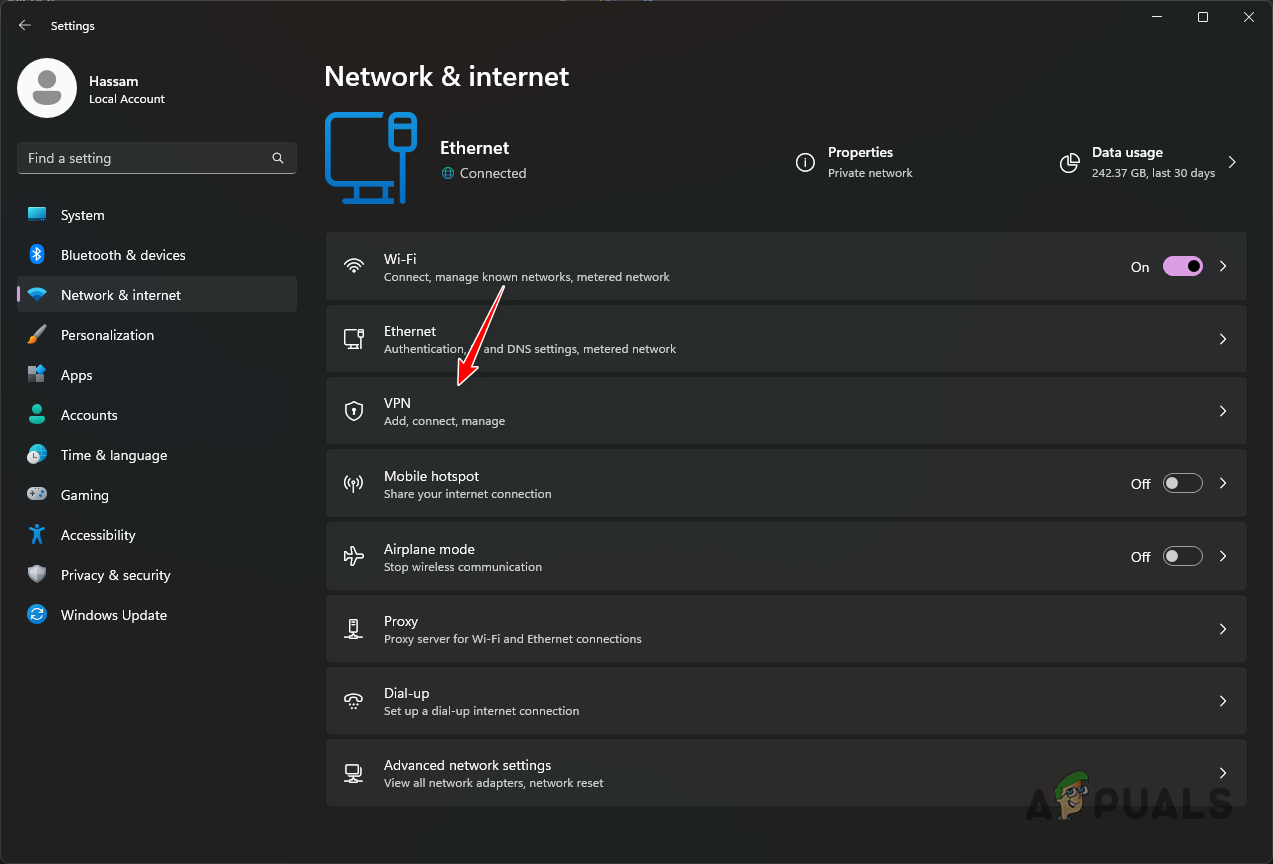
VPN Settings - After that, on the VPN page, click the Add VPN option.
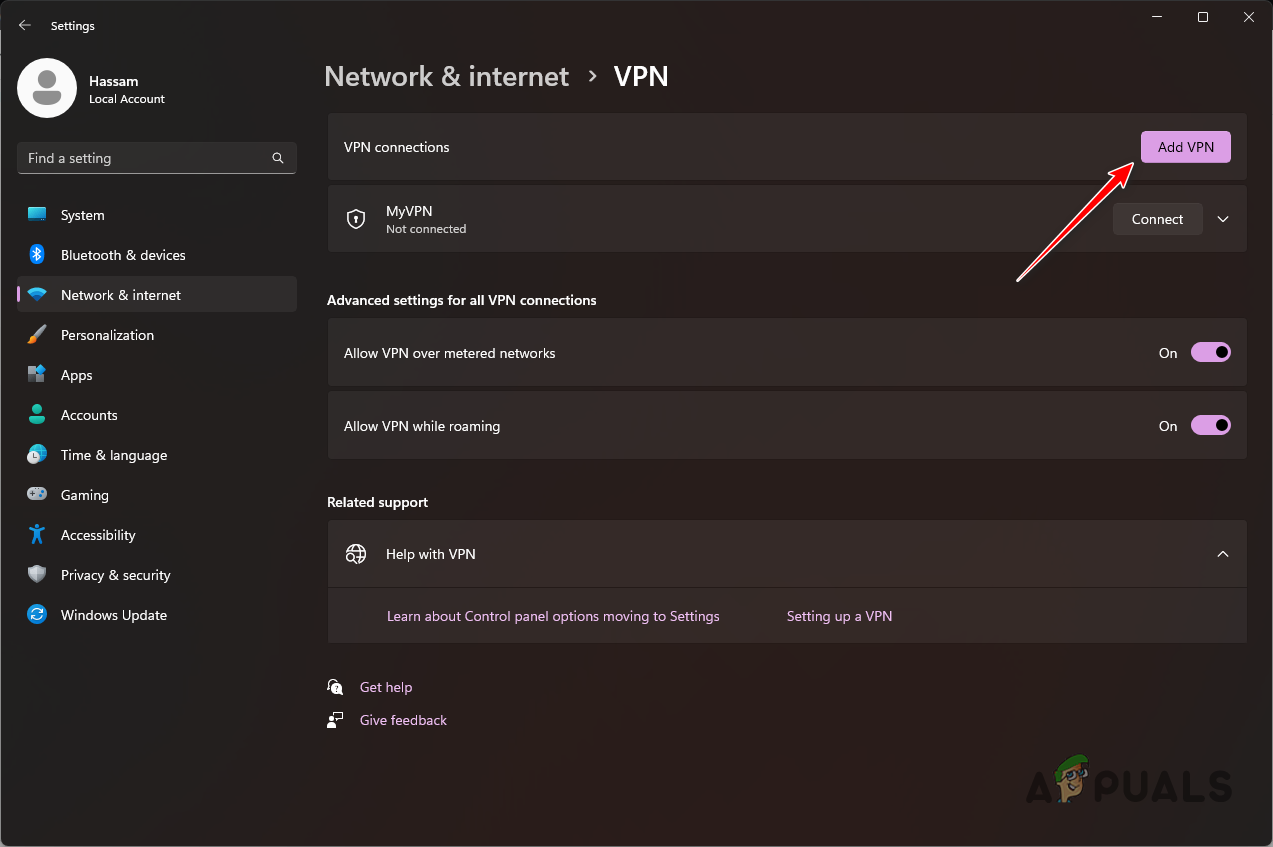
Adding a VPN - Then, on the VPN connection dialog box, fill out the fields with the VPN server details.
- If you have been provided with a username and password for the VPN, please enter them in their respective fields or change the sign-in type.
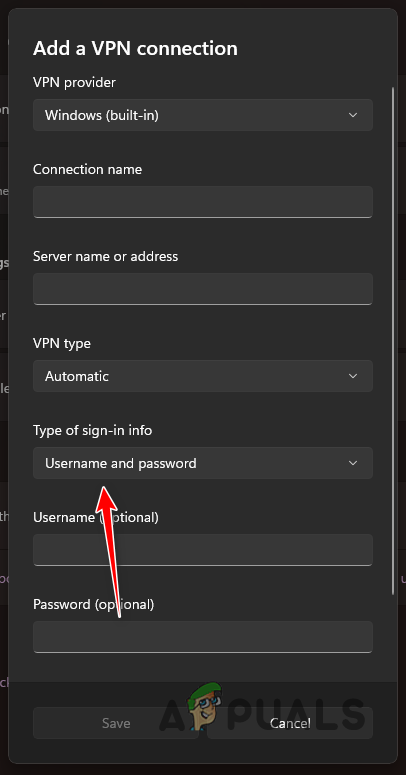
VPN Sign-in Type - Finally, click the Save button.
- Once you do that, the VPN should appear, and you can connect to it using the Connect button provided.


