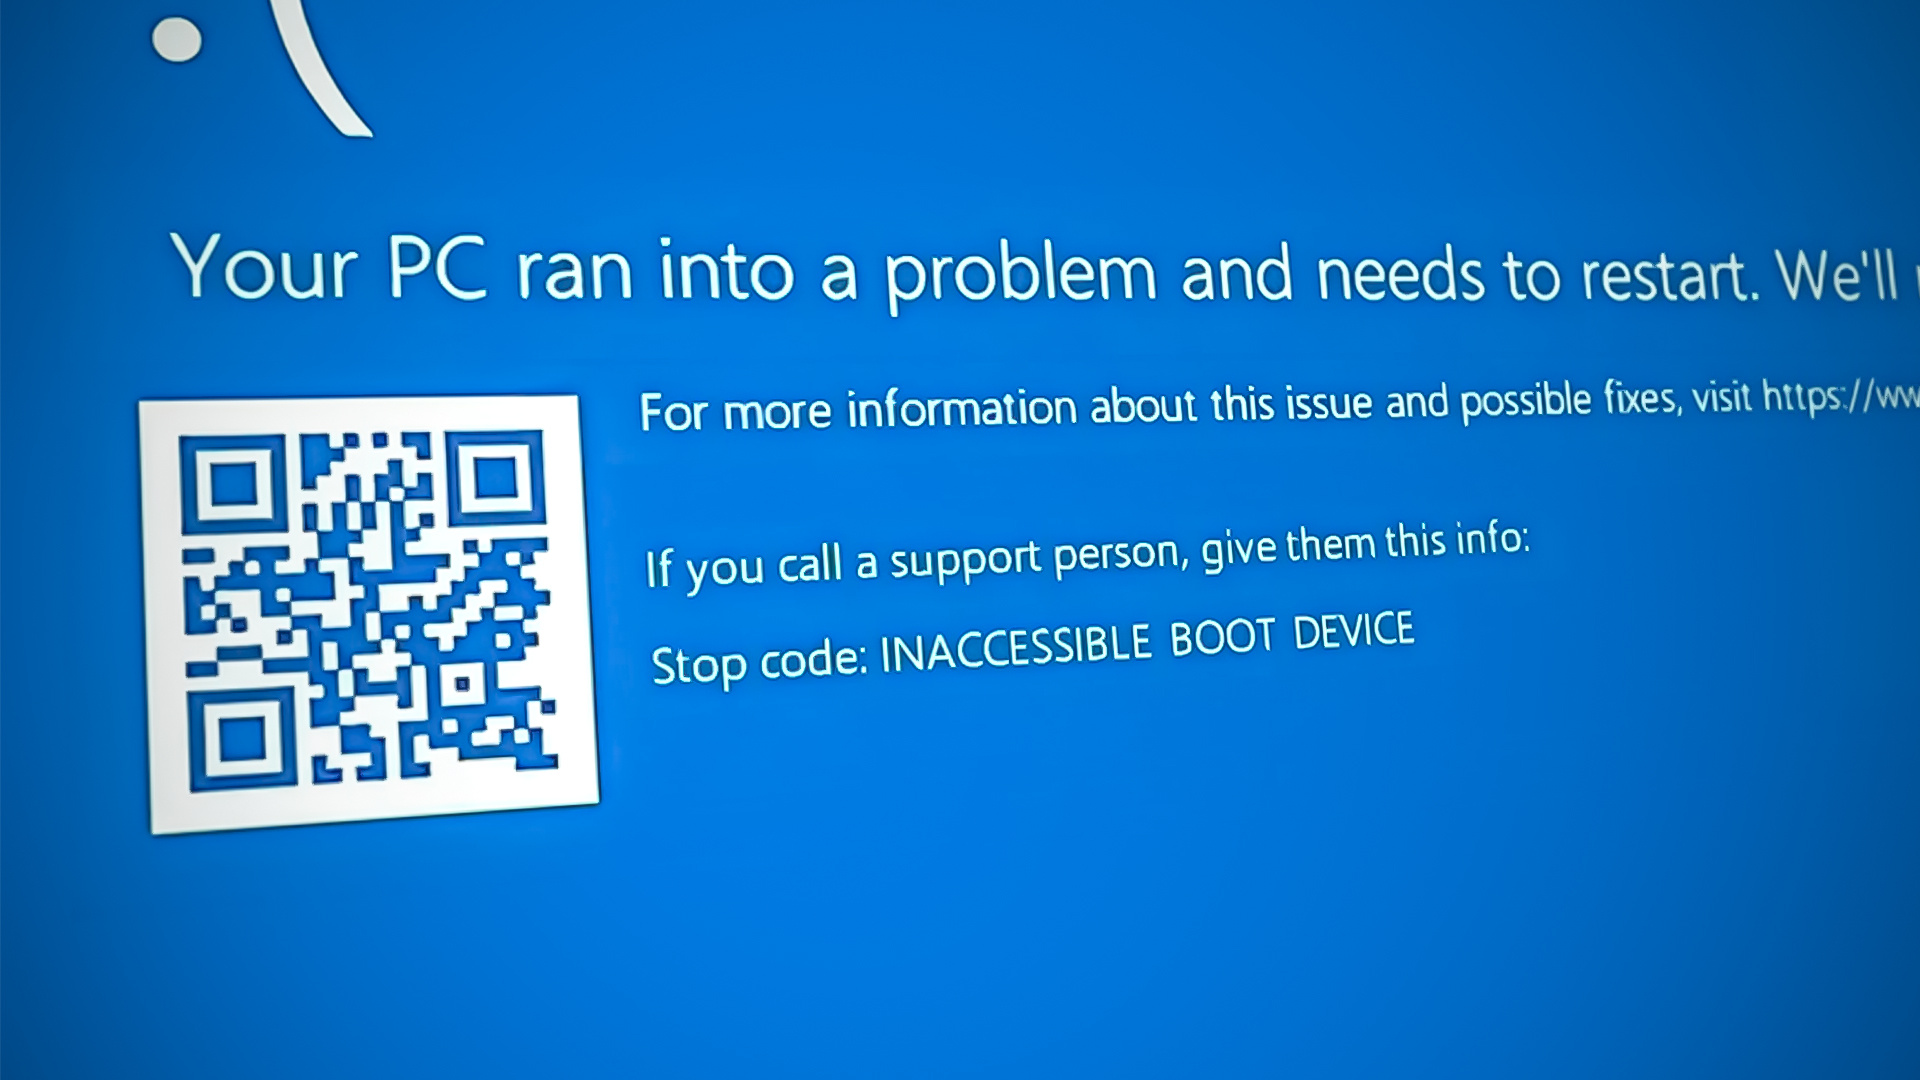
Fix: INACCESSIBLE_BOOT_DEVICE BSOD on Windows 10/11
The INACCESSIBLE_BOOT_DEVICE Blue Screen means Windows was unable to access the system partition during startup required to boot into Windows . This error prevents the user from booting into the system and is caused by a variety of factors, such as BIOS upgrades and overclocked CPUs. There is usually more than one reason for an inaccessible boot device.
Below, we have discussed the different troubleshooting methods in case of this error. Proceed with the one that suits your situation the best.
1. Uninstall the Recent Updates
The problem at hand is typically caused due to faulty or buggy updates installed on the system. An easy solution, if this scenario is applicable, is to uninstall these updates.
In this method, we will boot into the Recovery environment of Windows to uninstall these updates.
Here is what you need to do:
- Turn your computer off, wait for a few seconds and turn it back on.
- When the Windows is on the loading screen, turn it off again using the power button.
- After you do this twice, Windows will launch the Recovery menu once you turn the computer on.
- Choose Troubleshoot from the list of options available.
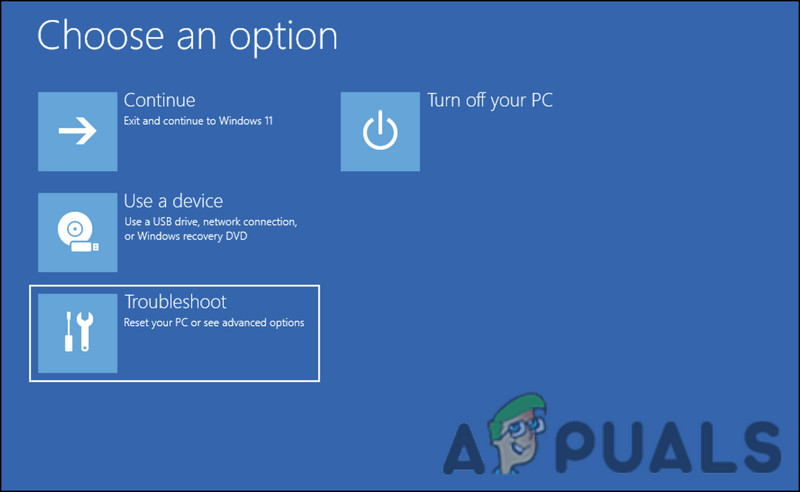
Click on Troubleshoot - Choose Uninstall Updates in the following window.
- Now, choose the recently install updates and uninstall them one by one.
- Once done, restart your computer and check if the issue is resolved.
2. Boot Into Safe Mode Via Recovery Menu
Since the following BSOD error prevents you from booting into the system, you need to use the recovery menu to launch the Safe Mode. By doing so, you will be able to implement the troubleshooting methods that we have discussed later in this guide.
Safe mode in Windows is a diagnostic mode. It starts Windows in a basic state, with only a limited set of files and drivers installed. It is likely that the problem won’t occur in safe mode if the default settings and basic device drivers aren’t causing it.
Here is how you can boot into Safe Mode:
- Follow steps 1-4 listed above.
- In the following window, choose the Startup Settings option.
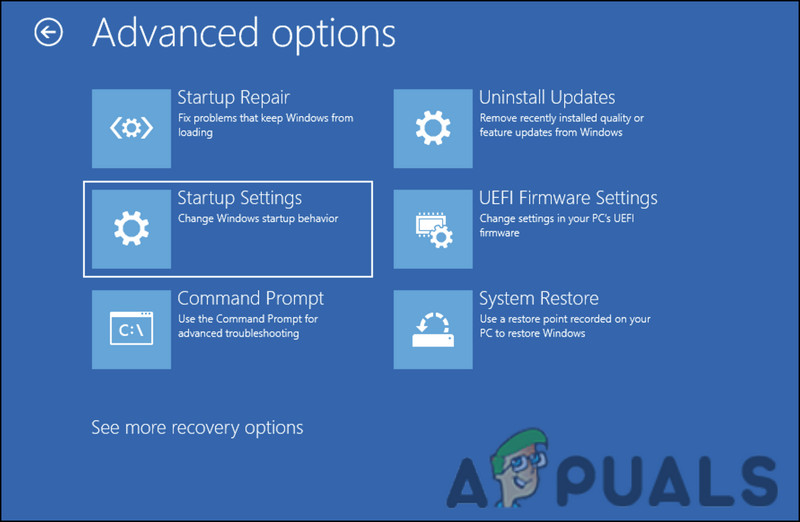
Click on Startup settings in the Advanced options menu - Wait for the PC to reboot into the Startup settings menu, and then press the F4 key to boot into Safe Mode.
- Hit Yes in the confirmation prompt.
3. Run System Scans
Corruption errors, and viruses within the protected system files can also lead to issues like this. File corruption is most commonly resolved by removing the infected components, but doing that manually is not recommended when it comes to system-related files.
Once you are in Safe Mode, it is best to run the System File Checker, which is a utility designed to fix this issue. The program scans the system for problematic files, and if any are found, it will replace them with their healthy counterparts without causing any harm to the system.
You can run this utility using the Command Prompt. We will also be running the DISM utility with it, which repairs a corrupt system image.
Here is how you can run an SFC and DISM scans on Windows:
- Press the Win + R keys together to open Run.
- Type cmd in the text field of Run and press the Ctrl + Shift + Enter keys together. This will launch Command Prompt as an administrator.
- Alternatively, you can also type cmd in Windows search and click on Run as administrator.
- Once you are inside the Command Prompt window, type the command mentioned below and hit Enter.
DISM.exe /Online /Cleanup-image /Restorehealth
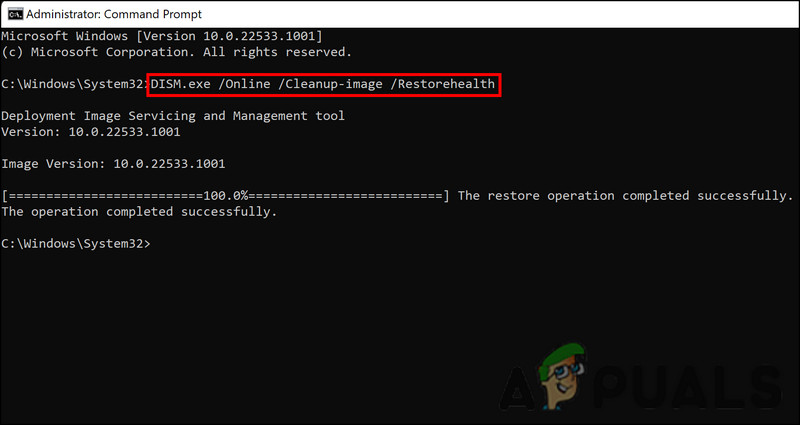
Run the Restorehealth command - After the command is executed, proceed with the following command:
sfc /scannow
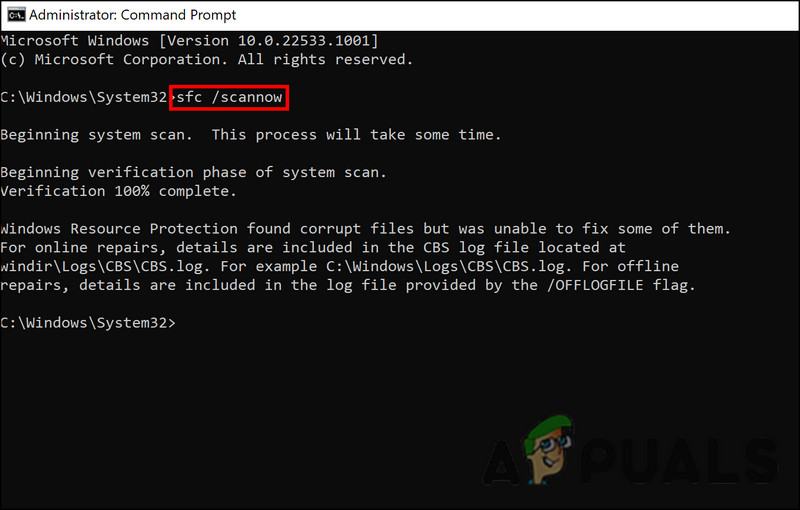
Run the SFC command as shown - Once the command has been executed, restart your computer.
Hopefully, you will not face the problem again after restarting.
4. Run a CHKDSK Scan
You can also run a CHKDSK scan, which checks the drives for errors and fixes any issues that are identified. If the issue is being caused due to a corrupt drive, then this should fix it.
Here is how you can run the CHKDSK scan:
- Open a Run dialog by pressing the Win + R keys together.
- Type cmd in the text field of Run and press Ctrl + Shift + Enter to open Command Prompt with administrative privileges.
- Once you are in the Command Prompt window, type the command mentioned below and hit Enter to execute it. The CHKDSK utility will scan for problems with it.
chkdsk /r C:
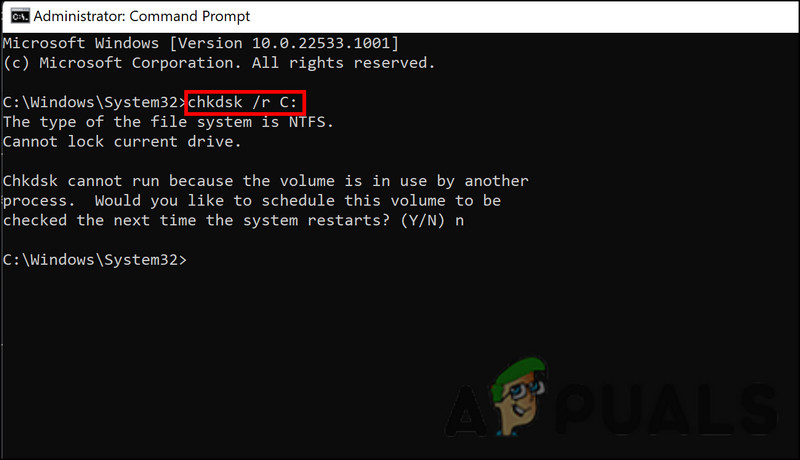
Run the CHKDSK scan - If the volume is already in use, you can schedule the scan at the next restart. If you will like to do this, type Y and click Enter.
- Once the command has been executed, restart your computer.
5. Restore the System to a Previous Point
The Windows operating system takes snapshots of the system state from time to time and refers to them as restore points. You can use these restore points to revert to a certain point in time if anything goes wrong with the system in the future. In this method, we will be going back to a system state where the BSOD was not present.
Here is all that you need to do:
- Press Win + R to open Run.
- Type control in the text field of Run and hit Enter.
- In the Control Panel, click Create a restore point.
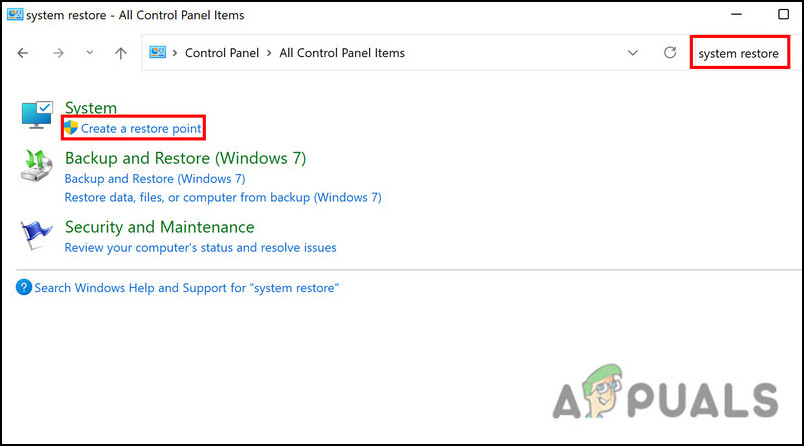
Create a restore point in Control Panel - Select System Restore and then click Next.
- There should be a list of restore points on your system displayed in this window. Choose the most recent and click Next.
- When the changes are implemented, restart your computer and check if the issue is resolved.


