What to do if your HP Docking Station is not working?
In most cases, this issue occurs if the docking station is not detected at all. In some other cases, the docking station is detected, but the connected devices are not.
This issue may be caused by your computer, as it is unable to establish a connection with the docking station. This can occur due to outdated Windows updates or because the update being installed is not functioning as intended.
Another cause could be triggered by the Thunderbolt software, which is unable to detect the docking station. This issue can also be caused by a configurable setting in your computer’s BIOS.
Here is a list of methods that will help you fix this issue:
1. Update your Windows.
Your HP docking station might be unable to work because your Windows is outdated. This can happen if there are pending updates waiting to be installed. It could affect your computer because the docking station requires recent updates to function properly.
You can check for updates from the Windows Settings. Go to the Windows Update section and install any pending updates, if there are any.
Here are the steps on how to do this:
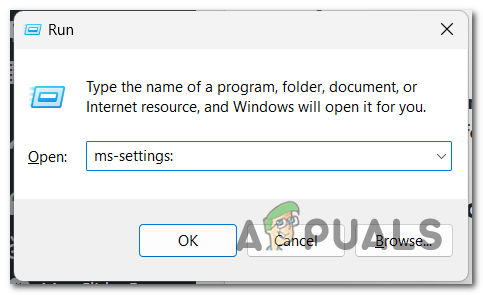
- Press the Windows key + R to open a Run dialog box.
- Type “ms-settings:” in the search bar and press Enter to open the Windows Settings.
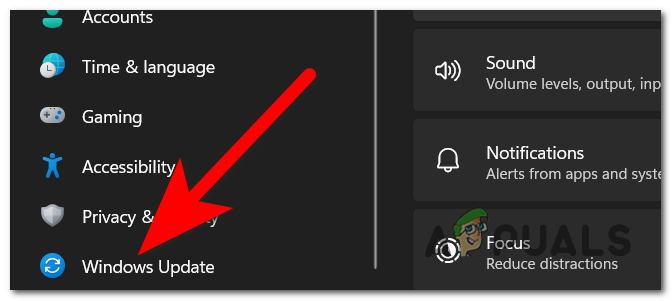
Opening the Windows Settings - Look on the left side and select the Windows Update section.
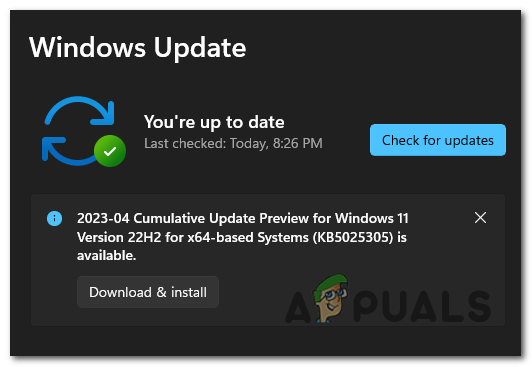
Selecting the Windows Update section - Now, if there are pending updates, click on the Install button to install them. If you don’t see any, click on Check for Updates to see if there are any available updates that didn’t appear at first.
Installing the latest Windows updates - Once the updates have been installed, restart your computer to ensure their application and check if your HP docking station is still not working.
2. Approve it from the Thunderbolt Software.
To make the docking station work, you need to ensure that you have approved it through the Thunderbolt Control Center. The Thunderbolt Software is an app essential for you to control the docking station.
All you need to do is approve the connection of the docking station by setting it to ‘Always Connect.’ A message should appear on your screen when you connect the device. If not, manually go to the Thunderbolt Software and approve it.
Here is a guide that will show you how to do this:
- Disconnect the docking station from your computer and restart the computer.
- Once it has booted back completely, plug the docking station back into the computer.
Note: A message should appear on your screen asking you if you want to connect the_device. - Select the drop-down menu next to the device and click on ‘Always Connect.’
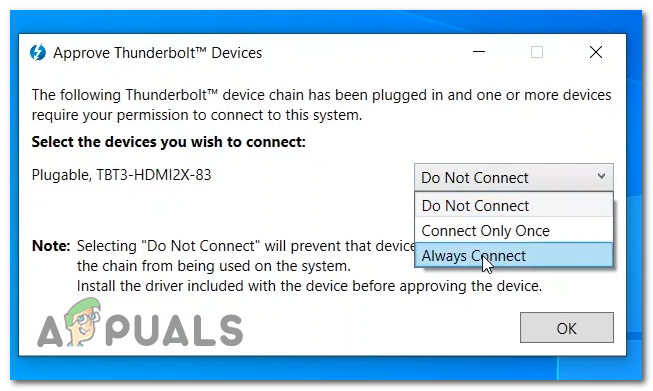
Approving the docking station to always connect - Click on OK, and the HP docking station should be able to work.
- If the message didn’t appear on your screen when the device was plugged into the computer, open the Thunderbolt Control Center and go to the Approve Devices section.
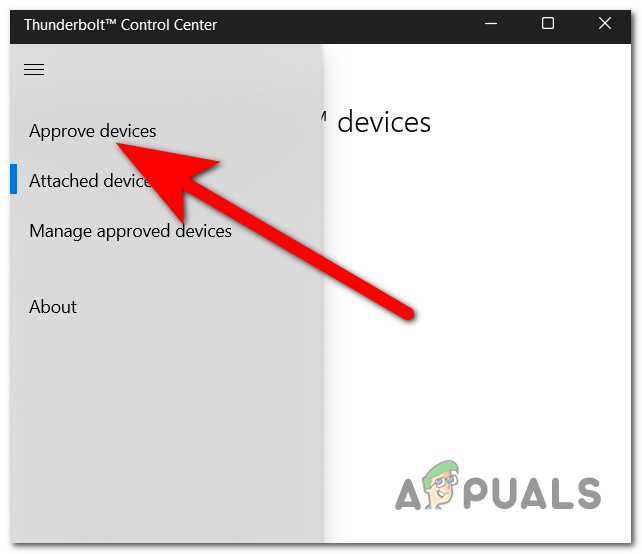
Selecting the Approve Device section - You should be able to approve the device from here.
- Once the HP docking station has been approved, check to see if the device is still not working.
3. Set the security level to ‘No Security’ (if applicable).
The HP docking station not working issue could also be caused by a setting that is blocking your computer. This is a security setting that you can find in the BIOS of your computer.
With this setting, you can establish a security level for your Thunderbolt Software to prevent devices from connecting to your computer easily. You need to set it to ‘No Security’ to allow the app to enable the docking station to connect.
Note: Before going through the guide, you need to know that this setting is not available on every computer. If you cannot find the settings in the BIOS of your laptop, this method will not be helpful to you.
Here is how you can change the security level:
- Turn on your computer and open the BIOS menu. Press the F10 key repeatedly until the BIOS menu opens.
Note: The button you need to press could be different; so, if the F10 key doesn’t work, search for the specific one. Please refer to ‘How to Access the BIOS on Different Motherboard Manufacturers.’ - Now using your keyboard, navigate to the Advanced section and select Port Options.
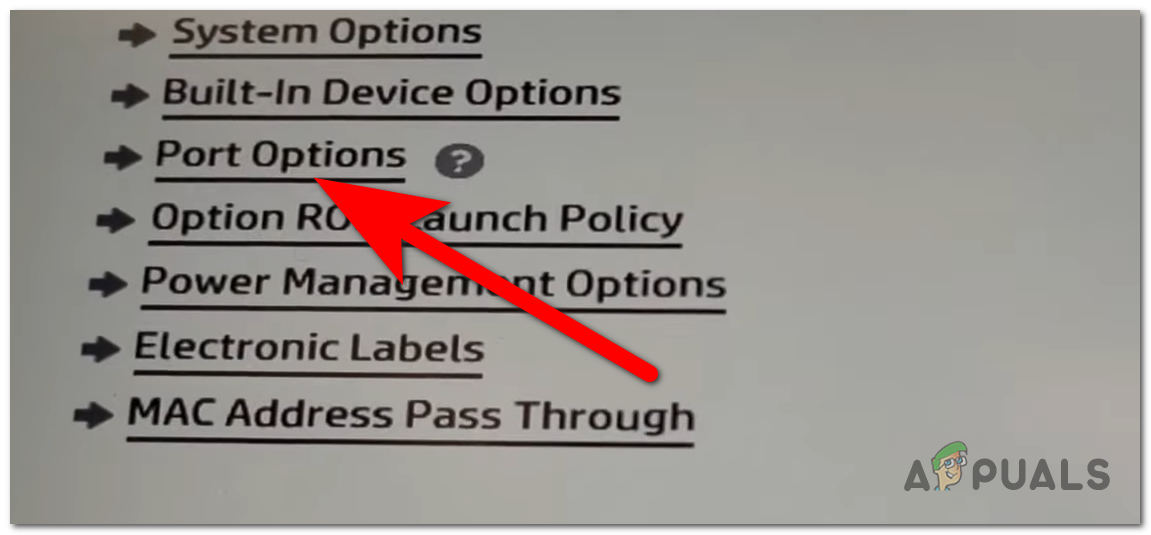
Opening the Port Options - Go to the Thunderbolt Security Level and select the PCIe and DisplayPort – No Security option.

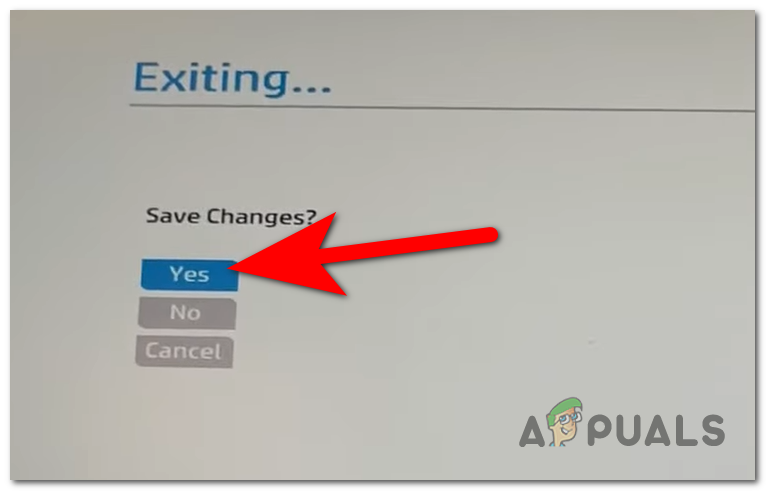
Selecting the No Security Thunderbolt Security Level - All that is left to do is save the changes. Press the F10 key again and select Yes; then, your computer will turn on.
Saving the changes - Now, test your laptop to see if the HP docking station’s problem of not working has been fixed.


