How To Use A Nintendo Switch Pro Controller For PC Gaming
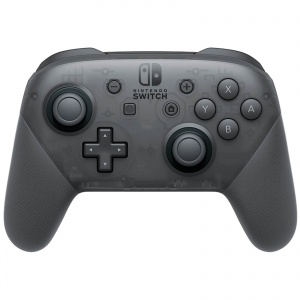
PC gaming is better served connecting an external controller to your PC setup to give you a better range of hands-on functionality. You can either buy controllers that are specifically designed to be hooked up to your PC and used for PC gaming or you can recycle some of your available console controllers to serve the same purpose. If you have got a Nintendo Switch Pro and are looking to configure its controller with your PC for gaming, this guide will walk you through all the essential steps to going about this.
There are two gaming scenarios that you may need to configure your Nintendo Switch Pro controller to your PC for. The first is to play games through the Steam Engine. The second is to play non-Steam PC games with their own independent clients. For each of the two scenarios, the steps for configuration are slightly different. You can connect the controller through the wire or wirelessly via Bluetooth. All you will need to get started are your PC that you want to configure with, your Nintendo Switch Pro controller, and a USB C cable to process the pairing.
Configuring For Steam
- Launch your Steam Engine on your PC device.
- Head over into its settings and into the controller settings available here.
- Select the checkbox beside “Switch Pro Configuration Support” to enable support for your Nintendo Switch Pro controller.
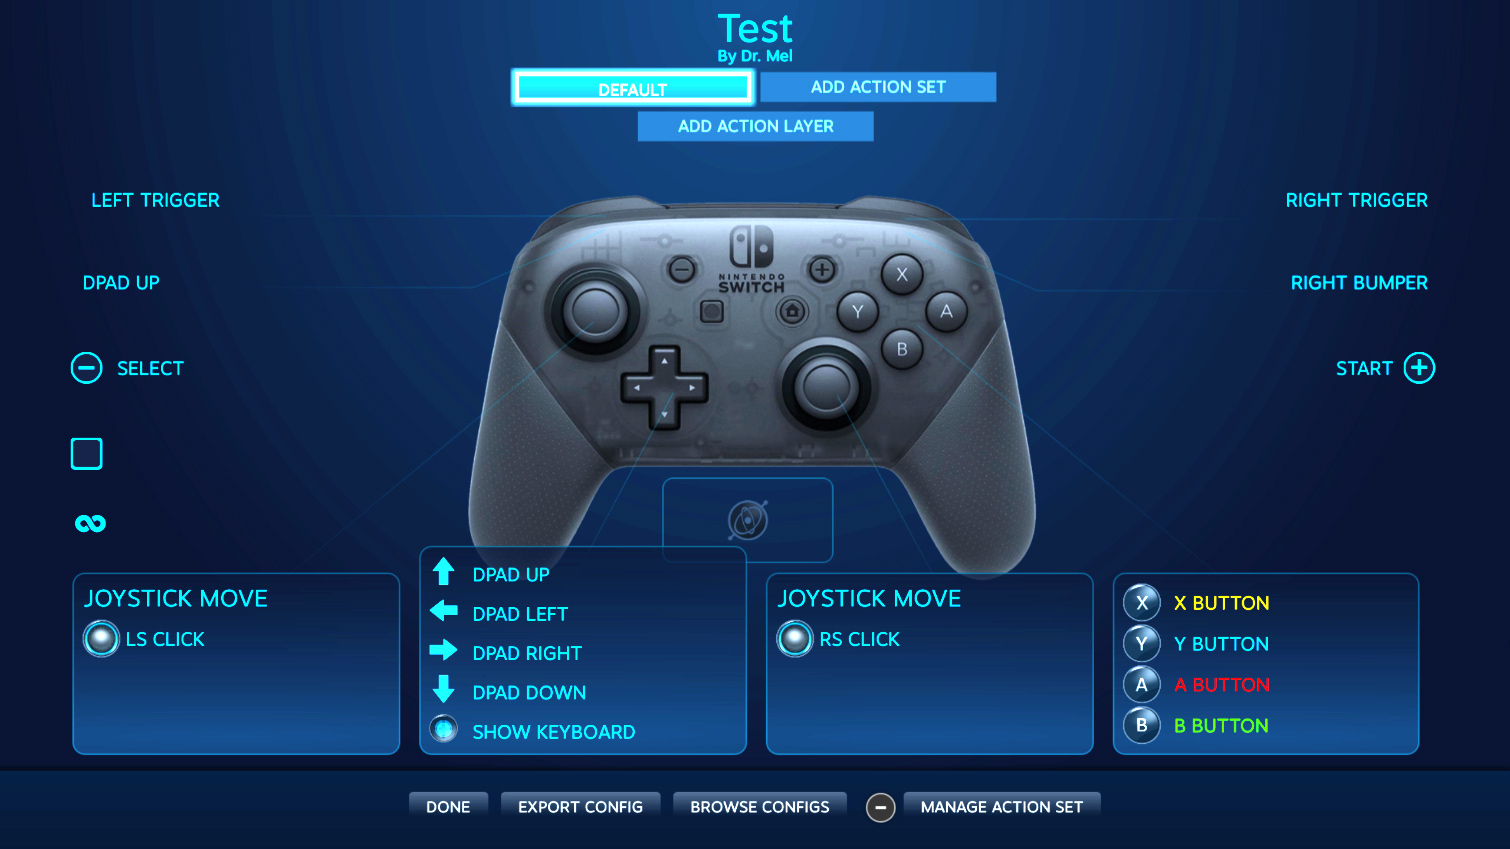
- In this same menu, you can also change your button layout to accommodate how you like to use your controller. For specific games in Steam, this can be done later on by right-clicking the game titles on the main screen and editing their Steam Controller Configurations individually. You can virtually map every single one of your controller buttons to the functionality you would like and customize it according to each game. You can even adjust the lighting on your controller and whether or not to incorporate the gyro technology. Note that it is advised to stick to the standard settings first (other than obvious control mapping changes) and test the controller out in-game before proceeding with controller optimizations in its configuration settings.
- Your Nintendo Switch Pro controller should be detected and showing at the bottom of the menu screen.
Now that you’ve set your controller up with your Steam Engine, all you will have to do before playing any game is plug it in to your PC. The system will automatically detect your controller and your control mapping and latency profiles will be saved for each game as you’ve made them, ready for use.
Configuring For Individual PC Games
Wired Connection
To configure your Nintendo Switch Pro controller for games that do not run on the Steam Engine or run on independent clients, you will have to configure the controller generally with Windows. Steam makes it much easier to configure your controller. The procedure for configuring it with Windows is slightly more challenging but doable, nonetheless. If you want to take a wireless over Bluetooth configuration route, you can opt for the easier way which will cost you USD $20. For this you will need two additional pieces of equipment, namely: a Bluetooth dongle and an 8Bitdo wireless Bluetooth adapter (the costing element).
If you would like to go through the regular Windows installation without these two pieces of equipment and free of cost, follow the instructions below:
- Use the USB C cable to connect your Nintendo Switch Pro controller to your PC device.
- Windows will automatically recognize that a new device has been plugged in.
- This seems easy enough that you have plugged in your controller, Windows has recognized it, and the system has installed the relevant drivers to allow for your controller to function with your PC. The hindrance here is that because there isn’t a streamlined engine handling all of your gaming activities for non-Steam PC games, your controller may not function properly for all of your desired games without some additional configuration.
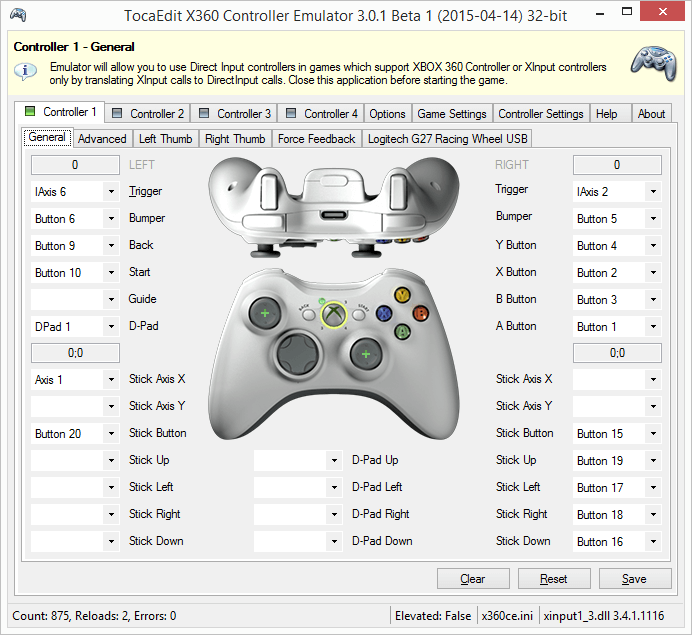
- Download and install x360ce (a controller emulator) in both its 32 bit and 64 bit versions. While your PC may either be 32 bit or 64 bit, some games can be either and you may need to install one or the other of the versions. The app x360ce itself lets you know which one to install for each game. The purpose of this software is to unite all of your gaming controller connectivities through one streamlined platform.
- Find where your game’s “.exe” file is installed. Head into this folder and paste your x360ce “.zip”. Extract this here. The x360ce application, at this point, will let you know if you need to paste in a 32 bit version or a 64 bit one. Once you’ve pasted the correct one and extracted it, run the file and a window will pop up asking you to create a “.dll” file. Create this.
- Next, you will be asked to configure the settings for your Nintendo Switch Pro controller. Check “Search the Internet” and wait as the system finds the layout for your controller. Once this appears, you can simply save the settings and hit “Finish”.
Note that the above procedure needs to be carried out in the folder of each individual executable game you have installed to configure the Nintendo Switch Pro controller for each of the games. You may encounter key mapping problems in any of the games where the buttons, despite being configured according to the template your system downloaded, may not operate that way in-game. To resolve this, you can head into the in-game settings and map out your keys again specific to that game. This will ensure that they operate the way that you would like.
Wireless Connection (via Bluetooth)
A standard Windows Bluetooth configuration to allow for wireless gameplay requires that you carry out the steps above as well. Before doing so, however, ensure that the controller is disconnected from the USB C wire connecting it to your PC system. Turn on your computer’s Bluetooth settings and look for new devices. Simultaneously, press the button on top of your control to get it into pairing mode and pair the two devices. Once this is done, carry out steps 1 to 6 listed above for generic Windows configuration with x360ce for each game you would like. In this process, you can opt to use the 8bitdo wireless Bluetooth adapter module as your connector instead of the inbuilt Windows Bluetooth processing.
Final Thoughts
Connecting a Nintendo Switch Pro controller to your PC device for PC gaming is a manageable process. The only hurdle comes out when you’re looking to use it for multiple games. PC games can generally be broken down into Steam and Non-Steam games. For either, a client that is able to project your controller configurations to all your games is needed. In the case of Steam games, the Steam client acts as a one-stop configuration outlet for you to set up your Nintendo Switch Pro controller (with inbuilt compatibility in Steam) and it projects these settings across all of your Steam games. You can individually customize your controller buttons for each game on the Steam engine as well. For non-Steam games, the x360ce controller emulator configures your controller for each game individually. With these two solutions, you’ve got all your gaming configurations covered.


I am looking for detailed information on the button functions for Mario 3D and Golfing.