How to Properly Test the Stability of your GPU Overclock?
There is no doubt that a graphics card (or GPU) is arguably the most important component in a modern gaming system. As far as gaming and other 3D applications go, most of the performance of a gaming PC comes directly from the graphics card. Modern GPUs are also capable of performing additional tasks like video rendering and encoding, which helps in recording and streaming should the user be interested. It is, therefore, no surprise that avid gamers strive for faster and faster graphics card performance to get the best experience in their favorite games. This need for speed has lead to a monumental rise in the trend of “overclocking”.

What is “Overclocking”?
Overclocking is the process of manually increasing your card’s clock speeds and memory frequency which results in some free performance gains. Every graphics card is capable of being overclocked to a certain degree. This is because the GPU manufacturers leave some headroom above the rated clock speeds of the GPU, to get a consistent and stable GPU clock across all the cards that will be produced. Overclocking is thus, a free and fairly easy way to increase the performance of your card.
You might want to overclock your card if you just need that little bit of extra performance from your GPU. It is free, so why should you leave performance on the table? Overclocking is also a really fun and interesting way to tinker with your PC components. It also helps to increase your knowledge about said hardware and thus you are better equipped to handle any troubleshooting problems that may arise later. Enthusiasts in the PC space have made it a sort of a competition to see how well they can overclock their cards. You basically cannot cause any physical damage to the card with traditional overclocking means. Thus overclocking is becoming more and more popular in the consumer PC culture. Our comprehensive GPU Overclocking guide can be of tremendous help to overclockers of every skill level.
There are some things you need to be wary of, though. It is important to understand that overclocking means running your graphics card at speeds beyond the manufacturer’s spec. This means that you will have to validate the stability of the clocks you set yourself. In addition to this, you need to keep the temperatures of your card in check. Naturally, an overclocked card draws more power from the power supply and therefore produces more heat. Adequate case ventilation can help significantly in this aspect, you can learn more about that in this article.
What you need to know before Stress Testing
Overclocking is a fun process for hardware enthusiasts and gamers alike who want to push their card to its limit and get the best possible frame-rate, however, some things need to be understood well before we dive into the process. We will not be going over the whole process of overclocking in this guide (you can check out our comprehensive GPU overclocking guide for that), but we will be tackling the process of properly stress-testing your card. These important concepts tie into stress-testing quite heavily, so it is beneficial for you to get a basic understanding of them:
-
Silicon binning and Silicon Lottery
The GPU (the actual die inside the graphics card) is made from a thin wafer of silicon. Due to the silicon’s natural properties, there are slight variations between each GPU that is made. This means that no GPU is identical to another, even if they belong to the same graphics card family. So the actual GPU inside one RTX 3080 will have very slightly different properties than another RTX 3080.
What does this mean for the end-user? It means that in terms of overclocking, some GPUs will have the potential to boost higher than others of the same family, due to their higher quality silicon. This is particularly helpful during overclocking when you are trying to squeeze every last bit of performance from the card. Two concepts tie into this.
Silicon Binning is the process by which GPU Manufacturers (like Nvidia or AMD), and AIB partners (like ASUS, MSI, Gigabyte, EVGA, etc.) separate the higher quality silicon from the lower quality one. This means that the best silicon goes into the top cards of the respective series. If we take the RTX 3080 as an example again, this means that the absolute best silicon will go into the most expensive variants like the ASUS Strix, Gigabyte Aorus Extreme, EVGA FTW3, etc. These cards will have higher overclocking potential because of this practice.
Silicon Lottery is the name given to the phenomenon of getting a high-quality chip on a random basis. Since not all of the GPUs are “binned”, it is possible to get a very high quality or a very low-quality chip on the basis of luck, thus the name. Note that ALL of the GPUs that are produced are capable of running at stock clocks which are set by the manufacturer/AIB. The quality of the actual silicon behind the GPU is important only while overclocking the card. The better the silicon, the higher clocks it will be able to maintain while being stable.
-
GPU Boost: The Concept of Dynamic Boost
Nvidia Graphics cards since the Pascal series, and AMD Graphics cards since the Vega architecture make use of a technology called Dynamic Boost. Basically, this means that the card will try to overclock itself as high as possible, as long as it has A) Temperature Headroom and B) Power Headroom. This concept of Dynamic Boost (or GPU Boost in Nvidia’s terms) means that even in stock configuration, the cards will try to boost as high as they can, even way beyond the rated boost clocks. This concept is key while overclocking and stress testing, as we will have to keep an eye for the boost clocks we are achieving, as well as the peak temperature and the power draw of our card. Creating a balance in which the card can achieve a fairly high boost clock while staying under comfortable operating temperatures is key for a stable overclock.
-
Nvidia’s Boost Binning Algorithm
During the already mentioned GPU Boost phase, Nvidia graphics cards employ a technique called Boost Binning. What this technique does is that it varies the highest boost speed very quickly, depending on the temperature and power draw. You can think of these “boost bins” as little packets of clock speed (each containing 15Mhz) that get shuffled by the algorithm very quickly. The important thing to take away from this algorithm is that Nvidia cards vary their core clocks by + or – 15Mhz every time. This gives us a number that is important for the process of overclocking. If the card is unstable in our testing, we can drop the core clocks by a matter of 15Mhz to enter the lower boost bin. This would give a pretty good stability report during the testing phase.
-
AMD’s Boost Clock Target Algorithm
Unlike Nvidia’s boosting technique, AMD uses a “boost target” methodology in its cards. In AMD cards, you can only dial in a particular boost target when overclocking. This means that the card will try to boost up-to that target clock speed, provided it has enough power and thermal headroom. Thus the resultant boost clock that the user will experience in-game will be somewhat lower than the actual clock target that was dialed in. This is an important distinction from the Nvidia cards.
Stress Testing – Why is it important?
The process of stress-testing your graphics card after an overclock is extremely crucial. Stress-testing basically means that after an overclock is dialed in, the card is pushed to its limits by using a mixture of synthetic benchmarks and tests. These adequately-named “stress tests” put a tremendous amount of load on the graphics card to provide a worst-case scenario for both thermals and power draw. The card often uses all of the resources available to it in these scenarios, and thus these tests are extremely useful to confirm the stability of an overclock.
It is important to note that stress testing is absolutely necessary after an overclock or undervolt. You cannot just dial in a rough overclock in Afterburner and just call it a day. Nothing is more annoying for gamers than being in the middle of a game and then having your card crash. Stress testing puts enough synthetic load on your card that you can be reasonably sure about its stability in less demanding applications like games. The main areas which are stressed include the GPU core frequency, the memory frequency, the temperature of the GPU and the VRAM, the power delivery system, and also other things like the fan curve and VRM temperatures.
Types of Stress Tests
There are a few different forms of stress testing that are available to the end-users. Synthetic Benchmarks are really popular and they do get the job done very well. They generally target all aspects of a graphics card and try to simulate a worst-case scenario. In addition to synthetics, there are some specifically designed “Torture Tests” that stress only one aspect of the card really heavily. Some of these focus on temperatures while others may focus on power draw or memory overclocking. Nowadays, many modern games offer built-in benchmarks that are also quite demanding. These can also be helpful in testing as they simulate a more real-world scenario that you may encounter in-game.
Popular Stress Test Applications
There are many popular stress tests that are commonly used by PC overclockers. Each one of them offers a slightly different approach to testing therefore it is ideal that all of them be used at least once. These are the ones that are useful for testing the stability of a GPU overclock:
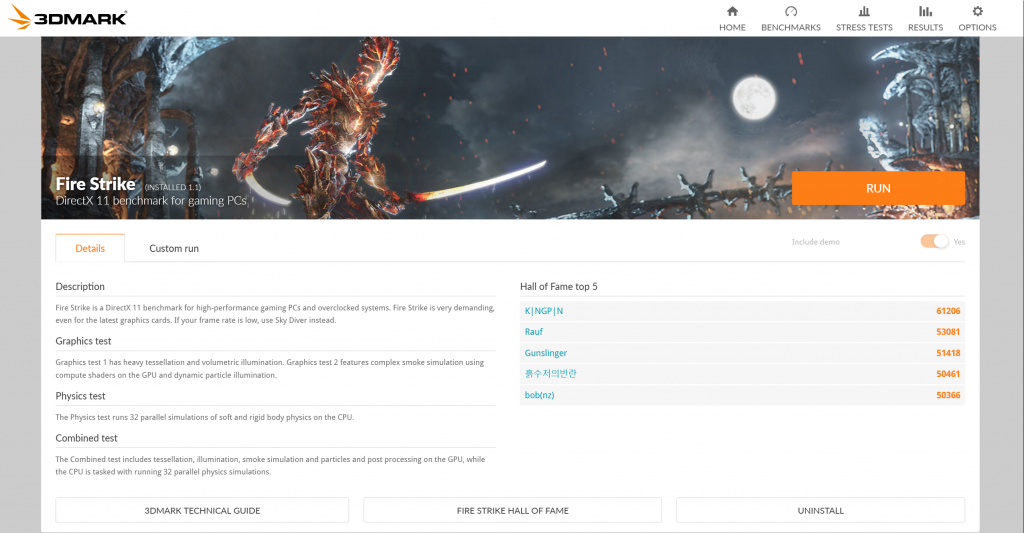
- 3DMark FireStrike and FireStrike Extreme
- 3DMark TimeSpy and TimeSpy Extreme
- 3DMark Port Royal
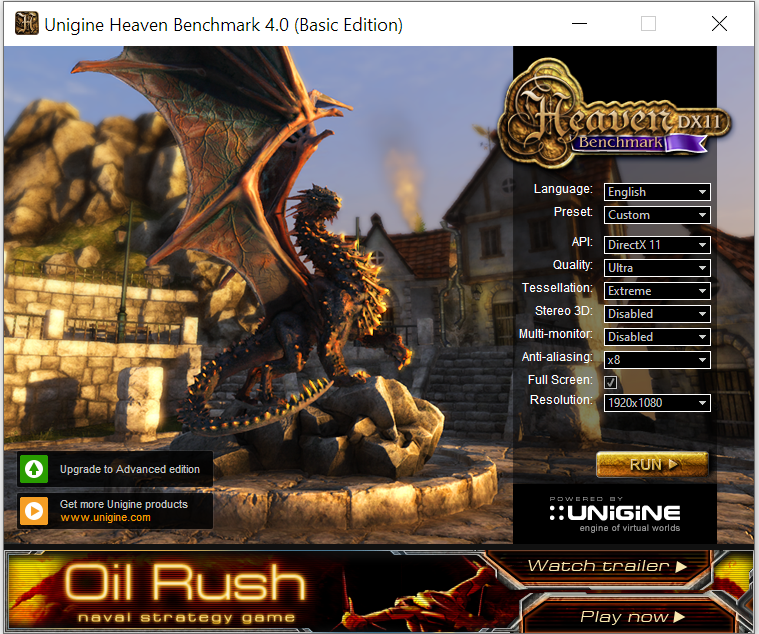
- Unigine Heaven
- Unigine Valley
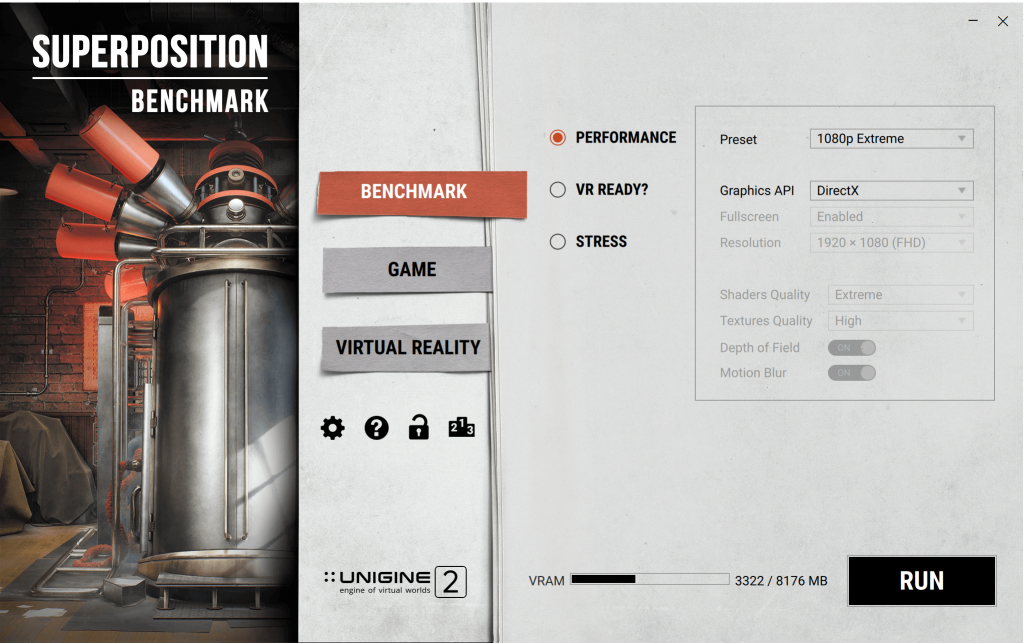
- Unigine Superposition
- Furmark
- OCCT
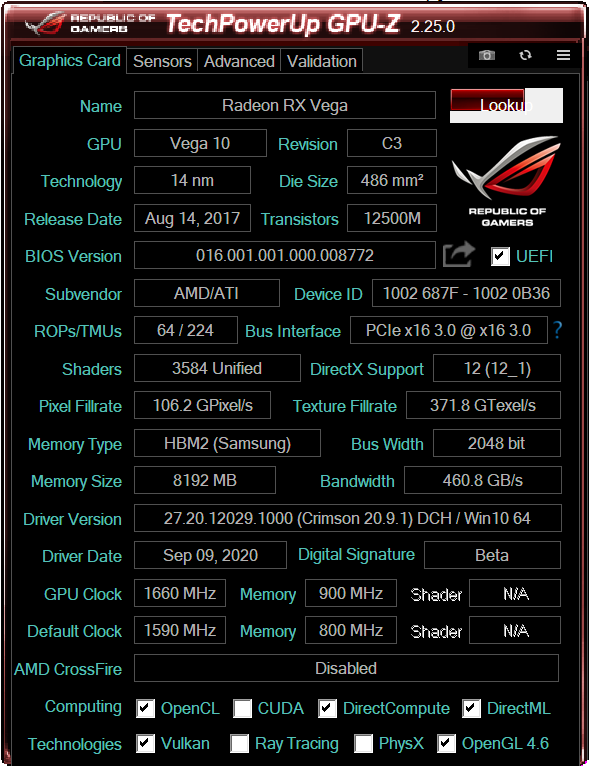
In addition to these testing applications, it is strongly recommended that you download the following utilities for monitoring the statistics of your PC:
You may be wondering what exactly the difference between all these tests is. Wouldn’t just running one test suffice? The answer to this question lies in the way each of them is configured to work.
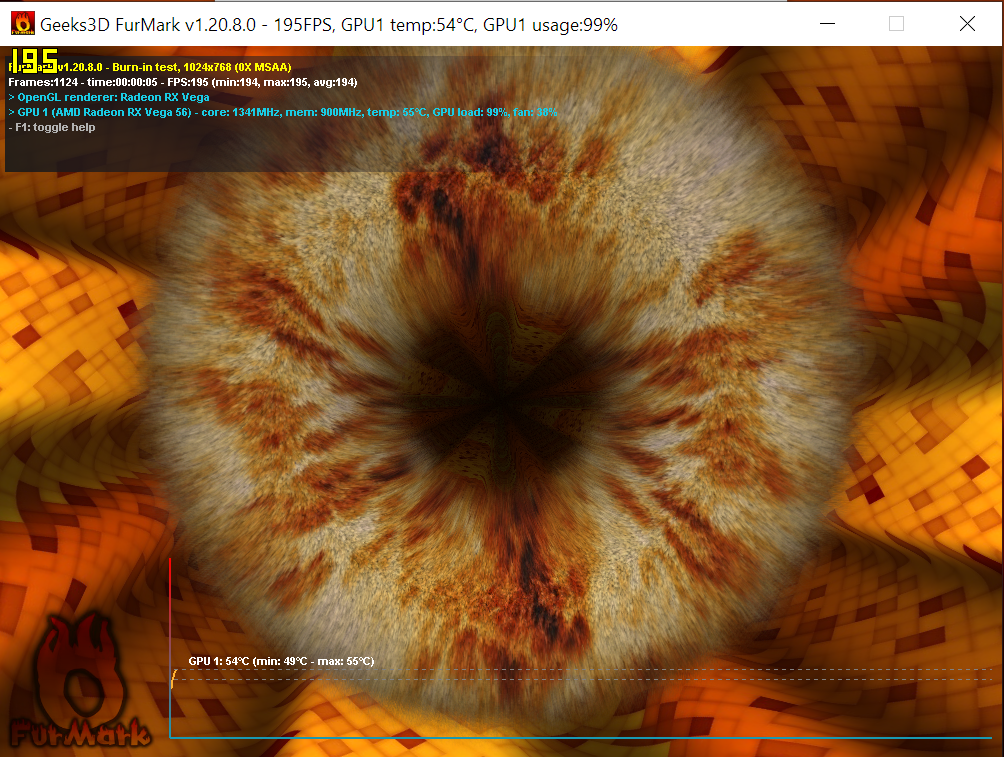
Tests like 3DMark FireStrike and Unigine Heaven/Valley are DX11 tests, but each of them takes a different approach to the level of resources it demands. Tests like the 3DMark TimeSpy and the newer Unigine Superposition are very demanding DX12 tests, with Superposition even offering an 8K version of the benchmark which is absolutely punishing. 3DMark’s Port Royal is a relatively new addition that is specific to RTX Real-Time RayTracing performance. If you have a shiny new RTX card from Nvidia, this is the test to perform. Furmark is a temperature torture test, which has nothing to do with performance testing. Furmark is designed to push your temperatures to as high as they can possibly go.
This gives a worst-case scenario for temperatures and can be useful in identifying the level of temperature headroom your card offers. OCCT takes a similar approach but it has options to push the GPU power draw and even the total system power draw with its testing.
Process of Stress-testing
Now that we have established a comprehensive understanding of the concepts behind the testing, let us move on to the process.
- Open the Stress-test/Benchmark application after you have configured an overclock.
- Close all non-essential applications.
- Use the maximum quality settings on 1920×1080 resolution. You can use higher resolutions as well generally the “Extreme” presets of these tests run at 1080p.
- Use “Fullscreen Mode” if you do not plan to change your overclock settings while the test is running. “Windowed Mode” can be used if you want to make changes simultaneously.
- Let the test/benchmark run. Keep an eye on the statistics of your PC. Note the highest core clocks, memory clocks, voltages, power draw, and especially temperatures. If the temperature gets too high, you might want to dial back your overclock.
- Keep an eye out for artifacts in the tests. These indicate unstable memory speeds.
- Once the test is finished successfully, you might be presented with a score of some sort. You might want to save that in case you’re pushing for the highest overclock and want to see quantitative results.
Monitoring
While the tests are running, you should be constantly monitoring your card’s statistics. Overclocking is basically a game of finding the sweet spot between temperatures and clock speeds. Monitoring these parameters will help you find a stable overclock that is ideal for daily use and does not overheat the card. You can also tinker with the fan curve to get the best balance between noise and thermals.
On Nvidia GPUs, you should note the highest boost clock that your card was able to produce. Making use of GPU Boost technology, the card will boost as high as it can as long as temperature and power headroom is available. Finding the balance between high clock speeds and the temperature is key here.
On AMD GPUs you should see how close your boost clock is to the set boost target. It will also vary based on the temperatures and power draw. Knowing the concept of Boost Targets and Dynamic Boost Algorithms can prove helpful in dialing in a balanced overclock.
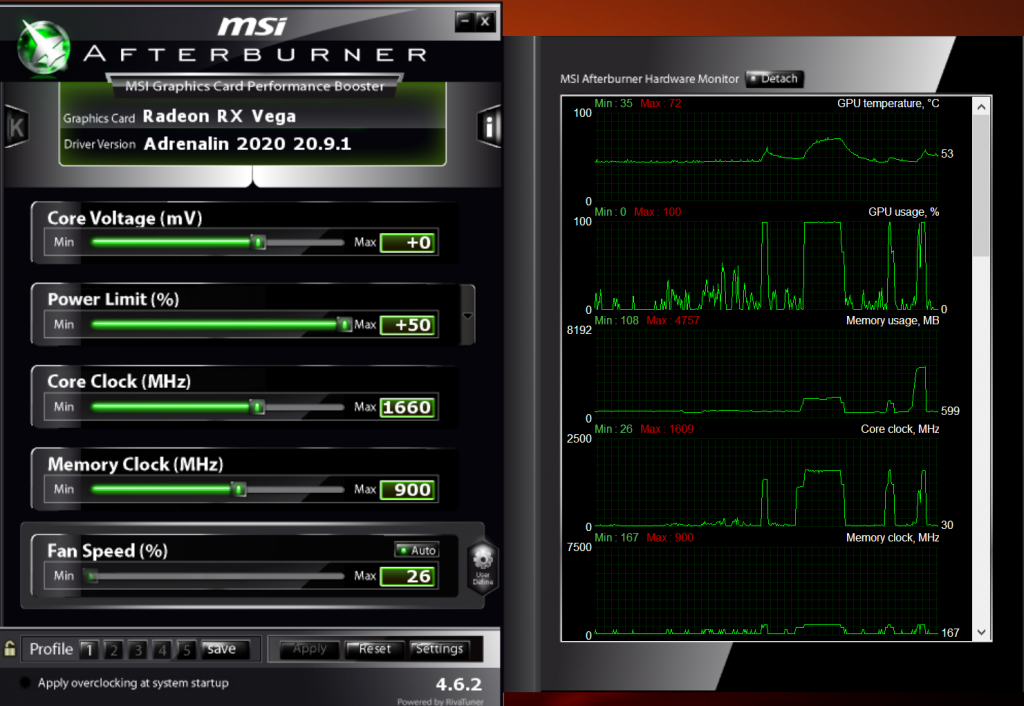
For temperature monitoring, it is ideal that both the GPU temperature as well as the memory temperature be monitored. MSI Afterburner and HWInfo can tune into these sensors and provide that information to RivaTuner to display. Modifying the fan curve and optimizing case airflow can help lower temperatures effectively. If you see the temperatures crossing 85 degrees Celcius, consider dialing back the overclock.
The purpose of each test
- 3DMark FireStrike and Unigine Heaven: Testing Real World Stability and Performance in DX11
- 3DMark TimeSpy: Testing Real World Stability and Performance in DX12
- 3DMark PortRoyal: RayTracing Performance for RTX GPUs
- Unigine Superposition: Testing Extreme scenarios and VR Performance
- Furmark: General OC Stability and Peak Temperature Testing
- OCCT: Hybrid of Real-World Testing and Peak Temperature Testing
Crashes and Artifacts
What if your overclock is unstable? During testing you may experience one of three things:
- Crashes: The card will crash to desktop. Your monitor may flicker a bit and your overclock will be reset. Do not worry, this is normal behavior if the card is under an unstable overclock. On Nvidia GPU’s you should consider dropping your core clock to the lower boost bin (-15 MHz) and test again. On AMD GPU’s try and lower the boost target that you have set in the overclocking software. Since every single GPU is different (because of the aforementioned Silicon lottery concept) you might want to put some time into dialing in a perfect overclock for your specific card.
- Artifacts: These may appear as patches of “glitches” in the scene that is being rendered. Pixelated blocks, weird shapes, lines, etc may be seen. This is a sure sign of unstable memory clocks. Dial back the memory clocks slightly and re-test.
- Hard Restarts: If your PC restarts under load (especially in OCCT and Furmark), it’s because your card is drawing more power than your Power Supply can handle. Dial back your power limit if this is the case.
Duration
Now it is time to decide how long you want to stress-test your overclock. It is recommended to use a 3 tiered approach to this.
-
Basic Stability (30 Minutes)
This is the most basic level of stability. Unigine Heaven, Valley, Superposition, 3DMark FireStrike and Furmark, etc should all crash in this time if there is an unstable overclock (Note that in Unigine Suite you can also run back-to-back benchmarks if you do not have an option of a looping test). If your card is stable in this range, you may be stable throughout 1 or 2 average-sized gaming sessions. If you crash, dial back your overclocks and try again.
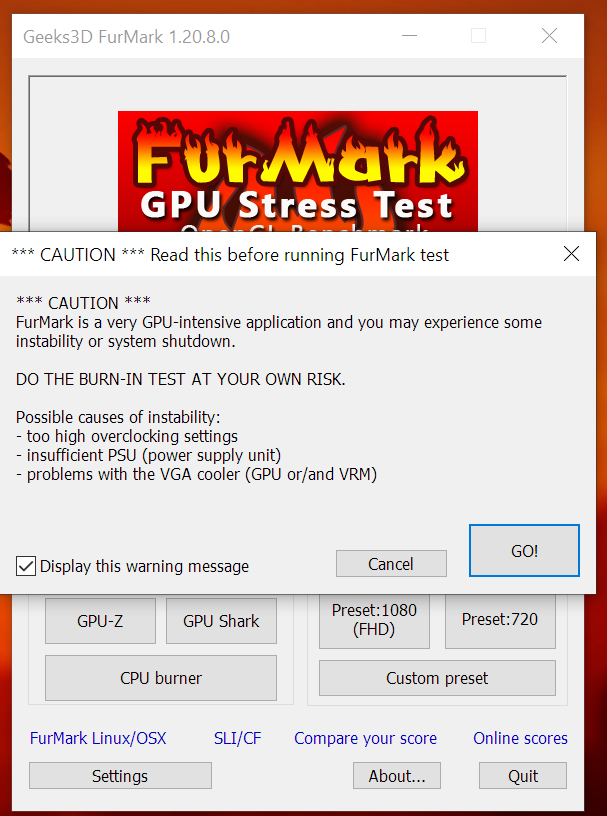
Furmark displays a caution message before you can run the test. NOTE: ONLY RUN FURMARK UPTO THIS RANGE. Furmark is a torture test and running it for more than 30 minutes is not a wise idea. Temperatures should stabilize after 10-15 minutes and 30 minutes is the maximum that is safe to run.
-
Solid Stability (1 Hour)
If you want to ensure that your card will not crash in extended gaming sessions (3-5 hours) then this is the duration of stress testing that is recommended. If your card passes this level without crashing or overheating then consider it safe for most gaming sessions and general system stability.
-
Confirmed Stability (6 Hours)
If your use case involves the GPU being under load for extended periods of time (overnight gaming, rendering, mining, etc) then you might want to consider this level of testing. This is where the paid versions of these tests come in handy since they offer extremely long looping tests. You can try running the tests overnight while you’re sleeping to make the waiting game easier. If your overclock passes this test, then consider is rock-stable. Running normal games will never push your card this hard for this long and you can have faith in your overclock.
Results
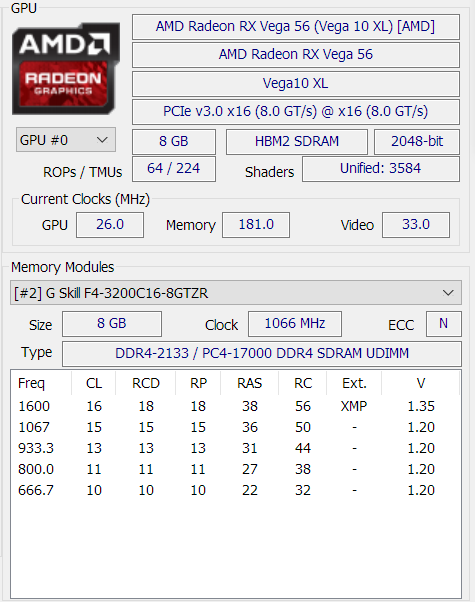
The actual results of the tests themselves are not that important since most of them are performance benchmarks. They can be useful in case of testing the max overclocking potential of the card since they give a quantitative result of your overclocks. However, monitoring software like Afterburner+RivaTuner actually gives us the data we need from the tests. While the tests are running, monitoring the core clocks, memory clocks, voltages, power draw and temperature of the card is crucial since these are the numbers that give us a fairly accurate idea of the overclock stability.
Take note of the max temps in Furmark (both the GPU Temp and the Memory Temp) and compare them with the temperature readings you get in Superposition. This depicts the amount of temperature headroom you may have in overclocking since Furmark represents the absolute peak temperatures you may encounter. Notice the boost clocks in tests like Heaven versus tests like TimeSpy. This is the closest depiction of the actual numbers in games that use DX11 and DX12. Take note of the RayTracing performance in Port Royal and also note the VRAM usage. These numbers give you an idea about the RayTracing capabilities of your RTX card. Notice the high VRAM usage in the 8K benchmark of Unigine Superposition, and keep an eye on the performance loss at high VRAM usage. Keep an eye out for artifacts in all of these tests. If your memory speed is slightly higher than the stable speed, you may not see any artifacts in the majority of tests, but one or two tests will show the artifacts thus warning you about the unstable memory speed. Also, note the run-to-run variation in the results of performance benchmarks like Heaven. If you increased the memory speed but your score decreased, it means that the memory is encountering a lot of “errors”, and its performance is degrading at such a high speed.
All of these metrics are important if you’re looking for long-term stability with your overclocked graphics card.
Are Stress tests harmful?
This may be a concern of yours since stress tests obviously put the card under harsh conditions to exhibit a worst-case scenario. You may be wondering if those high temperatures and frequent crashing had any sort of negative impact on your card’s health. However, there is no way that a graphics card can have any sort of damage through stress testing or normal overclocking. All modern GPUs have extensive limitations built into the card’s VBIOS which prevent dangerous voltage or high power draw to reach the core. Even if you crash multiple times during a test, those crashes do not have a hardware-level effect.
As far as temperatures go, there are throttling mechanisms built into the cards which protect them. If the temperature gets too hot, the card slows down its clock speeds to protect itself. Slower clock speeds draw less voltage and thus less power, therefore lowering temperatures. In extreme cases, the card may shut down completely if the temperatures breaches the TJmax (the max limit of the Junction Temperature). These values are set by the manufacturers and ensure that no damage is done to the card during these processes.
Hence, it is fairly impossible to cause any sort of damage to the card through normal overclocking and stress testing. Unless you were actually trying to harm the card, it would be far-fetched to think that the tests can have any sort of negative effect on the card.
Final Words
Stress testing your graphics card may be tedious and unintuitive but it is extremely important for the stability of your card’s overclock. If you plan to run even a minor overclock 24/7, it is crucial that you ensure maximum testing with these applications so that the card is not running in an unstable state. It is also important to run a variety of test applications since they all specialize in different aspects of testing. It is very possible for an overclocked card to pass one test but then crash in another one. It takes a bit of time and effort, but the resulting peace of mind is well worth it.