How to Root the Moto G6 with TWRP and Magisk Beta
Motorola’s Moto G6 is the latest budget-device in their hottest selling G-series lineup. It features Android Oreo, a Qualcomm SDM45 Snapdragon (Octa-core 1.8GHz Cortex-A53), and the Adreno 506 GPU. It’s quite a nice device for the price, and now we’re able to fully root it using TWRP and Magisk!
However, this is not an easy root process. This guide involves several things to flash and ADB commands to run. Be sure to create a backup of your device before continuing, not just incase something goes wrong, but also because part of this guide involves factory resetting your Moto G6.
Requirements:
- Magisk Beta
- MotoG6-ali-TWRP.img
- XT1925-2 – XT1925-2_no-verity-boot.img (stock edit)
- XT1925-4 – XT1925-4_no-verity-boot.img (stock edit)
- XT1925-5 – XT1925-5_no-verity-boot.img (stock edit)
- XT1925-6 – XT1925-6_no-verity-boot.img (stock edit) and MotoG6-ali-boot.img (kernel and dtb’s built from OPS27.104-15-10 source)
- Force Encryption Disabler for ALI Oreo
Notes for XT1925-6: There are two boot images for download, one stock edited and one source built. In the “MotoG6-ali-boot.img” the kernel and device blobs have been rebuilt from source (OPS27.104-15-10) with verity removed (and the device blobs used in TWRP have been rebuilt as well to pull up the external SD card).
This particular port of TWRP has some issues and is therefore experimental. It won’t allow you to directly move files to the SD card, but you can copy instead of move. TWRP places internal storage at /SDCard, and external storage at /External_SD.
Warning: Proceeding with this guide involves wiping your userdata, be sure to create backups of all your data! Also, when you flash through the bootloader, it will give a message “(bootloader) Image not signed or corrupt”. This is perfectly normal because the image isn’t signed by Motorola.
How to Root the Moto G6
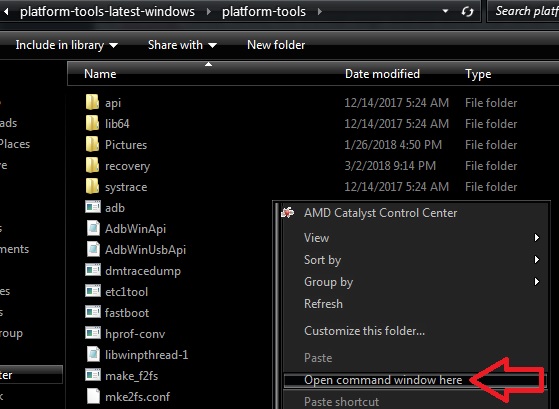
Download the TWRP image from above this guide to the ADB/Fastboot folder on your computer.
Enable USB debugging on your Moto G6. Go into Settings > About > tap Build Number 7 times until Developer Mode is activated, then go into Developer Options and enable “USB Debugging”.
Reboot to your bootloader. You can do this by turning on your device and holding power and both volume buttons at the same time.
Once the device reboots to the bootloader type the following from your computer with your phone connected via USB.
fastboot boot MotoG6-ali-TWRP.img
Once TWRP boots from your computer type (it may take a bit to boot because it is trying to decrypt your userdata, but it will fail and may prompt for a password. Just click cancel):
adb pull /dev/block/platform/soc/7824900.sdhci/by-name/boot stockboot.img
adb pull /dev/block/platform/soc/7824900.sdhci/by-name/recovery stockrecovery.img
This will create a backup of your stock boot and recovery images if you want or need to revert to stock later.
Reboot to the bootloader by typing from your computer the following:
adb reboot bootloader
Download the no-verity-boot image specifically for your device from the downloads section of this guide, and place it in your ADB folder.
Run the following command from your computer to install the boot image to your device.
fastboot flash boot <insert-boot-image-name-here>.img
Run the following command from your computer to install the TWRP image to your device.
fastboot flash recovery MotoG6-ali-TWRP.img
Use the volume keys on the device to select boot to recovery and then press the power button and TWRP will boot up. It should prompt for a decryption password, select cancel.
THIS STEP WILL WIPE YOUR DATA ON YOUR PHONE. ENSURE YOU HAVE A BACKUP BEFOREHAND.
Swipe to allow system to be mounted re-writable (r/w). Next click the “Wipe” button in TWRP and slide “Swipe to Factory Reset”. This step should have formatted data as it was encrypted (removing internal storage ) however if it didn’t and data is still not mountable in TWRP you can use the “Format Data” button above the swipe for Factory Reset, this will format data and remove EVERYTHING from internal sdcard (storage) as well.
This step will remove force-encryption upon first boot (you may still choose to encrypt after booting–the phone defaults to saying it’s encrypted, at least on retus system, in the security tab of settings but it’s not and the option to encrypt still exists within that menu. Note that re-encrypting manually will once again make data not readable in TWRP)
There are two ways to do this step, by hand or by zip. We’ve provided a modified zip to push the new fstab.qcom file while mounting the vendor partition for us so we’ll use it. At this time if you’re concerned about going back to complete stock you should backup your factory fstab.qcom by using the following code. Make sure you mount vendor in TWRP for this
adb pull /vendor/etc/fstab.qcom factory-fstab.qcom
Download the verity-disabler zip from the bottom of this post and push it to your phone. The example uses the /tmp directory.
From your computer type the following into your command prompt/terminal from your adb/fastboot folder:
adb push Force_Encryption_Disabler_For_ALI_Oreo_v2.zip /tmp
Flash the zip you just pushed by using the install option, select the storage where you pushed the zip to and install it. If you’re not seeing it, make sure you followed the previous commands correctly. We can verify it flashed by mounting vendor manually if it’s not mounted and using the following command and checking the line that mounts /data says “encryptable” instead of “forceencrypted”:
adb shell "cat /vendor/etc/fstab.qcom"
/dev/block/bootdevice/by-name/userdata /data f2fs rw,discard,nosuid,nodev,noatime,nodiratime,nobarri er,inline_xattr,inline_data wait,check,formattable,encryptable=/dev/block/bootdevice/by-name/metadata
Note where it says “encryptable”. That means we now have the choice to do so versus being forced to. If for whatever reason it still says “forceencrypted”, mount vendor manually and try again.
To be safe, reboot back into TWRP to make sure everything sees the data partition mounted correctly and again swipe to allow system to mount re-writable (r/w).
Download Magisk Beta and place it in your ADB folder, then run the following command to push the boot image to your device
adb push Magisk-vxxx.zip /tmp
Replace Magisk-vxxx.zip with whatever is the latest version of Magisk Beta.
Flash the Magisk .zip file from TWRP from Install button on TWRP main menu, and navigate to the /tmp (or wherever you pushed it) folder to select it and install it. Magisk should show success. Reboot your device
It will say N/A in the top corner of your device for a few seconds. This is normal as the boot image is not signed and thus shows N/A instead. It may look like it bootloops that screen, just let it go and and it should boot the Motorola boot screen and you can setup your device as a new phone.
Verify Magisk Manager is installed and the root functionality works.
The following are provided for backup purposes only in case you forgot to back up. When pulled from the phone, the images are the full partition size, not actual size.
XT1925-6 (OPS27.104-15-10) Factory pulled files
These files will get you back to stock as far as this guide is concerned. Remember though, ‘bad key’ will be displayed as they were pulled from a device instead of being provided by Motorola.
- Factory boot image – XT1925-6_factory-boot.img
- Factory recovery image – XT1925-6_factory-recovery.img
- Factory fstab.qcom file – factory-fstab.qcom– You can push this file to /vendor/etc/ to go back to stock vendor parition if you need. Factory boot images will probably have an issue booting without vendor being completely stock.


My G6 XT1925-6 got bricked after september OTA update. It wont boot to bootloader/fastboot. Would you help my moto G6 back to life