How to Enable Auto-login on Windows Systems for Faster Access?
The Windows auto-login feature allows users to access their PC without needing to enter a password every time they boot their system. If you aim to reduce your computer’s boot time and sidestep the hassle of entering a password, you can enable direct access instead and activate this feature.

Several methods exist to enable auto-login on Windows. However, activating this feature may compromise your privacy, particularly if your computer is used by different individuals. Therefore, it’s advisable to maintain password protection on your PC unless you are the sole user. Let’s explore the various ways to enable automatic login.
1. Via Windows Settings
The most direct method to enable or disable Windows auto-login is through Windows Settings. Activating this feature allows automatic login to your device without requiring a password. You simply need to change the Sign-in options and use a Windows Run command that removes the need for a password at login.
- Click on the Start icon.
- Navigate to Settings and select Accounts.
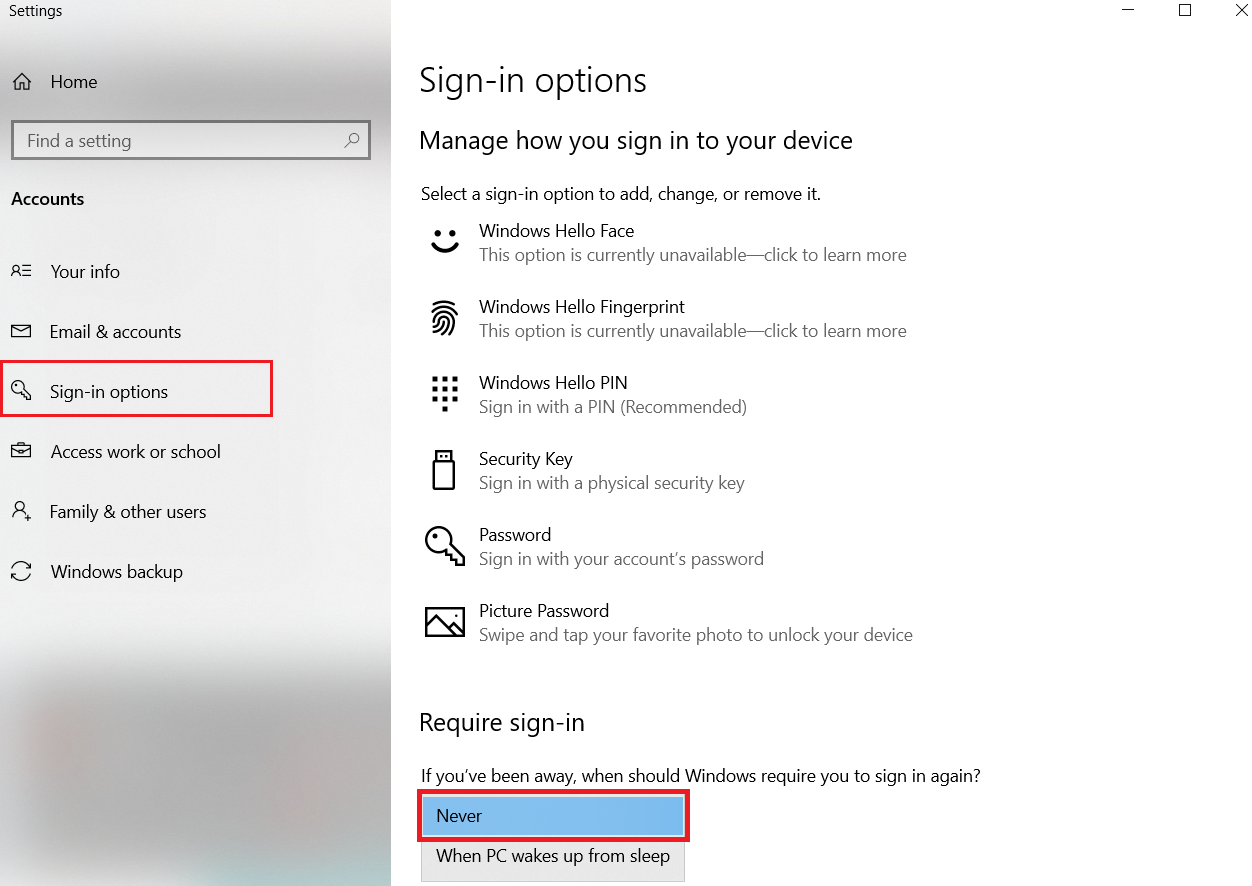
- Choose Sign-in options from the left pane of the Settings window.
- In the Require Sign-in section, click the drop-down menu and select Never.
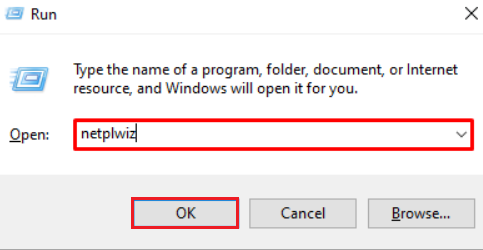
- Press the Windows + R keys to open the Run dialog box.
- Enter ‘netplwiz‘ in the text field and press Enter.
- In the User Accounts window, uncheck the box labeled Users must enter a username and password to use this computer.
- Click OK.
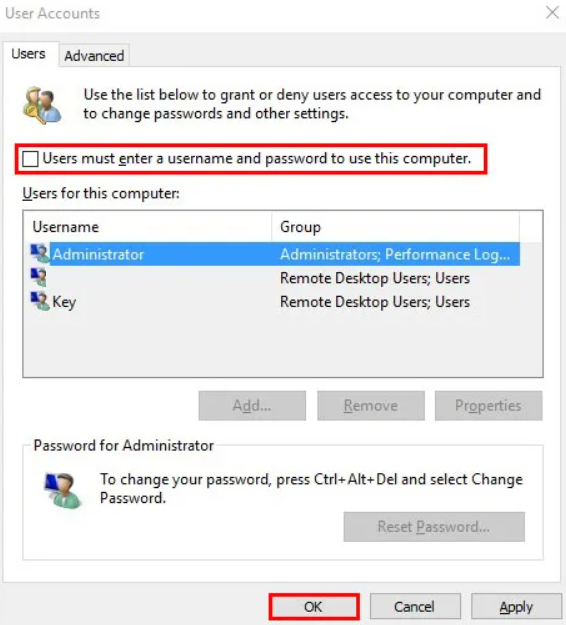
- Next, click on Apply.
- Enter your password in the prompt box that appears to confirm the action.
- To disable auto-login, recheck the Users must enter a username and password to use this computer box.
2. Via Autologon
Autologon is a third-party application by Microsoft’s Sysinternals that streamlines the automatic login process on your PC. Initially, you’ll need to input your credentials, but afterwards, you can enable the auto-login feature, sparing yourself the recurring entry of your user ID and password at startup.
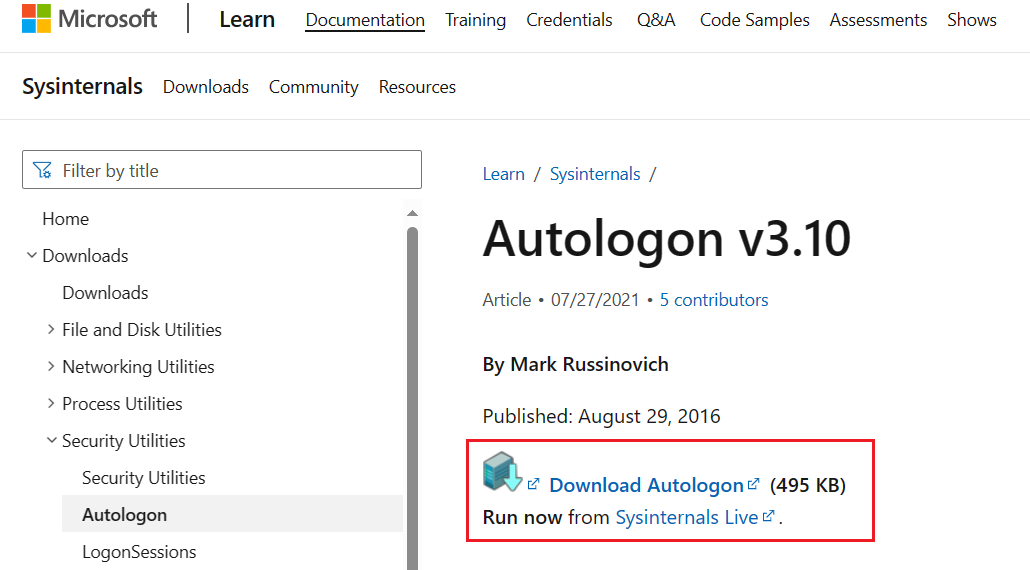
- Download Autologon from the official Microsoft website.
- Open the application on your computer.
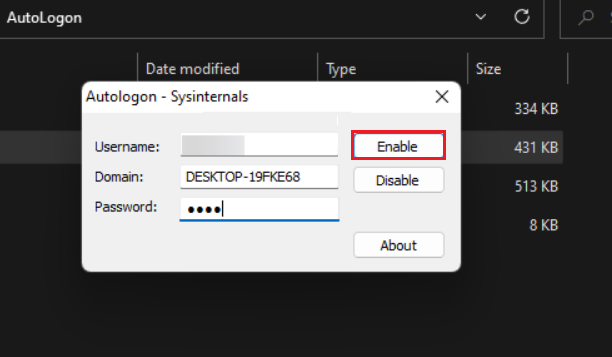
- When prompted, enter your credentials and click Yes.
- A new window will appear. Enter your password again and choose the Enable option.
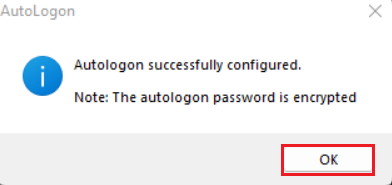
- You will see a confirmation message stating that Autologon has been successfully configured. Click OK.
- Restart your computer to apply the changes.
3. Via Registry Editor
The Windows Registry serves as a comprehensive database of configuration data for the operating system. It’s important to proceed with caution when modifying registry values, as incorrect changes can lead to data loss. By editing the appropriate system settings within the Registry Editor, you can enable the auto-login feature.
Please create a registry backup before you begin.
- Access the Start menu.
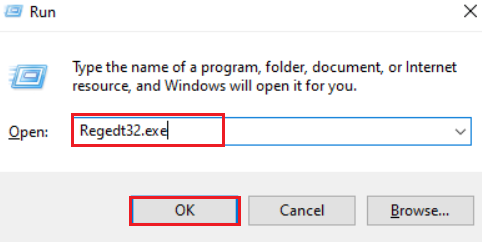
- Search for ‘Run‘ and select Open from the right pane.
- In the Run dialog, type ‘Regedt32.exe’ or ‘regedit.exe’ and click OK.
- Navigate to the following path:
HKEY_LOCAL_MACHINE\SOFTWARE\Microsoft\Windows NT\CurrentVersion\Winlogon
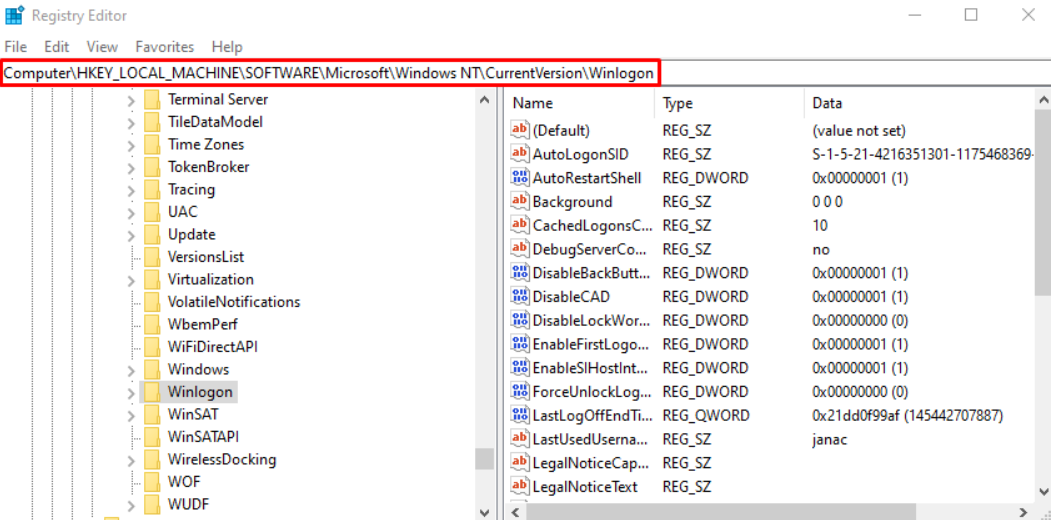
- Right-click on the Winlogon folder in the left pane.
- Select New and click on DWORD (32-bit) Value.
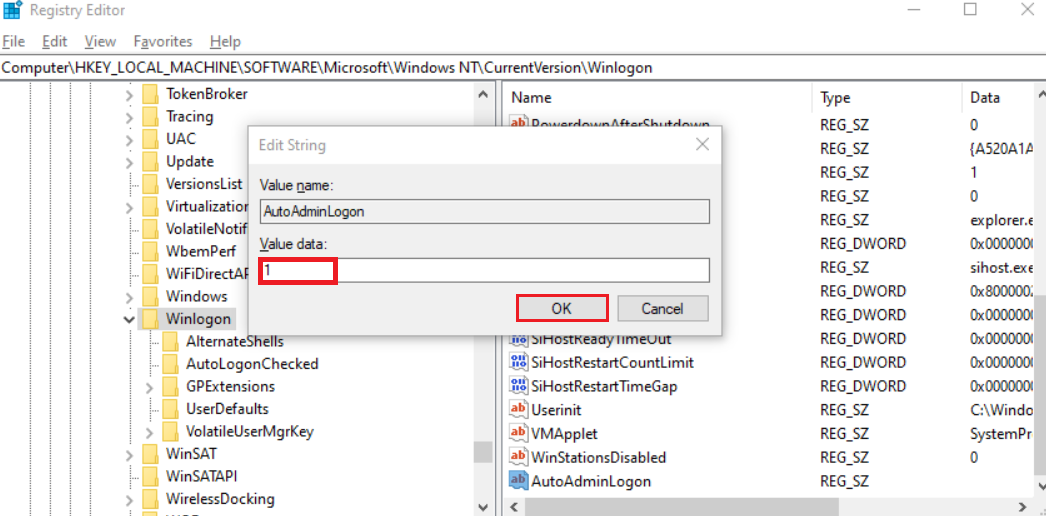
- Name this value AutoAdminLogon.
- Double-click AutoAdminLogon and set the Value to 1.
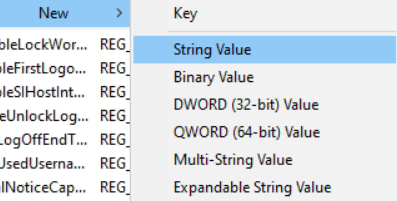
- Right-click the Winlogon folder again and choose New.
- Select String Value.
- Name the new string value DefaultUserName.
- Double-click DefaultUserName and enter your username in the Value data field. Click OK.
- Right-click the Winlogon folder once more, select New, then choose String Value and name it DefaultPassword.
- Type your password in the Value data field.
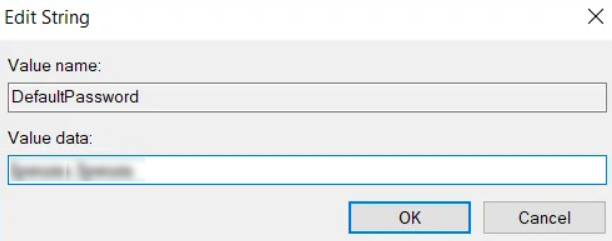
- Click OK to save your changes.


