How to Learn More About the Linux Kernel from Your Own Machine
Learning to work with GNU/Linux generally entails learning to work with a desktop environment. Theme technology allows these desktop environments to mimic the interfaces of iOS, Microsoft Windows, and OS X devices. This helps to minimize difficulties for users new to Linux. Many people proceed even further to learn Unix command line administration with the Bash or tcsh shells. However, becoming knowledgeable about the internals of the Linux kernel can help you better understand how different pieces of opcode interact with each other.
Some people would argue that it would be best to go several steps further and additionally learn how compilers transform C code into machine instructions for a microprocessor. Advocates of assembly code would then argue that it’s best to learn ASM to truly grasp programming on the x86 and x86_64 platforms. Irrespective of these positions, basic Linux commands can provide a wealth of information on how the kernel views your computer. Learning through a ‘look but don’t touch’ paradigm is a great way to master the kernel itself. Although the root account was used for the examples on this page, it’s highly recommended that you only ever view kernel-linked directories through a user account.
Method 1: The /proc Directory
The /proc directory is located in one of the primary regions of the top-level root directory in any Unix file system. It houses the proc file system, which is better known as procfs. This system contains information about the ways different resources access kernel memory. At the time the system boots, it’s mapped to /proc. This proxy file structure serves as an interface to the internal data structure inside the Linux kernel. Therefore, it is best to explore this only via a user account. Most files in this structure are classified by the visible system file structure as read-only. However, for safety reasons, it’s best to confirm this.
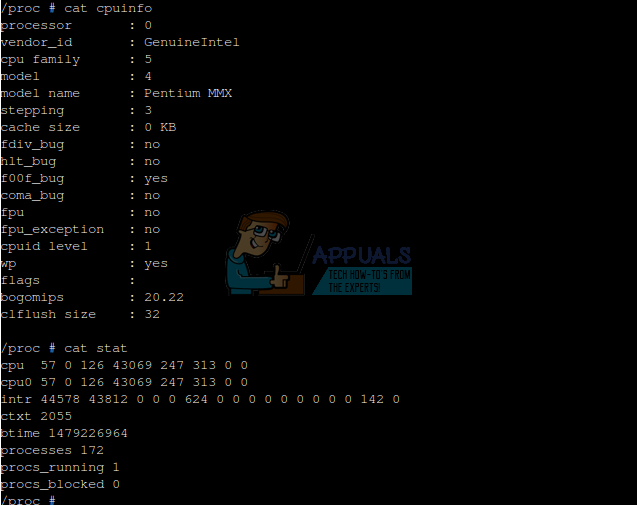
That being said, each of these is a text file, so you can view them if you wish. Use the cd command to enter the /proc directory, and then issue ls to get a look at what’s there. Use the cat, less or more command with any of the files to look at them. The cpuinfo file is a good place to start, since it displays how the kernel views your microprocessor. Look at the stat file for a view of running processes.
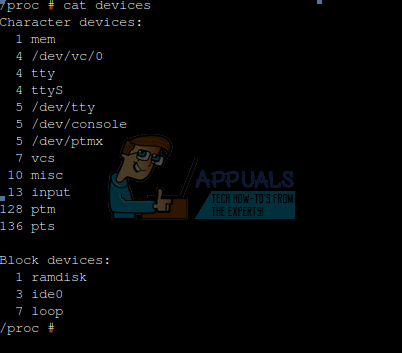
Typing cat devices will give you a look at what things are attached to your machine.
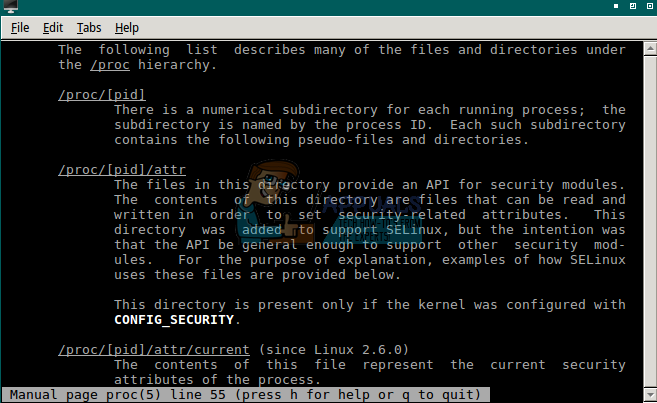
By the way, you can always issue the command man proc for a rundown of how the /proc file structure relates to the kernel. The page served comes from the Linux Programmer’s Manual.
Method 2: The /sys Directory
Your next stop on the tour of your kernel is /sys, which is another directory mapped to a pretend file structure. It follows the same general Unix concept as /proc does, but instead actively exports information about associated device drives and a number of kernel subsystems. If you’ve ever worked with a BSD-based system, then you might be more familiar with sysctl, which provides these functions. PCI, USB, and S/390 bus devices are all mapped to the /sys directory.
Use ‘cd /sys’ to navigate to the directory, then issue the ‘ls’ or ‘dir’ command. You might find directories titled ‘block’, ‘class’, ‘devices’, ‘fs’, ‘kernel’, and possibly others. You can explore these for additional flat files containing information about the system. However, do this from a user account and maintain a ‘look but don’t touch’ mentality.
Method 3: The /dev Directory
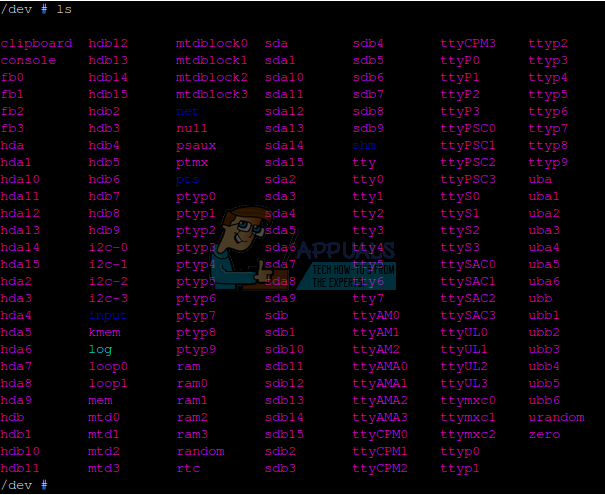
Use the ‘cd /dev’ command to navigate to the /dev directory, which may be the one kernel virtual structure with which you’re most familiar. The name signifies ‘devices’, and this directory contains file representations of devices attached to your system. If you run the ‘ls’ command in this directory, it will return many files, even on the simplest server distribution.
A few of these are very special. The /dev/null file is a null device that does nothing. If you type cat /dev/null, then you’ll get nothing out of it. It’s called the bit bucket, and output can be redirected to it to keep the screen clean. A file called /dev/zero contains nothing but zero data, which can be written to a disk to zero it out. The random and urandom files contain random junk data for creating security hashes.
If you’ve ever formatted a disk, then you likely have some experience with how the Linux kernel views them. Each disk attached to the system gets a name like sda, sdb, and so forth. Different types of disks receive different names. Bear in mind that the /dev directory uses one potential formal computer science definition of a disk, which differs from our usual use of the term. Thus, to the kernel, a hard drive, an SSD, an SD Card, a microSDHC card, a mounted smartphone file system attached via USB, USB sticks, and even mounted tablets are all considered disks.
Each disk name in Linux is appended with a numeral that indicates its partition number. For instance, if you have an SSD with two primary partitions, they might be designated as /dev/sda1 and /dev/sda2. If you’re running Linux on a desktop or laptop that uses MBR style partitioning, /dev/sda1 is likely to be set as the ext4 partition with Linux installed on it. Following this scheme, /dev/sda2 would typically be an extended partition, containing /dev/sda5 as a swap partition. Please note, however, that this partitioning scheme is common but not compulsory. Specifically, in this customary example, the swap partition is a logical disk within an extended partition, receiving 5 instead of 3 as its identifying numeral.
Should you want to learn more about the way the kernel views and formats partitions, then you can actually view a supported partition list with the fdisk command. While fdisk doesn’t write partition tables until you tell it to, it’s still best to try this with something you don’t care about toasting. It’s recommended to point it at something like a blank USB stick you could just easily reformat.
Let’s say your stick is showing up as /dev/sdc, then you could use sudo fdisk /dev/sdc to get it loaded up. If you have a valid partition in it, then type t to change the type and the type L to load a hex code list. Note that MBR and GUID partition schemes talk to the kernel differently, and therefore have different assignments.
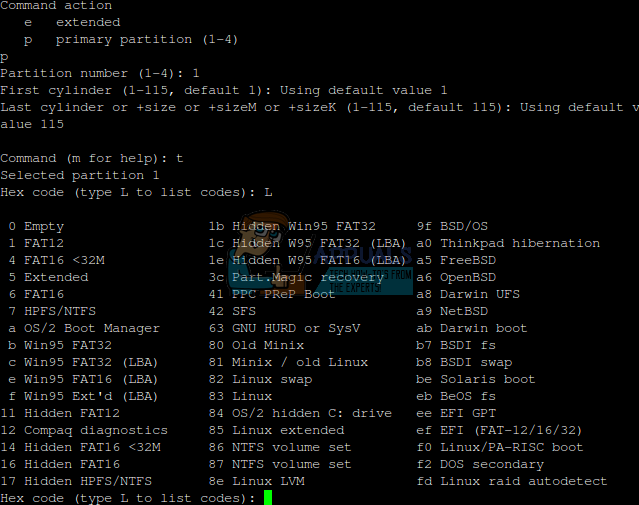
More often than not you’ll have drives set to type 83, which is for Linux drives, 82, which is for Linux swap partitions, or one of the FAT file types. FAT dates back in some form or another to 1977, and is still preferred for many types of mobile devices as well as many removable drives. Note that some partition types, such as type 0x0c, feature something called LBA support.
When a programmer designs a kernel for an operating system, they have a few different ways they can look at disks. One is to divide the platters into cylinders, heads, and sectors. This was the classic way to refer to hard drives for the longest time. Genuine disk geometry has never really been important to Linux, and this scheme unfortunately runs out of addresses after approximately 8 binary gigabytes. The second way is to use Logical C/H/S addressing, which does this, but then allows the disk controller to map cylinder, head, and sector numbers wherever they like. This is why an operating system could theoretically claim there were heads in an SD card or a USB stick when this is physically impossible.
The third method is through Logical Block Addressing, which is what LBA stands for. Each physical block in a volume receives a numeral in this scheme. The operating system tells the disk controller to write to a certain numbered block, but doesn’t actually know whether that’s the direct block on disk. This is the scheme most used today, and it’s certainly been used on the vast majority of hard disks since the mid-1990s.
Linux provides kernel support to mount a wide variety of partition types without direct input. However, it’s still better to avoid making unconventional selections. You could compromise your data if you select a very unusual match between partition type and file system.
Method 4: System Calls from the Linux Programmer’s Manual
Man pages readers, which are included onboard with a majority of Linux distributions, can provide a crash course on system calls, significantly aiding in learning about the kernel. You can start the xman graphical man pages browser either from a .desktop link, if available, or alternatively by holding down the super key and R simultaneously, then typing ‘xman’ and pressing enter. Choose the ‘Manual Page’ option, after which you should select ‘Sections’, and finally ‘(2) System Calls’ from the drop-down menu.
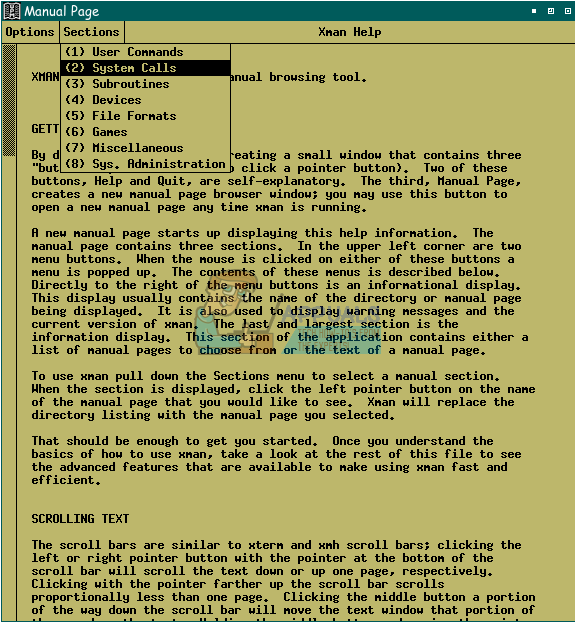
Once an option reading “intro” appears, select that. A page from the Linux Programmer’s Manual that will teach you quite a bit about system calls will then greet you.
