How to Insert a Running Head for APA Style in Word
APA (American Psychological Association) style is one of the most used writing styles for academic documents. Books, science journals, articles and essays that are written in APA style all follow a specific suite of guidelines designed to improve reading comprehension.
For the most part, formatting your paper for APA style is pretty straightforward. While most of the APA guidelines are simple, newcomers often get suck when having to insert a running head in their papers.
Think of the running head like a shortened version of your title. It should appear in uppercase letters at the top left of each of your pages. The purpose of the running head is to identify the pages of your paper and keep them together without having to use your name. A running head will do a good job of preserving your anonymity if you submit your work for a blind review.
A running head should not be more than 50 characters long and should contain a brief version of the title of your paper. This does not mean it’s a good idea to copy the first 50 characters of your paper’s title. You need to decide on a running head that doesn’t seem forced and gives the reader an idea of what the paper is about.
All word processing programs have some kind of automatic header feature that will let you insert a running head easily. There’s no need to insert it manually on each page when you can do it once and the software will automatically align it with the default setting.
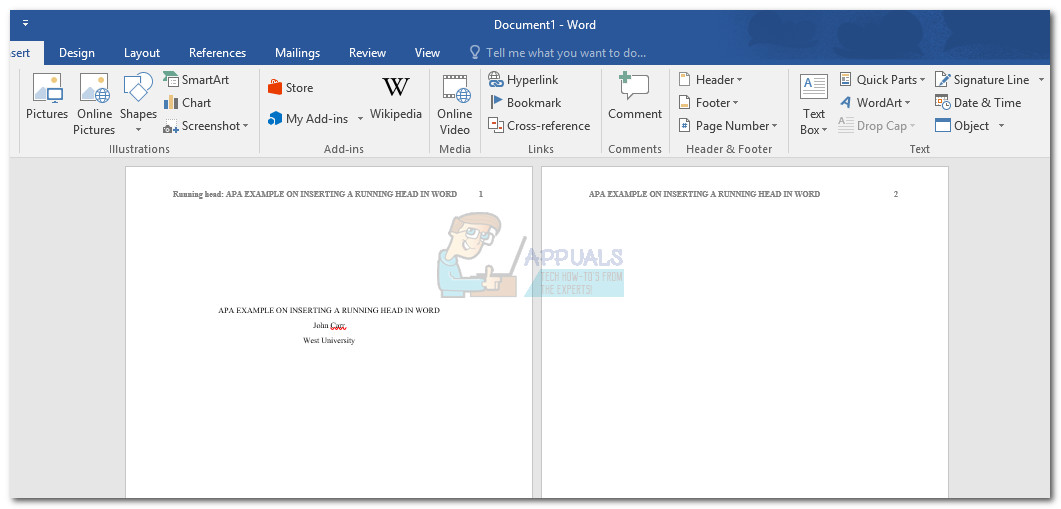
Currently, APA style requires a running head and page numbering on manuscripts. The running head will be located in the header area in the top-left corner. When writing in APA style, the phrase “Running head:” and the title appears only on page one. Starting with page two, only the actual running head appears in the header area.
Below you have a complete set of instructions that will show you how to insert a running head using APA style in Microsoft Word.
Inserting a Running Head with APA Style in Microsoft Word
Before inserting the running head into place, it’s important to make sure that the document is successfully formatted for APA. Follow the steps below to format your document and insert a running head along with page numbers using Microsoft Word:
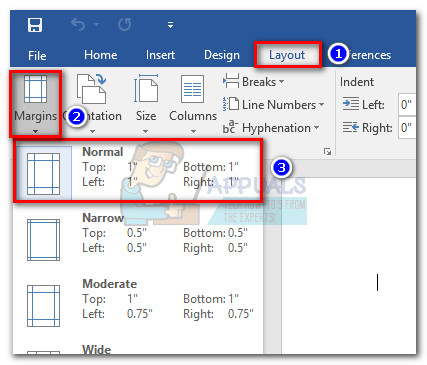
- Let’s start by setting the appropriate margins for your document (1 inch on all sides). With the file opened in Microsoft Word, go to Layout ( Page Layout on older versions), click on Margins and select Normal.
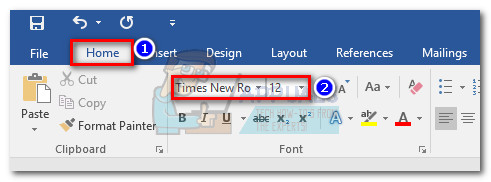
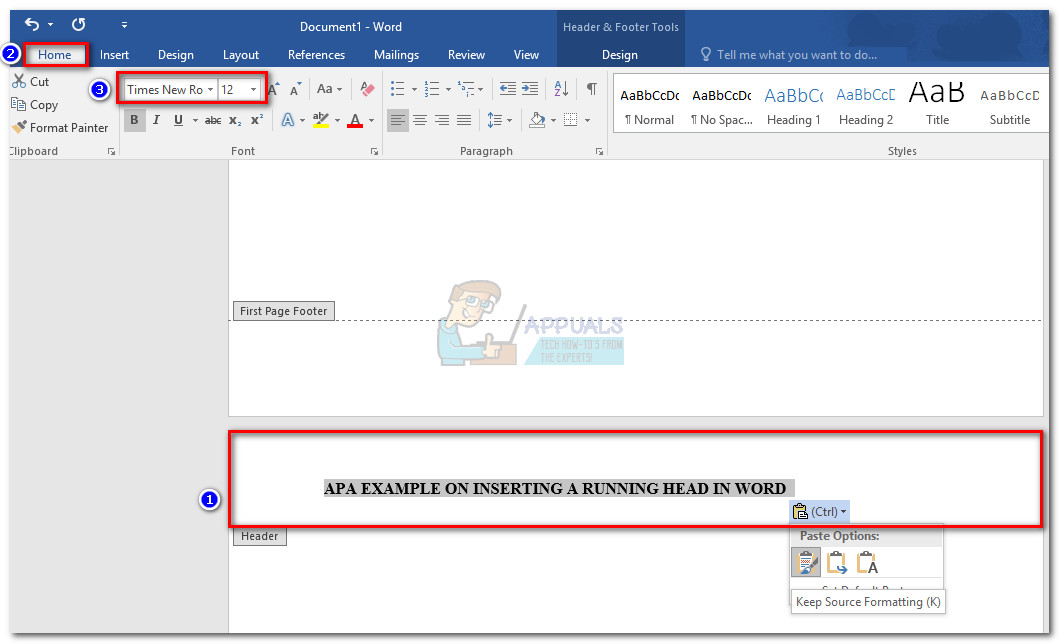
Set Margins of Word Document - Next, open the Home tab and set the font style to Times New Roman and the font size to 12 points.
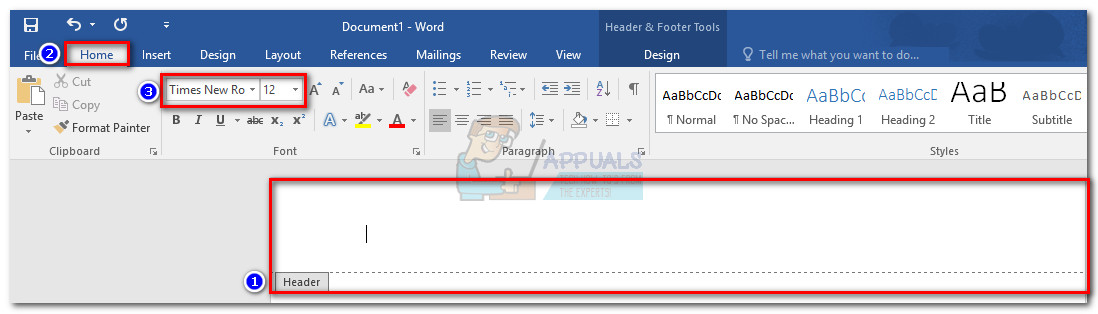
Set Font for Word Document - Keep in mind that Microsoft World will require you to set the font style and size for the header separately. To do this, double-click along the top of the page to open the Header & Footer Tool. Then, open the Home tab and set the font style and font size for the header.
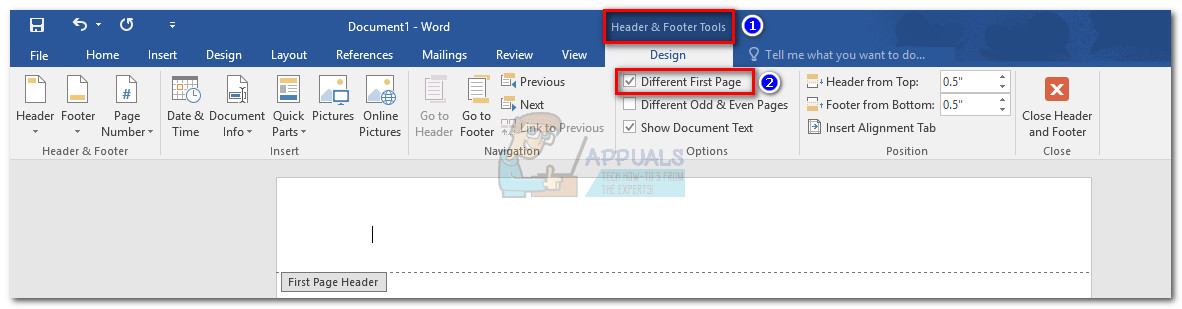
Set Font for Header & Footer of a Word Document - Next, with the first header opened, access the Header & Footer tools and make the box next to Different First Page is checked. Make sure you don’t type anything before you check the box.
Check Different First Page Option for Header & Footer - In the First Page Header, type “Running head:”, followed by the title of your paper. In this example, our first-page header looks like this: Running head: APA FORMATTING EXAMPLE ON INSERTING A RUNNING HEAD IN WORD.
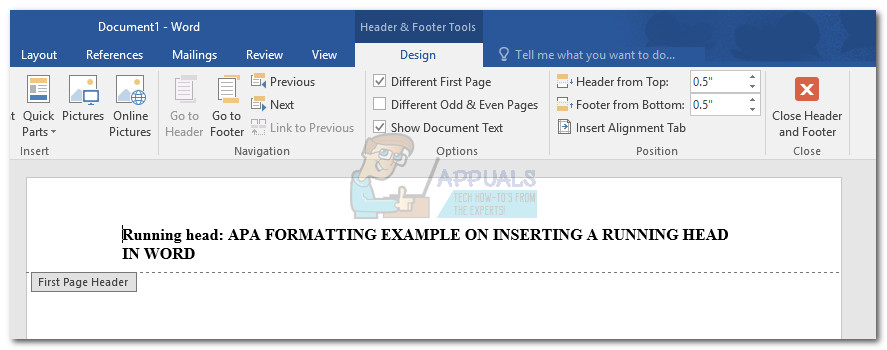
Type Running head in Header & Footer Note: Remember that the phrase “Running head:” should start with an uppercase letter followed by lowercase and the actual running head should be written with uppercase letters.
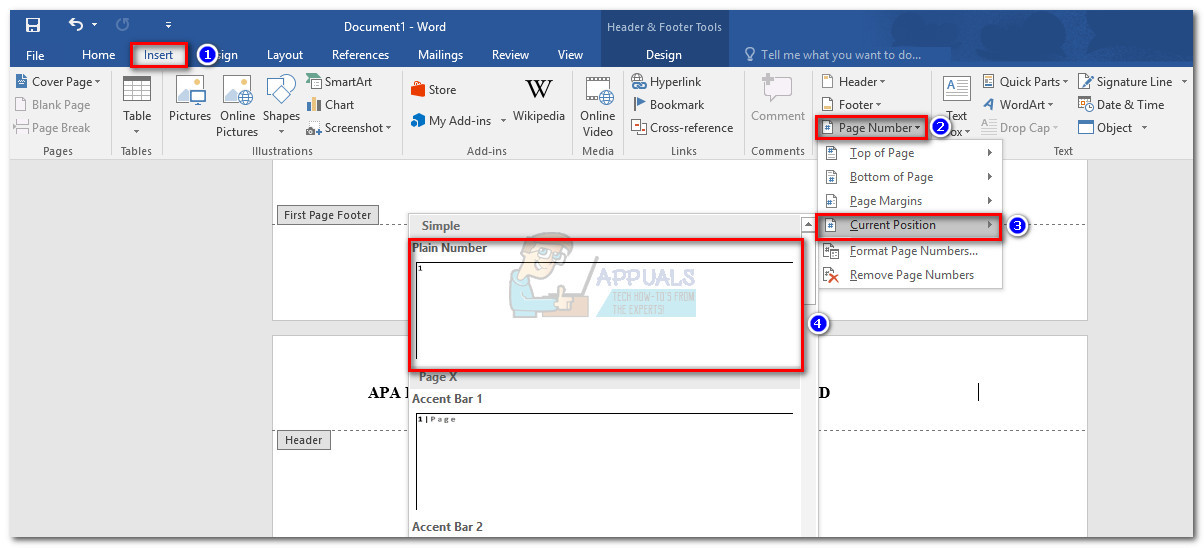
- After you successfully type the running head on the first header, position the cursor to where you want the page number to be inserted. Then, go to the Insert tab and click on Page Number. Next, select Current Position and click on the Plain Number thumbnail. At the end of this process, you’ll notice that page 1 will be inserted automatically.
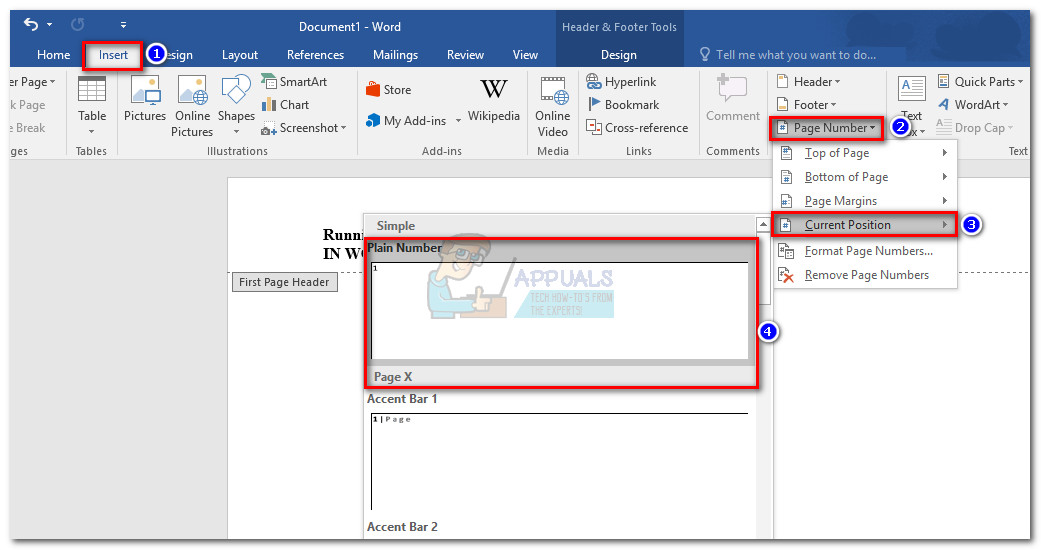
Insert Page Number at Current Position Note: You must use the Insert command for your first-page number. Otherwise, the page numbering will be off for the rest of your document.
- With the first running head inserted and the first-page number in place, click the Close Header and Footer button.
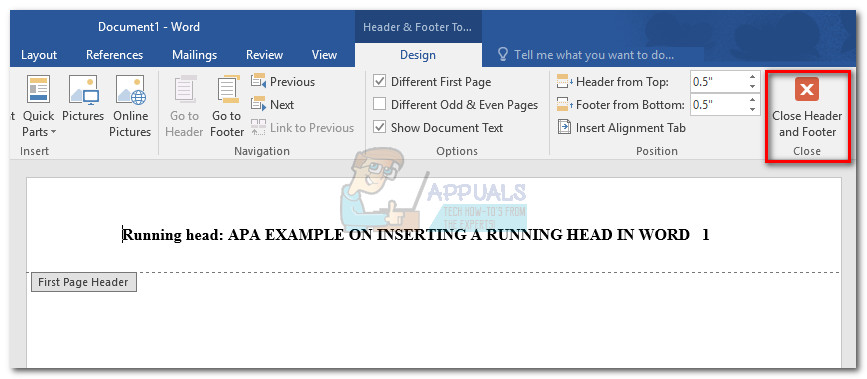
Close Header & Footer Note: You can also double-click outside the dedicated header space to exit the Header & Footing tool.
- Once you have successfully exited the Header & Footer tool, you can start typing your title page information. Once you have all the information you need on the first page, move the cursor below the last line of text and go to Insert and choose Page Break.
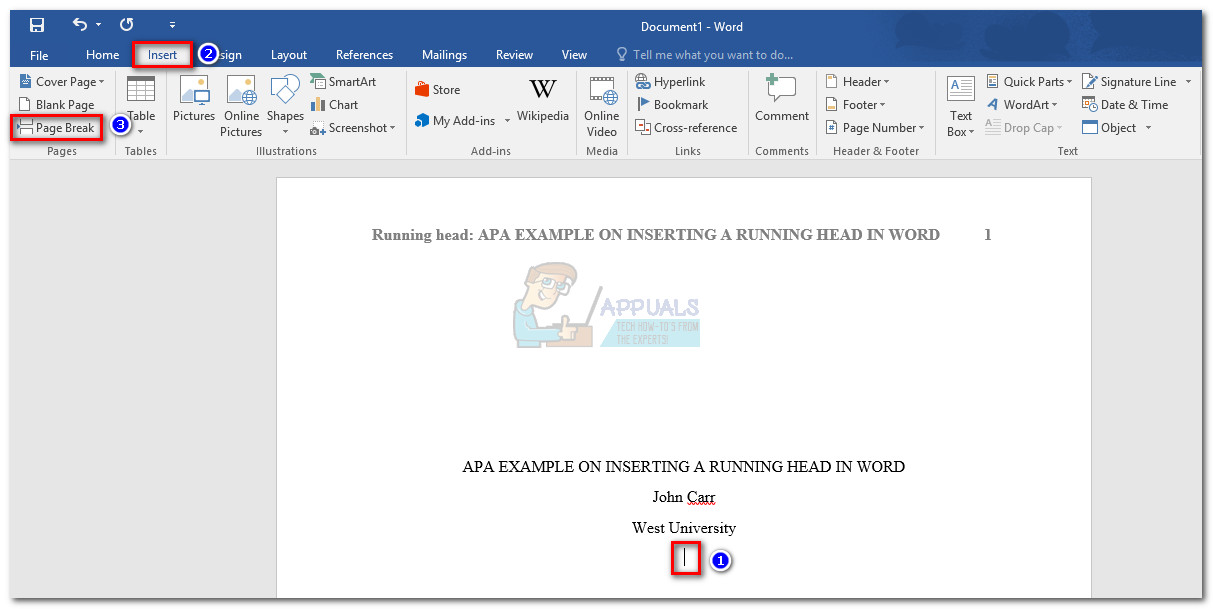
Insert Page Break Note: You’ll notice that the cursor will jump automatically to the next page. This is a sign that the page break is in place.
- Next, scroll down to the second page and double-click again on the header section to open the Header & Footer tool. Check to see if you have the correct font and font size, then type or copy only your running head (without the “Running head:” phrase).
Confirm Header & Footer Font Size - Next, position the cursor to where you want the page number inserted (ideally in the same location as the number on the first page). Then, go to the Insert tab > Page Number > Current Position and select Plain Number. If the page break was previously inserted correctly, page two will automatically be inserted.
Insert Page Number - With the running header in place, you can double-click outside the header section to close the Header & Footing tool.
Close the Header & Footer Note: For every new page you insert from now one, Word will automatically add the running head and the page number. If you decide to delete a page from the middle of the document, the page numbers will automatically be adjusted.
That’s it! Your document is now fully formatted for the APA style. With the running head and page number in place, you can start working on the Abstract page.
I have been trying to set up a running head for my paper for an hour and literally every other website and video I watched did not help at all. Upon finding this website instruction, I was able to figure it out in minutes. Thanks so much for the helpful and direct instructions!