How to Easily Delete A Facebook Page on Mobile & Desktop
 Reviewed by Huzaifa Haroon
Removing a Facebook Page can seem intimidating, but it’s quite simple. In this article, we will show you how to delete your Facebook Page in a few easy steps, whether you no longer need it, want to clean up your digital footprint, or simply want to start afresh. Perhaps you’re just fed up with the flurry of glitches on the platform.
Before you start, it is worth noting that once the Page is deleted, Facebook provides a 14-day window to recover it, but after that, the page is gone for good.
If you follow these steps carefully, you can remove any unnecessary Pages from your profile without hassle.
Download Your Page Data Before Deleting It
Before deleting your Facebook Page, save a copy of its data. Follow the steps below for this:
- Launch Facebook and select the descending arrow located at the upper right corner of the Facebook interface.
- Navigate to the “Settings” option.
- Select “Your Facebook Information” in the left-hand column in the settings menu.
- Locate the “Download your information” section and click “View.” On the following Page, ensure that only the desired box is checked while all others remain unchecked.
- Define the “Date Range,” choose the “File type,” and specify the “Media Quality.” Once you’ve set these preferences, click on “Create File.” A notification informing you that a copy of your information is being compiled will appear.
- Facebook will notify you when your data copy is ready. You can then download it from the “Available Copies” section.
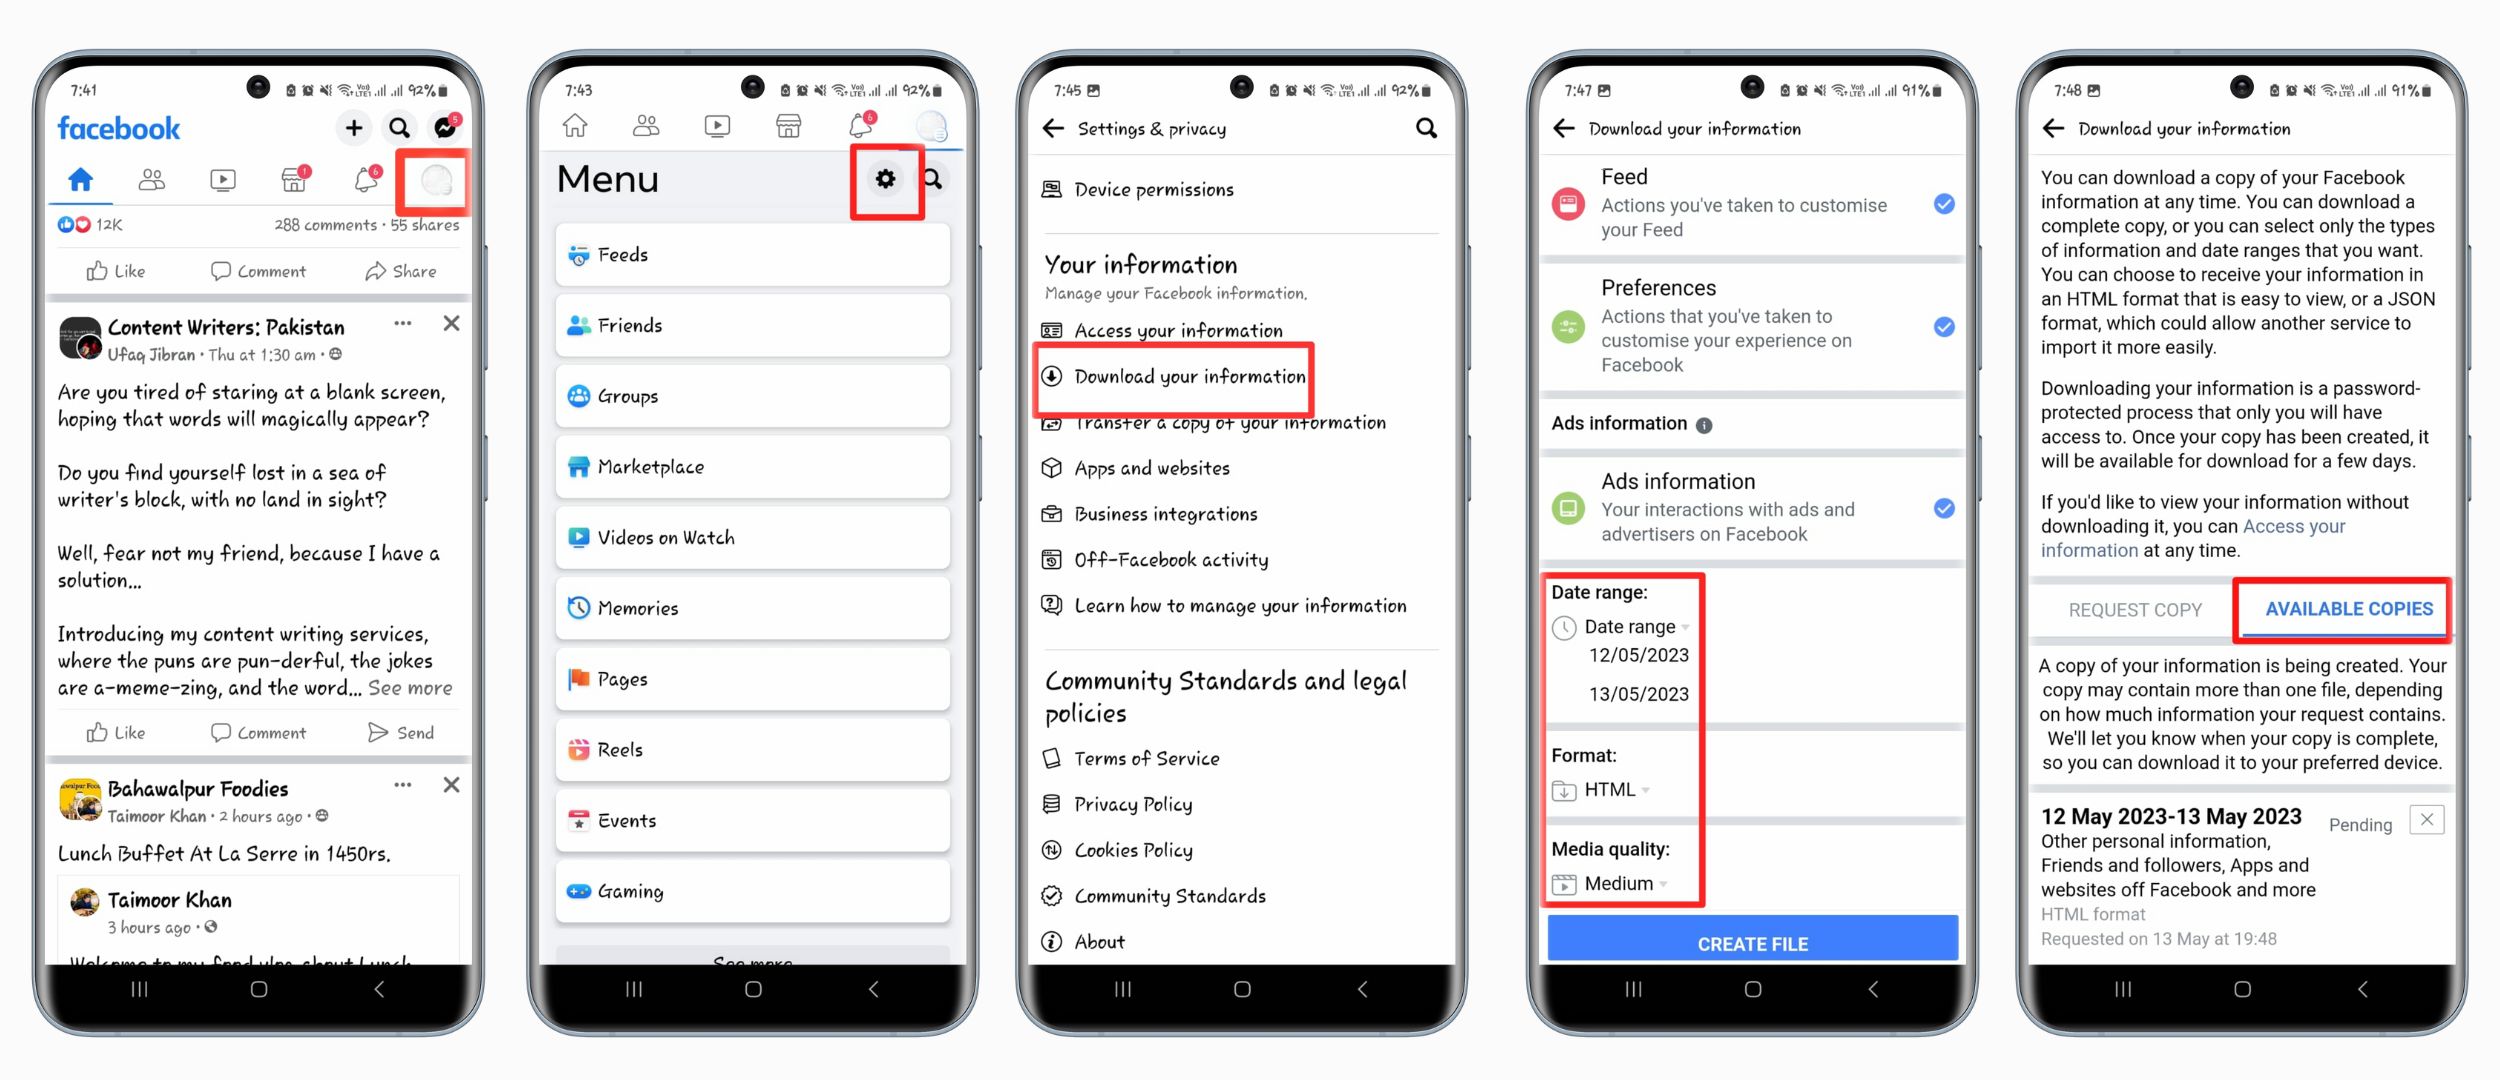
You have saved a copy of your Facebook Page data for later offline access. You can put it to use elsewhere or save it for later.
Delete A Facebook Page on Desktop
Here are the steps to take if you want to get rid of that Facebook Page for good:
- Visit Facebook.com and sign in with your account information.
- To access Pages, go to the left sidebar on the Facebook homepage.
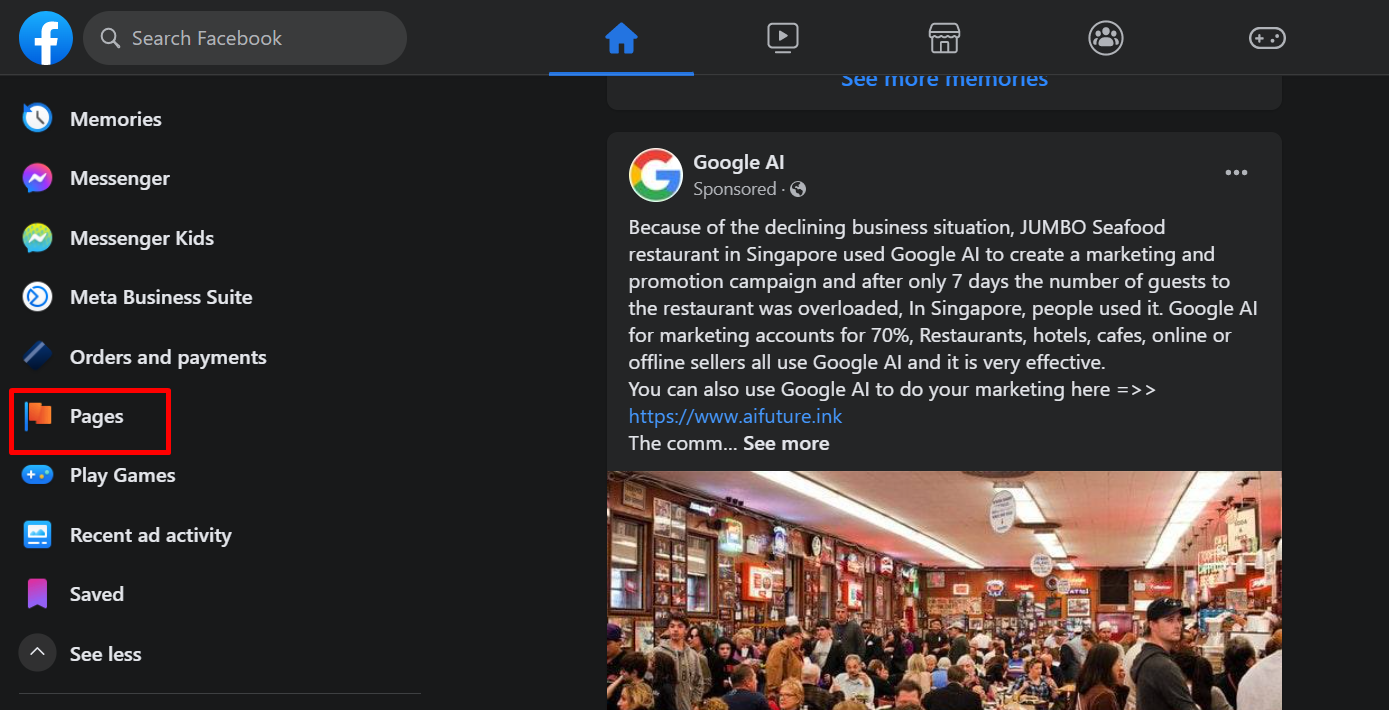
Open Pages from left sidebar - Navigate to the “Pages you manage” section and select the Page you wish to delete.
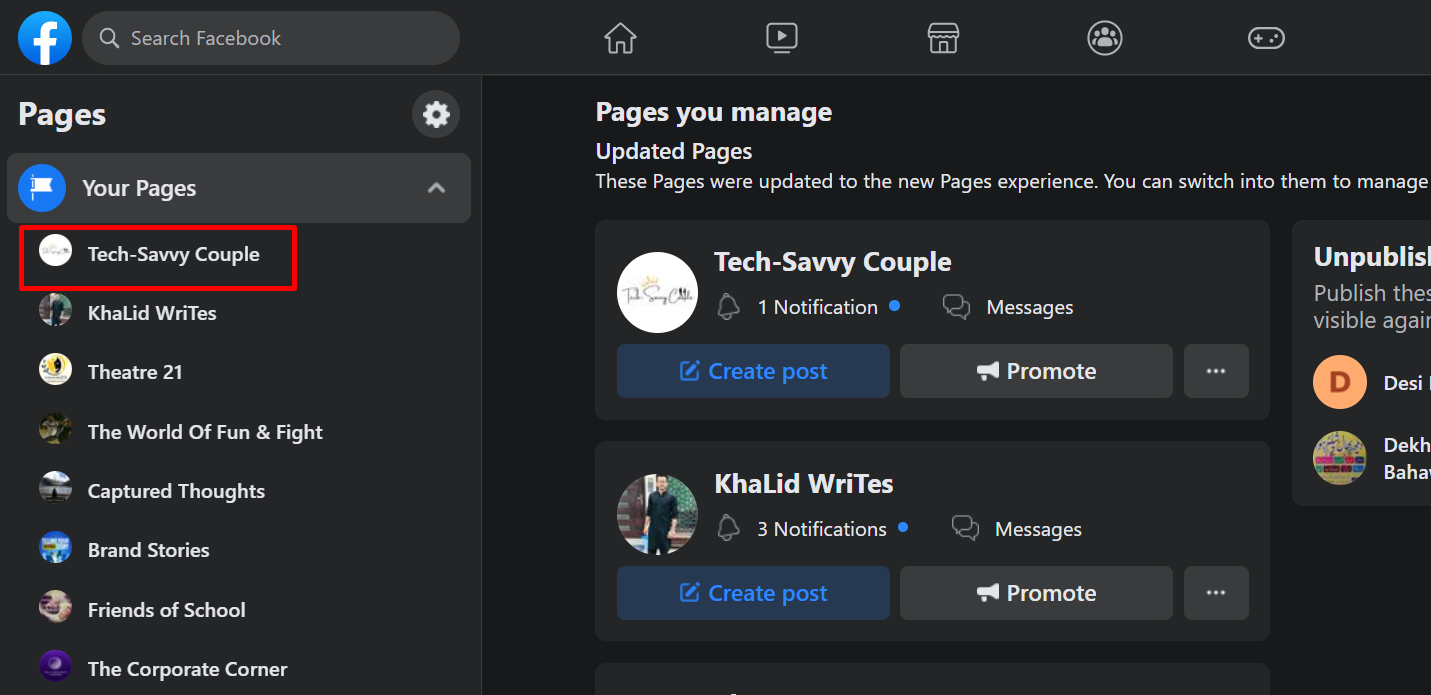
Choose the Facebook Page you want to delete - Select Settings from the submenu at the bottom of the left-hand sidebar menu. If you cannot click the Settings button here, switch the main profile to your Page.

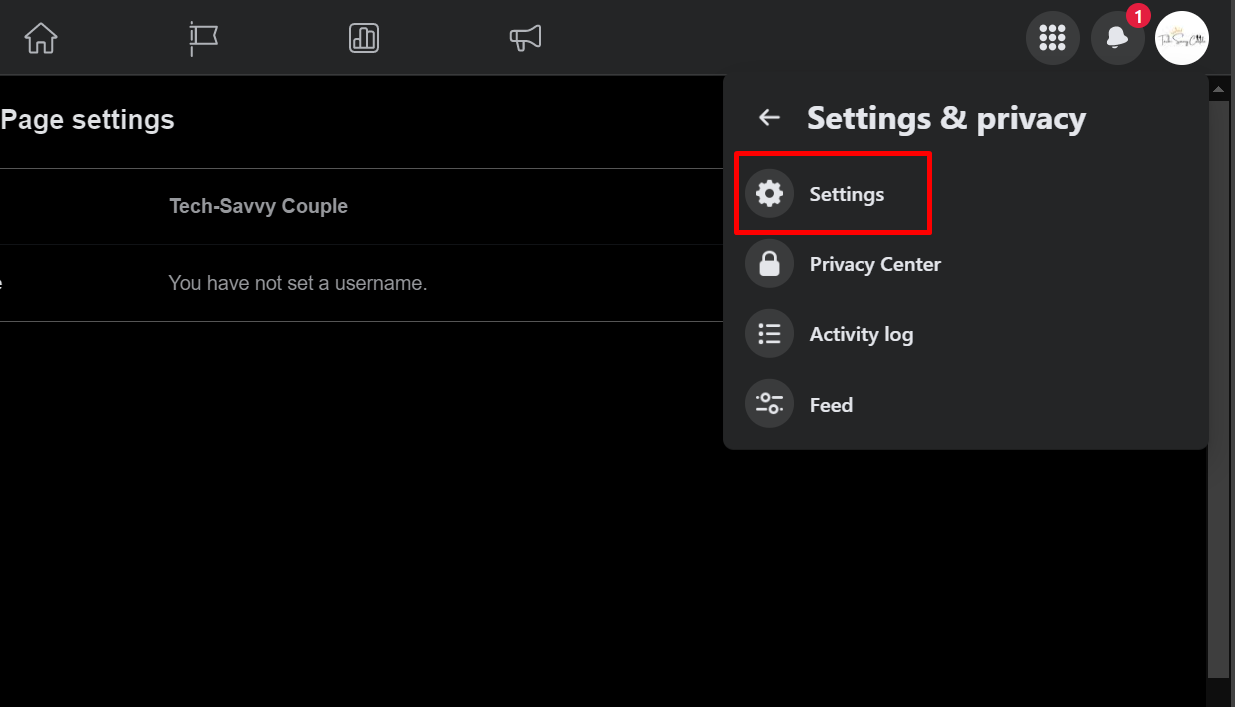
Switch to Page profile - When the profile is switched, click on the small Page’s picture in the top right corner and click “Settings & Privacy.”

Open Settings & Privacy - Click on “Setting” to open Page settings.
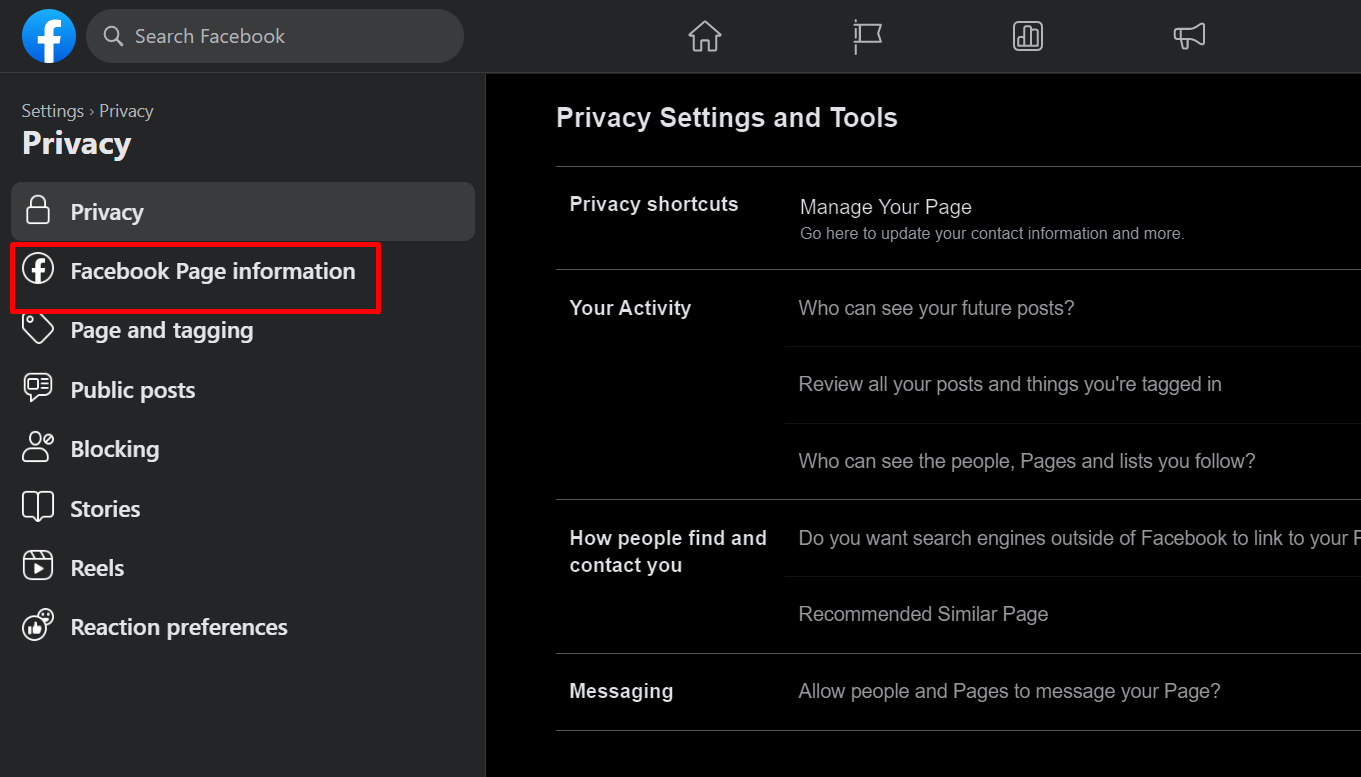
Open Settings - Open the “Privacy” tab.
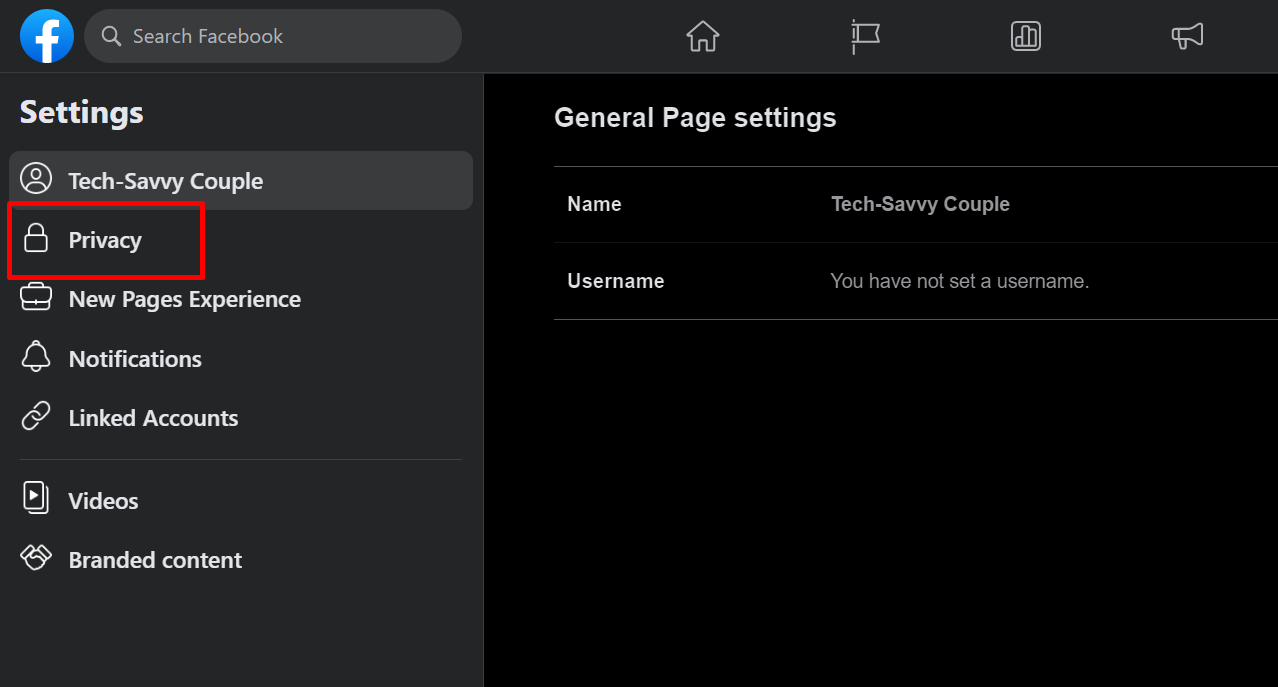
Click on Privacy - Now click on the “Facebook Page information” to open details about the Page.
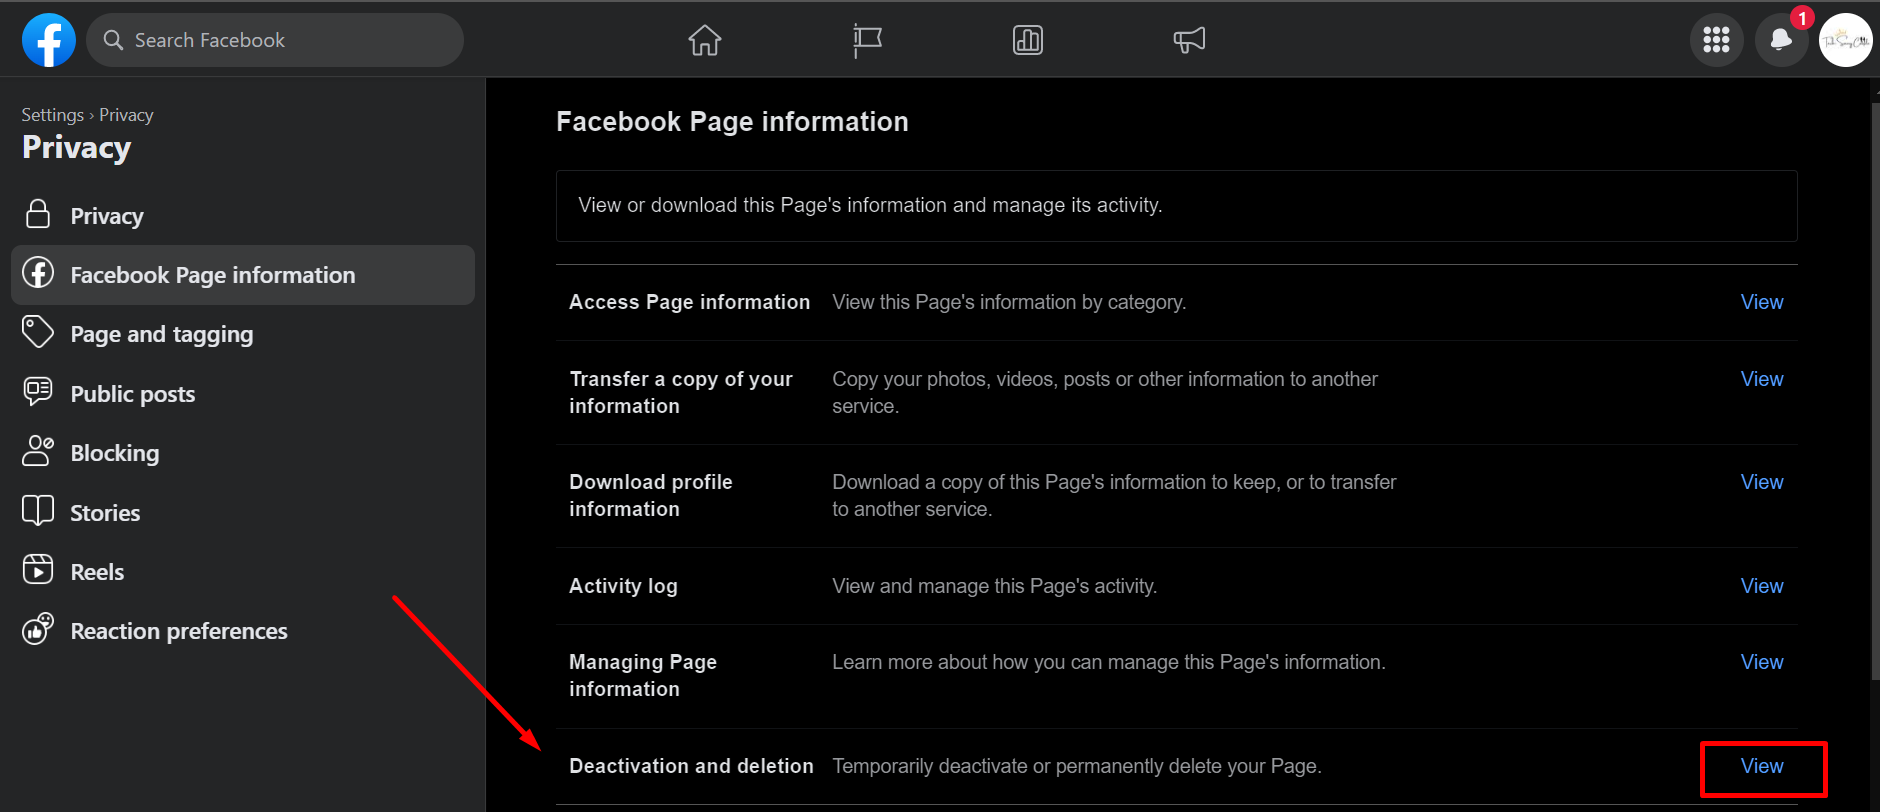
Open Facebook Page Information - Open “Deactivation and deletion” from several options by clicking on the “View” button.
Open Deactivation and deletion by click on View button - Select Delete Page, then click Continue and follow the on-screen instructions. You may be asked to re-enter your password.
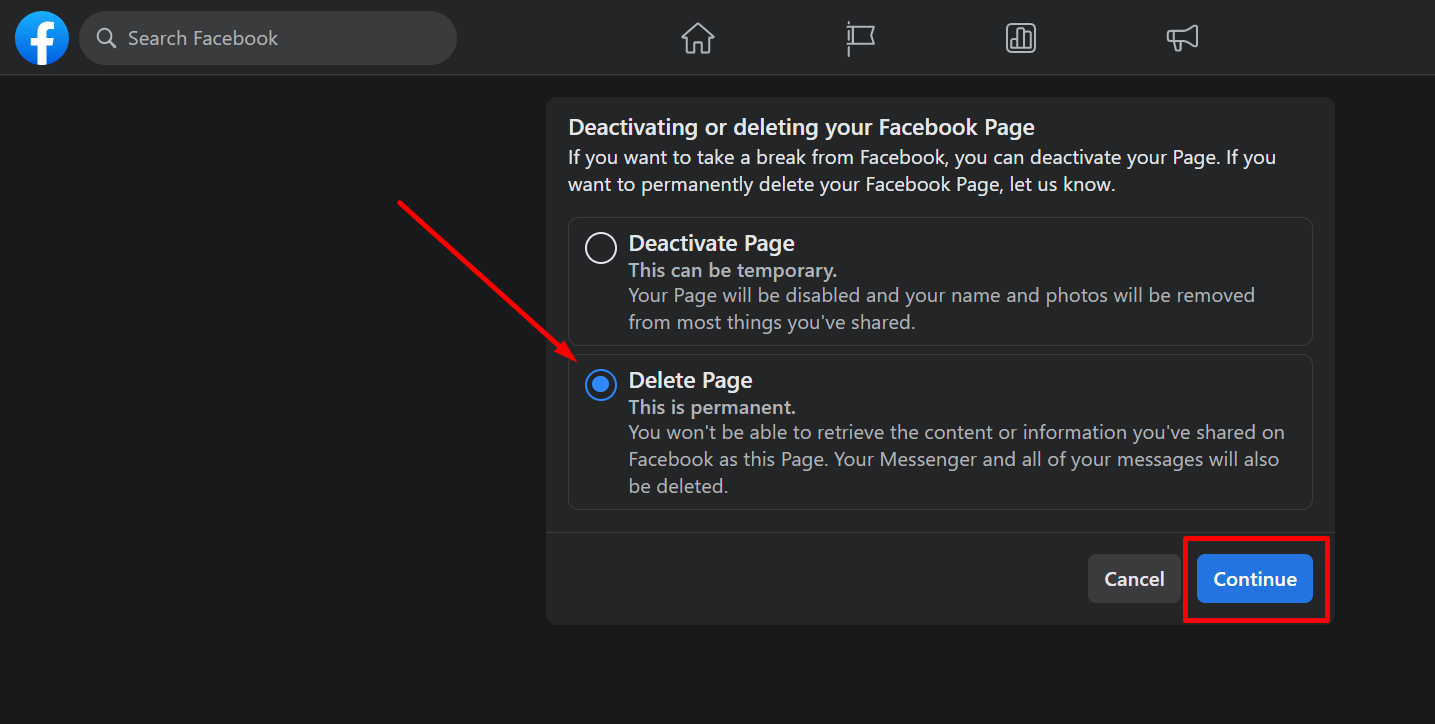
Select Delete Page and click Continue
After confirmation, your Page will be deleted after 14 days grace period.
Delete A Facebook Page Using The Mobile App
You can deactivate a Facebook Page from your Android phone, iPhone, or iPad if you can’t access a desktop computer. To get rid of a Facebook Page from your mobile device, follow these steps:
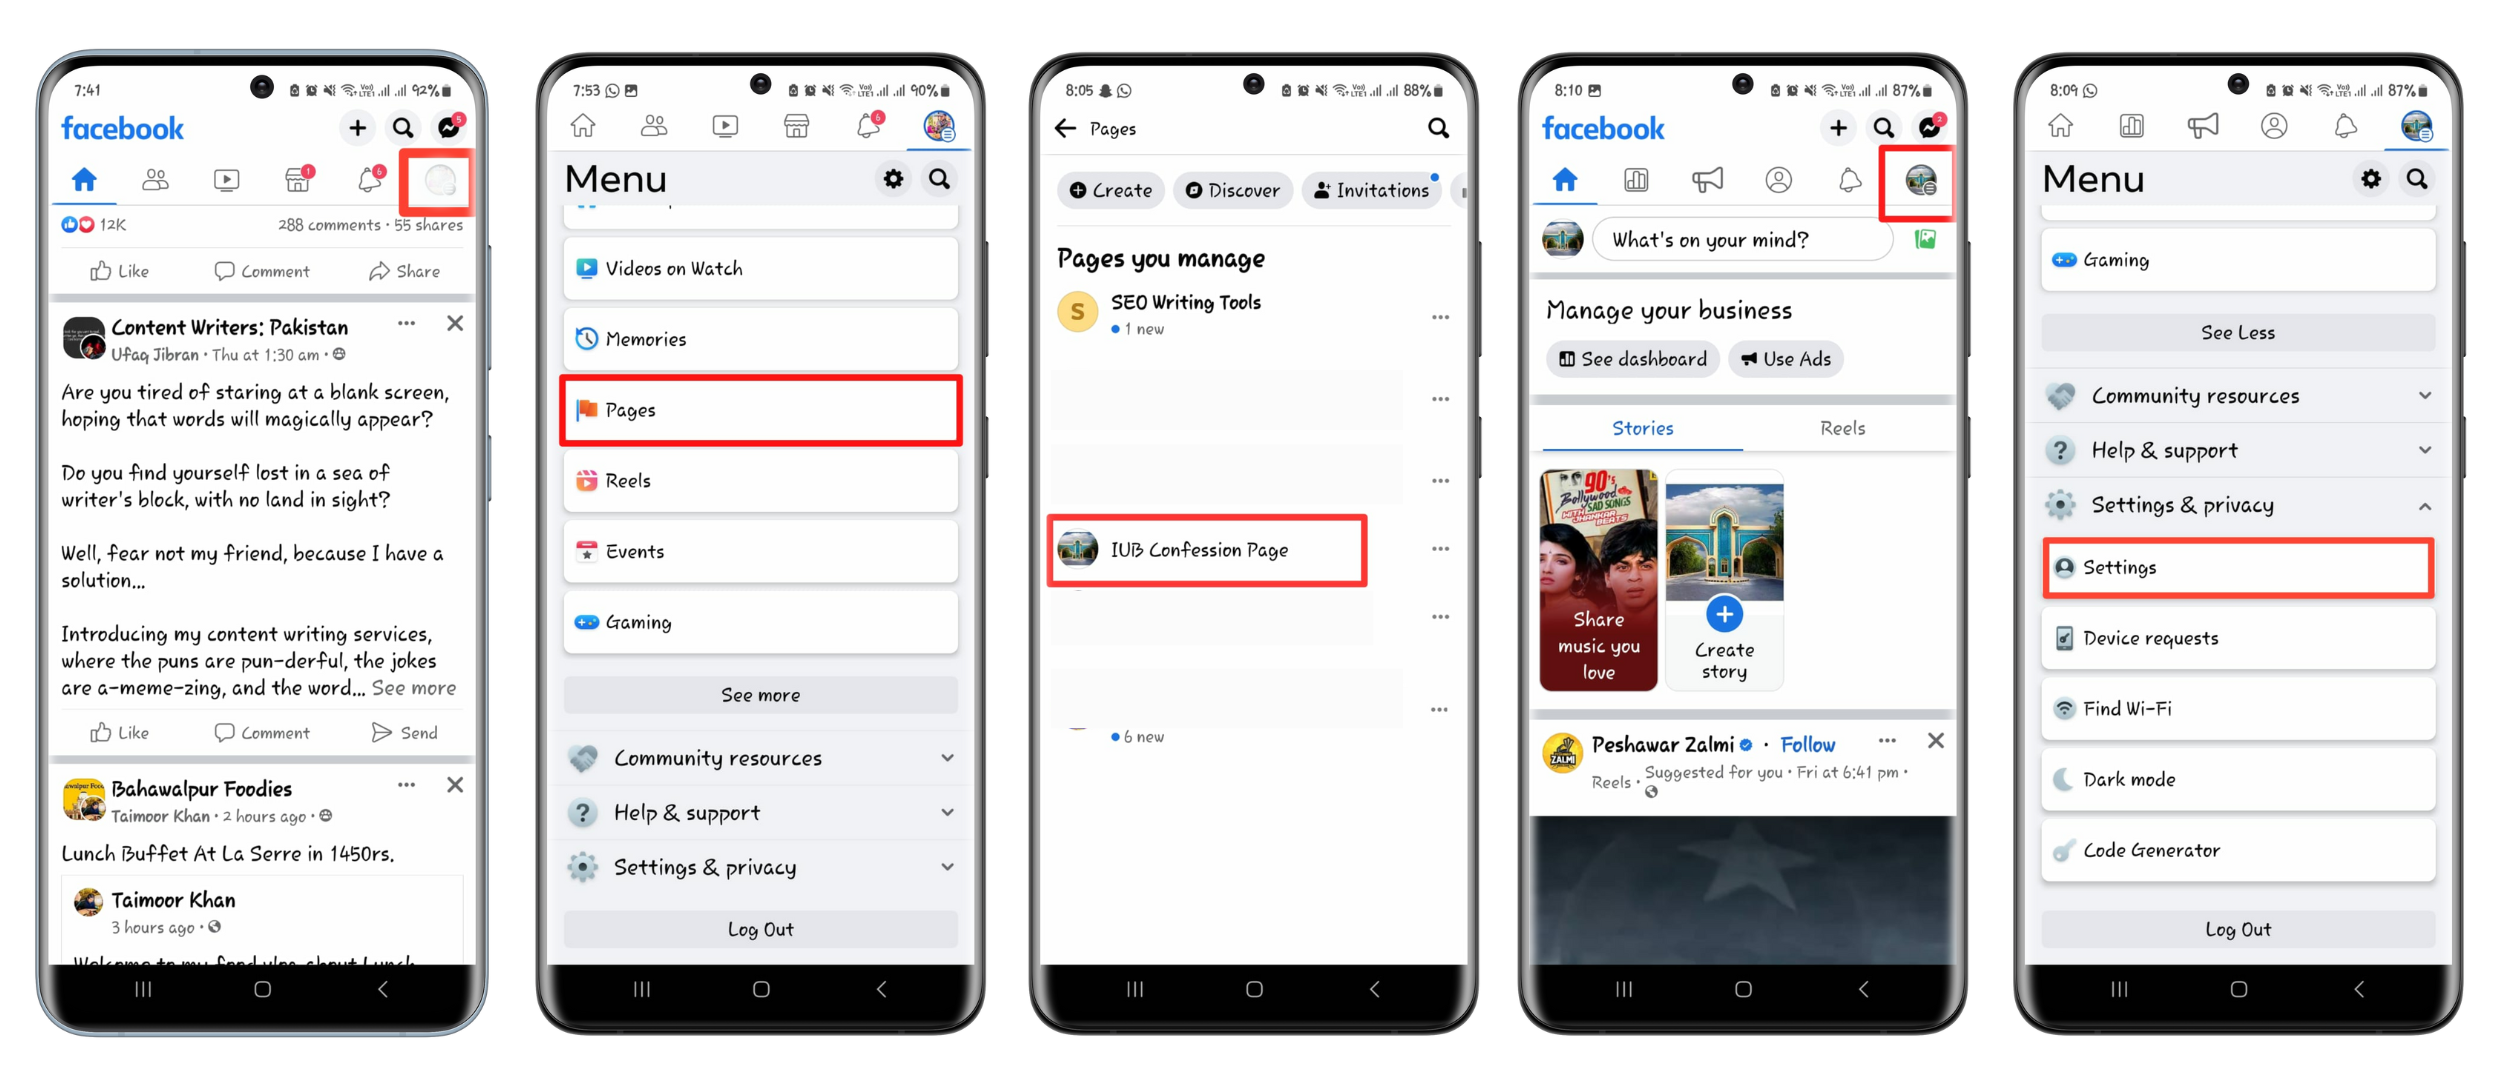
- Open the Facebook app on your mobile device.
- Tap on the three horizontal lines (Menu) at the bottom right on iPhone or at the top right on Android.
- Scroll down and select “Pages.”
- Select the Page you want to delete. Your profile will be switched to the Page profile you just selected.
- Once on the Page, tap the “More” option (three dots) in the upper right corner.
- Scroll down and tap “Settings” by opening the Settings and Privacy.
Delete Facebook Page from mobile app - In the new menu, scroll down to “Page Settings.”
- A new menu will appear. Find and click on the “Access and Control” tab here.
- Tap on “Deactivation and deletion.”
- Select “Delete Page” from the two options on the screen and click “Continue.”
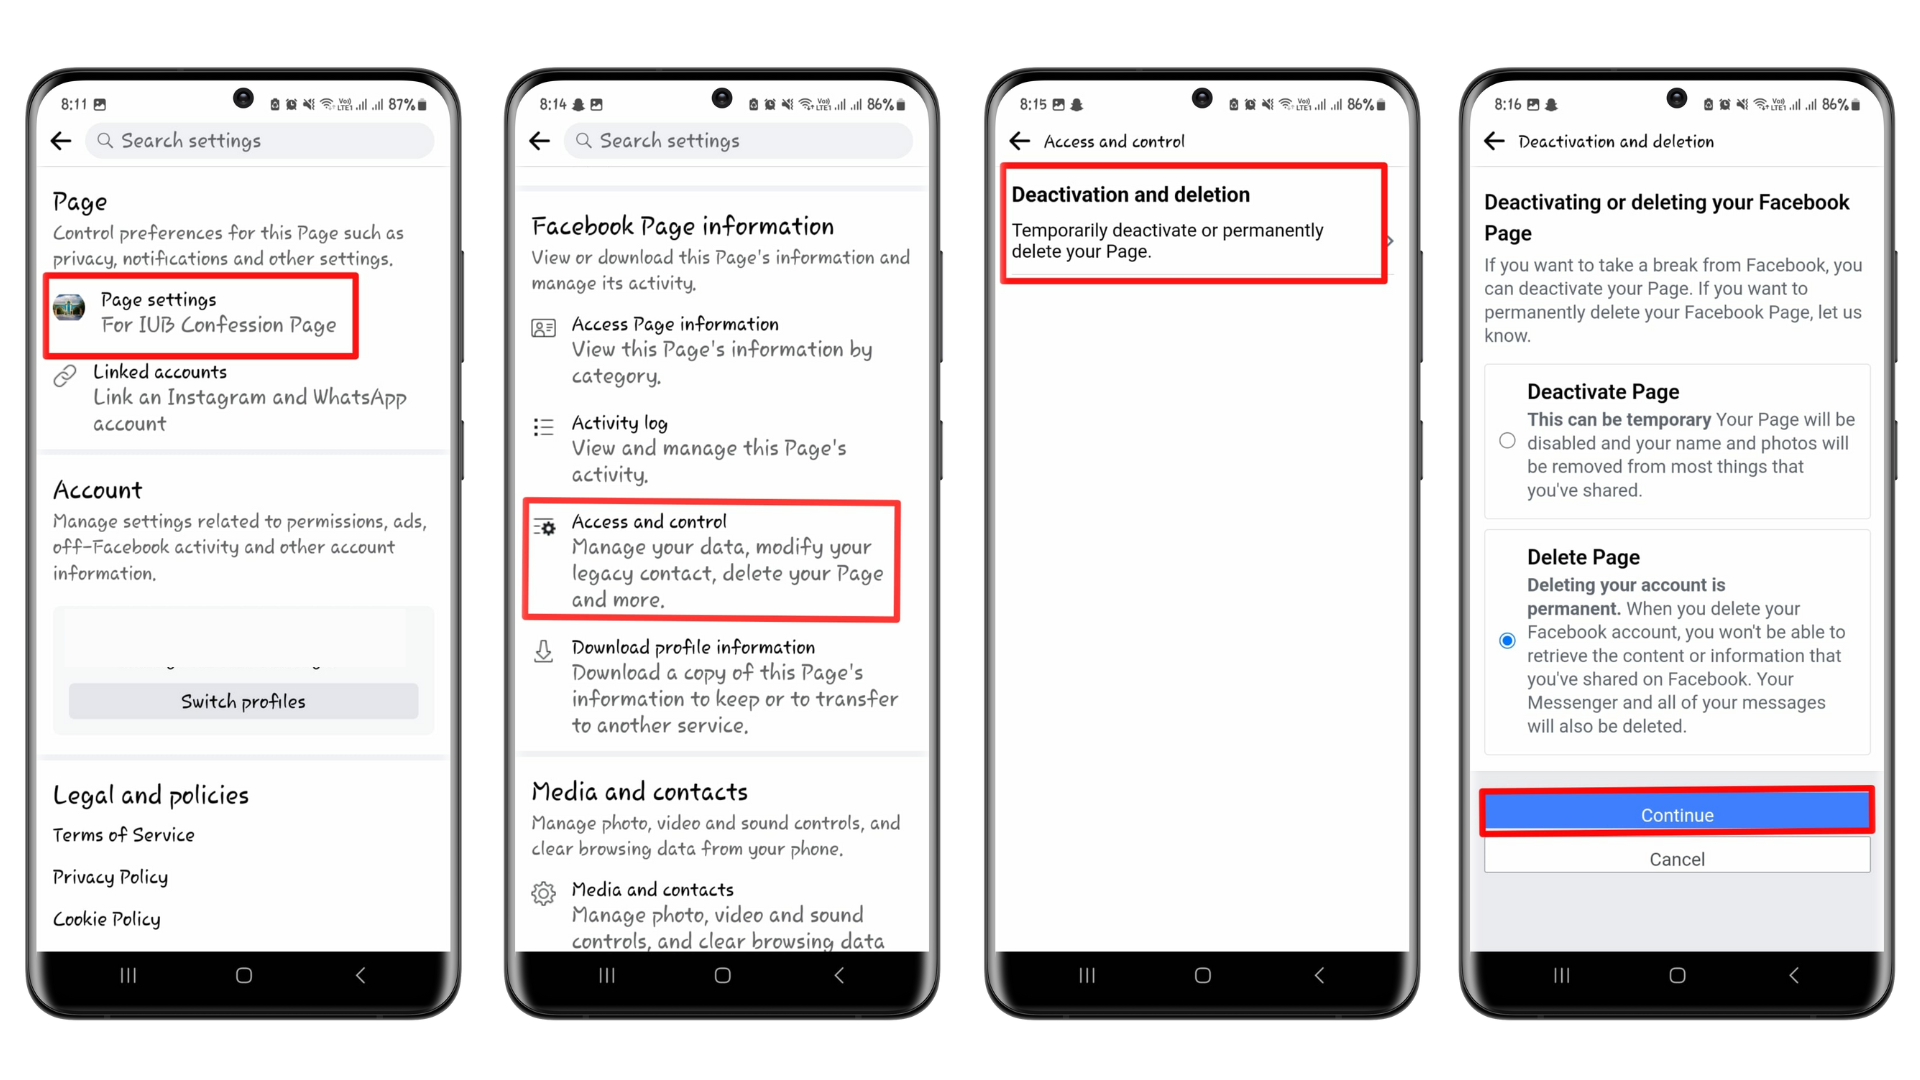
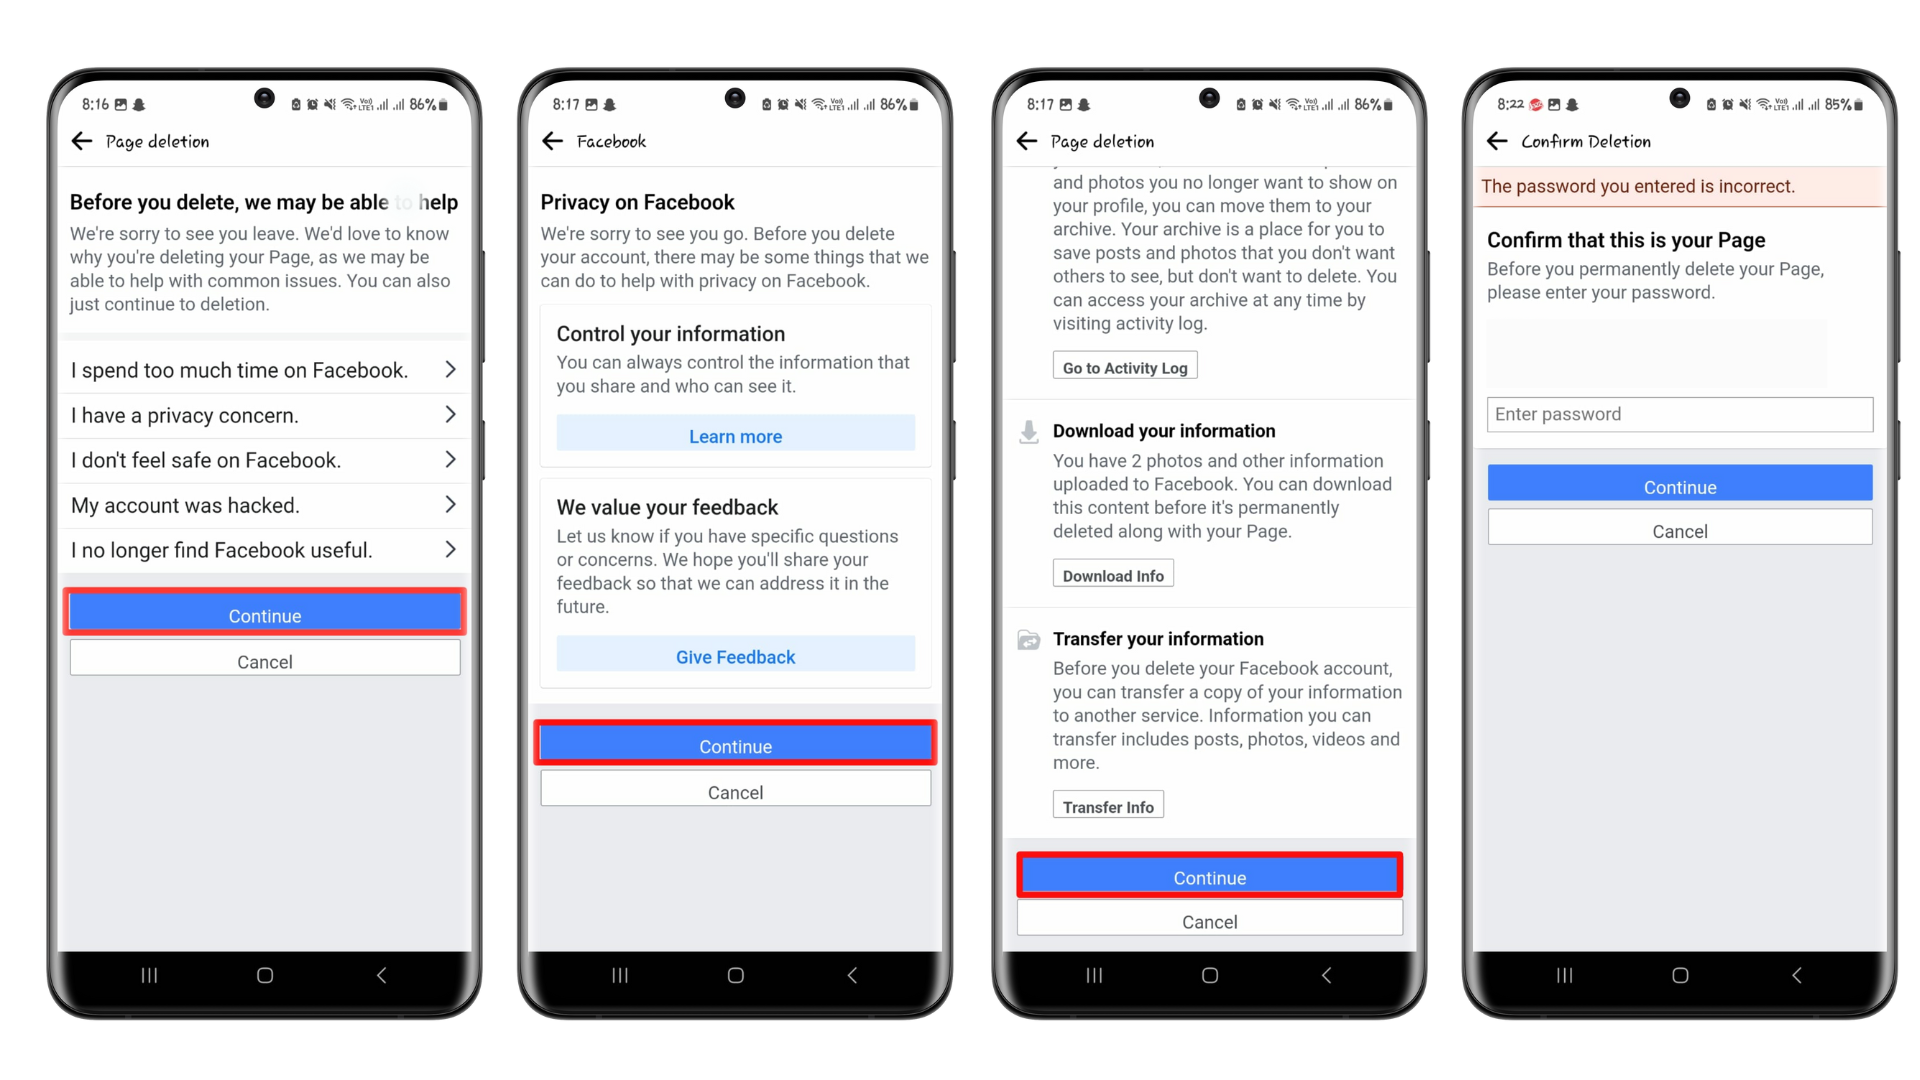
Delete Facebook Page from mobile app - Now select any possible reason for Page deletion and click Continue.
- You will be asked to provide feedback to Facebook about this deletion. Just click “Continue” one more time.
- You’ll see options for downloading or transferring your information here. If you have done that already, click on “Continue.”
- Enter your password to confirm the deletion. Once you click “Continue,” you will be notified that your Page deletion process has started, and you can reverse this within 14 days.
Delete Facebook Page from mobile app
Reviewed by Huzaifa Haroon