How to Fix “Your PC isn’t connected to the internet” Error on Windows 10
Even though it’s a fairly basic thing that people use on an everyday basis, Internet connectivity with Microsoft Windows can be a tricky thing. Ever since Windows 7, there has been a strange error plaguing users worldwide. The Internet connection is fully working, however browser-based applications will state that you are not connected to the Internet, and you may even get this issue with Windows Update.
Symptoms of this issue are Windows refusing to update, no Internet connection in the toolbar icon, and no connection in the Network Sharing Center. You may even see a yellow exclamation mark on top of the internet icon in the toolbar.

There are, however, a few things that you can try that can solve this issue, even though Microsoft refuses to acknowledge that it’s a problem, and it hasn’t been fixed in a number of updates that came out for Windows.
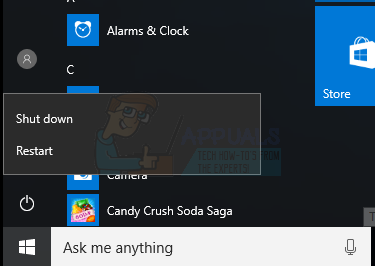
Method 1: Reboot your system
Even though this might seem like a generic “Turn it off, then on again” solution, it actually helps oftentimes with this issue. Simply open the Start menu on your computer, and select Restart instead of Turn off. Wait for your system to turn on and see if you’re facing the issue again. As previously mentioned, it is a known issue and it might come back since it is a problem with the OS, and if it does, you can move on to the next methods and see if they’re better.
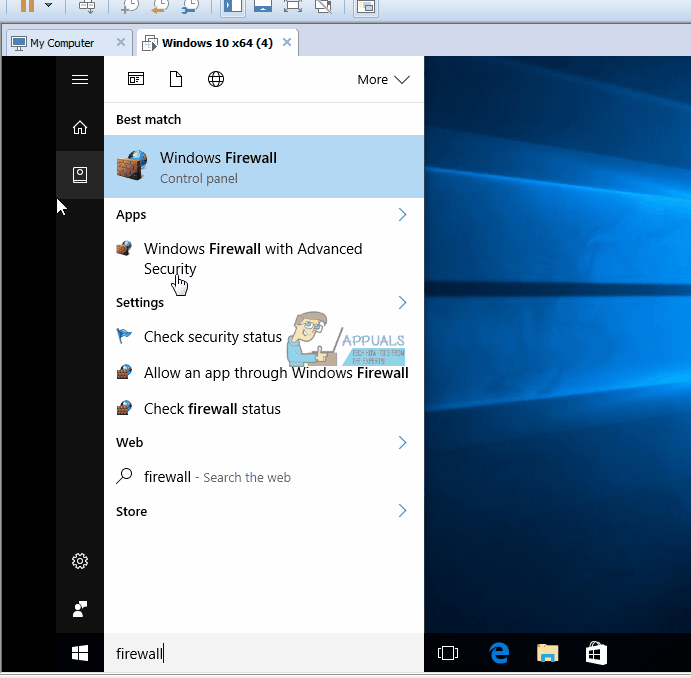
Method 2: Check your firewall and antivirus
If rebooting doesn’t solve the issue, a good advice would be to see if maybe your firewall or antivirus software is blocking your access.
- Press the Windows key on your keyboard and type Windows Firewall. Open the result.
- To the left side, you will see a link Allow an app or feature through Windows Firewall. Click it to see all apps that currently have access through the Windows Firewall. Carefully go through the list, and see if there’s anything that you’re using, such as your browser (Chrome, Firefox, Edge for example) that is getting blocked. If there is, make sure you check the boxes to allow access.
- If everything is okay, you should check your antivirus software. All applications are different, but when you’ve opened it, look for something like Apps allowed access or similar, to get to a list of applications that can get through the antivirus and access the Internet, as well as ones that are blocked. Again, go through that list and see if you can find your browser. If yes, make sure that it is allowed access for it to function properly.
Method 3: Restart/reset your router
If everything is okay on your computer’s side, the problem may be your router. You can try first restarting it, and if it doesn’t work, resetting it.
- To restart your router, simply plug it off and plug it in again. Wait for it to connect to the internet and see if the problem persists.
- If that doesn’t work, reset your router with the reset button you can find on the side or back of your router. Use a ballpoint pen or a paper clip to press it, and hold it for about 10 seconds. Again, wait for it to reestablish a connection and see if the problem is still there.
Method 4: Diagnose Network Manually
Hold the Windows Key and Press X. Choose Command Prompt (admin) and type the following commands in the command-prompt:
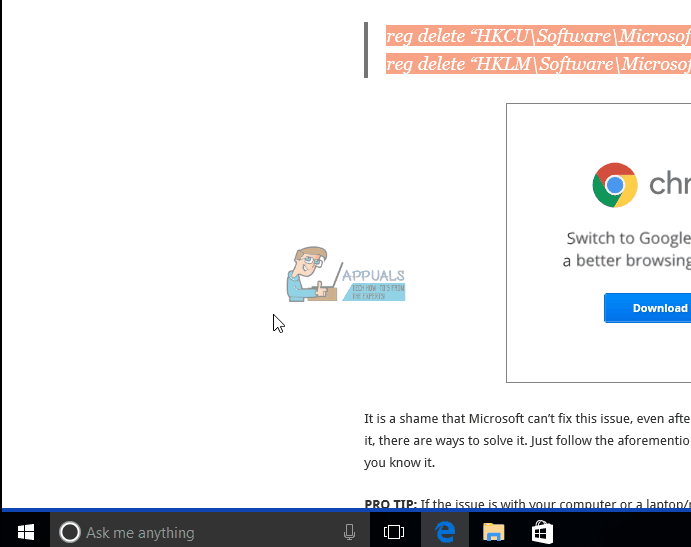
reg delete “HKCU\Software\Microsoft\WindowsSelfHost” /f
reg delete “HKLM\Software\Microsoft\WindowsSelfHost” /f
Once the above is done, copy the commands below and paste it again into the command prompt window and press enter.
sc config BFE start= auto
sc config Dhcp start= auto
sc config DiagTrack start= auto
sc config DPS start= auto
sc config lmhosts start= auto
sc config MpsSvc start= auto
sc config netprofm start= auto
sc config NlaSvc start= auto
sc config nsi start= auto
sc config Wcmsvc start= auto
sc config WinHttpAutoProxySvc start= auto
sc config Winmgmt start= autosc config NcbService start= demand
sc config Netman start= demand
sc config netprofm start= demand
sc config WinHttpAutoProxySvc start= demand
sc config WlanSvc start= demand
sc config WwanSvc start= demandnet start DPS
net start DiagTrack
net start BFE
net start MpsSvc
net start nsi
net start NlaSvc
net start Dhcp
net start BITS
net start wuauserv
net start WinHttpAutoProxySvc
net start Wcmsvc
Method 5: Manually reset your TCP/IP settings
- Press the Windows key on your keyboard, and type cmd. Open the result.
- Once in the Command Prompt, type in the following command, and press Enter on your keyboard to execute it:
netsh int ip reset resetlog.txt
- Once the command has been successfully executed, reboot your computer.
Method 6: Change the frequencies on your wireless adapter
This method applies for users who have issues with wireless connectivity, and one of the steps might vary, depending on what kind of network adapter you have on your device, but more on that later.
- Press the Windows key on your keyboard, type in Network and sharing center and open the result.
- On the left side, click the link that says Change adapter settings.
- You will see a window with your network adapters. Find the Wi-Fi adapter, right-click it, and select Properties from the menu.
- Click the Configure button, and in the window that opens, go to the Advanced tab
- This is the step that might be different depending on the network adapter you’re using, but what you’re looking for in the window is either HT Mode, or Bandwidth, or Bandwidth Capability. On the right side, there is a dropdown menu when you select one of the aforementioned, and the dropdown menu should have options such as 20MHz, 40MHz, 20/40MHz. This is the problematic setting, and what worked for most of the users was setting it to either 20MHz, or 20/40MHz. You’d be best off if you try both.
- Click OK and close the remaining windows by also pressing You should now have internet access.
Method 7: Check for conflicting software (BitDefender)
BitDefender has been known to cause this kind of issue, and if you use it, there are two things that you can do to try and solve this issue, and you should try them both. Keep in mind that the second one actually uninstalls BitDefender, and if you don’t want the built-in antivirus, you will need to get another one.
- Open BitDefender.
- Go to the Firewall settings.
- In the Advanced settings, there is a setting called Block Internet Connection Sharing. You should make sure that the setting is off. If this doesn’t help, your only remaining option is to completely uninstall BitDefender.
- Press the Windows key on your keyboard and type Change or remove a program. Open the result.
- From the list of software currently installed on your computer, find and select BitDefender.
- Click the Uninstall button near the top of the window and follow the instructions to complete the uninstall wizard and remove BitDefender.
- Close everything and reboot your device to save the changes.
It is a shame that Microsoft can’t fix this issue, even after a few years, but for people who are experiencing it, there are ways to solve it. Just follow the aforementioned methods, and you will be back online before you know it.