Fix: No Internet Connection on Windows 10
Unfortunately, there is a common issue experienced by Windows 10 users after installing the latest Windows updates for their computers where they see an error message stating “No Internet Connection” on their screens whenever they try to connect to the internet or access the internet in any way. In today’s day and age, computers use half of their functionality and practicality if they do not have a working internet connection – this makes not being able to use the internet on your Windows 10 computer a pretty significant problem.
Thankfully, though, Microsoft is aware of this problem, has acknowledged its existence, and is considered to be working on a permanent solution to it. The following is what Microsoft had to say regarding this problem:
“We are looking into reports that some customers are experiencing difficulty connecting to the Internet. We recommend customers restart their PCs, and if needed, visit Microsoft’s official Network Troubleshooting page. To restart, select the Start button from the taskbar, click the Power button and choose Restart (not Shut down).”
The current consensus regarding this issue is that the culprit is usually a DHCP (Dynamic Host Configuration Protocol) bug affecting the Windows 10 Operating System. As stated in Microsoft’s official statement on the matter, restarting a computer affected by this problem often sets things straight. However, if you are experiencing this problem and restarting your computer didn’t work, the following are the most effective solutions that you can use to try and fix the problem:
Method 1: Disable or Uninstall any and all Third-party Security Programs
Third-party antivirus, antimalware and firewall applications can sometimes interfere with internet access, especially following the installation of Windows updates. If a third-party security program is a reason you’re experiencing this problem, simply disable (or better yet, uninstall) any and all third-party security programs installed on your computer. Once that’s done, check to see whether or not the fix worked. If you would like to uninstall a third-party security program installed on your computer but don’t know how to do so, use this guide.
Method 2: Reset the computer’s Winsock Catalog and Internet Protocol settings
- Right-click on the Start Menu button or press the Windows Logo key + X to open the WinX Menu, and click on Command Prompt (Admin) to launch an elevated Command Prompt that has administrative privileges. Alternatively, you could achieve the same result by opening the Start Menu, searching for “cmd”, right-clicking on the search result titled cmd, and clicking on Run as administrator.
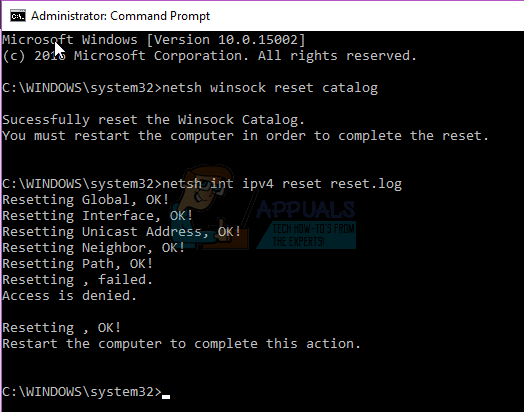
- One by one, type the following commands into the elevated Command Prompt, pressing Enter after typing in each one and waiting for one command to be fully executed before typing in the next:
netsh winsock reset catalog
netsh int ipv4 reset reset.log
- Once all of the commands have been successfully executed, close the elevated Command Prompt.
- Restart your computer. When the computer boots up, check to see whether or not the issue persists.
Method 3: Reset your Computer’s TCP/IP stack and renew its IP Address
- Right-click on the Start Menu button or press the Windows Logo key + X to open the WinX Menu, and click on Command Prompt (Admin) to launch an elevated Command Prompt that has administrative privileges. Alternatively, you could achieve the same result by opening the Start Menu, searching for “cmd”, right-clicking on the search result titled cmd and clicking on Run as administrator.
- One by one, type the following commands into the elevated Command Prompt, pressing Enter after typing in each one and waiting for one command to be fully executed before typing in the next:
netsh winsock reset
netsh int ip reset
ipconfig /release
ipconfig /flushdns
ipconfig /renew
- Once all of the commands have been successfully executed, close the elevated Command Prompt.
- Restart your computer. When the computer boots up, test your internet connection to see whether or not the fix worked.
Method 4: Ensure that DHCP is turned On
You may be suffering from this problem because DHCP has, for some reason, been turned off for your network. To make sure that DHCP is enabled and running, all you need to do is diagnose/troubleshoot your internet connection.
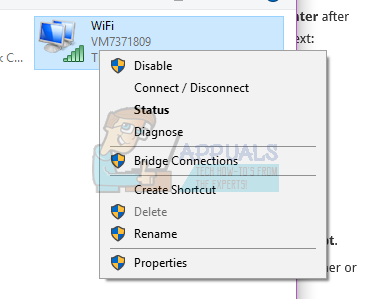
- Hold the Windows Key and Press R. Type ncpa.cpl and Click OK.
- Right-click on the internet connection you are having trouble accessing the internet with, and click on Diagnose.
- Wait for the computer to run the diagnosis – during this process, DHCP will be automatically turned on if it is disabled.
When the diagnosis has been completed, check to see whether or not your access to the internet has been restored.
Method 5: Disabling Active Probing
Sometimes your Internet’s Active Probing can be the culprit. There is a registry tweak that you can try which will disable the Active Probing of your Internet adaptor. This tweak can potentially fix the “No Internet Connection” issue for you. I have created a command so that you can easily disable the Active Probing feature without having to mess around with different registry settings.
To disable the Active Probing, follow the steps below.
-
- Right-click on your Start button and press “Windows Powershell (Admin)”
- Put the following command and press enter.
REG ADD HKEY_LOCAL_MACHINE\SYSTEM\CurrentControlSet\Services\NlaSvc\Parameters\Internet /v EnableActiveProbing /t REG_DWORD /d 0 /f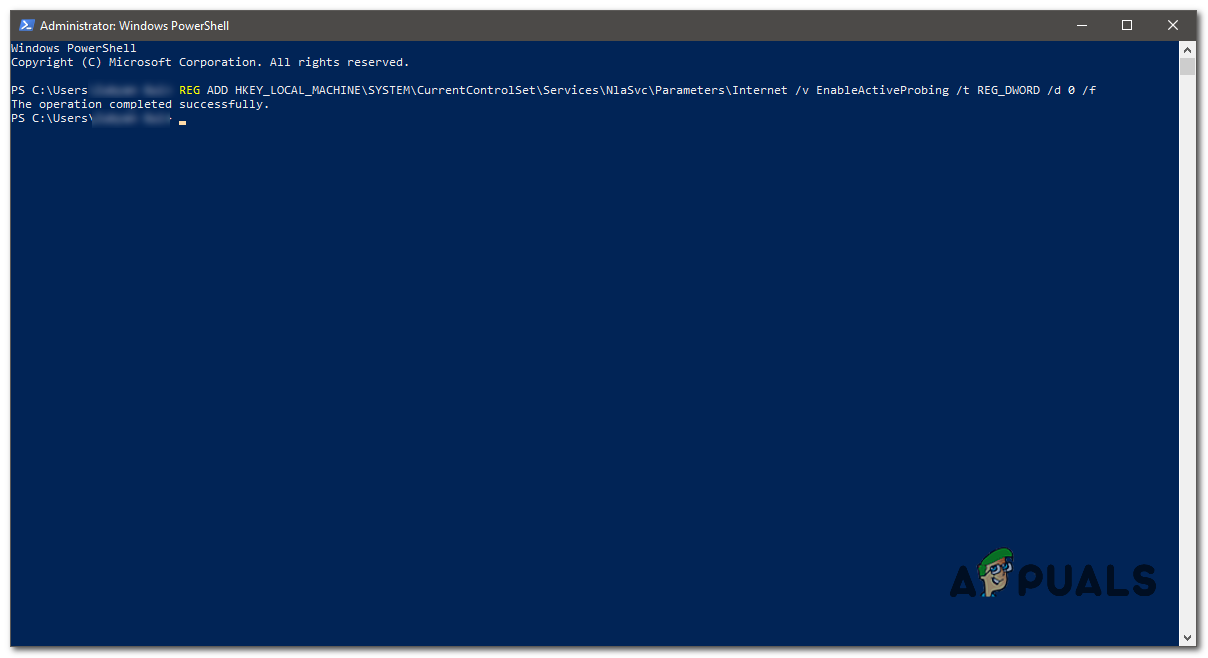
Executing the command. - Check to see if the issue still persists.
Method 6: Update your Network Adapter’s Driver Software
- Right-click on the Start Menu button to open the WinX Menu, and click on Device Manager in the WinX Menu.
- In the Device Manager, double-click on the Network adapters section to expand it.
- Locate the network adapter that your computer is currently using under the Network adapters section, right-click on it and click on Update Driver Software….
- Click on Search automatically for updated driver software, and wait for Windows to conduct the search.
- If Windows finds new drivers for your computer’s network adapter, they will be automatically downloaded and installed. If Windows does download and install new drivers, restart your computer once it’s done and test your internet connection when it boots up. If Windows does not find any updated driver software, simply try a different solution.
Method 7: Reinstall your computer’s Network Adapter
- Right-click on the Start Menu button to open the WinX Menu, and click on Device Manager in the WinX Menu.
- In the Device Manager, double-click on the Network adapters section to expand it.
- Locate your computer’s network adapter under the Network adapters section, right-click on it and click on Uninstall.
- Enable the Delete the driver software for this device option by checking the checkbox beside it, and then click on OK.
- Wait for the network adapter and its driver software to be completely uninstalled.
- Once the network adapter has been uninstalled, restart your computer. When the computer boots up, Windows will automatically detect and reinstall the network adapter and its drivers. You may check to see whether or not the problem has been resolved once your network adapter and its drivers have been reinstalled.
I wasted a full day trying to figure out what was wrong with my computer . I searched in Google and tried every method I found to try and fix it. After nothing worked I finally had it and went into Services and checked every single service, running or not. I found several that were disabled that shouldn’t have been so I opened their properties and clicked either manual or automatic (I figured out what was what by guess basically) and after every service was checked I restarted the computer. To my amazement I saw other networks again but no internet. I shut off Windows defender, ran the diagnosis and my computer now works again. I then went back into Windows defender and restarted it. I still have internet and no problems so far, it’s been 8 hours and no boot offs or glitches. Seems like I always have to rely on myself to fix microsoft problems (if I want to use my computer anyway, LOL). I know I didn’t go into detail but it just didn’t seem the place for it.
Thank you. Towerjack