How to Fix Ubuntu 20.04 Installer Stuck at Updates
Linux is an operating system that is everywhere, although not so popular among the individual users, its use in the commercial field is massive. There are a substantial amount of Linux distributions but Ubuntu has to be the most popular and widely used. With the new LTS launch, many users are naturally switching to the latest version. However, the process may not go as seamless for those who intend to install a fresh copy of the distribution. The installer offers an option to install all the latest updates for the system during the installation to save the user from having to do it manually after the installation.
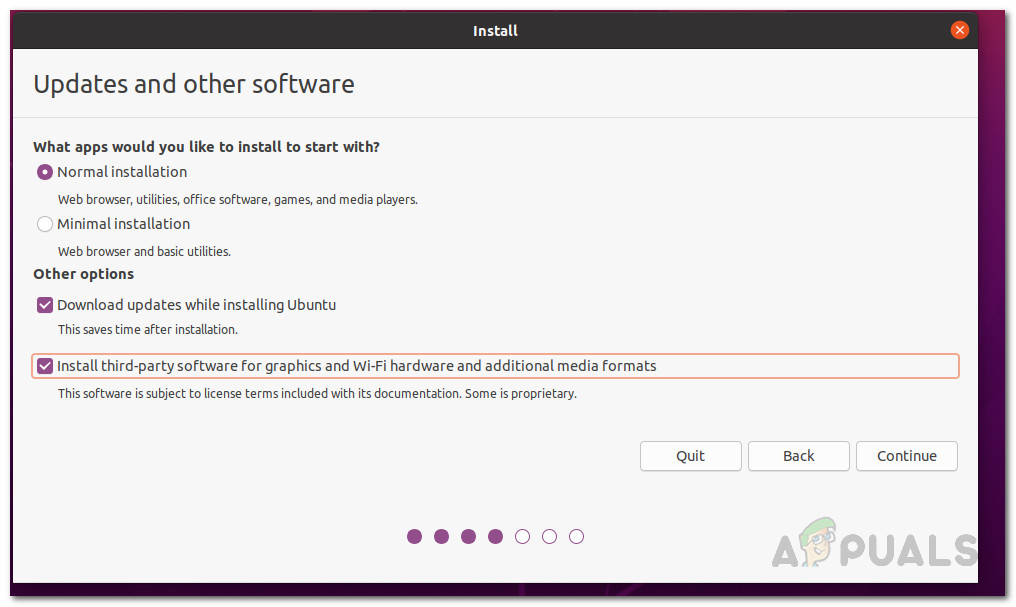
This, however, does not go very smoothly for some users. The installer does not proceed with the updates screen. This can happen due to a number of reasons, which range from a corrupted partition to the Windows partition etc. In order to get a better grasp of the issue, let us go through the potential causes of the issue, and then we will proceed with mentioning the various workarounds to fix the problem.
- Corrupted Partition — As it turns out, one of the reasons the installer may not proceed is if you have a corrupted partition on your storage device. In such a case, you will have to open GParted and then delete the corrupted partition.
- Windows Partition — Another cause of the installer getting stuck is can be your Windows partition. If you have a Windows installation on the same HD or SSD, Ubiquity which is the default installer for Ubuntu gets stuck and thus the installation does not proceed. If this case is applicable to you, the Windows partition has to be unmounted to resolve the issue.
- Display Driver — Your display driver in some cases might also trigger the issue. In such a scenario, you will have to launch Ubuntu in safe graphics mode to proceed with the installation.
- MSI — In some cases, the issue can occur due to the signal interrupts that are sent across the system. To resolve this, you will have to add nomsi in the boot parameters.
Now that we are done with the possible causes of the issue, let us go through the different methods that you implement to resolve the problem.
Method 1: Unmount Windows Partition
As it turns out, if you are trying to install the Ubuntu distribution alongside a Windows installation, the installer might get stuck during the installation process. This has been a known issue with the previous installers as well. Although not everyone gets to experience this problem, it certainly does catch a few victims now and then. Thus, if this applies to you, you must unmount the Windows partition.
It is also important to note that some users have reported that they had to do this two or three times to get it to work. If you don’t know how to unmount the partition, don’t worry, we will show you how to. Follow the instructions down below to do so:
- First of all, on your live Ubuntu drive, press the Windows key to open up the search menu.
- In the search bar, type gparted and then hit Enter.
- Once GParted has launched, locate the partition where Windows is installed.
- Right-click on the partition and then click the Unmount option.
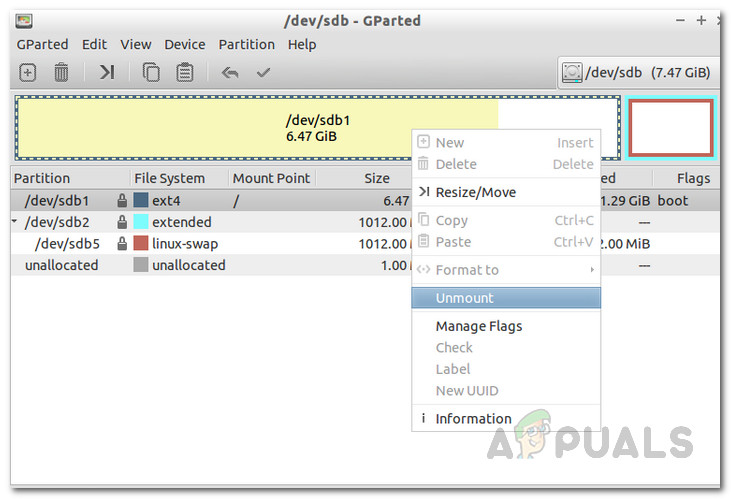
Unmounting Partition - This will unmount the Windows partition.
Method 2: Check for Corrupted Partitions
In case you do not have a Windows installation on the same drive or if the above method does not resolve your issue, it could be that you have a corrupted partition on your storage device. In such a case, the installer will naturally not proceed and get stuck at one point or another.
Therefore, it is important that you check for any corrupted partitions on your hard disk or SSD. This is rather easy. Follow the instructions below to check for any corrupted partition:
- To find a corrupted partition, you will have to open up GParted first. Thus, press the Windows key and then search for gparted and open it up.
- Once GParted has launched, make sure that the disk that you are installing the distribution on is selected.
- A corrupted partition often has a red exclamation mark as well the File System might be unknown.
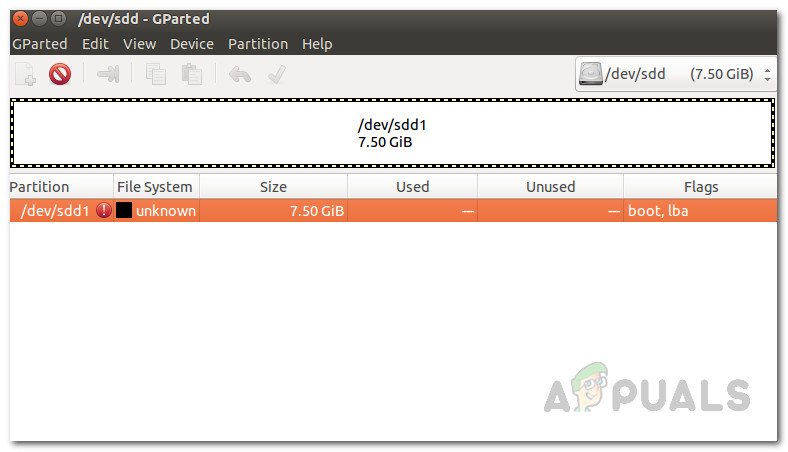
Corrupted Partition - Check if there are any such partition.
- In case there is a corrupted partition, right-click on it and select the Delete option from the drop-down menu.
Method 3: Run Ubuntu in Safe Graphics Mode
In some cases, the system is not able to initialize the graphics card during the boot correctly. To counter this, Ubuntu has a Safe Graphics mode. An issue with your display driver might cause the Ubiquity to get stuck during the installation prompts. To resolve the issue, you will have to launch Ubuntu in Safe Graphics mode which edits the boot parameters. This has been reported as working by a user who was facing a similar issue.
Therefore, it is worth a shot. To run Ubuntu in Safe Graphics mode, reboot your system, and then on the GRUB menu, choose the Install Ubuntu (safe graphics) option. Finally, start the installation as you normally would.

Method 4: Edit Boot Parameters
Finally, if none of the above methods have worked for you, the cause of the problem can be the Message Signaled Interrupts (MSI). When this parameter is turned on, an interrupt message can be triggered by a device that can cause the installer to get stuck. An interrupt message is basically a particular value that is written to a specific address by a device that results in an interrupt. This is not callous and can be done easily. Make sure you follow through the steps carefully and you will be good to go.
- First of all, boot into your live Ubuntu media.
- There, you have to access the advanced welcome page. To do so, you will have to press any key when the small logo is shown at the bottom of the screen.
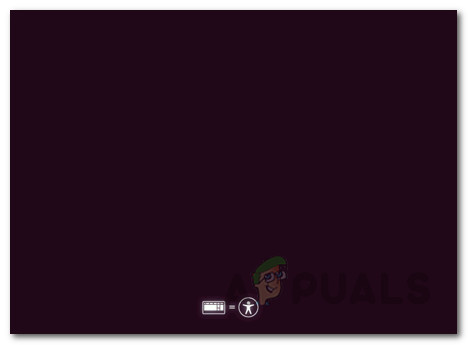
Ubuntu Welcome Page - If you do this correctly, you will be able to see the advanced welcome page as shown below.
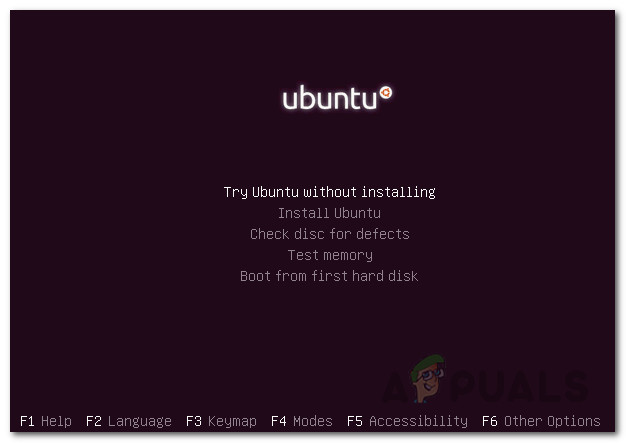
Ubuntu Advanced Welcome Page - Here, press the F6 key to bring up the boot commands.
- Upon pressing F6, you will see a pop-up menu. Press the ESC key to get rid of this.
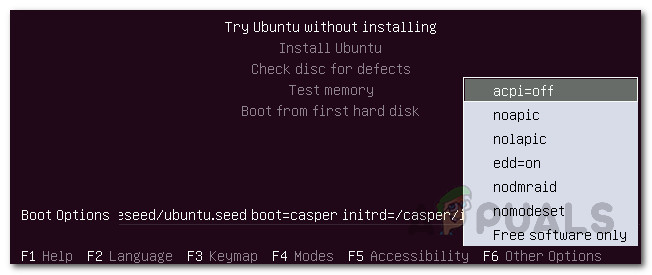
Boot Options - After that, the command line will be shown with Boot Options written on the left.
- You will have to leave a space after the double hyphens (–) and then enter the pci=nomsi command.
- Finally, press the Enter key to start the boot sequence.

SIR, I JUST WANT TO THANK YOU. U ARE A LIFE SAVER, THANK YOU SO MUCH