How to Fix the SYSTEM PTE MISUSE BSOD on Windows?
SYSTEM_PTE_MISUSE is a BSOD (Blue Screen of Death) error which crashes your system and requires a restart. BSOD problems are quite unfortunate as they will interrupt you no matter you were doing, leading to possible file corruption and data being lost. This error is not so common but it can be annoying on your computer.

Luckily for you, other users who have experienced the same issue have posted the methods the used to resolve the problem. We decided to gather these methods and put together this article for you to check out. Good luck in resolving this issue!
What Causes the SYSTEM PTE MISUSE BSOD on Windows?
The SYSTEM_PTE_MISUSE BSOD is caused by security issues regarding the security technology used by the firmware. There are two different types of security technologies which can cause this problem to appear: PTT and TPM. Disabling them in BIOS can resolve this issue quickly and efficiently!
If that doesn’t work out in your scenario, you can try to simply update BIOS to the latest version as some older versions cause this issue to appear more frequently.
Solution 1: Disable PTT Security in BIOS
PTT stands for Platform Trust Technology and it implements TPM (Trusted Platform Module) in system firmware. It was introduced by Intel and it’s cool but users have reported that disabling it in BIOS has managed to resolve the constant appearance of the SYSTEM_PTE_MISUSE BSOD. Follow the steps below to disable PTT Security in BIOS!
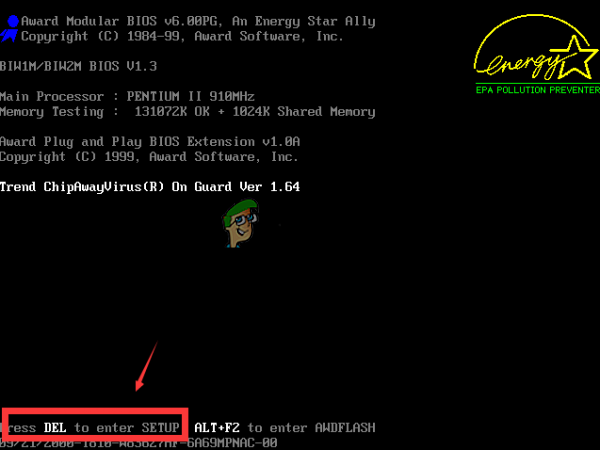
- Turn your PC on and try to enter BIOS settings by pressing the BIOS key as the system is about to start. The BIOS key is typically displayed on the boot screen, saying “Press ___ to enter Setup.” or something similar. There are other keys as well. The usual BIOS keys are F1, F2, Del, etc.

Press __ to run Setup - Now it’s time to disable PTT security. The option which you will need to change is located under different tabs on BIOS firmware tools made by different manufacturers and there is no unique way to find it. It’s usually located under the Security tab but there are many names for the same option.
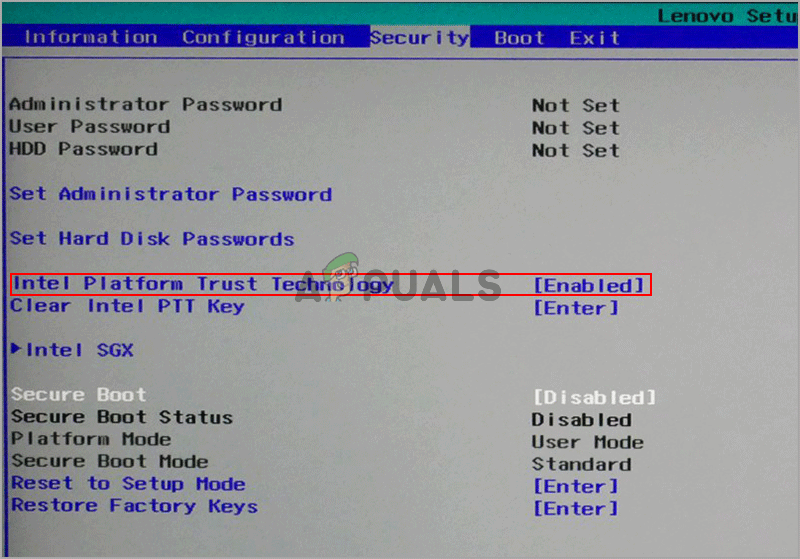
- Use the arrow keys to navigate to the Security tab or a similar sounding tab inside BIOS. Inside, select an option named PTT, PTT Security or something similar inside.

Select the option and tap the Enter key to disable it - After selecting the option, you will be able to disable it by clicking the Enter key with PTT Security selected and using the arrow keys to select the Disable option.
- Navigate to the Exit section and choose to Exit Saving Changes. This will proceed with the computer’s boot. Check to see if the problem persists.
Solution 2: Set TPM as Hidden in BIOS
TPM is an alternative to PTT, which makes this method similar to the first one. If your computer doesn’t have the PTT option in BIOS, it might have the TPM option and it’s often found in the same spot. Either way, follow the steps below to set TPM as hidden in BIOS
- Boot up your PC on and try to enter BIOS settings by pressing the BIOS key as the system is about to boot. The BIOS key is always displayed on the boot screen, saying “Press ___ to enter Setup.” or something similar. There are other keys as well. The usual BIOS keys are F1, F2, F10, Del, etc.

Press __ to run Setup - Now it’s time to set TMP as hidden in BIOS. The option which you will need to change is located under various tabs on BIOS firmware tools made by different PC manufacturers and there is no unique way to find it. It’s usually located under the Security or the Advanced tab but there are many names for the same option.
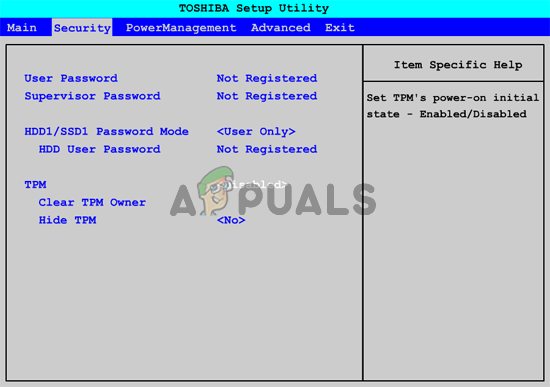
- Use the arrow keys to navigate to the Security tab or a similar sounding tab inside BIOS. Inside, select an option named TPM, TPM SUPPORT or something similar inside.

TPM option in BIOS - After selecting the option, you will be able to disable it by clicking the Enter key with PTT Security selected and using the arrow keys to select the Hidden option. If there is no Hidden option, choose Disable.
- Navigate to the Exit section and choose to Exit Saving Changes. This will proceed with the computer’s boot. Check to see if the problem persists.
Solution 3: Update BIOS on Your Computer
Updating BIOS is not necessarily an easy process and it requires the use of an external media drive such as a USB or a DVD. However, if the current version of BIOS installed on your computer is too old, all that can happen is that BSODs such as this one will start to appear more often. Follow the steps we have prepared below to update BIOS on your computer!
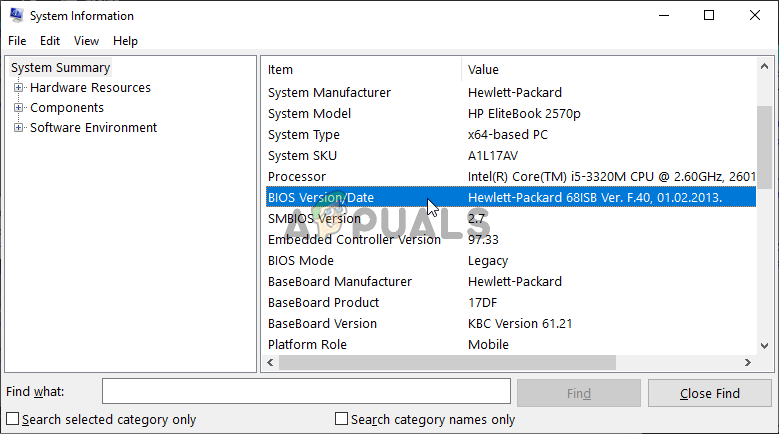
- Find out the current version of BIOS utility you have installed on your computer by typing “msinfo” in the search bar or the Start menu.
- Locate the BIOS version data just under your Processor model and copy or rewrite anything to a text file on your computer or a piece of paper.

Write down the version of BIOS on your computer - Find out whether your computer was bundled, pre-built or assembled manually. This is very important because you don’t want to use BIOS made for just one component of your PC when it won’t apply to your other devices and you will overwrite BIOS with a wrong one, leading to major errors and system problems.
- Prepare your computer for the BIOS update. If you are updating your laptop, make sure its battery is fully charged and plug it in the wall just in case. If you are updating a computer, it’s advisable to use an Uninterruptible Power Supply (UPS) to make sure your computer doesn’t shut down during the update because of a power outage.
- Follow the instructions we prepared for various desktop and laptop manufacturers such as Lenovo, Gateway, HP, Dell, and MSI.


