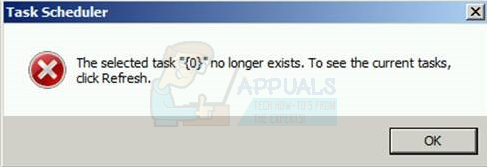
How to Fix “the selected task no longer exists” on Windows 10
The Task Scheduler is a snap-in that runs through the MMC (Microsoft Management Console), enabling you to automatically perform routine tasks on a chosen computer. When you create a task on the task scheduler, it generates a file under your OS drive (typically C:\), specifically, C:\Windows\System32\Tasks. Simultaneously, it also generates a registry under the given registry address, HKEY_LOCAL_MACHINE\SOFTWARE\Microsoft\Windows NT\CurrentVersion\Schedule\TaskCache\Tasks\. If the task is under a folder, it will also create a registry under HKEY_LOCAL_MACHINE\SOFTWARE\Microsoft\Windows NT\CurrentVersion\Schedule\TaskCache\Tree\.
At the moment of opening the Task Scheduler MMC, Windows will sync the registry with the files that are located under the Tasks folder, and if it’s not able to match one, then the error message “The selected task {} no longer exists. To see the current tasks, click refresh” will appear.

To resolve this issue, we need to either delete all of the tasks, or locate the corrupt one and delete it.
The easiest way would be to create a new account, since it will delete all tasks.
Method 1: Creating a new user account
Go to Action center and click All Settings and go to Accounts
Go to Family & other users, click Add someone else to this PC.
If you are looking to link a Microsoft account to your email, please input your email. If you wish to create a local account, proceed as follows:
Click on I don’t have this person sign in information.
Select Add a User without a Microsoft Account and input your information.
However, if you have several tasks, and you would like to avoid losing them, then you might need to determine which task is causing the conflict. To do so, you will need to compare both the registry and the task folder.
Method 2: Locate the corrupted task in the task scheduler and delete it from the task file folder
Open Task Scheduler and click OK when presented with the error. It may seem as though you are facing the same error repeatedly, but this is primarily due to the number of broken tasks. Make a note of the number of times you encounter the ‘selected task {0}’ error. This represents the quantity of task files that are out of sync with the registry.
Start with the first folder under Windows tasks (Task Scheduler(Local)\Task Scheduler Library\Microsoft\Windows), and select each folder in turn until you receive the “selected task {0}” error. This folder contains files that are not in sync with the Task Scheduler.
Open Windows Explorer and navigate to the tasks file folder (%systemroot%\system32\Tasks\Microsoft\Windows) and find the folder which corresponds to the folder in which you received the error.
For some tasks, you will be able to determine which files need to be deleted by comparing the list in the Task Scheduler with the list of files in Explorer. Some tasks will only have a single file in Explorer while in another case, I had two and the first was missing. Once the Task Scheduler encounters this error, it will no longer display tasks. This issue makes the job of synchronizing the two slightly more difficult. Once you have determined which files exist in the File Folder but are not present in the Task Scheduler folder, delete those files.
IMPORTANT – Close and reopen Task Scheduler. Once an error is encountered, Task Scheduler ceases to display the tasks, requiring you to close and restart it to continue with your synchronization efforts.
Continue to select folders in Task Scheduler under Windows tasks until you encounter the error again. Then repeat the process of determining which file exists on the file system, but not in Task Scheduler.
Please note, this issue may prevent the MMC from loading the Task Scheduler snap-in, and the following error might be shown: “MMC has detected an error in a snap-in and will unload it.” Consequently, you won’t be able to identify the problematic task through the Task Scheduler and you will need to locate it manually.
Method 3: Compare tasks from registry and explorer, and delete the ones that don’t match
Open C:\Windows\System32\Tasks
Hold the Windows Key, press R, and type ‘regedit’, or you can also enter ‘regedit‘ in the start menu.
Locate the folder HKEY_LOCAL_MACHINE\SOFTWARE\Microsoft\Windows NT\CurrentVersion\Schedule\TaskCache\
Copy the name of the task from the Explorer and then search for the name under the \TaskCache\Task and \TaskCache\Tree folder in the registry.
Delete any task from the explorer folder that is not shown in the registry folder mentioned above.
Once you are able to manually delete any missing key and match all tasks, restart your computer.