How to Fix Low Volume on Windows 10
Windows 10 has issues outputting full volume primarily because of incorrect settings in your computer or because of corrupt and outdated drivers. This issue rarely surfaces because of hardware problems so rest assured. Here are some solutions on how to overcome the low volume in Windows 10.
Solution 1: Restarting your PC and Updating Drivers
One of the basic fixes is to restart your PC. If you installed an application, it is possible that it isn’t properly configured with your computer and requires a restart. Furthermore, you should update your sound drivers. Sound drivers are the main bridge between the operating system and your sound hardware. If the correct drivers are not installed on your PC, you might not get the optimum experience and the sound might not be generating to its full capacity. Update your sound drivers and turn them on and off. Then after restarting your PC, check if the problem got solved.
Solution 2: Changing the Sound Quality
We can increase the frequency of the sound output from the sound settings. Having a high-frequency output doesn’t harm your computer in any way and it is reported that varying the frequency increases the sound output from the speakers significantly. You can always change back to default settings if this doesn’t make a difference.
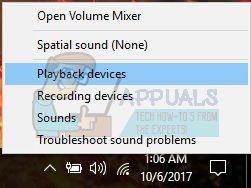
- Right click on the sound icon present at your taskbar and select “Playback Devices” (bottom right side of the screen).
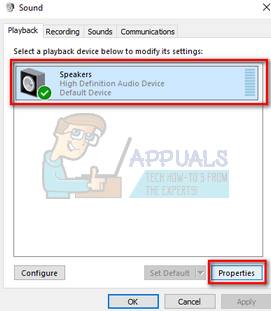
- Navigate to the Playback tab. Select the output device (your speakers) and click on Properties present at the bottom right side of the screen.
- Once in the properties, navigate to the Advanced tab. Select the drop-down under the subheading of Default Format and select the highest quality.
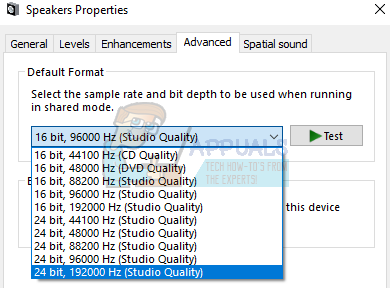
- Press Apply to save changes and exit. Now check if there is any significant difference in the sound quality.
Solution 3: Enabling Loudness Equalization
Loudness Equalization is an option present in the sound settings which enable you to boost your sound so the output increases. However, you might be doing a tradeoff with the performance of the sound but since this increases the sound volume a lot, we can go with it.
- Right click on the sound icon present at your taskbar and select “Playback Devices” (bottom right side of the screen).
- Navigate to the Playback tab. Select the output device (your speakers) and click on Properties present at the bottom right side of the screen.
- Once in the properties, navigate to the Enhancements tab. Check the option which says “Loudness Equalization”. Click on Apply to save changes and exit.
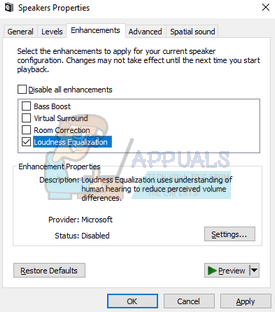
- A restart might be required to implement the changes. After restarting, check if the problem got fixed. If you are facing a lot of baffled and low sound than before, you can easily revert the changes.
Solution 4: Changing the Communications Sound Settings
Windows has a built-in feature which reduces your master volume by a significant percentage if it detects incoming telecommunications. We rarely use this feature in our daily lives and most probably, we don’t even know if it works. It is possible that this feature is not configured properly with your hardware and OS; thus causing your problems. We can try disabling this feature and check if the sound output changes.
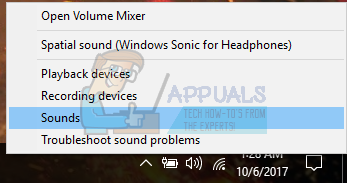
- Right click on the sound icon present at your taskbar and select “Sounds” (bottom right side of the screen).
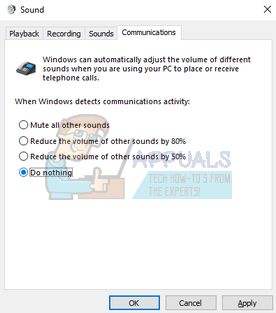
- Once in the Sound properties, navigate to the Communications tab. Select the option of “Do nothing”. Press Apply to save changes and exit.
- Restart your computer and check if the sound quality got any better.
Solution 5: Changing the Volume using Volume Mixer
Windows has the option to set different volumes for different applications present on your computer. Mostly, the sound of other applications isn’t set to the highest potential. If you are using Chrome or some other application, and not receiving the expected sound, you should check the settings of Volume Mixer and turn all the settings to highest.
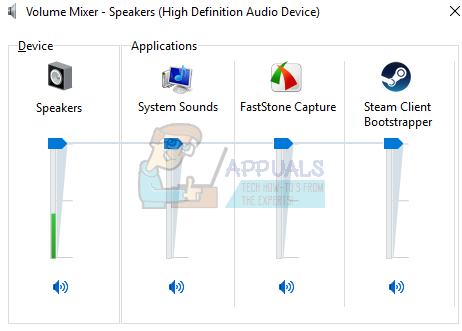
- Right click on the sound icon present at your taskbar and select “Open Volume Mixer” (bottom right side of the screen).

- Once in the volume mixer, make sure that all the sounds are at their highest.
- Re-launch the application where you were having problems and check if the problem got solved.
Solution 6: Installing the default drivers
If you are having the Realtek audio drivers installed on your computer, we can try uninstalling them. We will replace Realtek with the default audio driver used by the audio hardware. For some, this solved the problem instantly. Follow this solution after all the previous ones didn’t work for you.
Windows, by default, will automatically try to update your drivers to the latest version available. We can turn this behavior off by doing the following steps.
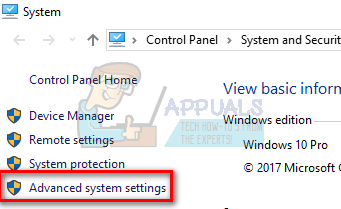
- Press Windows + S to launch the search menu of your start bar. Type “system” in the dialogue box and select the first item which returns in the result.

- Once in the system, click on “Advanced system settings” present at the left side of the screen.
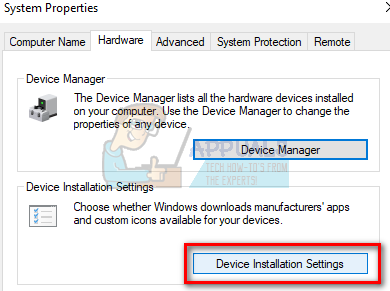
- Navigate to the Hardware tab and click on “Device Installation Settings”.
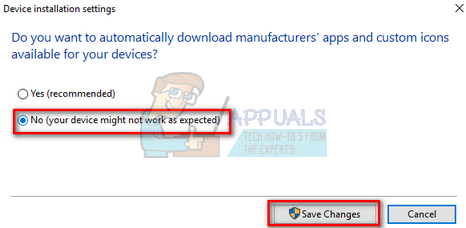
- Select the option of “No (your device might not work as expected”. Press Save changes and exit. This will disable the Windows update from updating your audio drivers automatically.
- Now press Windows + X to launch the quick start menu and select “Device Manager” from the list of options available.
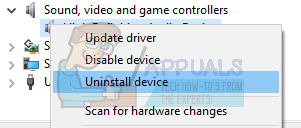
- Once in the Device manager, expand “Sound, video and game controllers” category. Right-click on Realtek device and select “Uninstall device”.
- Check the uninstall driver checkbox to uninstall the driver as well and proceed with the uninstallation.
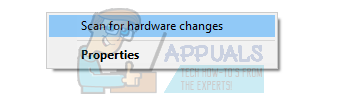
- Once the device is uninstalled, right click on any empty space on the Device manager and select “Scan for hardware changes”. Your computer will now detect the audio hardware on your computer and automatically install “High Definition Audio Device”.
- Now check if this brings any difference. Also, reboot your machine after the installation of default drivers.
Note: Try to disable hardware acceleration and check if that fixes this particular issue.
If none of these suggestions worked to fix your sound, another option is to search “SmartAudio” in the search bar. Some (or all, I don’t know) Windows 10 computers have this software. When you turn this on, put your mouse over the big headphones under the “SmartAudio” logo. A display should come up saying “Disable Headphone Limiter.” If you click that, a dialog should appear saying that you are responsible for any hearing issues etc. that may come with being able to have your headphones at a higher volume. After that, your audio, at least through headphones, should be much louder.