How to Fix Facebook Images not Loading?
Facebook is one of the first social media platforms which emerged almost a decade ago and has been rising to the top since. It has acquired numerous other platforms as well including Instagram, Snapchat etc.
Users all around the globe have experienced an issues where Facebook images refused to load. It can be either on Android devices or on web browsers as well. Officially, Facebook hasn’t released an official statement regarding the problem but we traced it back to several causes. In this article, we will go through all the reasons as to why this issue occurs and what the possible workarounds are to fix the problem.
What causes Images not to Load on Facebook?
We looked at several user cases and after doing some research on our own, we came to the conclusion that the issue occurred due to several different reasons but most of them related to the network on your computer. Some of the reasons why Facebook might not load images are but not limited to:
- Bad DNS: DNS servers perform a pivotal role in resolving the hostnames of different requests. If the DNS is not working on your computer, you will be unable to load any images or in some cases, your Facebook also might not work.
- Bad internet connection: This cause doesn’t need much explanation. If you have a bad internet connection on your computer, the images will stay in an infinite loading sequence.
- Network cache: Like all other modules in other devices, your network cache performs a pivotal role in running all network-related applications. If your network cache is somehow corrupt or has bad data, it might conflict with the new upcoming data from Facebook and images will fail to load.
- Hosts file: The hosts file is responsible for handling the hosts locally on your computer. If your host file doesn’t contain proper entries for Facebook, the images will fail to load indefinitely.
- Free Facebook: In some networks, Facebook provides itself free without consuming any data from your plan provided that you are not downloading images. If the free mode is activated, the images will not be loaded.
- Disabled images: Some browsers like Firefox have the ability to block incoming images if a certain property is enabled. Here, we can check the properties and make sure no such thing is enabled.
- Flash player: Even though Facebook doesn’t routinely use the Flash player for its operations, in some cases, it might. Installing and enabling the Flash player might help.
- Ad-blockers: Ad-blockers work tirelessly on your browser to make sure that all the Ads gets blocked. However, in some cases, during the process the application blocks Facebook’s own images. Disabling the ad-blocker might help.
- Server outage: In rare cases, the service by Facebook itself is facing outages either because of unexpected issues in the servers or due to maintenance. You can check the server statuses here to confirm.
Before we start with the solutions, make sure that you are not logged in as an administrator and have saved all your work as we will be restarting your computer a lot. Also, make sure that you have your account credentials at hand.
Pre-requisite: Checking Internet Connection
The very first step in solving the issue of Facebook images not loading is making sure that you have an active internet connection. If there are some issues with your network and the Facebook client is unable to connect to its image server, you will not be able to load any images or videos whatsoever. In this solution, we will give you some handy tips which you can implement to make sure that you have a good internet connection.
- Try connecting some other device to the same network and see if Facebook’s images are bring loaded. If they are, it means there is some problem with your every device.
- Try doing a speed test and check the speed of your current internet. This will give you an idea whether you should consider changing your network or not.
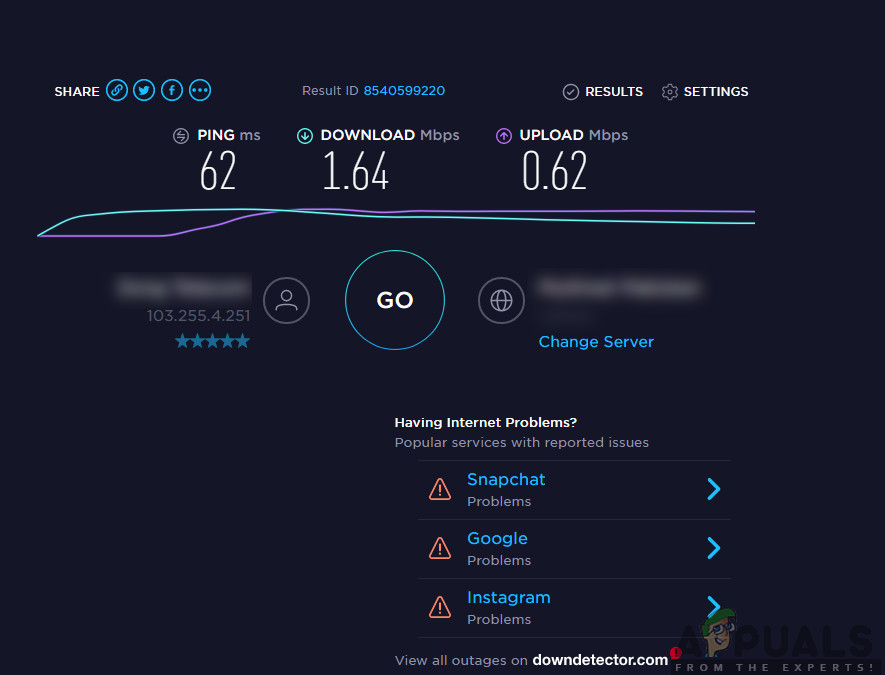
Checking Internet Speed - If you are using an organizational or public internet, it is recommended that you switch to a private Usually, open and public internets have limited access which causes websites like Facebook not to work properly.
If these tips don’t work and you still cannot load Facebook images, you should consider resetting your router but do so after performing the other solutions. Below is the method on how to do so but you should come back to it after performing all the other solutions.
Before we move on to reset your router, make sure that you have all the configurations saved beforehand. Every router usually has configurations saved by your ISP to access its network. Here, you need to navigate to the IP address associated with your router. This is either present at the backside of the device or in the box of your router. This can be something like ‘192.168.1.2’. If you don’t find the address associated, Google your router’s model and obtain the IP from there.
- Search for a button at the back of your router and press it for around 6 seconds until the router turns off and blinks its light to show it has been reset.
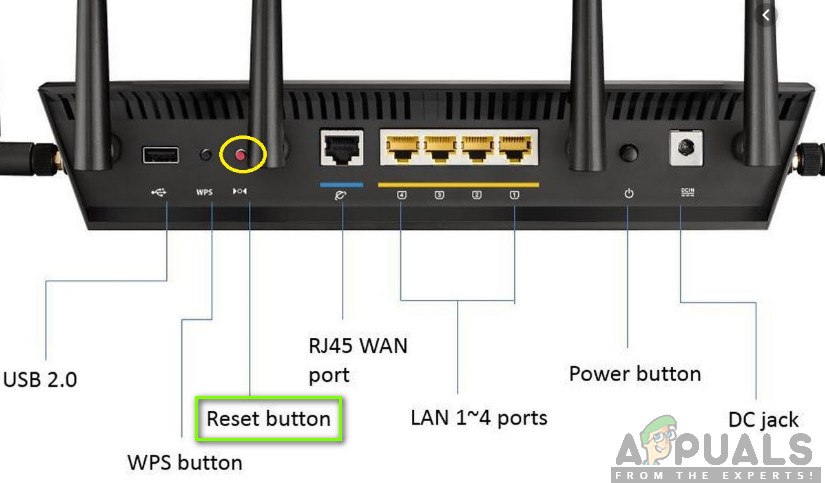
Resetting Router - Now connect to the router and enter the configurations back in. Now try connecting to Facebook and see if the issue is resolved for good.
Solution 1: Checking Server Status
An important step to try before we move on to other technical details is checking whether the Facebook servers are up and running. Servers being down is nothing new with giant social media platforms. In fact, we came across numerous cases which occurred periodically.
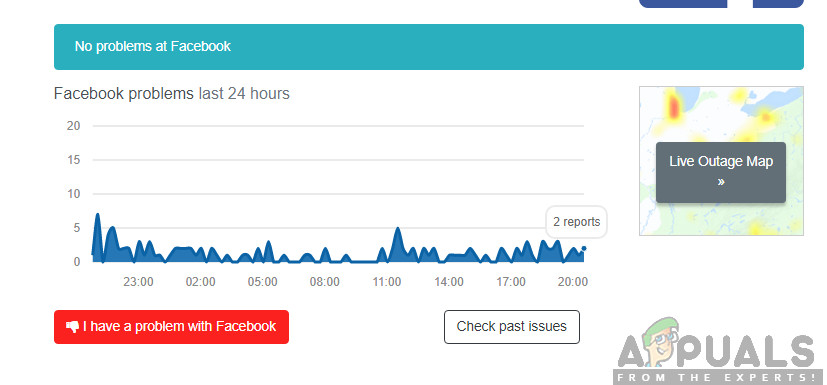
Another case which we came across was where the server status showed that the servers were up but in reality, they were not. You can always check the official server status but make sure that you also check other various forums and look for users having a similar situation. If you find any, it probably means that there is an outage from the backend and the issue will most probably be fixed within a few hours.
Solution 2: Checking version of Facebook
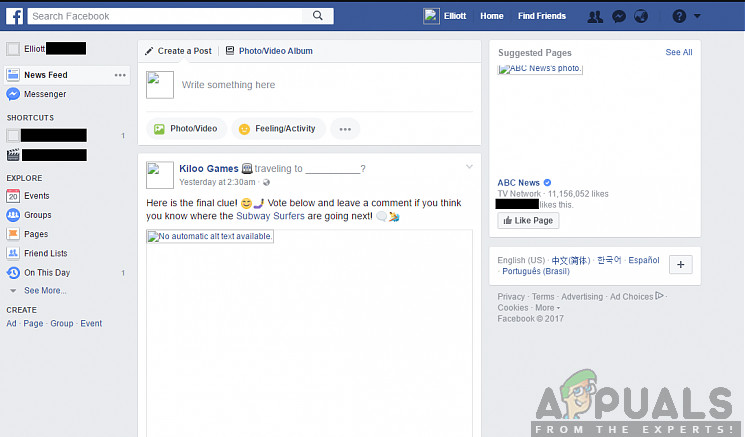
Facebook has a feature of free Facebook for several network providers. In this mode, users will be able to see all the latest posts of the people they are following but they will not be able to see any photos displayed.
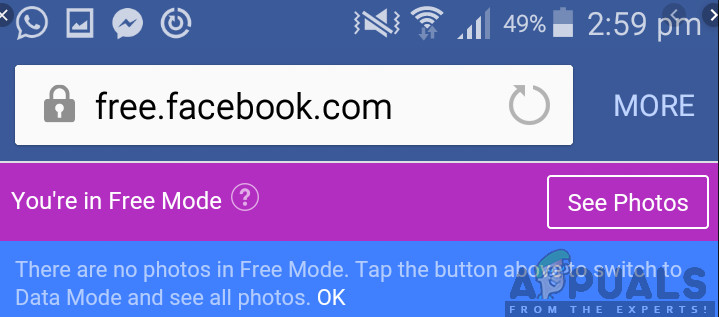
This is a well-known feature which improved user experience quite a lot but, as the heading says, there are no photos available in the Free mode. Hence if you are using that mode, click on See Photos. All the photos will now be visible.
Solution 3: Checking for Disabled Images
Another thing to check before we proceed is making sure that images are not disabled on your web browser. If they are, not only will you not be able to see images on Facebook, you will not be able to see any images.
If you experience this behavior, you should check with your computer’s documentation and see which options you can tweak to disable the option. For example, in Google Chrome, you can search for Images and when the option comes forward, make sure Show all is enabled. Restart your computer after doing so and see if this fixes the problem.
Solution 4: Setting Google’s DNS
If none of the above methods work and you still cannot load images on Facebook, we can try changing your DNS server. Domain Name Servers are used sparingly when you are browsing the platform but if the computer cannot connect to them, you will be facing bizarre issues including where the images don’t load.
When we change your DNS server to Google’s public DNS, the changes will reflect to all the other applications on your computer but don’t worry, this DNS server usually works all the time.
- Press Windows + R, type “control panel” in the dialogue box and press Enter.
- Once in the control panel, click on the sub-heading “Network and Internet”.
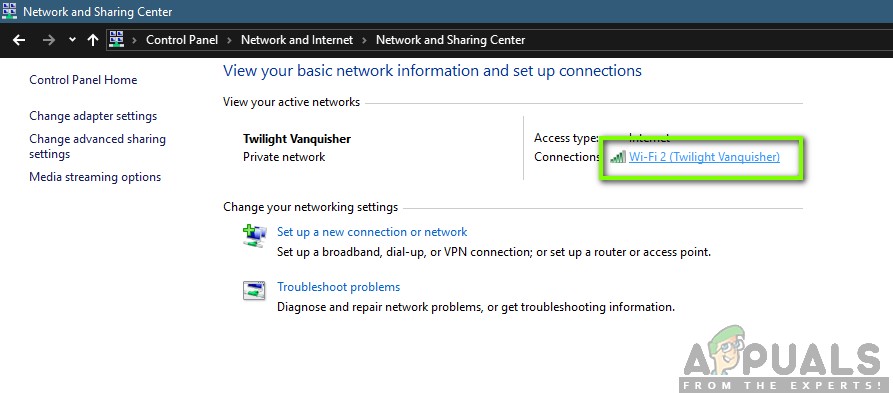
- Select “Network and Sharing Center” from the next window.
- All the networks which your computer is currently connected to will be listed here. Click on the current connection which you are using to open Favebook.
Opening Current Connected Network - Now click on “Properties” present at the near bottom of the small window which pops up.
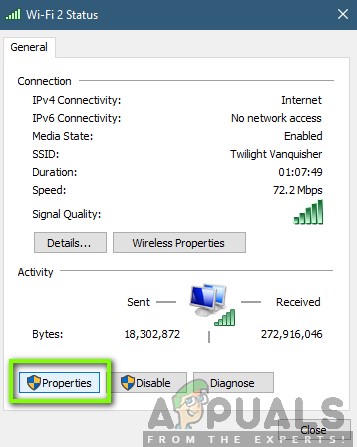
Network Properties
- Double-click on “Internet Protocol Version 4 (TCP/IPv4)” so we can change the DNS server.
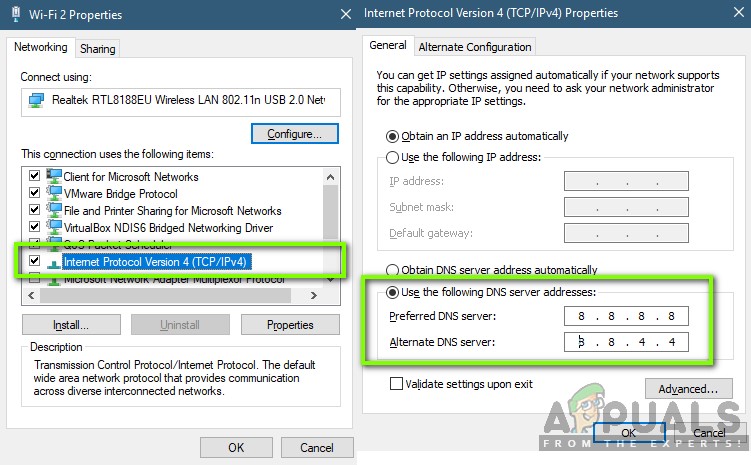
Changing DNS Server - Click on “Use the following DNS server addresses:” so the dialogue boxes below become editable. Now set the values as following:
Preferred DNS server: 8.8.8.8

Alternate DNS server: 8.8.4.4
- Press OK to save changes and exit. Restart your computer properly and wait for a few seconds before launching the game. Check if this solved our issue.
Solution 5: Resetting Network Cache and Configurations
Everything that connects to the internet uses network cache and its configurations to operate properly. If your network configurations and cache are somehow corrupt or have bad data, you will experience numerous problems including not being able to load Facebook images.
What we can do here is resetting the network settings and cache and see if this works. We will also be resetting your DHCP settings.
Note: This will erase all the custom settings which you have set manually.
- Press Windows + R, type “command prompt” in the dialogue box, right-click on the application and select “Run as administrator”.
- Once in elevated command prompt, execute the following commands one by one:
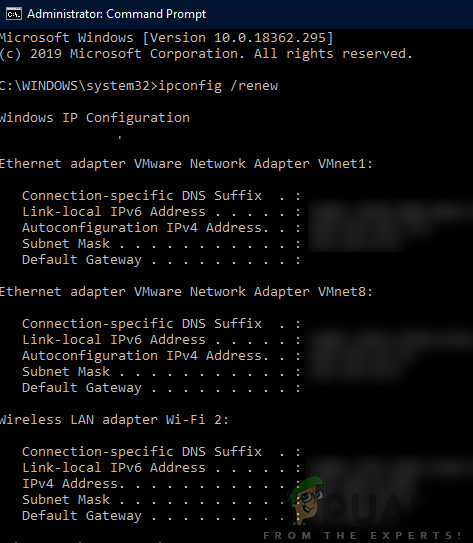
Resetting Network Configuration
ipconfig /release

ipconfig /renew

ipconfig /flushdns

netsh winsock reset

net stop dhcp

net start dhcp

netsh winhttp reset proxy
- Restart your computer completely after resetting your network and check if the issue is resolved.
Solution 6: Changing your Hosts File
Every computer has a hosts file which allows the mapping of hostnames to IP addresses whenever your computer is connecting to the internet. According to several users, there was a workaround where adding a specific entry manually solved the problem of Facebook images not loading instantly.
Note: We recommend that you make a copy of your existing Hosts file in case something goes wrong so you can easily replace it.
- Press Windows + S, type “command prompt” in the dialogue box, right-click on the application and select Run as administrator.
- Now, execute the following command:
notepad.exe c:\WINDOWS\system32\drivers\etc\hosts
- When the hosts file is open in Notepad, click Ctrl + F and type the following sentence at the end of the comments:
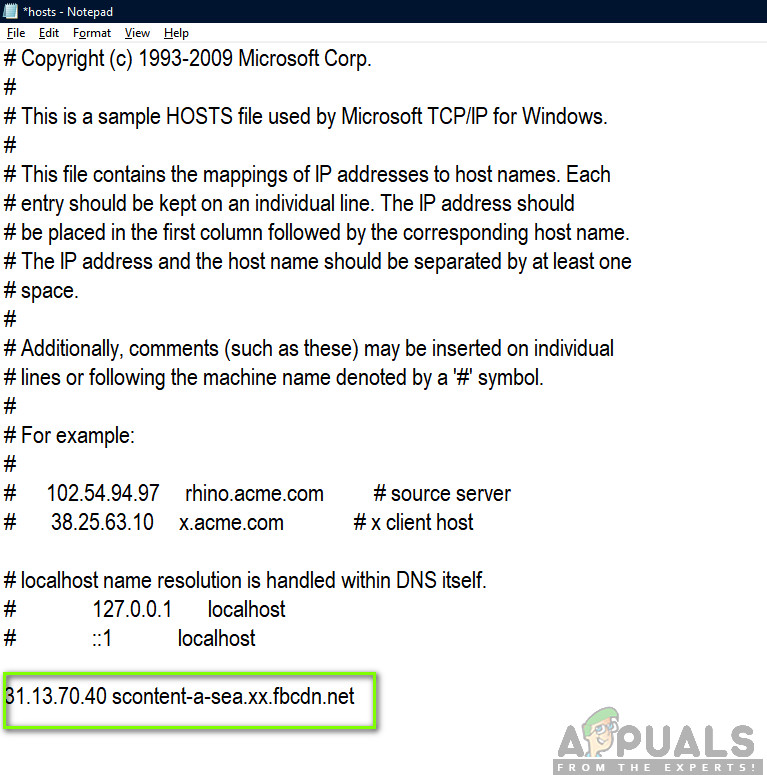
Changing Hosts File
31.13.70.40 scontent-a-sea.xx.fbcdn.net
- Make sure that you follow the format strictly as shown. Save changes and exit. Restart your computer and check if the issue is resolved.
Solution 7: Installing Adobe Flash Player
Adobe Flash player is reportedly used very sparingly in applications nowadays. Even though it is disabled in Chrome by default, we came across numerous instances where activating/installing it solves the problem. Flash player doesn’t provide any overhead to your computer. In fact, there was a time where it was being used extensively on all applications here and there. Below is the method to check whether you already have the player and if not, how to install it.
- Navigate to the official website of Adobe Flash. Once on the website, click on Check Now. It will tell you whether you have Flash player installed or not.
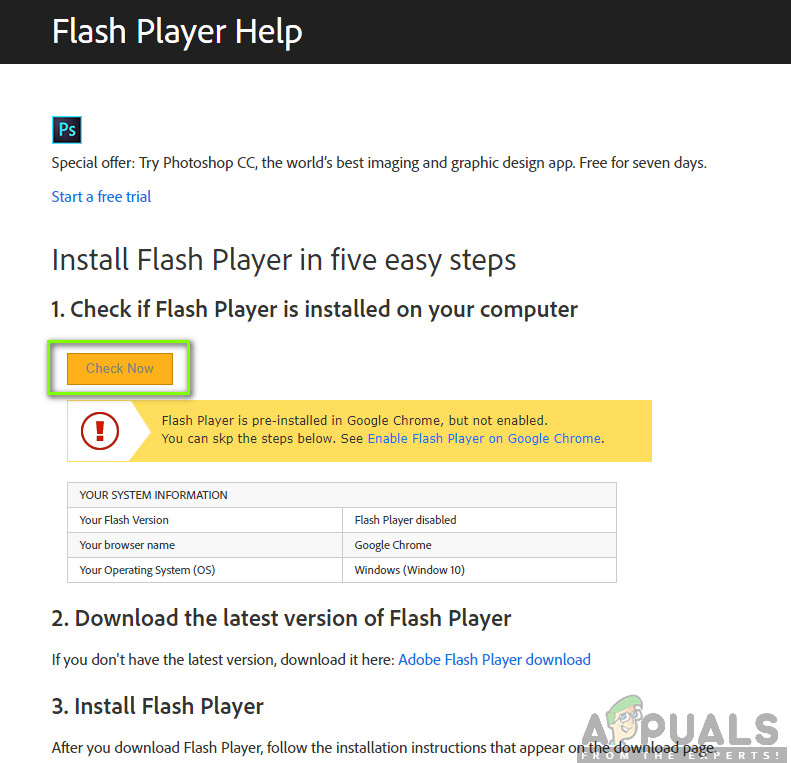
Checking Flash Player Status - If you do not have Flash Player installed, you can download it easily by clicking on the download link. Furthermore, if it is disabled, you can enable it by clicking on the link as well.
- After you are done enabling Flash Player, reload your browser and see if the issue is resolved for good.
Solution 8: Disabling Ad blockers
Ad blockers somehow improve your browsing experience by removing all the ads which you see on your computer. They have an inbuilt mechanism which intercepts all the traffic and then passes on the filtered version with ads removed. Even though extensions like these might improve your experience, there are instances where they cause issues like Facebook images not working.
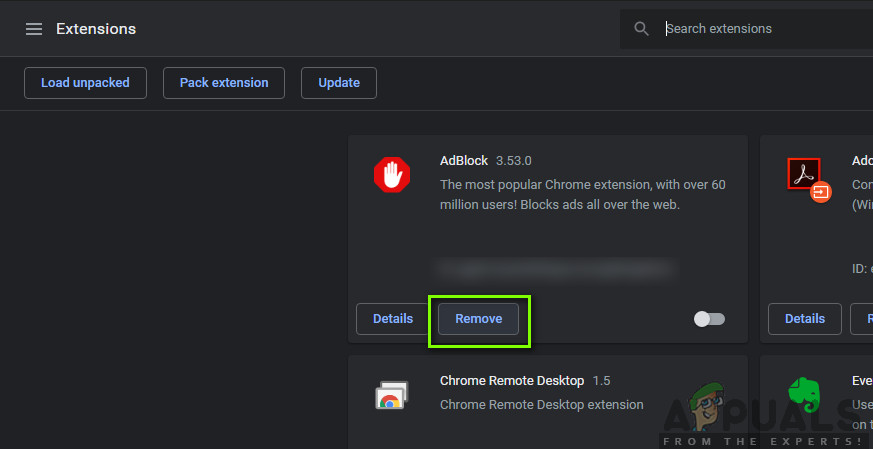
To check your browser extensions on Chrome, type “chrome://extensions” in the address bar and press Enter. You can disable the ad-blocker extension by unchecking the “enable” option. This will automatically disable the extension from making any changes to your UI. Restart your browser and check if the search mechanism works properly.
Note: Try disabling every extension. This might help troubleshoot if any specific application is causing the problem.