How to Fix Alt + F4 not Working on Windows
Alt + F4 key combination is probably the first key combination everyone learned when they turned on their first computer. It’s used to close the currently active window or even to initiate the shutdown menu if the Desktop screen is currently active. However, users have reported that the combination isn’t working after they installed an update or after some changes were made to their computer.
It’s usually after a major update or while updating to Windows 10 but numerous other scenarios were registered as well. Check out the methods we have prepared which have helped others and should help you as well!
What Causes the Alt + F4 Combination to not Work on Windows?
Causes for this problem are not so numerous but it will still be useful to check them out as you can try out the solution better adapted to your scenario. Check out the list below:
- Fn Lock is turned on – Your keyboard settings might always be set to always pretend the Fn key is being held when using the F1-F12 keys which actually controls some other settings.
- Windows has mistakenly disabled this combination – This can occur after an update or an upgrade as a registry entry changes its state. Here we can change the registry keys or create new ones to fix the issue.
- BIOS is outdated – This issue was seen in several BIOS versions. Many manufacturers have released newer versions of BIOS which prevent this problem from happening
- Old keyboard drivers –Outdated keyboard drivers can also cause issues in pressing a combination of keys. Users have reported that they managed to resolve the problem by installing new keyboard drivers.
Solution 1: Toggle Fn Lock Off
The F1-F12 keys can be used as standard function keys but they often have special multimedia functions if they are pressed while holding the Function (Fn) key on your keyboard. However, there is the Fn Lock option which, when turned on, makes the F1-F12 keys behave as if you’re always holding down the Fn key. This can be turned off in BIOS easily if you follow the instructions below!
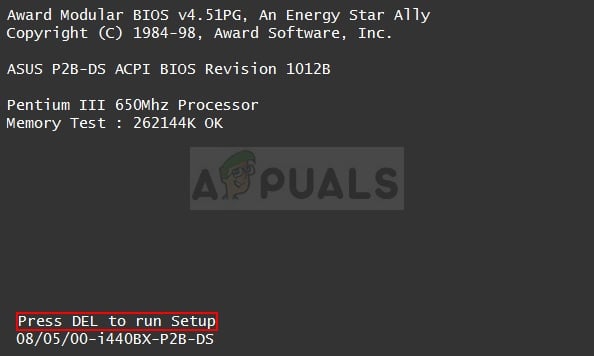
- Turn your PC on again and try to enter BIOS settings by pressing the BIOS key as the system is about to start. The BIOS key is typically displayed on the boot screen, saying “Press ___ to enter Setup.” or something similar to that. There are other keys as well. The usual BIOS keys are F1, F2, Del, etc.
- Now it’s time to toggle the Fn Lock. The option which you will need to change is located under different tabs on BIOS firmware tools made by different manufacturers and there is no unique way to find it. It’s usually located under the Advanced tab but there are many names for the same option.
- Use the arrow keys to navigate to the Advanced, Advanced BIOS Features or a similar sounding option inside BIOS. Inside, select an option named Function Key Behavior, Fn Lock or something similar inside.
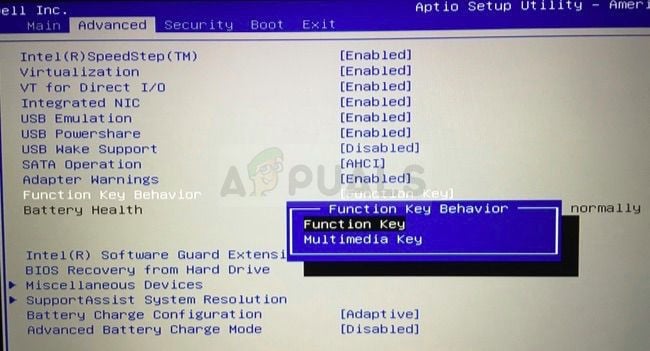
- After selecting the option, you will either be prompted with On/Off options or Function Key vs Multimedia Key, depending on the actual name of the option. Make sure you choose Off for Fn Lock or Function Key for Function Key Behavior, depending on the context.
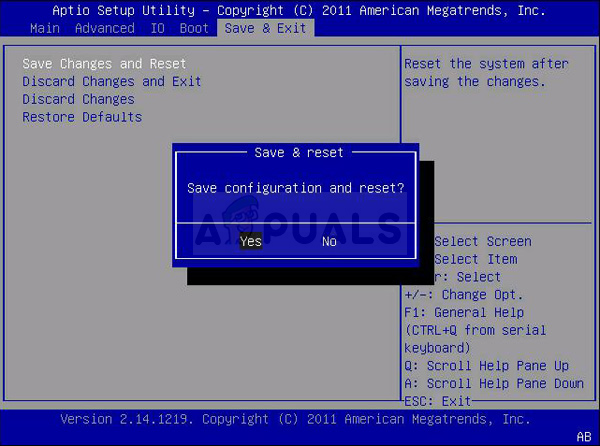
- Navigate to the Exit section and choose to Exit Saving Changes. This will proceed with the computer’s boot. Check to see if the problem persists.
Solution 2: Edit a Registry Entry
This method might be useful if Windows has disabled the key combination’s function completely by mistake. This can be undone in the Registry Editor simply by changing the value of a registry entry. Make sure you follow the steps below carefully!
- Since you are going to edit a registry key, we recommend you check out this article we have published for you to safely backup your registry to prevent other problems. Still, nothing wrong will occur if you follow the steps carefully and correctly.
- Open the Registry Editor window by typing “regedit” in the search bar, the Start menu, or the Run dialog box which can be accessed with the Windows Key + R key combination. Navigate to the following key in your registry by navigating at the left pane:
HKEY_CURRENT_USER\Software\Microsoft\Windows\CurrentVersion\Policies\Explorer
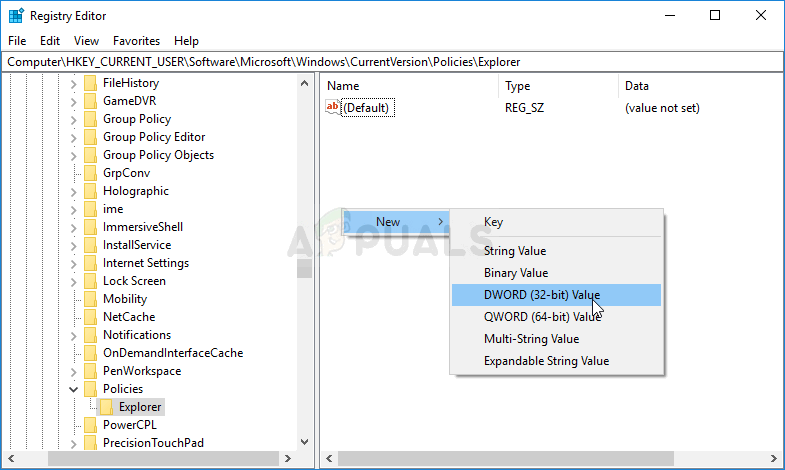
- Click on this key and try to locate an entry named NoWinKeys. If it’s not there, create a new DWORD Value entry called NoWinKeys by right-clicking at the right side of the window and choosing New >> DWORD (32-bit) Value. Right-click on it, and choose the Modify option from the context menu.
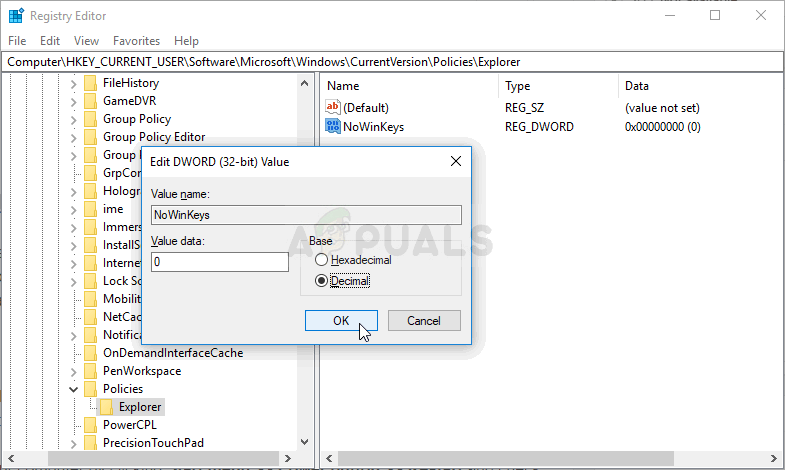
- In the Edit window, under the Value data section change the value to 0 and apply the changes you have made. Make sure the Base is set to Decimal. Confirm any security dialogs which may appear during this process.
- You can now manually restart your computer by clicking Start menu > Power button > Restart and check to see if the problem is gone. This will probably resolve the problem immediately.
Solution 3: Update the BIOS Firmware on Your Computer
Sometimes the problem can be blamed completely on your computer’s BIOS, especially if you have recently performed a system upgrade or if you have installed new devices. Updating BIOS can be a tricky process and the problem is that it differs vastly from manufacturer to manufacturer. That is why you should follow the steps carefully if you want to solve the problem.
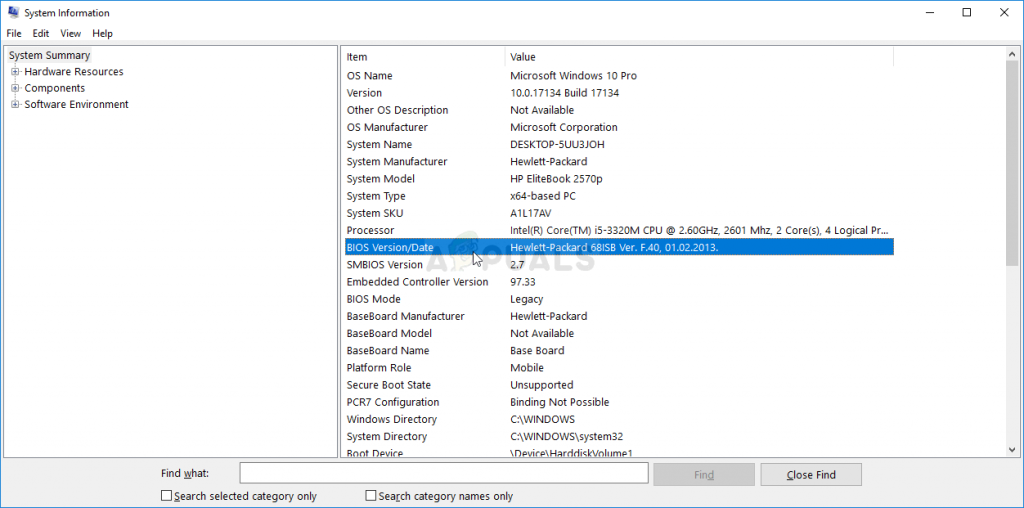
- Find out the current version of BIOS utility you have installed on your computer by typing “msinfo” in the Search bar or the Start menu.
- Locate the BIOS version data just under your Processor model and copy or rewrite anything to a text file on your computer or a piece of paper.
- Find out whether your computer was bundled, pre-built or assembled This is very important because you don’t want to use BIOS made for just one component of your PC when it won’t apply to your other devices and you will overwrite BIOS with a wrong one, leading to major errors and system problems.
- Prepare your computer for the BIOS update. If you are updating your laptop, make sure its battery is fully charged and plug it in the wall just in case. If you are updating a computer, it’s advisable to use an Uninterruptible Power Supply (UPS) to make sure your computer doesn’t shut down during the update because of a power outage.
- Follow the instructions we prepared for various desktop and laptop manufacturers such as Lenovo, Gateway, HP, Dell, and MSI.
Solution 4: Reinstall the Keyboard Drivers
Users have reported that installing the latest drivers available managed to resolve the problem for them without having to change any advanced settings. Keyboard drivers can be found on the manufacturer’s page.
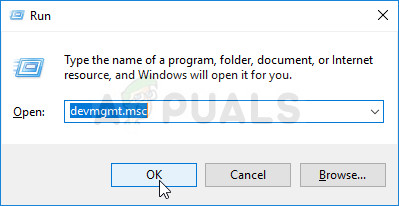
- Click the Start menu button, type in “Device Manager”, and select it from the list of available results by simply clicking the first one. You can also tap the Windows Key + R key combo in order to bring up the Run dialog box. Type in “devmgmt.msc” in the dialog box and click OK in order to run it.
- Since it’s the keyboard driver you want to update on your computer, expand the Keyboards section, right click on your keyboard, and choose the Uninstall Device.
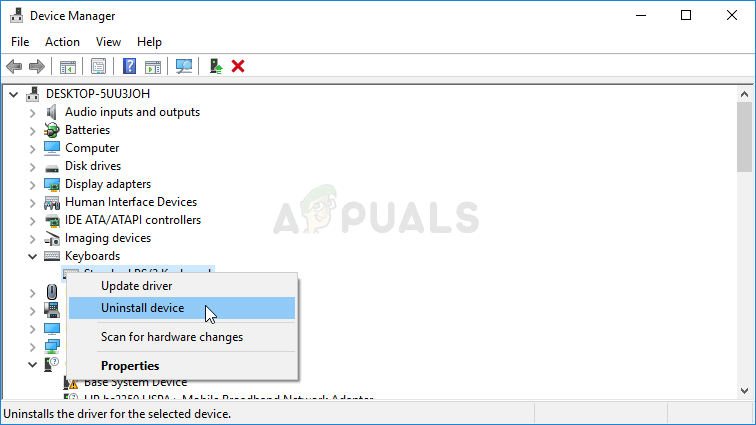
- Confirm any dialogues or prompts which may ask you to confirm the uninstallation of the current driver and wait for the process to complete.
- Google ‘your keyboard’s name + manufacturer’ and look for a link to their official website. Find your keyboard’s latest driver and download it.
- Make sure you run the file you have just downloaded and follow the instructions which will appear on-screen in order to install the latest drivers.
- Check to see if the problem has been resolved and if Alt + F4 key combination problems still occur!


