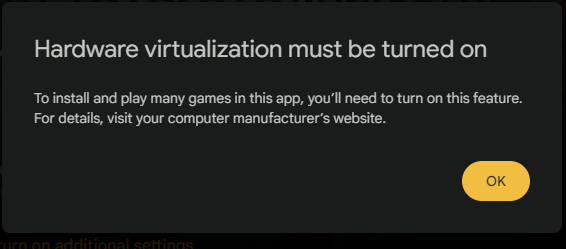
Fix: “Hardware virtualization must be turned on” Google Play Games
The “Hardware virtualization must be turned on” error usually appears when you try to install or launch a game in Google Play Games for Windows on a PC where CPU virtualization is disabled in BIOS/UEFI, not supported by the processor, or blocked by an incompatible Windows virtualization setup.
Hardware virtualization is a processor feature that allows Windows to run isolated virtual environments. Google Play Games uses this feature to create the Android environment it needs on Windows. If virtualization is unavailable or not configured correctly, Google Play Games may fail to start and show this error.
The most common reasons for this error are:
- Virtualization is disabled in BIOS/UEFI
- Your processor does not support virtualization
- The setting exists, but is named differently by your motherboard or laptop manufacturer
- Required Windows virtualization features are disabled or misconfigured
- Hyper-V or related components are conflicting with Google Play Games
Before entering BIOS, it is worth confirming whether your processor supports virtualization. If it does, you can then enable the feature in BIOS/UEFI and verify the change in Windows.
Check If Your CPU Supports Virtualization
Most modern Intel and AMD processors support virtualization, but it is still important to confirm for your exact model.
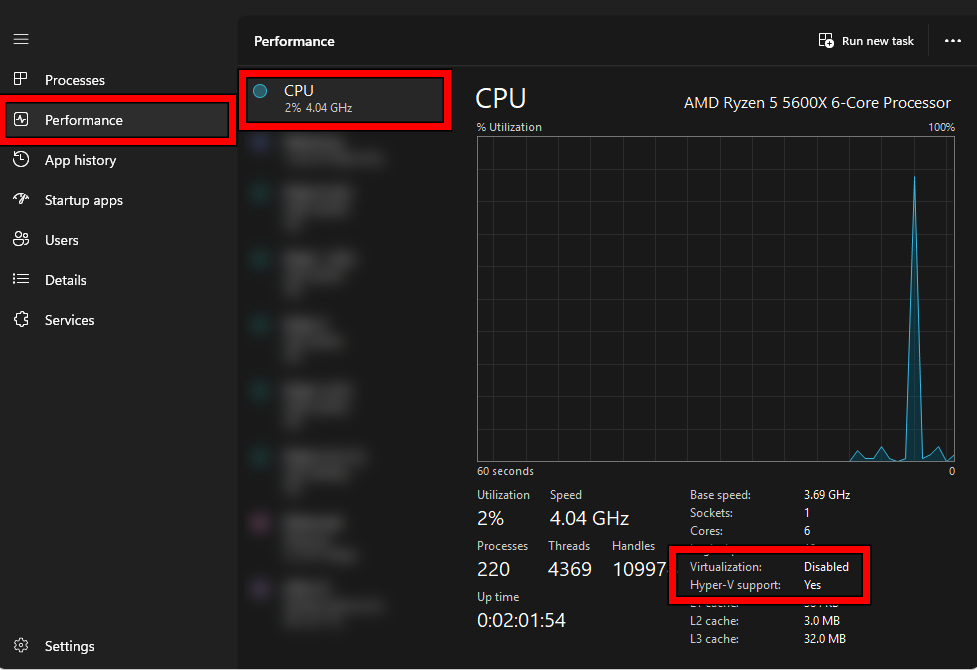
- Press Ctrl + Shift + Esc to open Task Manager
- Go to Performance > CPU and note your processor name
- Search your CPU model on the official Intel or AMD website
- Look for Intel VT-x, Intel Virtualization Technology, AMD-V, or SVM
If your processor does not support virtualization, this feature cannot be enabled, and Google Play Games for Windows will not work on your system.
1. Enable Virtualization in BIOS/UEFI
Hardware virtualization is controlled through your system firmware, not standard Windows settings. Even if your processor supports it, the feature is often disabled by default and must be enabled manually in BIOS/UEFI.
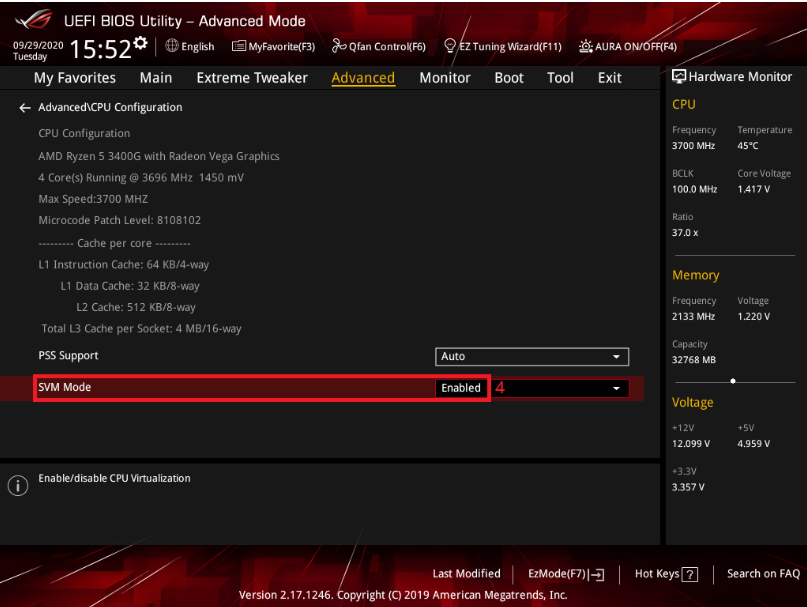
Depending on your motherboard or laptop manufacturer, the option may appear under different names such as Intel Virtualization Technology, Intel VT-x, VMX, SVM Mode, or AMD-V. It is usually located in sections like Advanced, CPU Configuration, Security, or Overclocking.
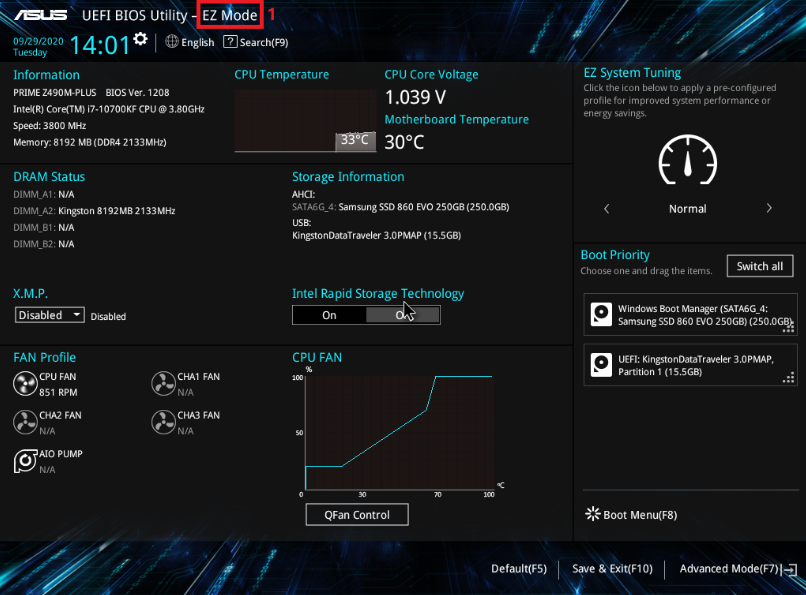
The screenshots below are from an ASUS motherboard, so your layout may look slightly different.
- Restart your PC and repeatedly press the BIOS key during startup. This is commonly Delete or F2, but some systems may use F10, Esc, or F12.
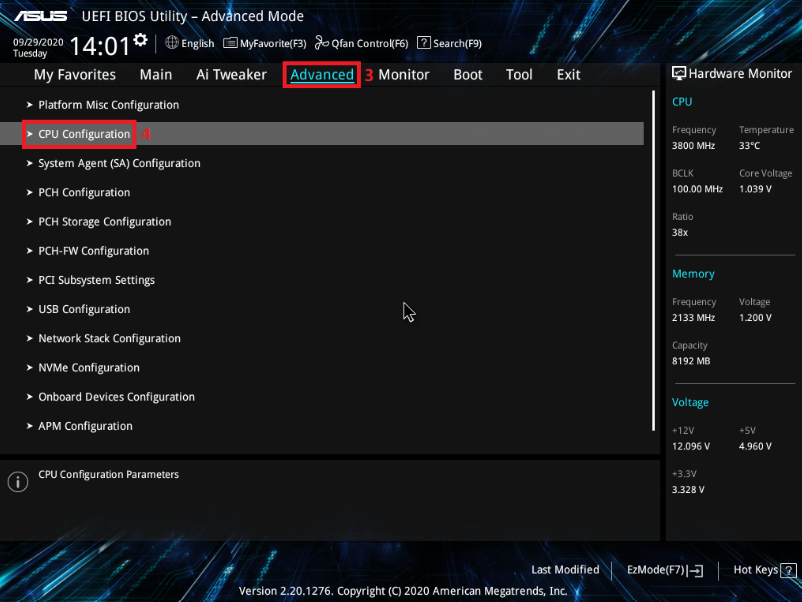
- Once inside BIOS, switch to Advanced Mode if needed.
- Go to the Advanced tab, then open CPU Configuration.
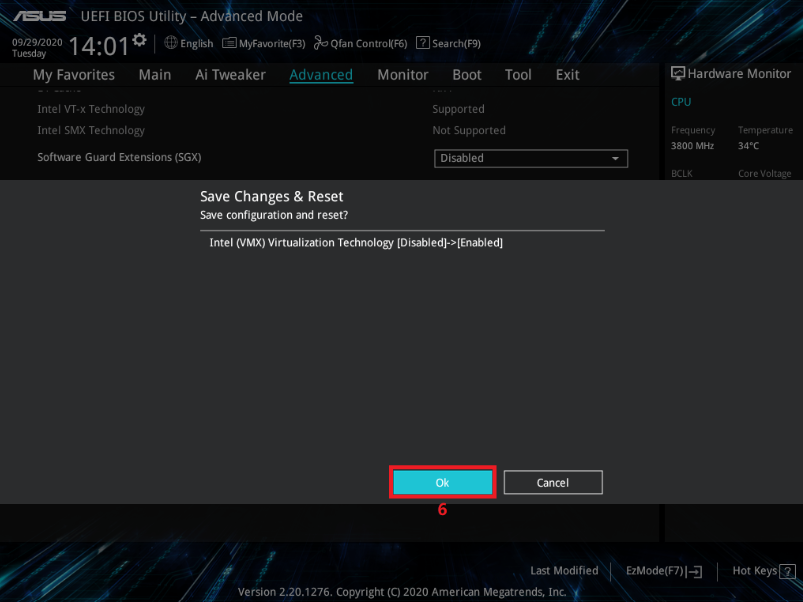
- If you have an Intel processor, find and enable Intel (VMX) Virtualization Technology.

- If you have an AMD processor, find and enable SVM Mode.
- Press F10, then select OK to save the changes and exit BIOS.
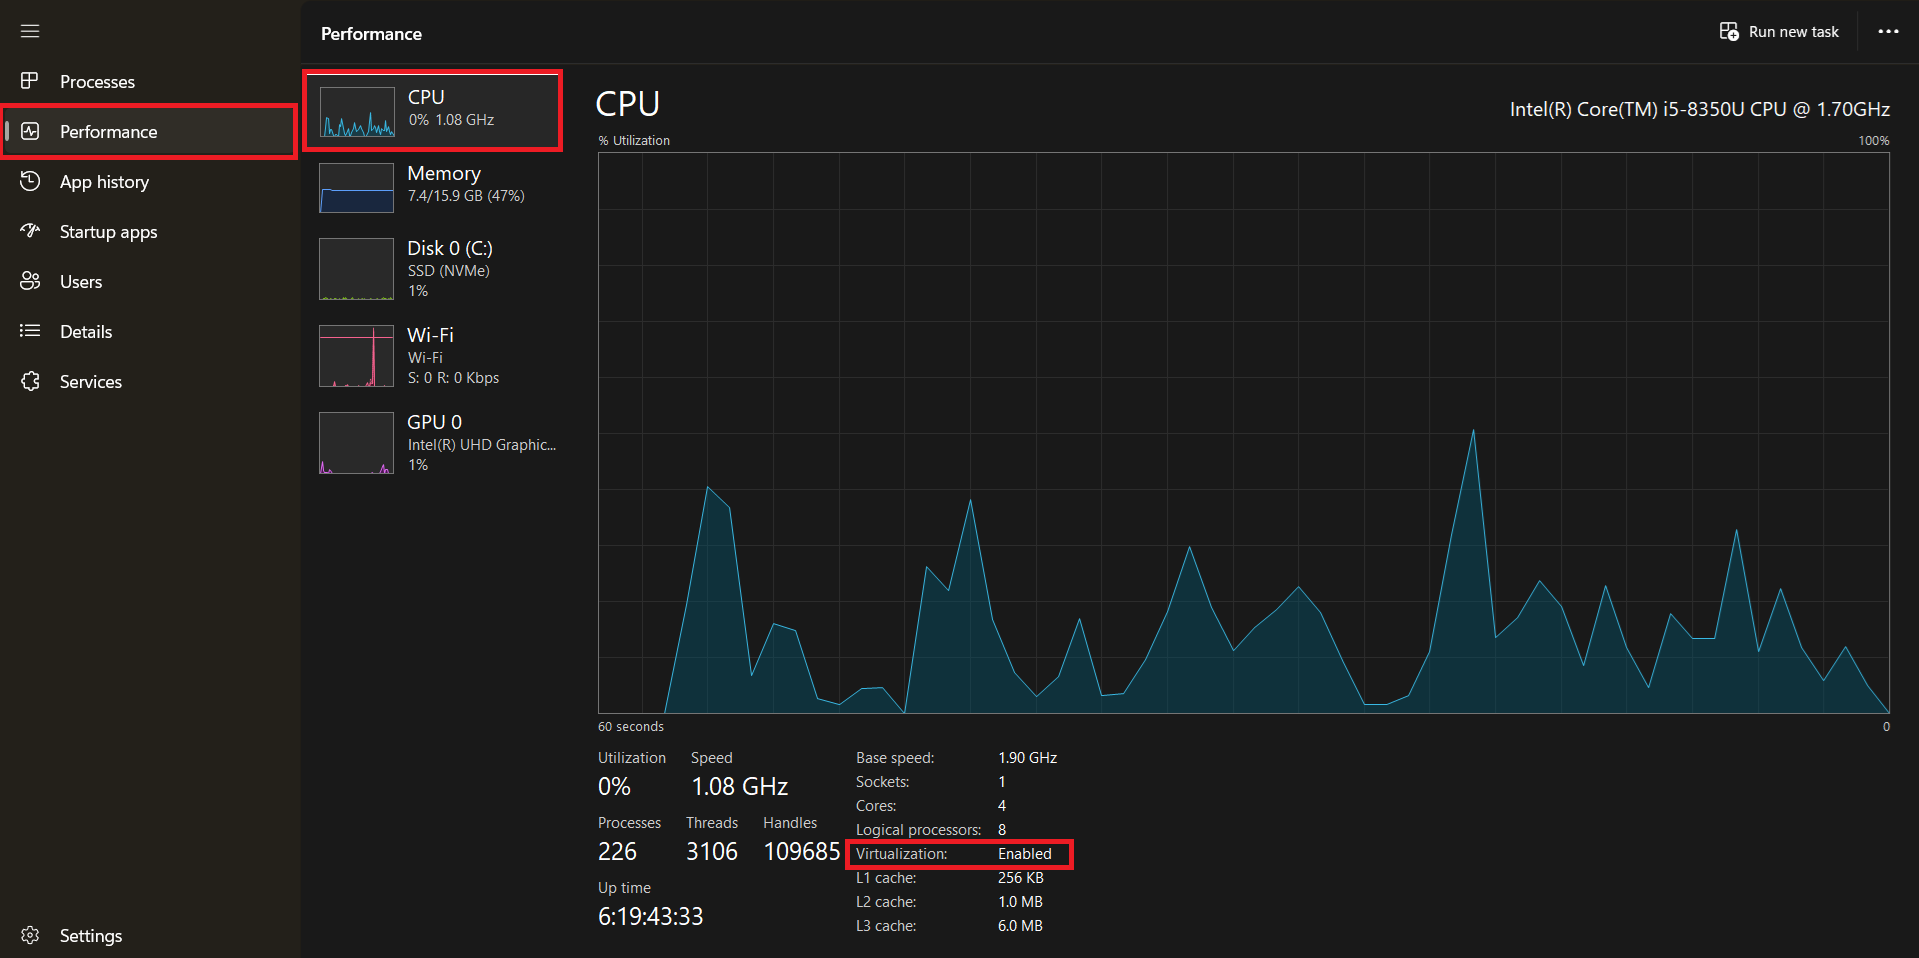
- After Windows starts, press Ctrl + Shift + Esc to open Task Manager.
- Go to Performance > CPU and check the Virtualization field. If it says Enabled, virtualization is active on your system.
- Launch Google Play Games again and check whether the error is gone.
If Task Manager still shows virtualization as disabled, return to BIOS and confirm that the setting was saved correctly. In some cases, a full shutdown (turn the PC off completely, wait a few seconds, then power it back on) works better than a normal restart.
If you cannot find the option in BIOS, check your motherboard or laptop manufacturer’s support page. Some systems place the setting in a different menu or use a different name for the same feature.
If Task Manager shows Virtualization: Enabled but Google Play Games still shows the same error, the issue is likely related to Windows virtualization components.
2. Enable Required Windows Virtualization Features
Google Play Games for Windows requires certain Windows components to be enabled. If they are disabled or partially configured, the application may fail even when BIOS virtualization is turned on.
- Press Windows + R, type optionalfeatures, and press Enter.
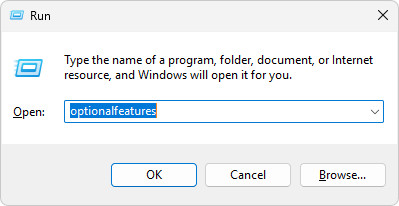
- Enable the following options:
Virtual Machine Platform
Windows Hypervisor Platform
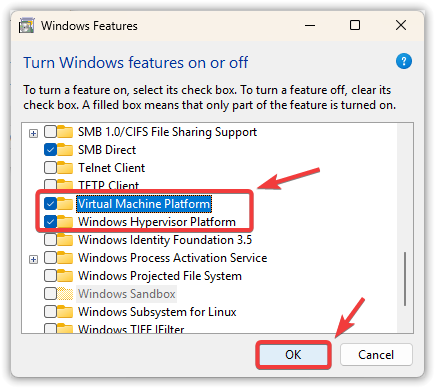
- Click OK and restart your PC.
After restarting, try launching Google Play Games again.
3. Disable Conflicting Hyper-V Components (If Needed)
On some systems, Hyper-V or related features can conflict with Google Play Games, especially if they are partially enabled or misconfigured.
- Open optionalfeatures again
- Disable:
- Hyper-V
- Windows Sandbox
- Windows Subsystem for Linux (if not needed)
- Restart your PC
After restarting, launch Google Play Games again and check if the error is resolved.
By ensuring virtualization is enabled in BIOS and properly configured in Windows, most users can resolve this error and run Google Play Games without issues.


