How to Fix Hard Disk 1 Quick Error (303) on Windows
Some Windows users are no longer able to start up their computer as they end up receiving the Hard Disk 1 Quick (303) error during the initial startup sequences. Other users are reporting that they end up receiving this
issue intermittently. This problem is confirmed to occur on Windows 7, Windows 8.1, and Windows 10.
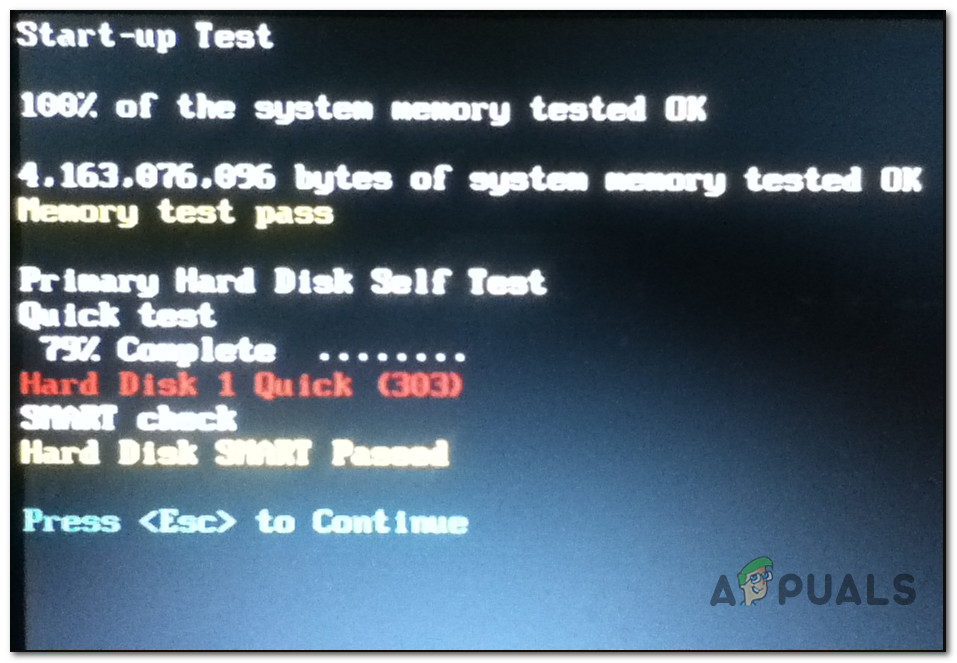
After investigating this particular issue, it turns out that the Hard Disk 1 Quick (303) error is always associated with a failing hard drive, which doesn’t necessarily mean you need to order a replacement. There are some things you can do to extend the life of your HDD / SSD and stop this error from occurring for a while.
Here’s a shortlist of methods that other affected users have successfully used to temporarily fix the Hard Disk 1 Quick (303) error:
Method 1: Running CHKDSK
If you’re starting to encounter this issue intermittently or during every attempted startup, the first thing you should do is perform a CHKDSK (Check Disk Scan) operation.
This utility is a built-in tool that’s capable of identifying bad sectors and other block-related inconsistencies that can be the root cause of the Hard Disk 1 Quick (303) error. It works by utilizing non-used sectors to replace those that are currently malfunctioning.
Of course, if you have a lot of bad sectors that are currently failing on your HDD, this utility might not be able to fix the problem. But it’s still worth the show.
However, since you’re most likely not able to complete the startup procedure, you will need to run this utility a little bit differently – By opening an elevated Command Prompt from the Recovery Options menu on your Windows computer.
To make matters easier for you, we’ve put together a step-by-step guide that will walk you through the entire process. Here’s what you need to do:
- Insert or plug a compatible installation media that’s compatible with your Windows version, start your computer and press the Setup key as soon as you see the initial screen.
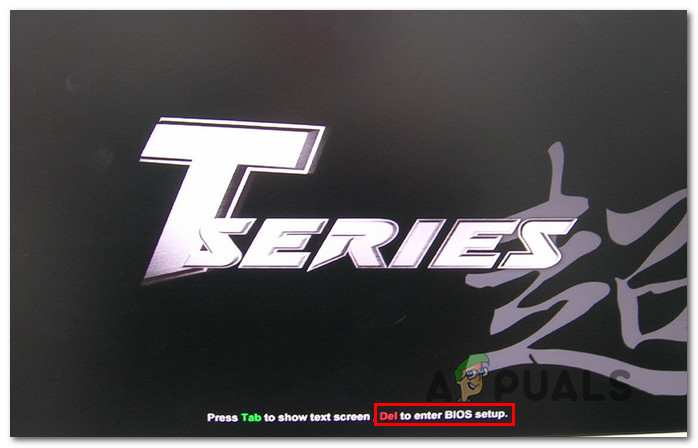
Pressing the Setup key at the initial startup screen Note: The Setup key should be installed on screen, but just in case it’s not, try pressing one of the F keys, Esc, or Del keys. If you’re still unable to boot from your installation media, search online for specific steps.
- After you successfully boot from your installation media, click on Repair your computer from the bottom-left corner of the screen.
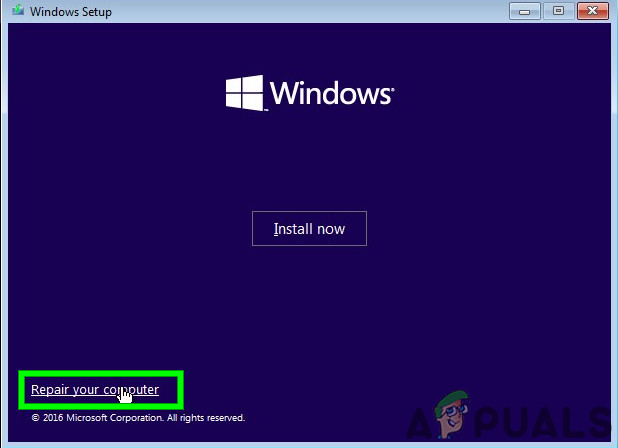
Repairing this Computer Note: Keep in mind that in case you don’t have a compatible installation media at the ready, you can force the Recovery menu to appear by forcing 2-3 unexpected shutdowns in the middle of the startup procedure. Doing this will automatically force your OS to boot directly into the recovery menu.
- Once you’re finally inside the recovery menu, start by clicking on Troubleshoot, then click on Command Prompt from the list of available options.
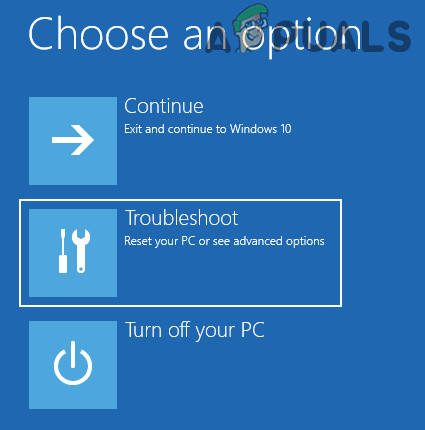
Accessing the Troubleshooting menu - Once you’re inside the Troubleshoot (Recovery) menu, click on Command Prompt from the list of available options.

Accessing Command Prompt via Recovery Menu - Once you’re inside the elevated Command Prompt, type the following command to initiate a CHKDSK scan:
CHKDSK X:
Note: X is simply a placeholder. Replace it with the letter of the drive containing your Windows installation. Most commonly, that letter is C.
- Wait until the operation is complete, then restart your computer and allow it to boot normally to see if the Hard Disk 1 Quick (303) error is still occurring.
In case you are still unable to boot your computer due to this error, move down to the next potential fix below.
Method 2: Running a TestDisk Scan (If Applicable)
Assuming that you already tried to do a CHKDSK scan using the method above and you’re still encountering this problem, the evidence is certainly pointing to a failing drive. But before you go ahead and take a radical action that will inevitably hurt your wallet, you should still assume that you are dealing with some reparable bad sectors with consequent data loss on your HDD.
With this in mind, you should continue the troubleshooting by using the TestDisk utility to find and retrieve si corrupted system files currently located on bad blocks of memory storage.
And to make matters easier for you, we’ve put together a step-by-step guide that will walk you through the process of running a TestDisk Scan on a computer that is booting irregularly or only booting in safe mode.
IMPORTANT: If your computer is not booting at all, this method will not work in your case. If you find yourself in this scenario, move down to the next method below.
- Open your default browser and navigate to the official download page of TeskDisk. Once you arrive at the correct location, click on the Download button and wait for the operation to complete.
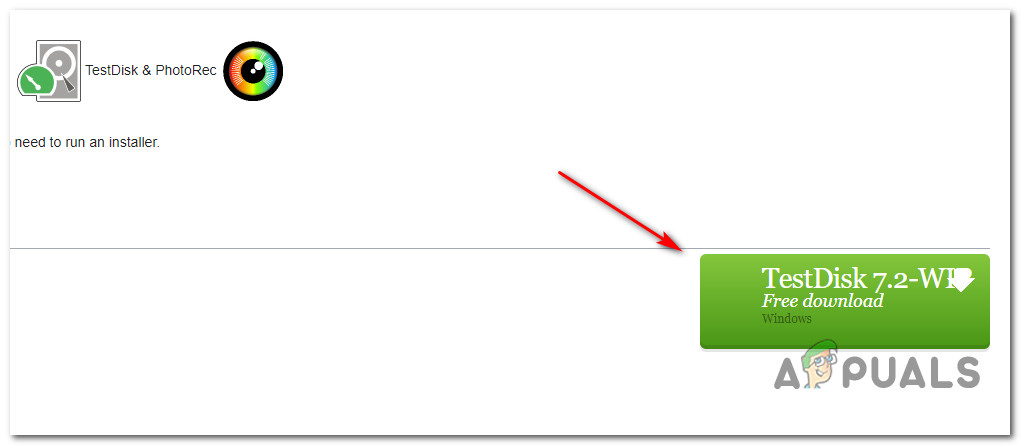
Downloading TestDesk on your computer - Once the download is complete, use a utility like Win-Zip, WinRar, or 7Zip to extract the contents of the archive in a dedicated folder.
- After you successfully extract the contents of the archive, right-click on testdisk_win.exe and click on Run as administrator from the context menu that just appeared.
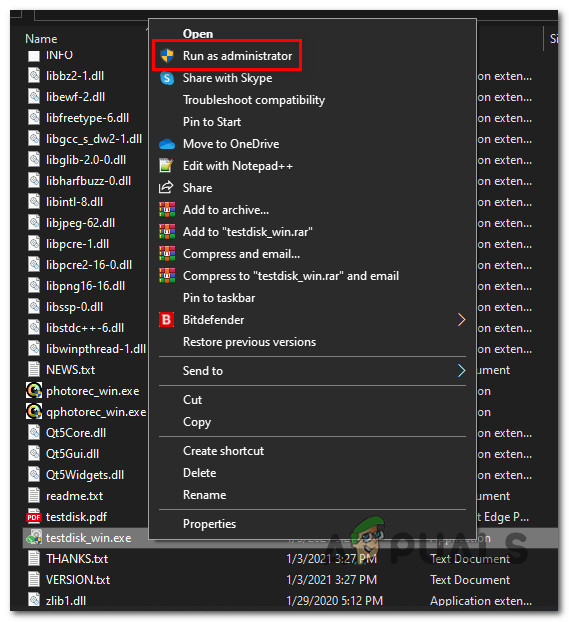
Opening the TestDisk utility with admin access - When prompted by the UAC (User Account Control) prompt, click Yes to grant admin access.
- Immediately after the CMD window related to TestDisk opens, you’ll be asked to choose between 3 options. When it comes to this, use the arrow keys to choose Create, then press Enter to confirm your choice.
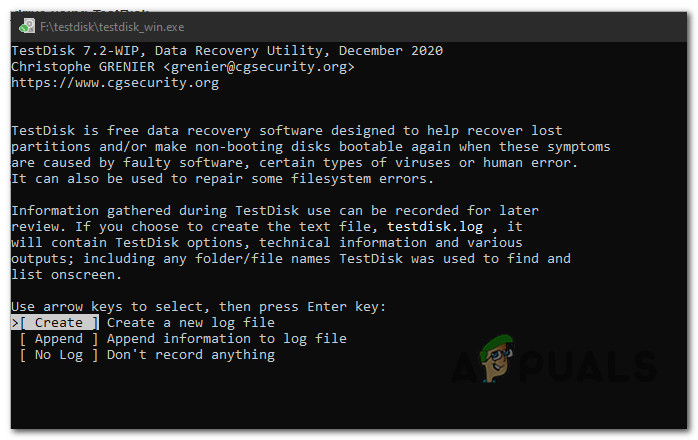
Creating a NEW log file inside the TeskDisk utility - TestDisk will now begin to scan for all partitions and present you with a choice to choose between them. Make sure to select the OS partition and press Enter once again.
- Next, you’ll be asked to select the partition table type. When this happens, choose Intel (the first option at the top) and press Enter once again.
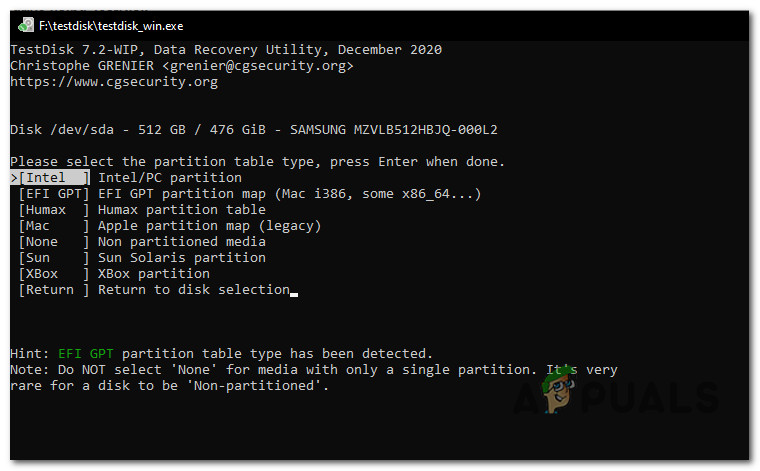
Choosing the Partition type - From the next choice prompt, choose the arrow keys to select Analyse, then press Enter to get TeskDisk to analyze the current partition structure and search for lost partitions.
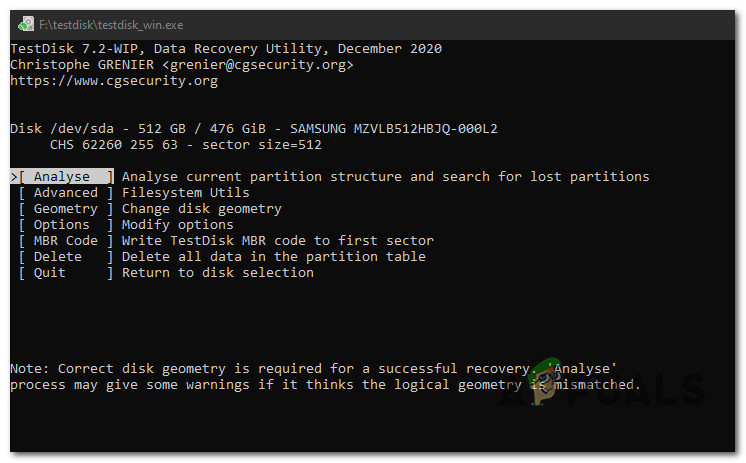
Analyzing the problematic partition - Wait until the initial scan is complete, then choose Quick Search and press Enter when asked to do so. Next, press the Y key.
- After a couple of seconds, you should see all your partitions listed. When this happens, use the arrow keys to select the partition that holds your OS files, then press P to list the contents of that partition.

Listings the contents of the partition - Next, select the Write key, then press Enter and then Ok to confirm before finally waiting for the partitions to be registered in the partition table.
- Close the Teskdisk utility and see if the Hard Disk 1 Quick (303) error is now fixed.
If the same problem is still occurring, move down to the next method below.
Method 3: Getting a Replacement HDD / SSD
If none of the potential fixes above have worked in your case, it’s clear that you are dealing with a failing drive. And given that it’s a hardware issue, there is no method that will save you from having to replace the bad HDD / SSD.
In case your computer is still under warranty, the path is clear. Send your computer in for repairs and they will replace the drive automatically.
Note: If you still have doubts about the hardware failure, here are a few other methods you can follow to confirm a HDD failure.
But on the other hand, if your warranty is expired or voided, the only choice is to order a replacement. You can either order a replacement online if you’re tech-savvy, or you can take your PC to a certified technician.


