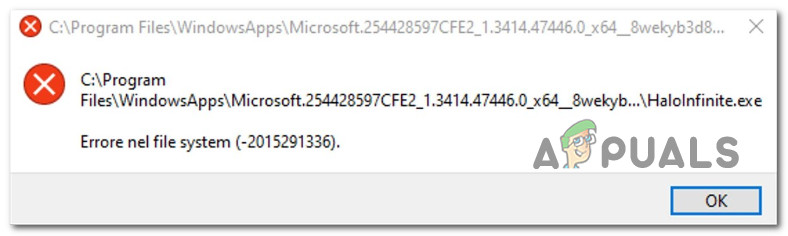
How to Fix Halo Infinite File System Error (-2015291336)
Some Windows 10 and Windows 11 users are reporting that they always get the Halo Infinite File System Error (-2015291336) error when attempting to open Halo Infinite on a PC. This error appears at every startup and prevents affected players from starting the game up.
After investigating this issue extensively, we realized that there are actually several different underlying scenarios that might be at the root of this file system error. Here’s a shortlist of potential culprits that might be responsible for this problem:
- Inconsistency with the UWP version of Halo Infinite – If you launch Halo Infinite via the Microsoft Store, chances are you’re dealing with some kind of issue that’s quite common on the UWP version of the game. If this scenario is applicable, you should try repairing or resetting the game installation from the Settings menu.
- Microsoft Store inconsistency – Another potential culprit that’s quite popular in this kind of scenario is an inconsistency affecting the Store component and thus every game or app that is launched through it. In this case, you can get the issue resolved by running the Windows Store troubleshooter.
- Xbox App account is different from Microsoft Store – Although Microsoft doesn’t specifically tell you, you actually need to have the same account signed in on both the Xbox app and the Microsoft Store in order to launch any first-party game from Microsoft’s fleet. If you’re using two different accounts, pick one and sign in with it on both the Xbox App and Microsoft Store to fix the issue.
- Expired Xbox Game Pass Subscription – If you attempt to launch the game via the Game Pass Lineup, you should start by checking if your Xbox Game Pass subscription is still active. If it has expired, you need to renew it in order to launch the game.
- Missing Windows Infrastructure update – As it turns out, you might expect to be unable to launch this game in situations where you are missing a key infrastructure Windows Update that your operating system needs in order to launch first-party games from Microsoft.
- Incorrect date, time, and region – One unlikely culprit that you are likely to ignore is the date, time & region of your system. If these values are way off the expected values, the Store-initiated verification might fail and you will be prevented to launch the game. To fix this issue, simply set the correct Date & Time according to your region.
- Microsoft Store is partially de-registered – According to a lot of affected users, one reason why you might be unable to launch Halo Infinite and other similar games brought through the Microsoft Store is that the Store has been partially registered. To fix this problem, you’ll need to run a series of commands in an elevated Powershell prompt.
- System File corruption – System file corruption can also be responsible for this particular error. When it comes to resolving this particular cause you should start by utilizing the System Restore utility to see if you can restore your PC back to a healthy state. If this fails, go for a repair install or clean install if the issue persists.
- Corrupted Windows account – A corrupted Windows account is another likely culprit that might indirectly cause the Halo Infinite File System Error (-2015291336) error as your OS is unable to call upon the required dependencies. In this case, the easiest way to fix the issue is to create a new Windows account.
Now that we went over every potential cause that might be responsible for triggering this issue, let’s go over every fix that other affected users have successfully used to get to the bottom of this Halo Infinite File System Error (-2015291336):
1. Repair or Reset the Halo Infinite App
If you start Halo Infinite through the Microsoft Store, there’s a good chance you’re experiencing a problem that’s pretty typical for the UWP version of the game. Try repairing or resetting the game installation from the Settings menu if this scenario applies.
All the damaged files that are preventing the Halo Infinite app from functioning properly will be fixed or replaced when you repair or reset the program. The File System Error (-2015291336) error should be resolved after completing this operation.
All you need to do is open the Advanced Options by going to Windows Settings. There, the Halo Infinite program may be reset or fixed. To find out if either solution will resolve your problem, you should attempt both.
Here is a tutorial with all the instructions you require in case you don’t know how to accomplish this:
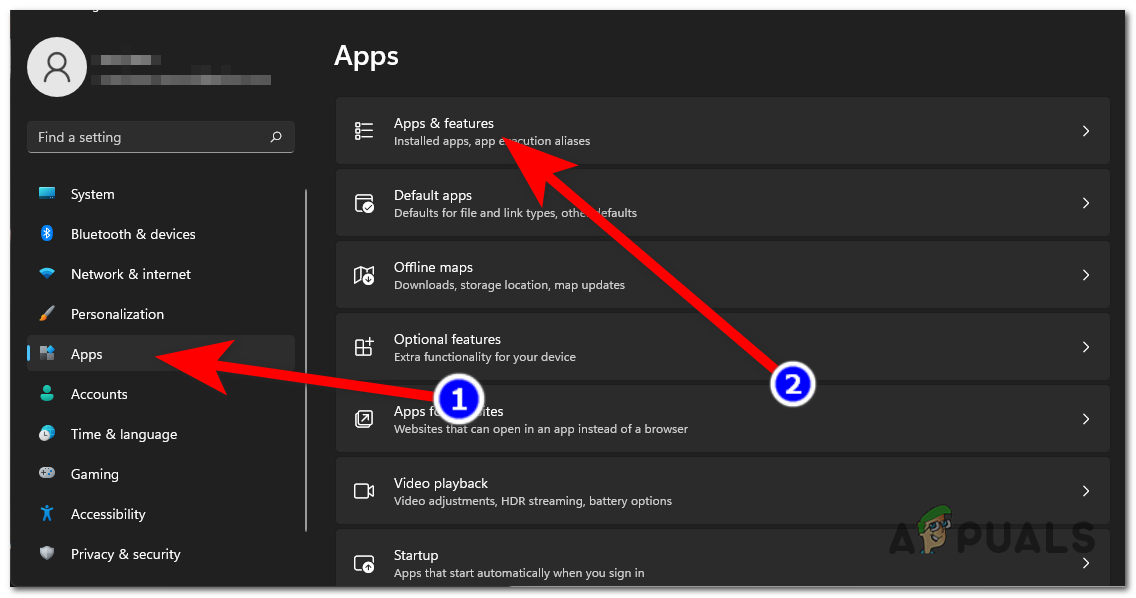
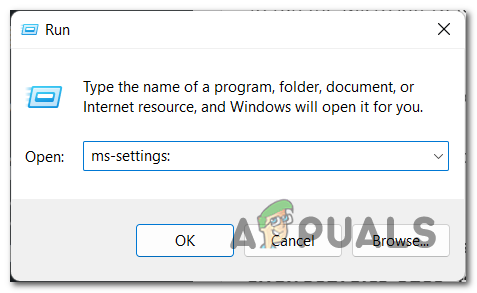
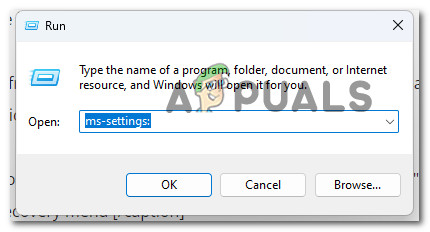
- To open the Windows Settings, open a Run dialog box by hitting the Windows key + R, putting “ms-settings:” into the search field, and then hitting Enter. The Microsoft Store may be accessed in a variety of ways, so do it as you choose.

Open Microsoft Settings - After entering Windows Settings, scan the list on the left side of the screen until you find the Apps area. After choosing it, you must click on Apps & Features.
Accessing the Apps & Features menu - You will be able to view a list of all the programs installed on your computer when you are in the Apps & features area. You may either use the search feature to discover the Halo Infinite more quickly or scroll through the list till you find it.
- After you’ve identified Halo Infinite, select Advanced settings by clicking on the three dots next to the app’s right side.
- Next, scroll down until the Repair and Reset buttons are visible. First, choose Repair to see if it resolves your Halo Infinite issue.
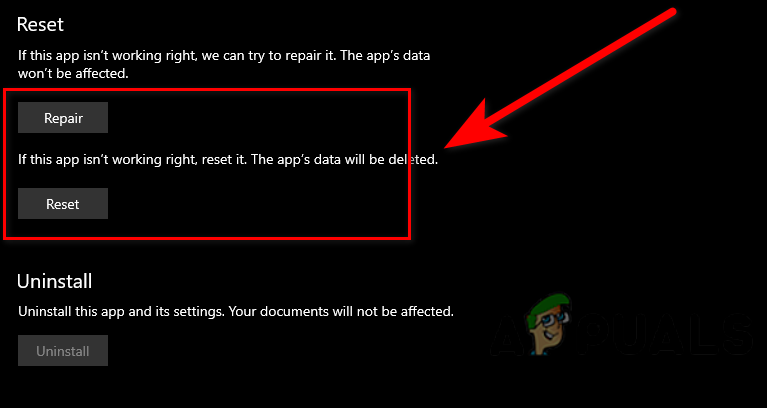
Repairing or resetting Halo Infinite 6. Click the Reset option to attempt to reset the app if the repair procedure was unsuccessful. But bear in mind that the data associated with the app, along with the sign-in choices and preferences, will be erased from your computer during this procedure.
7. Test the game once again to check if you still see the same issue when attempting to open Halo Infinite once the reset procedure is complete.
If repairing or resetting your Halo Infinite installation didn’t do anything in your case, move down to the next method below.
2. Run the Windows Store Apps Troubleshooter
The Store component, and consequently any game or program that is launched through it, is another potential offender that’s highly popular in this sort of circumstance. Running the Windows Store troubleshooter in this situation will fix the problem.
Another solution that has assisted players in resolving their Halo Infinite File System Error (-2015291336) issue is this one. Running the Windows Store Apps troubleshooter was sometimes the solution that restored appropriate functionality to the Microsoft Store and allowed the game to launch normally.
The procedures to get there are slightly different for Windows 10 and Windows 11, although both operating systems support this strategy. If you are having trouble doing this on Windows 10, look online for detailed instructions.
All you need to do is enter the Troubleshoot area of Windows Settings and look for the Windows Store Apps troubleshooter option there. When you choose it, it will instantly ascertain the error’s root cause and suggest a course of action for fixing it.
To use the Windows Store Apps troubleshooter on Windows 11, follow these simple steps:
- You must access the Windows Settings as your initial step. Enter “ms-settings:” in the Run dialog box after pressing the Windows key + R to launch the Settings. Alternatively, you may open them by hitting the Windows key + I or directly from the taskbar.
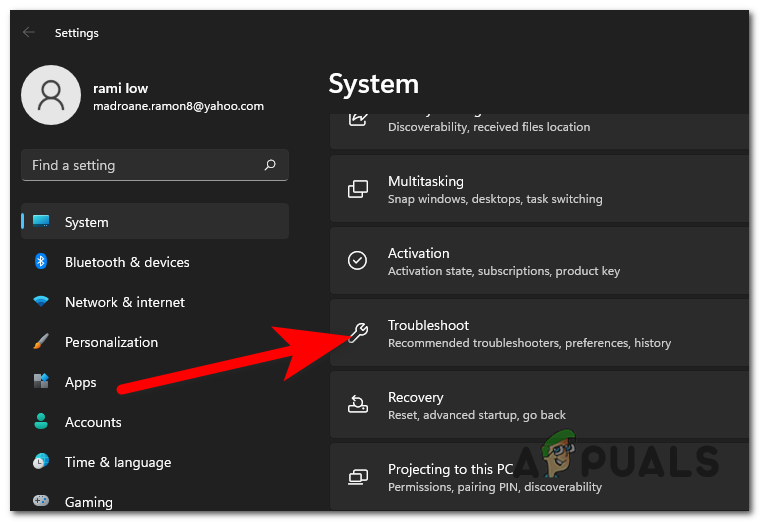
Open Windows Settings - Having entered the Windows Settings, locate System in the list on the screen’s left side. Click on this area when you locate it.
- Scroll down until you see Troubleshoot in the System section, then click on it.
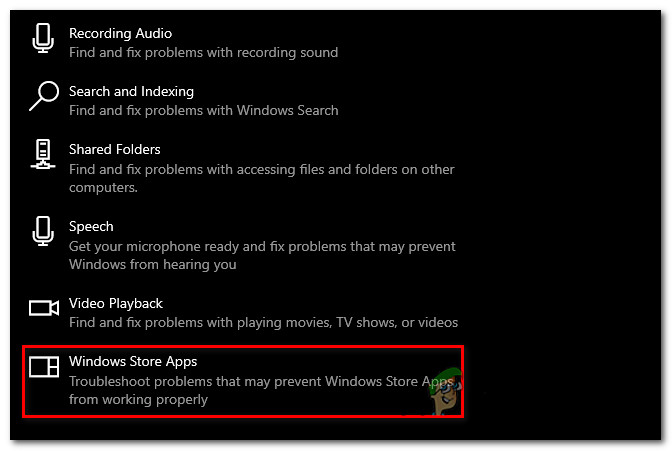
Accessing the Settings menu - For this step, you must now click on Other troubleshooters.
- To find Windows Store Apps, go to the bottom of the screen after entering the Other troubleshooters area.
- Click Run to launch the Windows Store Apps troubleshooter when you see it.
Accessing the Windows Store Apps - After you’ve finished troubleshooting, follow the recommendations given to you to finish the procedure.
- When you’ve finished, launch Halo Infinite once again and see if the system file error is now fixed.
Check the following potential solution below if the problem is still happening.
3. Use the same account for Xbox App & Microsoft Store
You actually need to have the same account logged in on both the Xbox app and the Microsoft Store in order to start any first-party game from Microsoft’s library, despite the fact that Microsoft doesn’t explicitly state this. To resolve the problem, choose one of your accounts and sign in with it on the Xbox App and the Microsoft Store.
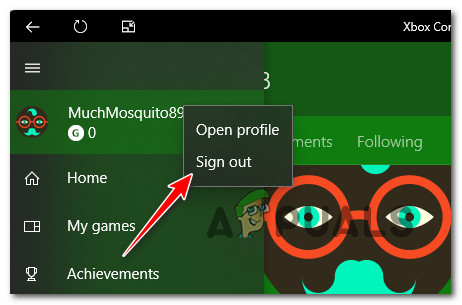
First, click on the Start key and search for Xbox App (now renamed Xbox Console Companion). Once inside, right-click on your currently signed-in account and click on Sign out.
Once you’ve done this, sign in with the Microsoft account that you’re also using with your Microsoft Store, then reboot your PC and launch Halo Infinite once again to see if the problem is now fixed.
In case you’re still dealing with the same File System Error (-2015291336) error, move down to the next method below.
4. Make sure your Xbox Game Pass subscription is active
Check to see if your Xbox Game Pass subscription is still current before trying to launch the game from the Game Pass Lineup. To start the game if it has expired, you must renew the license.
Here’s how to check if your Xbox Game Pass subscription is active or if it has expired:
- Start by signing with your Microsoft Account on the official Microsoft page here. Alternatively, you can open the Microsoft Store.
- Once you’re signed in with your Xbox account, search for Xbox Game pass using the search functionality up top, then click on Xbox Game Pass for PC (or Xbox Game Pass Ultimate) from the list of the results.
- If the Xbox Game Pass subscription is active, you will be able to click on the three-dot icon and click on My Library > Xbox Game Pass, which will display all the Game Pass lineup available to you. Note: If you can’t see this window, it means that your Game Pass subscription is no longer active.
If this investigation has revealed that your Xbox Game Pass subscription is no longer active, all you have to do is renew it and you should be able to get rid of the Halo Infinite File System Error (-2015291336) error.
In case this method was not applicable, move down to the next method below.
5. Start the Microsoft Store Install Service
For the applications and games installed via this service to function effectively, the Microsoft Store Install Service, which supports the Microsoft Store’s infrastructure, must be enabled. The Microsoft Store won’t operate correctly if it is deactivated.
All you need to do is go to Windows’ Services menu, see if the Microsoft Store Install Service is active, and then restart your computer to ensure that it is functioning correctly.
The procedures you must take to verify the Microsoft Store Install Service are listed below:
- You should start by opening the Services screen via a Run box. To launch the Run dialog box, click the Windows key + R. Type “services.msc” into the search field and hit Enter to launch the Services program.

Open the Services screen - You must navigate through the list of Services after they display on your screen to discover Microsoft Store Install Service. Make sure the status reads “Running” immediately after the name when you view it.
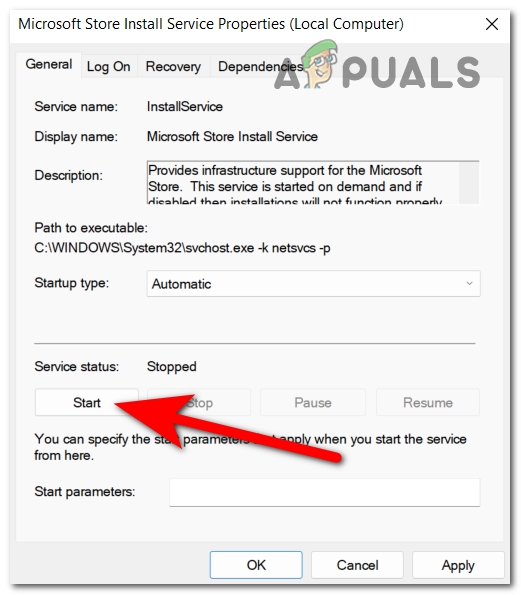
Start the Microsoft Install Service 3. Double-click the Microsoft Store Install Service and change the Startup type to Automatic if it’s disabled, then click OK.
4. You must restart the service to ensure that it is operating correctly now that you are certain the Microsoft.
5. Restart your PC, then launch Halo Infinite once again and see if the problem is now resolved.
If the problem is still not resolved, move down to the next method below.
6. Update Windows version
As it turns out, you could anticipate that you won’t be able to launch this game if you’re lacking a crucial piece of Windows Update infrastructure that your operating system requires to support Microsoft’s first-party games.
Simply open Windows Update, check to see if any updates are available, install them if they are, and that’s all there is to it. The Windows Update settings will be found in the settings of your machine.
Here are the methods in case you’re unsure how to determine whether the most recent Windows updates have been installed:
- Start by launching the Windows Settings. By clicking the Windows key + R, type “ms-settings:” and then pressing Enter, you may launch a Run dialog box and do this task in one of the quickest ways possible.
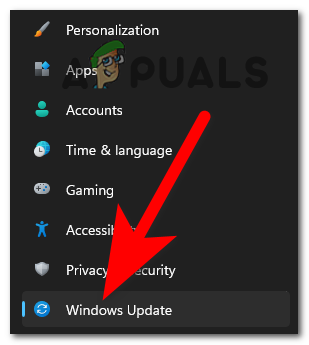
Accessing the Microsoft Settings - Use the menu on the left to navigate down until you find Windows Update in the Windows Settings window. When you find it, click on it.
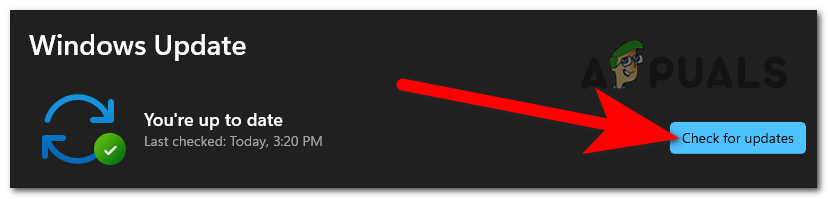
Access the Windows Update settings - The Check for updates button should be visible once you are in the Windows Update. The scan won’t be ready right away. If there are updates that need to be installed right away, select Install to get started.
Checking for updates - Restart your computer after the updates have been installed to ensure that they are properly applied.
- Launch Halo Infinite once again and see if the problem is now resolved.
If the same problem is still occurring, move down to the next potential fix below.
7. Set the Correct Date & Time
The date, time, and region of your system are unlikely offenders that you are likely to disregard. The Store-initiated verification could fail if these values are significantly out of the expected range, which would prevent you from starting the game. Simply set the appropriate Date & Time for your location to resolve this issue.
If this situation applies, you should be able to resolve the problem by altering the date, time, and timezone values in the Date & time settings menu to the appropriate values. Several impacted users have attested that this action helped them to finally resolve the problem.
To establish the proper date and time, adhere to the directions below:
Note: No matter what version of Windows you use, the following procedures will function.
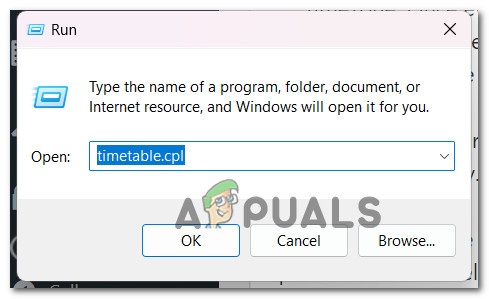
- To bring up the Run dialog box, press Windows key + R. The Date & Time box will then appear once you input “timetable.cpl” and hit Enter.
Accessing the TimeTable - Select the Date and Time tab and click on Change date & Time after you’ve reached the Date & Time window.
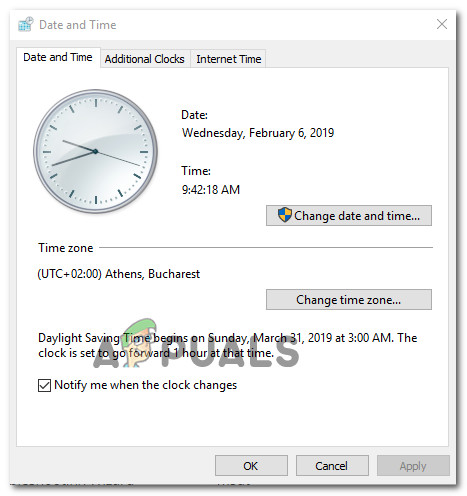
Set the Correct date & time Note: Click Yes to grant administrator privileges when the UAC (User Account Control) box prompts you to do so.
- Enter the proper time in the next option, use the calendar to choose the relevant values for your time zone, and then click OK to save the adjustment.
- Once the date and time have been changed accordingly, restart your system, then launch the game once again and see if the problem is now fixed.
If the same kind of issue is still occurring, move down to the next method below.
8. Clear the Store’s LocalCache
According to many affected users, you may anticipate encountering this issue if the LocalCache folder of the Microsoft Store contains corrupt data that prevents the installation of pending updates. Manually deleting the LocalCache folder, in this case, ought to fix the issue.
If the error still persists after running the wsreset operation, follow the steps listed below to manually remove the Windows Store’s cache folder:
- Ensure that the Windows Store component is completely turned off.
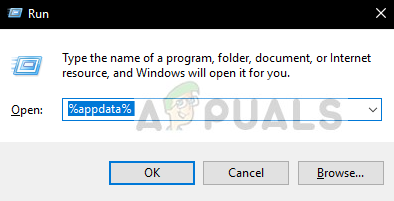
- Press Windows key + R to open the Run dialog box.
- To uncover the hidden AppData folder, type “%APPDATA%” into the Run box’s text field and then press Ctrl + Shift + Enter.
Access the Appdata folder - Select the AppData folder and then navigate to the following location:
C:\Users\User_name\AppData\Local\Packages \Microsoft.WindowsStore_8wekyb3d8bbwe\
- Next, use your right mouse click to pick Delete from the pop-up option on LocalCache.
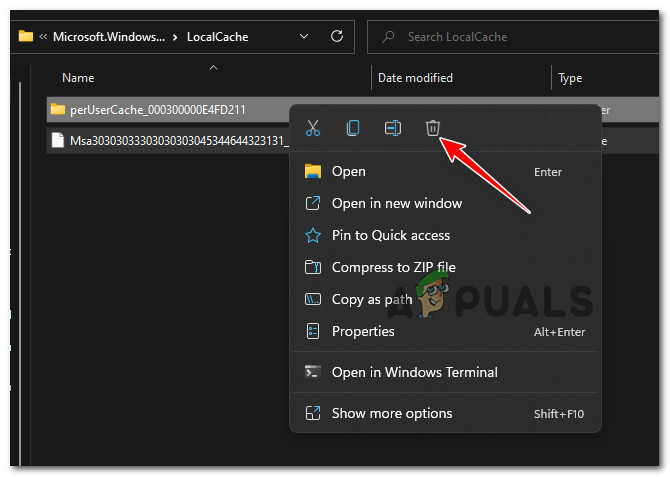
Delete the Local cache - Removing it will have no underlying effects because the Store component will automatically rebuild this folder the next time you run the program.
- Relaunch the Halo Infinite after deleting the LocalCache folder to check if the error has been resolved.
If the same kind of issue is still occurring, move down to the next method below.
9. Re-Register Store
Many people claim that the partially registered Microsoft Store is one of the reasons why Halo Infinite and other comparable games sold through the Microsoft Store may not be able to be launched. You’ll need to issue a number of commands from an elevated Powershell prompt in order to resolve this issue.
Here’s how to use an elevated Powershell window to re-register the Store app:
- Hold down the Windows key + R to open the Run dialog box.
- To open an elevated Powershell window, type “powershell” into the newly launched window and hit Ctrl + Shift + Enter.

Access the Powershell menu - To enable the UAC (User Account Control) window to open with administrative access, click Yes.
- To re-register the Windows Store component, enter the following command in the elevated Powershell window and click Enter.
Get-AppXPackage *WindowsStore* -AllUsers | Foreach {Add-AppxPackage -DisableDevelopmentMode -Register "$($_.InstallLocation)\AppXManifest.xml"}5. After executing the command, restart your computer to verify if the issue is fixed when you launch Halo Infinite once again.
If you’re still experiencing the same File System Error (-2015291336), move down to the next method below.
10. Deploy SFC and DISM scans
If you’ve reached this point without finding a solution, there’s a good possibility that you’re dealing with a system file corruption of some kind that causes this File System Error (-2015291336).
Running SFC (System File Checker) and DISM (Deployment Image Servicing and Management), two built-in tools capable of resolving the most frequent causes of system file corruption, should come next.
Although SFC and DISM are somewhat similar, I advise running them both quickly after one another to increase your chances of resolving the corruption issue.
It should be noted that although DISM uses Windows Update to get files that need to replace corrupted counterparts, SFC retrieves healthy system files from a local location.
Check to determine whether there is any system file corruption by running an SFC scan from an elevated CMD prompt.
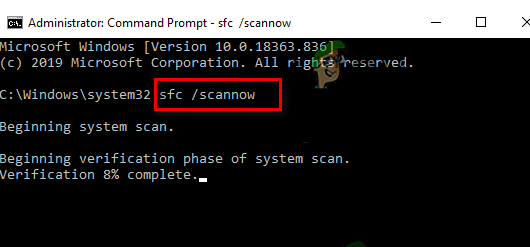
Note: It’s advised not to stop this procedure midway (or prematurely close the CMD window) even if the tool appears to have frozen. Eventually, when the operation is finished, you’ll receive the success message.
Restart your PC after the DISM scan is finished, then after the subsequent startup has finished, deploy a DISM scan.

Make sure you have a solid Internet connection before beginning this process.
Once the DISM command has been properly executed, restart your PC to check if the issue has been resolved.
If the problem is still not fixed, continue to the final potential cure below if the File System error (-2015291336) error is still present despite doing both of these scans.
11. Create a new Windows Account
Another potential offender that could indirectly contribute to the Halo Infinite File System Error (-2015291336) error is a misconfigured Windows account that prevents your OS from accessing the necessary components. The simplest solution in this situation is to create a new Windows account.
The issue was resolved, according to some users who were experiencing problems opening games, by switching to a local Microsoft account.
The removal of any damaged dependencies currently connected to your current user profile will result from this action, so take note.
If you haven’t already, use the steps listed below to make a new user account in an effort to get around Halo Infinite’s File System Error (-2015291336) error:
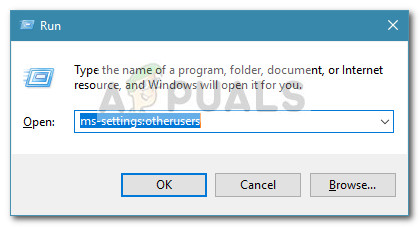
- Press Windows key + R to open the run dialog box.
- To access the Family & Other People tab of the Settings app, type “ms-settings:otherusers” in the text box and press Enter.
Access the Other Users tab - From the Family & other users menu, click Add someone else to this PC and then scroll down to the Other users option.
4. Complete the remaining steps to create a new Windows account, restart your computer, and sign in using that account to see if you can get beyond the error and play Halo Infinite without issues.
If the same kind of issue is still occurring, move down to the next method below.
12. Use System Restore
If all else fails, you can roll back your PC to a previous system restore point when Halo Infinite was functioning normally in an effort to try to fix the File System Error (-2015291336). Some users have found the issue to be resolved thanks to this.
Note: The System Restore feature of Microsoft Windows allows you to return your machine to a previous state. This can be used to fix problems like faulty systems.
Follow the instructions below to get your computer back to working order:
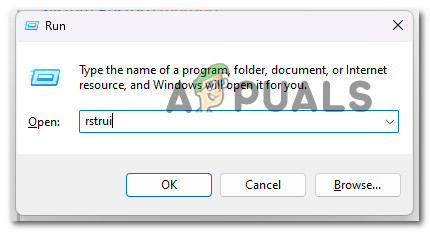
- Press the Windows key + R to open the Run command.
- Type “rstrui” in the Run box and hit Enter to start the System Restore wizard.
Open the System Restore utility - On the next screen, select a different restore point, then click the Next button.
Note: It’s important to select a restore point that was established prior to the time when you detected this error, then click Next once more.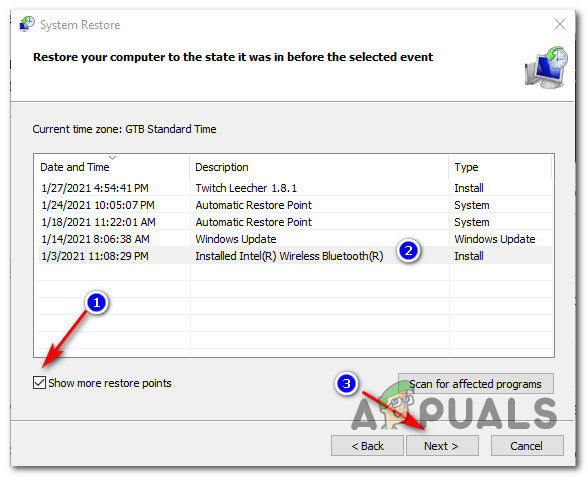
Select a viable restore point - Once the restoration procedure has started, select Finish and wait for your computer to restart.
- To see if the problem has been fixed, try restarting your Windows computer and see if you are able to get past the File System Error (-2015291336) error.
If the problem is still not fixed, move down to the next method below.
13. Deploy a Repair install or Clean install
The only option left is to completely replace all of the impacted system file dependencies with healthy substitutes if none of the aforementioned methods have worked for you.
The only options available to you at this point are to execute a clean install or a repair install (in-place upgrade).
If you have the choice, our suggestion is to repair install (in-place upgrade) if you’re in a bind.
- Repair install – During a repair install (in-place upgrade), only the system files will be modified (while keeping your personal files, user preferences apps & games).
- Clean install – A clean install may be the best option if specific kernel processes are affected, but it has the drawback of erasing any personal data kept on the OS disk. You should be warned, though, that if you choose this route, you will lose all of your personal data


