How to Stop Ground Branch from Constantly Crashing on Windows?
Numerous Ground Branch fans have said that they commonly come up against crashing problems while playing the game. For some, this has been a persistent problem that makes it impossible to play the game. This error is only found on PC.

After a lot of reports were made by players, we have investigated this problem closely and come up with a shortlist of all the possible causes for this error:
- Graphics card problem – Some of the users have reported that this problem was caused by the game which was running Ground Branch on the integrated graphics card. You can fix this by forcing the game to run on the dedicated GPU that you are using.
- GPU overloading – Another motive for this error could be the GPU you are using, which is overloading and causing the game to crash. This can be simply fixed by lowering the in-game graphics settings, then you can also reset the GPU’s setting from Quality to Performance.
Now that you are aware of all the possible causes of these problems, listed below are two methods that will help you fix the Ground Branch constantly crashing issue:
Force the game to run on your dedicated GPU (if applicable)
Some users say they were able to fix this problem by changing which GPU the game uses.
In some cases, it seems like the crashing problems were caused by the game running on the integrated graphics card by default.
Note: According to community members, this problem occurs because the developers didn’t make it explicitly clear for Windows that the game executable requires a lot of processing power. As a result, Windows might decide to run the game on the integrated GPU solutions if it has to choose between integrated and dedicated.
So if you’re experiencing this issue, the first thing that might be worth checking is to see if forcing the game to run on your dedicated GPU fixes it. The easiest way to do this is from the Windows Settings – this works for both AMD and Nvidia dedicated GPU and the steps below are applicable to both Windows 10 and Windows 11.
Follow the instructions below to force Ground Branch to run on your dedicated GPU:
- Press Windows key + R to open a Run dialog box.
- Type inside the search bar ‘ms-settings:display-advancedgraphics’ to open the Graphics Settings.
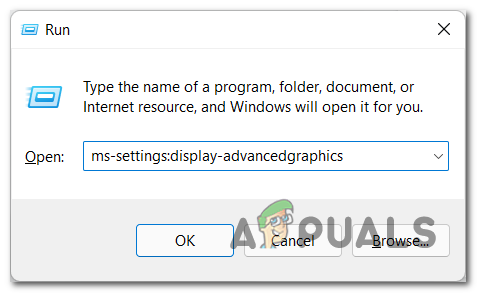
Accessing the Advanced Graphics menu on Windows - After you are inside the Graphics Settings, look for the Ground Branch game in the list of apps. In case you can’t find it, click on the Browse button and manually search for the game file, then select it.

Adding the Ground Branch entry to the list of apps the Windows manages - Now that you see the game, click on it and click on Options. A menu should appear on your screen. Select your PC’s dedicated graphics card and click on Save to apply the changes.
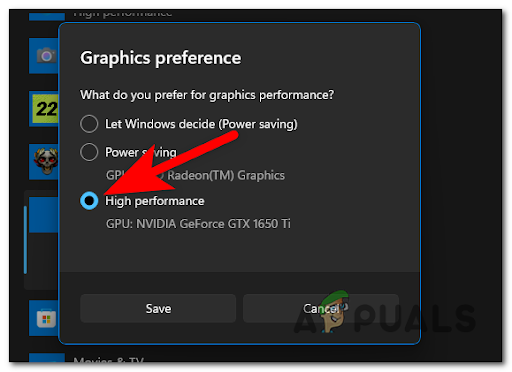
Force the dedicated GPU to render the game - After you’ve done that, you can close the settings. After that, launch Ground Branch and test the game to see if the game still crashes.
If you still encounter crashes constantly, check the other method below.
2. Reduce in-game graphics and change your GPU setting (Nvidia users)
The second method consists in lowering the in-game graphics settings, then resetting your GPU’s setting from Quality to Performance. As it was reported, one of the causes for this error might be the GPU which is being overloaded.
This typically happens with low-end to medium-tier GPUs that we’re released before the official launch of Windows 11.
One quick way to enforce this without having to tweak through the various graphics settings manually, you can use the Nvidia Control panel to force your GPU to prioritize performance instead of visual fidelity. This will force the GPU to focus on the performance of the game and not the quality.
Note: This fix will only work if you are an Nvidia user and you can use the Nvidia Control Panel app. If you’re using an AMD GPU, you might be able to replicate the steps below on the Adrenalin software. If not, the only option is to tone down the graphics options manually.
Here are the steps that will allow you to reduce the in-game graphics of Ground Branch in order to prioritize performance instead of graphical fidelity:
- The first thing you need to do is to launch the game, then access the Settings.
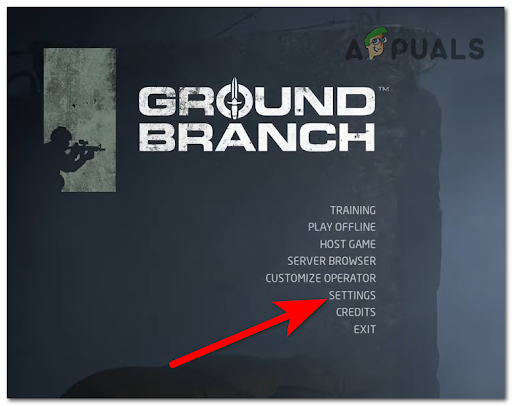
Accessing the Settings menu - Now that you are inside the Settings section, go to the Video setting and make sure to reduce all the graphics settings. After that, you need to apply the changes and close the game.
- Once you’ve done that, open the Nvidia Control Panel. To do this, you need to either right-click on the screen and open it from the little menu or open it from the taskbar’s hidden menu.
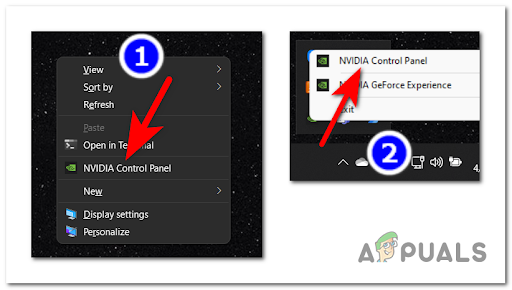
Accessing Nvidia Control Panel - After you are inside the Nvidia Control Panel, go to Manage 3D settings and click on Global Settings.
- Now right under Preferred graphics processor, you can select the GPU that your computer will use. Extend the drop-down menu, then select High-performance NVIDIA processor.
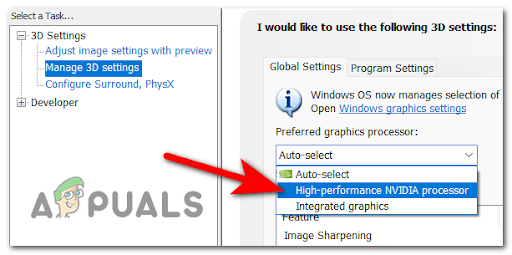
Enforcing the High-Performance NVIDIA processor - Once you’ve done that, you can close the NVIDIA Control Panel and open the game. Test it to see if it still crashes.


