How to Fix Chrome Black Screen on Windows?
“Chrome Black Screen“ appears when Google Chrome opens a blank or completely black window instead of rendering the website or the UI. This usually happens during remote desktop sessions (Chrome Remote Desktop) or while opening heavy webpages with videos, animations, or WebGL content.
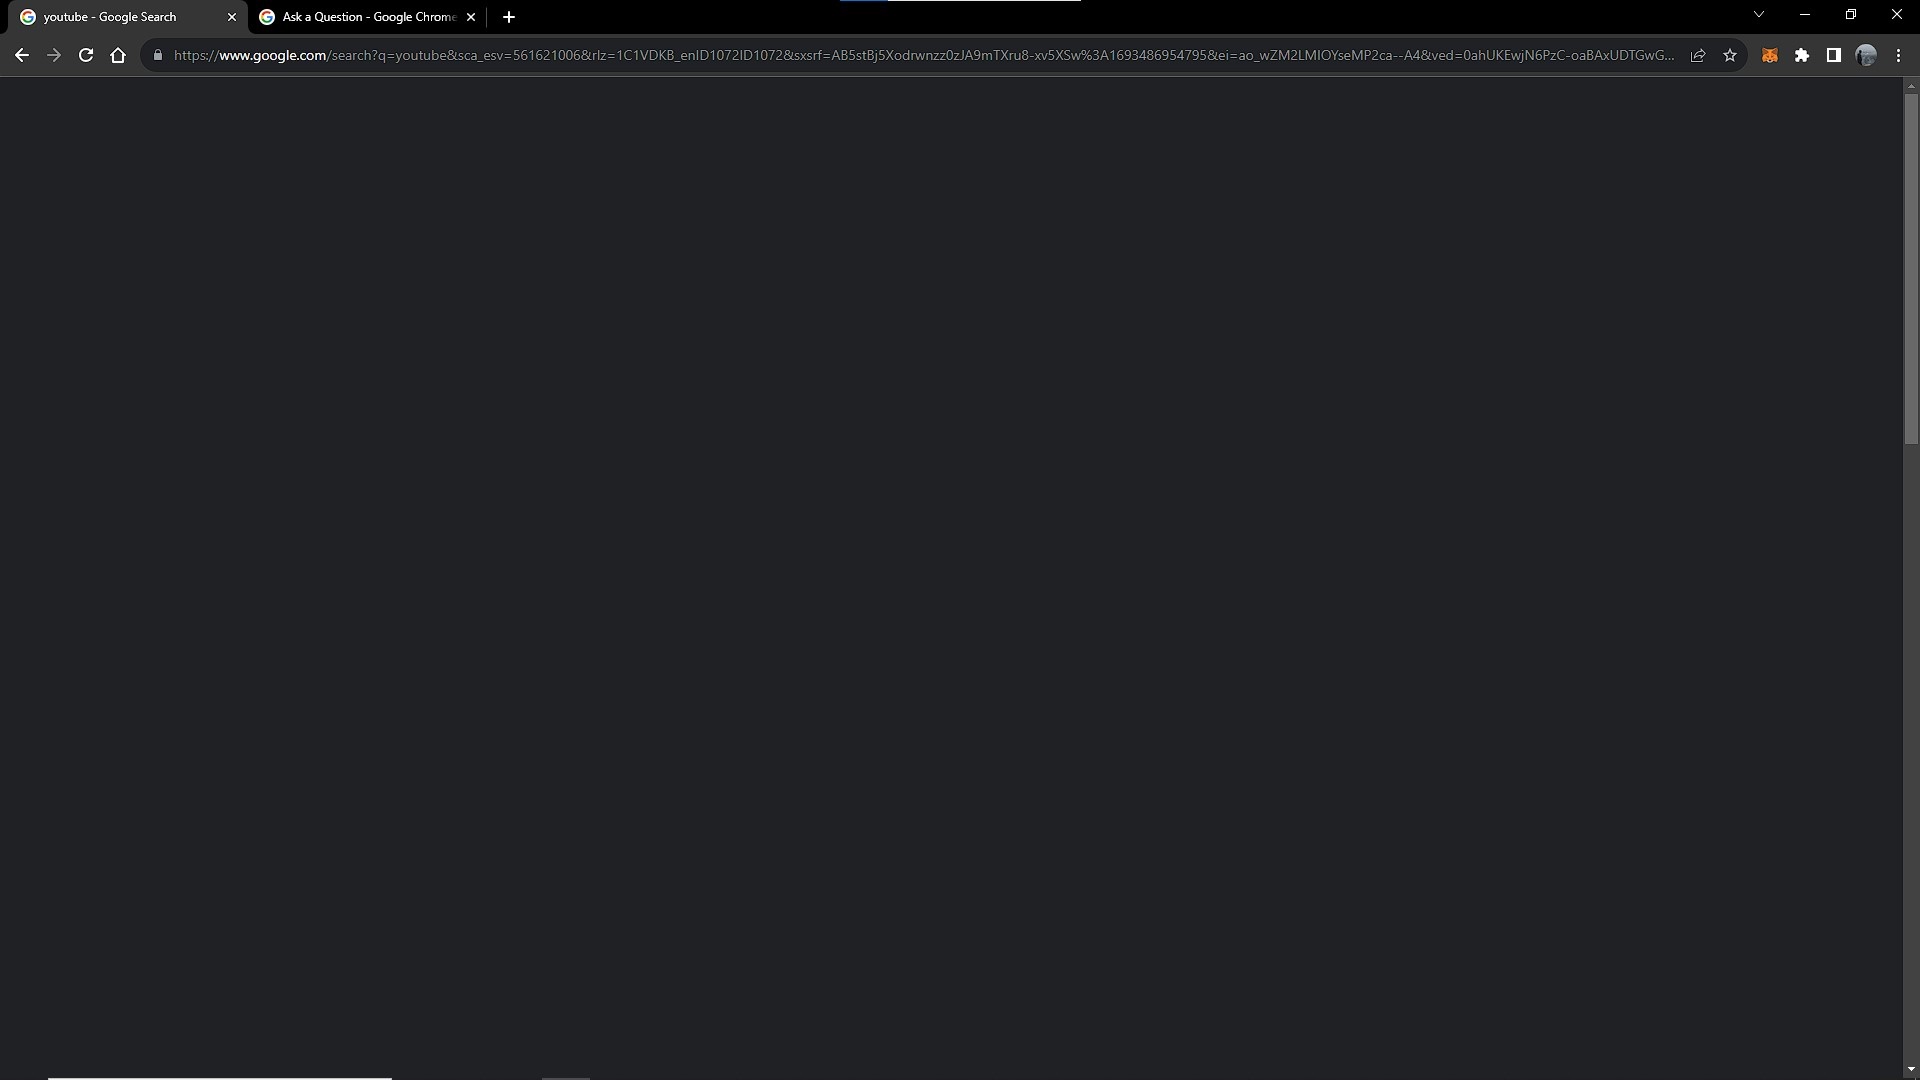
When this happens, you may not be able to view websites, interact with tabs, or even see menus. If this occurs while filling forms, editing documents, or using web apps, your unsaved work can be lost.
Why This Happens?
The issue often comes from:
- Hardware acceleration or GPU rendering conflicts
- A faulty or incomplete Chromium update
- Outdated graphics drivers unable to communicate properly with Chrome
- Remote desktop encoder/decoder issues causing the streamed Chrome window to appear black
- Broken extensions interfering with rendering
- Aggressive or unstable experimental flags
- Corrupted settings or cached GPU shaders
In simple words: Chrome tries to use your GPU to draw the window, but something in the chain (flags, drivers, ANGLE backend, extensions, or cache) breaks, and Chrome shows a black screen instead.
Now that you have a clear idea of what causes this behavior, follow the solutions below in order, starting from the easiest ones.
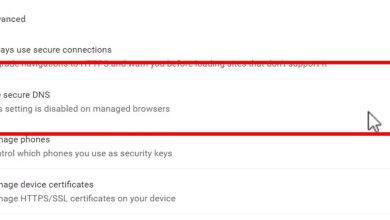
1. Reset All Chrome Flags
Experimental flags change how Chrome renders pages. A bad or unstable flag can force Chrome to use a rendering path your GPU cannot handle. Resetting returns all hidden settings to their default, stable state.
- Open Google Chrome.
- Type
chrome://flags/
in the address bar and press Enter.

- Click Reset all at the top-right.
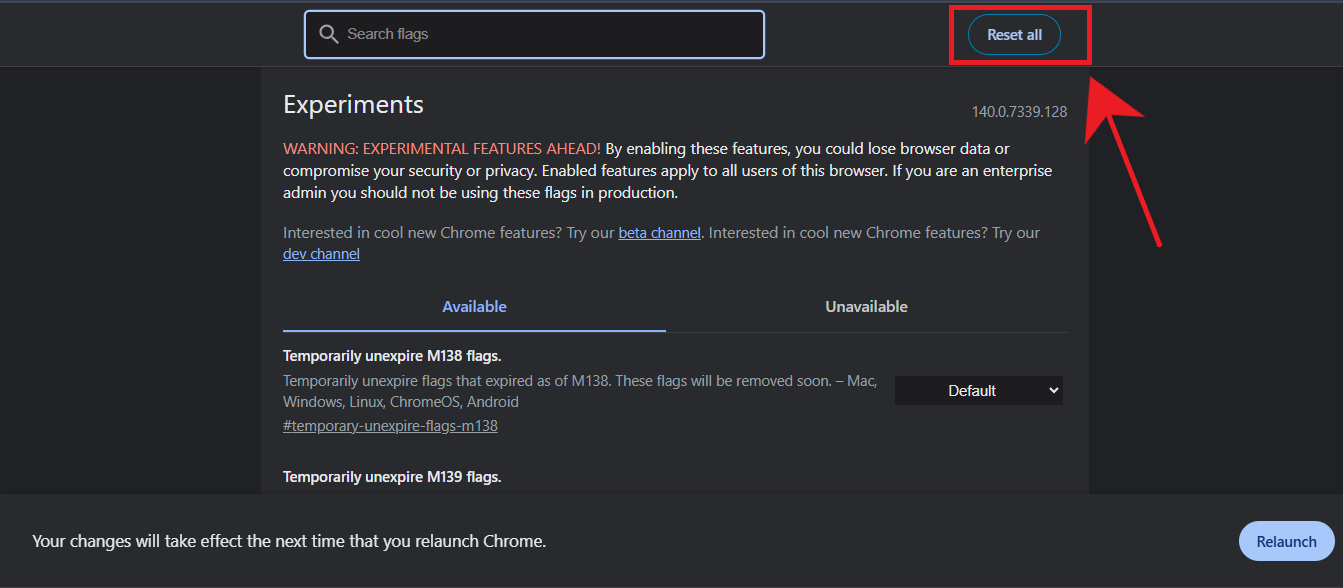
- Close and relaunch Chrome.
2. Disable Hardware Acceleration
By default, Chrome uses hardware acceleration to offload rendering work to your GPU. If your graphics drivers are buggy or not fully compatible, this handoff can fail and result in a black screen.
Turning off hardware acceleration forces Chrome to use software rendering instead. This may be slightly slower on graphics-heavy pages but is often much more stable when you are facing black screen issues.
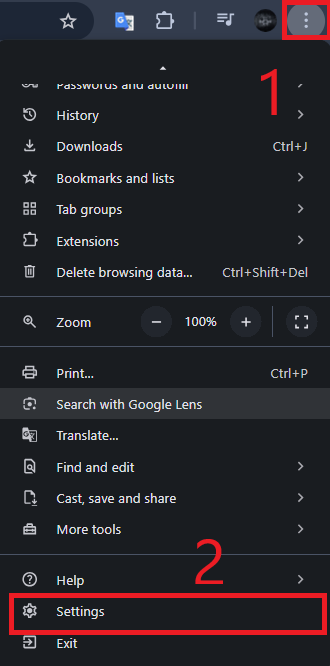
- Open Chrome → click the three dots.
- Select Settings.
- Go to System.
- Turn off Use graphics acceleration when available.
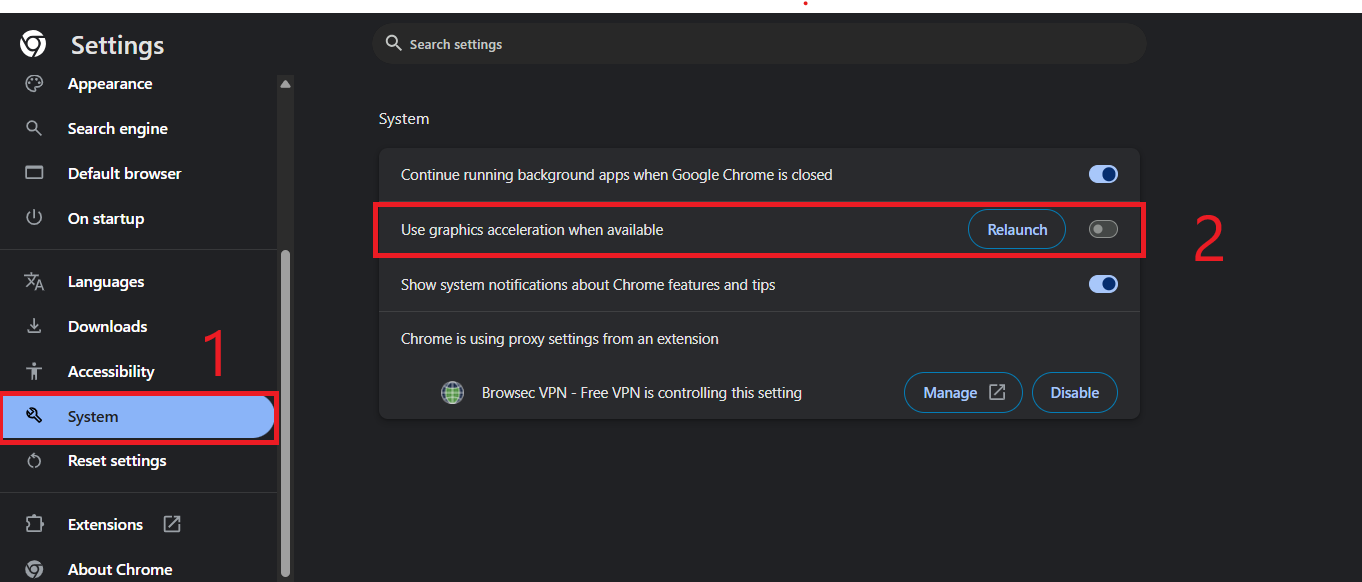
- Click Relaunch.
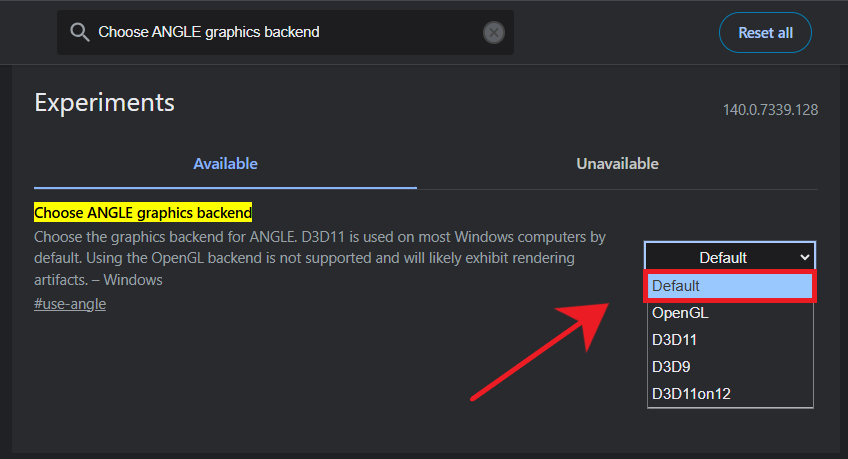
3. Reset ANGLE Graphics Backend
ANGLE is the middle layer that converts Chrome’s graphics commands into GPU-friendly instructions. If ANGLE uses the wrong backend (like Vulkan or D3D11 when your GPU can’t handle it), Chrome shows a black screen. Resetting it restores the best compatible mode for your system.
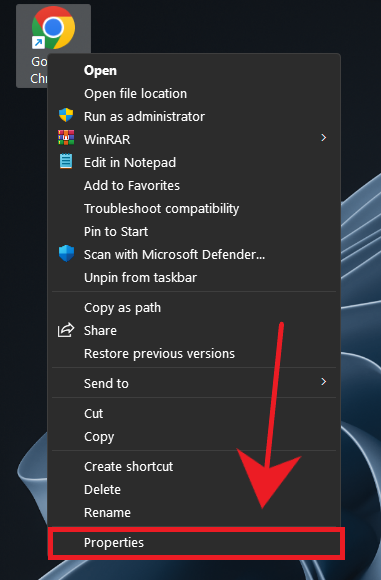
- Right-click your Chrome shortcut → Properties.
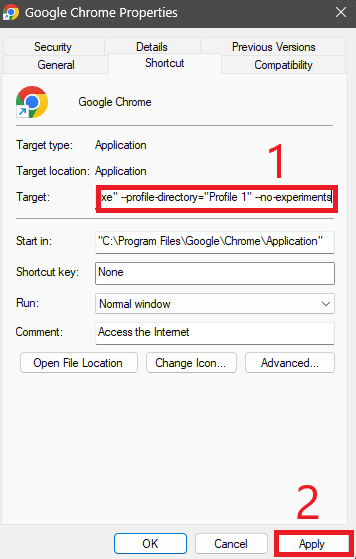
- At the end of the Target line, add:
--no-experiments
- Launch Chrome using this shortcut.
- Open
chrome://flags/
- Search for “Choose ANGLE graphics backend” and set it to Default.
- Close Chrome.
- Remove
--no-experimentsfrom the shortcut. - Restart Chrome normally.
4. Clear Chrome’s Shader Cache
Chrome stores compiled GPU shaders in a cache folder so pages can load faster. Over time, these cached files can become corrupted or mismatched with your current GPU drivers or Chrome version. When that happens, Chrome may fail to draw the window correctly and show a black screen instead.
Deleting the shader cache forces Chrome to rebuild these files from scratch, using your current driver and browser version.
- Close Google Chrome completely. Make sure no Chrome window is running in the background.
- Press Win + R → type:
%localappdata%
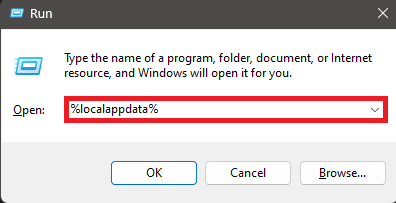
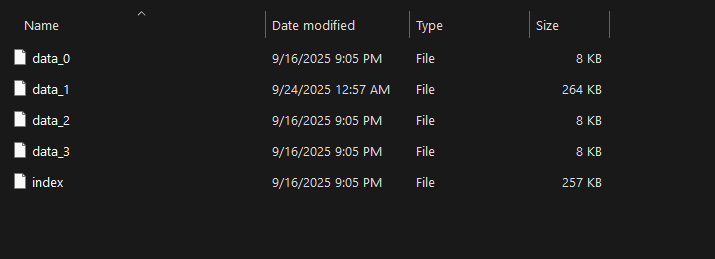
- Go to: Google → Chrome → User Data → ShaderCache → GPUCache
- Delete all files inside GPUCache.
- Restart Chrome.
If the folder or path does not exist, you can skip this step and move on to the next solution.
5. Update Graphics Drivers
Outdated or buggy graphics drivers are one of the most common causes of rendering problems in browsers. If your GPU driver does not understand the commands Chrome is sending (especially with newer graphics APIs or ANGLE backends), it can fail silently and leave you with a black window.
Updating your graphics drivers installs the latest compatibility patches, performance improvements, and bug fixes from your GPU manufacturer. This directly affects how the GPU handles Chrome’s rendering tasks and often resolves persistent black screen issues.
To update your graphics drivers, follow our detailed step-by-step guide here: How to Update Graphics Drivers (AMD/Nvidia/Intel)
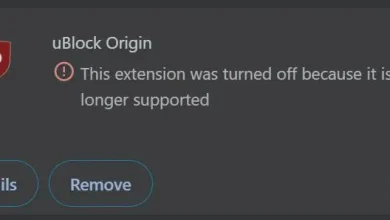
6. Disable Broken Extensions
Some extensions inject overlays or modify page rendering. A faulty one can cause Chrome’s tab area to turn black. Turning all extensions off helps find the culprit.
- Open Chrome.
- Visit:
chrome://extensions/
- Toggle off all extensions.
- Restart Chrome.
- Turn extensions back on one-by-one to find which one causes the issue.
Additional Notes
- These steps are written for Windows. Some options (like
chrome://flags, disabling hardware acceleration, and managing extensions) also apply to macOS and ChromeOS, but folder paths and system menus will look different. - In remote desktop sessions, Chrome’s window is streamed as a video. If the connection is unstable or the rendering path is broken on the host, the stream can appear as a black screen even if Chrome is working locally. The fixes above still help by stabilizing rendering on the host PC.
After applying the fixes above, Chrome should start rendering normally again without showing a black window.
If the black screen problem continues, consider resetting your Chrome profile or reinstalling Chrome to rule out deeper corruption:
- A profile reset restores Chrome’s settings to default but does not delete your bookmarks or passwords if you are signed into your Google account.
- A clean reinstall ensures you are running a fresh copy of Chrome without leftover corrupted files or experimental tweaks.
Once Chrome is back to its default, stable configuration, it should communicate properly with your GPU and display pages without the black screen issue.