How To Get Marshmallow on Samsung Galaxy Tab S
For those that are wondering, the Samsung Galaxy Tab S will not be getting any more update support. Unfortunately this means that there will not be an official Android 6.0 Marshmallow release for the Samsung Galaxy Tab S.
It’s not all bad news though, because there is a method available for Galaxy Tab S users to get 6.0 Marshmallow, and potentially 7.0 Nougat in the future on their Tab S. The process requires you to ‘root’ your smartphone and install a custom version of Android onto your device. We’ll provide a step by step guide on how to do this below.
Step 1: Requirements
Before we get started there are a number of things you’ll need to download for this process. To begin, first download the following tools. You’ll need to install ODIN onto your PC, whereas the other tools will need to be installed onto your Samsung Galaxy Tab S, but there will be more on that later.
You’ll need two more tools, a tool called TWRP and the ROM download file for your Galaxy Tab S. The version of these files you need will depend on your Galaxy Tab S variant. First let’s download the ROM. Click on the corresponding links below for the right files.
Once you have downloaded the correct ROM file from above, you’ll need to download the correct TWRP file. Click on the link for your device below and download the latest file available.
Step 2: Installing TWRP
Before you get started with step 2, make sure you have all of the downloaded files from above in one, easy-to-access location. This includes TWRP, ODIN, SuperSU, GApps and the ROM file.
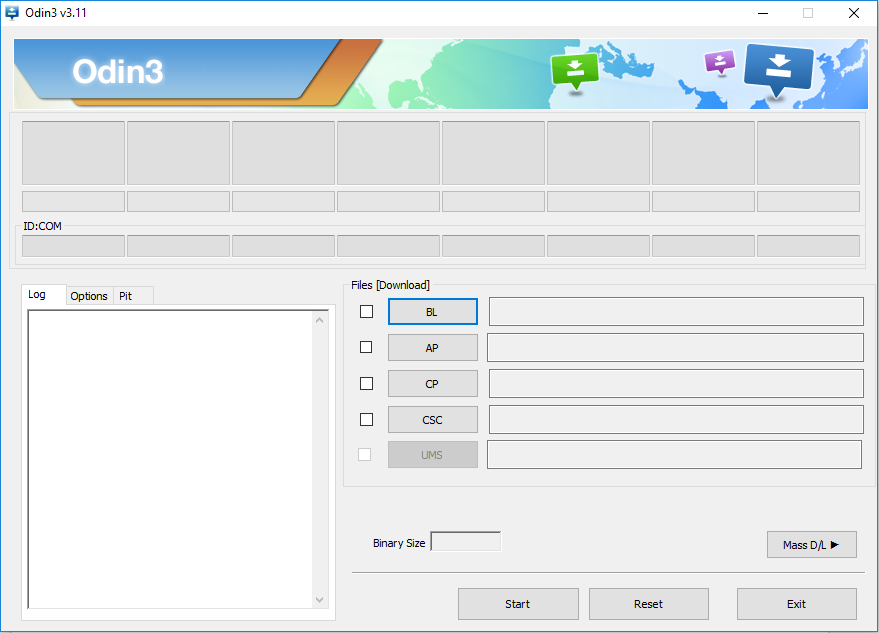
Next, run the ODIN .exe file and open it. The program should like like the image shown below.
After that, you’ll need to enable developer options on your Galaxy Tab S. To do this, go to Settings > General > About device. Next, scroll to Build Number and tap it 7 times. A pop-up will appear to let you know that developer options have been enabled.
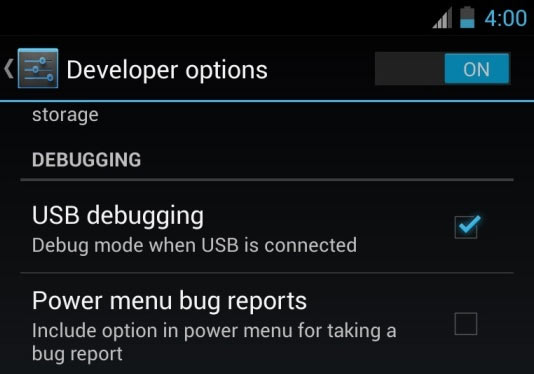
Next, navigate to Settings > General > Developer options and tap the option to enable USB debugging.
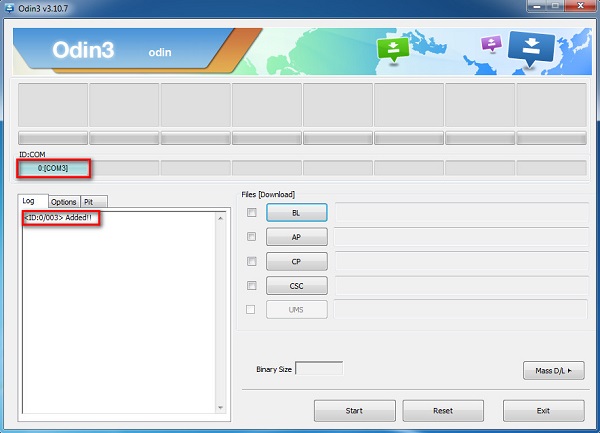
After you have enabled USB debugging, switch off your Galaxy Tab S. After this, hold down the Volume Down button, Home button & Power button. Your device will boot up. Once it does, press the Volume Up button. Next, connect your Galaxy Tab S to your PC.
After this, your device should appear on the ODIN software as shown in the image below.
Once your device has appeared, click the AP button. Next, a Windows explorer tab will open. You’ll need to locate and select the TWRP file that you downloaded earlier. Once you have selected the TWRP file, it will be loaded into ODIN and a Start button will appear. Click the Start button and the ODIN software will begin to install TWRP onto your device.
Step 3 : Flash the Files
Once ODIN has been completed, your Galaxy Tab S will reboot. Next, you’ll need to move over all of the other files onto the internal storage of your Galaxy Tab S. This includes the SuperSU zip, the GApps zip and the ROM file.
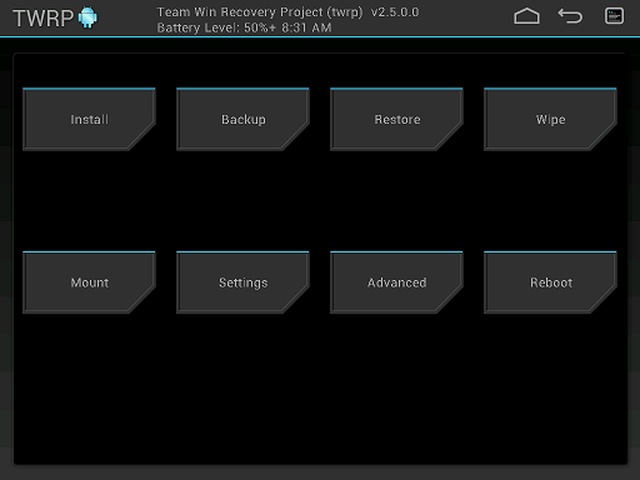
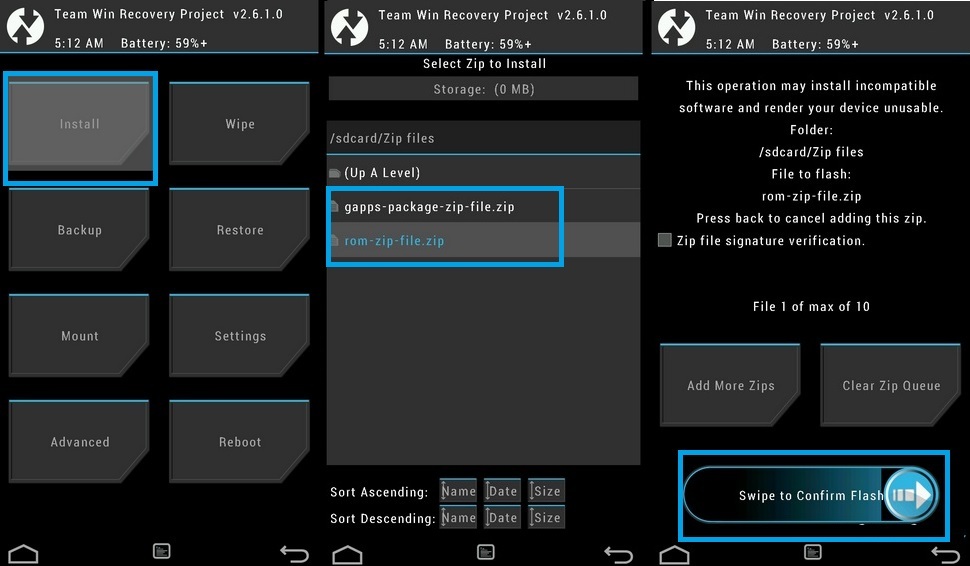
Once you have moved over the files, you will need to reboot into recovery mode on your Galaxy Tab S. Switch off your tablet and hold the Home button, Volume Up Button & Power Button to reboot into recovery. The recovery menu should like the image shown below.
Tap the Wipe button
Tap Advanced Wipe
Check Dalvik Cache
Check System
Check Cache
Check Data
Now Select ‘Wipe’
Tap the Back Button at the Top of the Device
Tap the Install Button
10: Locate the ROM file you Downloaded
11: Swipe to Flash
Repeat Step 10-11 with the GApps file
Repeat Step 10-11 with the SuperSU file
Tap the Back Button at the Top of the Device
Tap the Reboot Button
Your Galaxy Tab S will now be updated to Marshmallow! There are a couple of things you’ll need to do to ensure your device runs without any errors in the future.
Firstly, visit the settings menu on your device and check System Updates. Next, you’ll need to use the file manager app to copy the SuperSU and GApps files into the ‘/sdcard/OpenDelta/FlashAfterUpdate’ directory.
The steps above are crucial if you plan to update your device in the future.
That’s it! You can now use your device will all of the new 6.0 Marshmallow features.
Look at.