How to Forward Ports for PS4 to Play Games Online
The PlayStation 4 is a wonderful console. It is top-of-the-line, with exclusive lines of first-person shooters and sports games. However, most of these games are much more enjoyable when played with friends. The same-console gaming, often known as couch co-op, has become very limited in the new generation of consoles. However, you can game online with your friends around the world. Today, we are going to show you the ins and outs of online gaming on the PlayStation 4, how to set up your Wi-Fi, and address any troubleshooting problems you may encounter.
We are going to go through the process of setting up ports to play online on your PlayStation 4.
First, we’ll need to ensure that you have a static IP address for your PlayStation. To obtain a static IP address, go into your settings, and then to the network section.
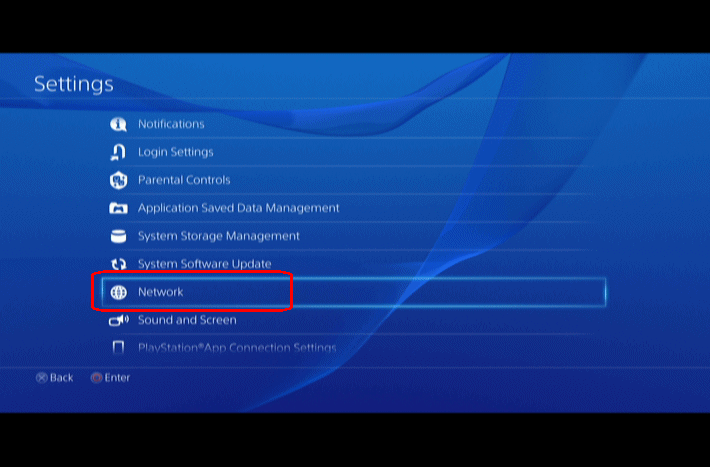
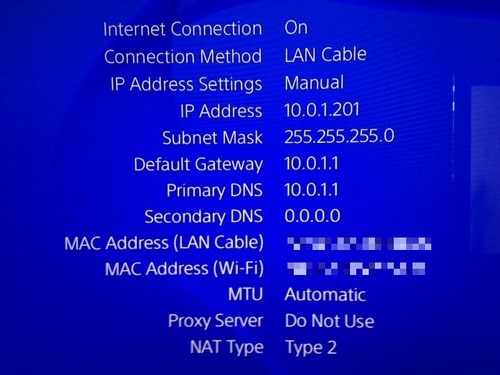
Choose ‘View Connection Status’; you’ll be prompted with a window that shows your IP address, primary DNS, secondary DNS, default gateway, and subnet mask. Write down all of these numbers because we will need them later.
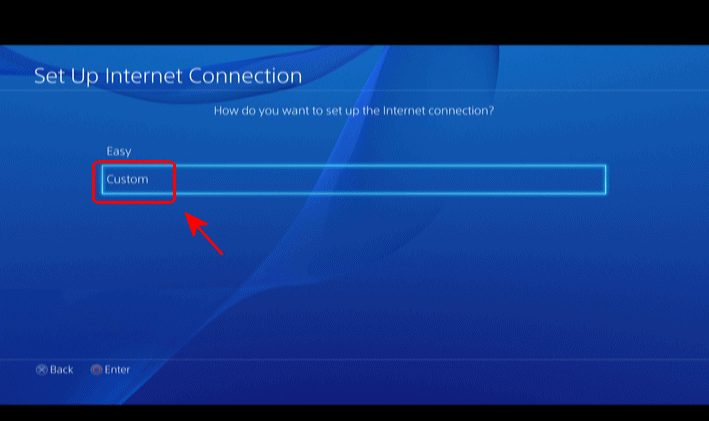
Firstly, choose ‘Cancel’ and return to the menu you were previously at. Now, select ‘Set Up Internet Connection’, then choose ‘WiFi’ or ‘LAN’, depending on your type of connection. Next, choose ‘Custom’, then ‘Manual’. Set your IP address, which is usually set to 192.168.1.100. Write down your IP address on a piece of paper. Then, set the Subnet mask, primary DNS, default gateway, and secondary DNS to the information you just wrote down. When you’re finished, press ‘Next’. On the MTU screen, choose ‘Automatic’. On the Proxy screen, select ‘Do Not Use’. Finally, select ‘Test Internet Connection’ to ensure everything is working correctly.
Now, set up the ports on your computer or laptop instead of your PS4.
We are going to explain this in two ways. The first is a simple, generic method that is less safe. The second method is somewhat less straightforward, but it nonetheless provides safety for your network.
DMZ Method
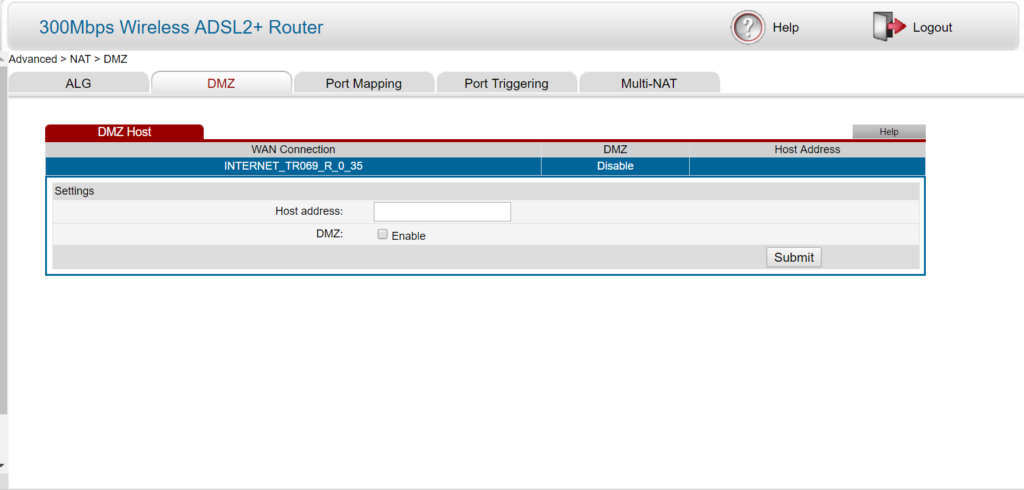
To use this method, open your browser’s page and go to the router page. This is usually done by typing in either 192.168.1.1 or 192.168.0.1. Next, enter your username and password. If you have never seen this page before, then your username and password are probably ‘admin’. If they are not, call your internet company and ask them for your default username and password. Once on the router page, select ‘DMZ’. Each router page is different; some have ‘DMZ’ straight onto the router page, some require you to choose ‘NAT settings’ from the ‘Advanced’ or ‘Firewall’ menu. Type in your PS4 IP address, then press ‘Enable DMZ’, and finally press ‘submit’.
PSN Specific Ports
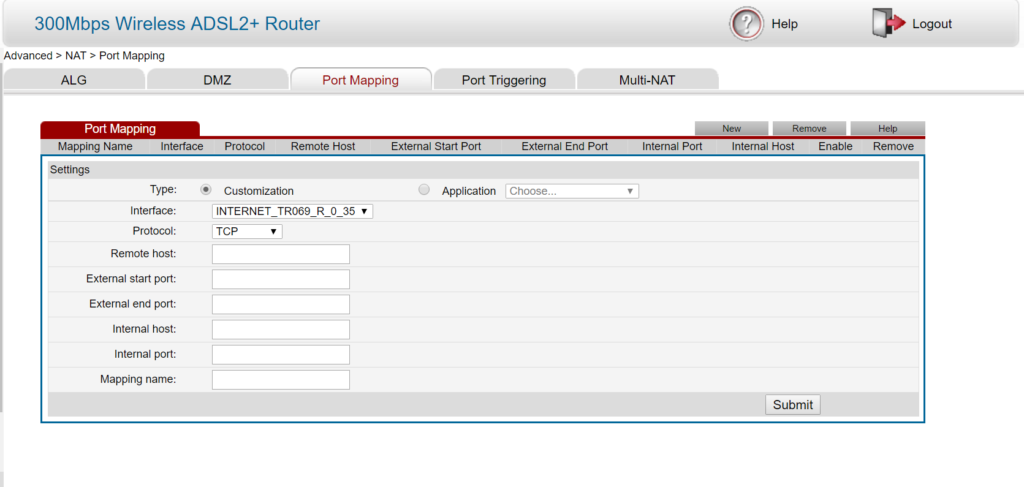
To carry out this method, you will also need to open your router’s page. After entering your username and password, proceed to the NAT settings which are usually located in the ‘Advanced’ or ‘Firewall’ menu. Next, select ‘Port Mapping.’ The process might differ on every router’s page, but you will generally need to set a TCP port of 80, 443, 1935, and 3478-3480, and set a UDP port of 3478-3479. If you’re unsure about how to do this, you can search for ‘Setting port for your router name‘ on Google.
Once done, you will be able to access online gaming on your PS4 as usual. You can now enjoy the massive world of online gaming!