Fix: Windows Update Error 0x80092004
The updates released by Microsoft for Windows are an essential component. All the people out there using Windows operating system are always grateful for new updates and releases. Packed with security fixes, a lot more stability, bug fixes and new drivers for your hardware, most of the users tend to install the new updates without giving it a second thought or without seeing the contents of the update. However, for some of them, updating their system becomes quite the task as they face issues that are completely unknown to them.
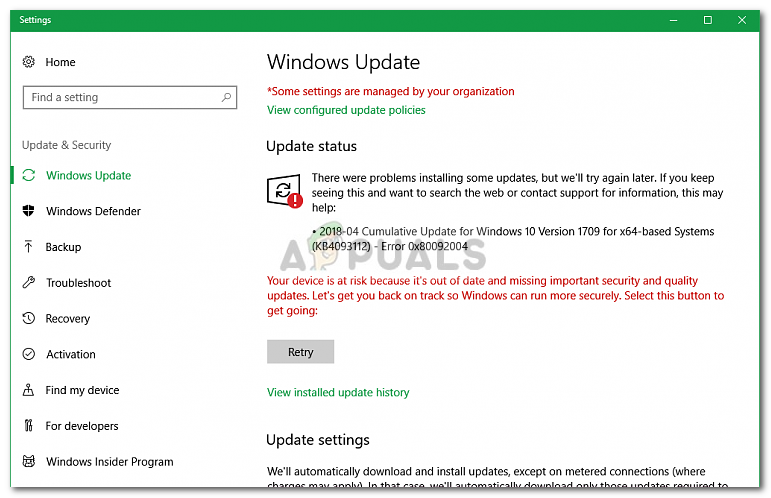
When the Windows updates don’t go the way they’re supposed to, they usually revert and uninstall the update, having the potential of messing up your system files and show an error code. The ‘Error 0x80092004’ is no exception to this.
What causes the Update to Fail with Error 0x80092004?
Whenever you encounter this error, your system or hardware is not to blame but rather the update pushed by Microsoft itself. Therefore, the causes are —
- Turmoil update from Microsoft. You might confront this error whenever you try to install an update that has been just released (which usually contains bugs and errors) without waiting for a reply from the community.
- Corrupted system files. If you are trying to update your device while your system files are corrupted, the error might show up and you won’t be able to proceed.
Now that we know about the error and its cause, what could one possible do to solve it? Well, we’ve picked the most effective solutions off the internet to help you get rid of this issue.
Solution 1: Downloading Servicing Stack Update
A Servicing Stack Update is used to update the Component Based Servicing that is responsible for installing updates on the operating system.
To start off, you should download the latest Servicing Stack Update (SSU) for your Windows version and install it. Beware that before you run SSU, make sure to turn off automatic updates. To do that:
- Hit the Winkey and open Settings.
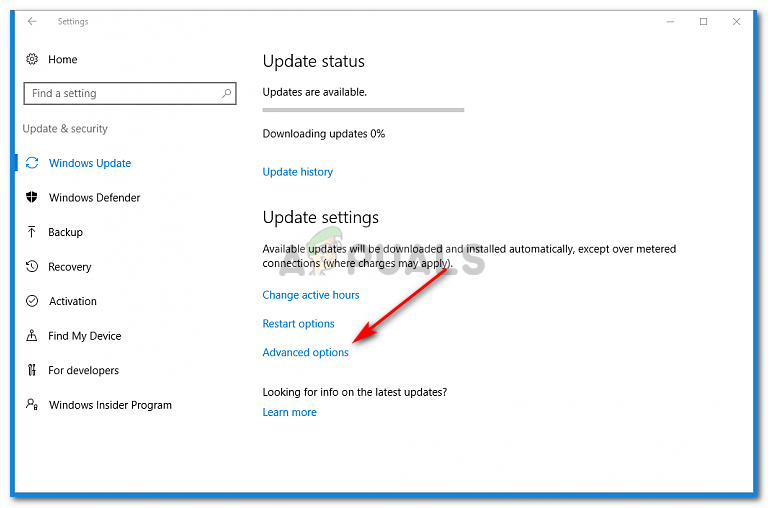
- Select Windows Update.
- Click on ‘Advanced Options’.
Click on Advanced Options - Select ‘Never’ to hit OK.
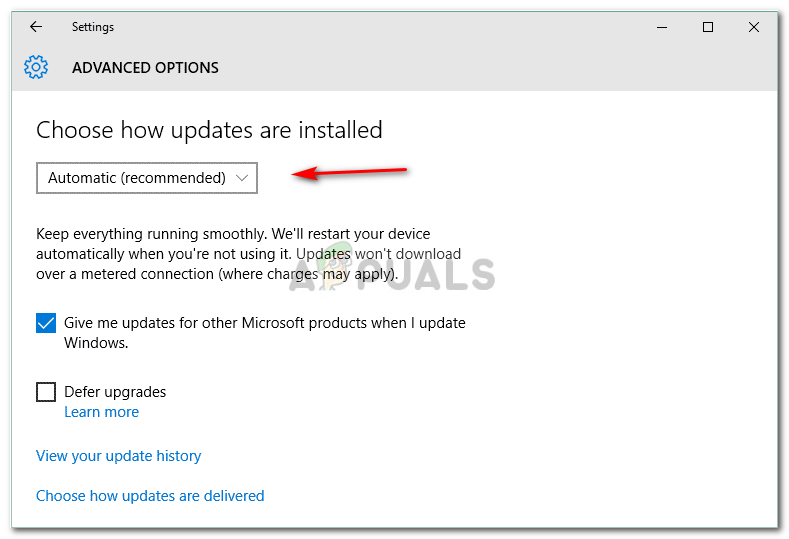
Choose Never from the drop-down list. - Restart your device.
Once your device has restarted, install SSU and then try to update your windows by turning on the automatic updates. Follow the same procedure as above but select ‘Automatic’ while changing the update settings to turn on automatic updates.
Solution 2: Fix Corrupted System Files
If installing SSU doesn’t work out for you, don’t worry you can still resolve the problem. Before you update your device, let us make sure there are no corrupted system files in your PC that are stopping your device from updating. For this:
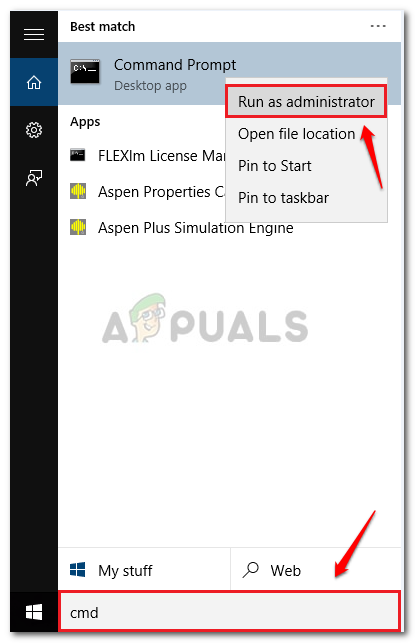
- Open Start Menu and enter cmd.
- Right click on cmd and select ‘Run as an Administrator’.
Select Run as an administrator - When cmd loads, type in the following command and hit enter:
DISM.exe /Online /Cleanup-image /Restorehealth
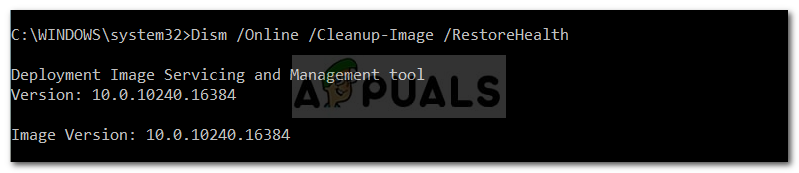
This is gonna take a while so make sure to wait for it.
- Once that has finished, type in:
sfc /scannow
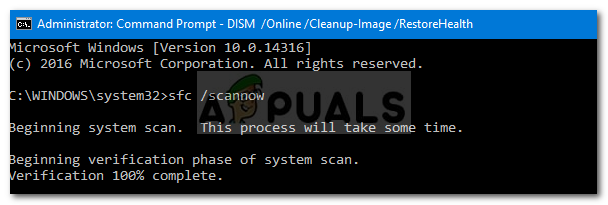
After it has completed, exit cmd and try to update your device.
Solution 3: Removing the Faulty Update
It could a possibility that your update hadn’t installed properly and now you are stuck with this issue. In such an event, you have to remove the update and try again. Here’s how to remove the packages:
-
- Open Start Menu and run cmd as an administrator.
- Enter the following commands one by one:
dism.exe /online /remove-package /packagename:Package_for_RollupFix_Wrapper~31bf3856ad364e35~amd64~~16299.248.1.17

dism.exe /online /remove-package /packagename:Package_for_RollupFix_Wrapper~31bf3856ad364e35~amd64~~16299.192.1.9

dism.exe /online /remove-package /packagename:Package_for_RollupFix~31bf3856ad364e35~amd64~~16299.192.1.9
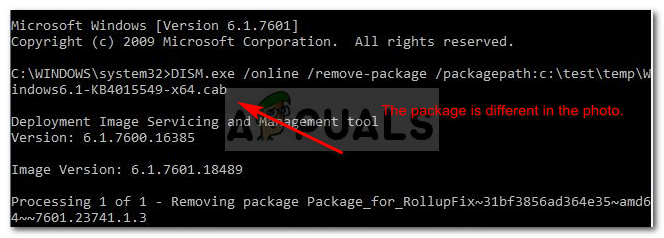
Your device is going to need a reboot after this.
3. When your device reboots, open cmd as an administrator again and enter the following command:
Dism.exe /online /Cleanup-Image /StartComponentCleanup

Upon completion, try to update your PC again.
Solution 4: Installing the Update Manually
If your problem still persists, your only resort is installing the update manually. For this, you’ll have to download the update you’ve been trying to install all this way from Microsoft’s website. To download the update, do the following:
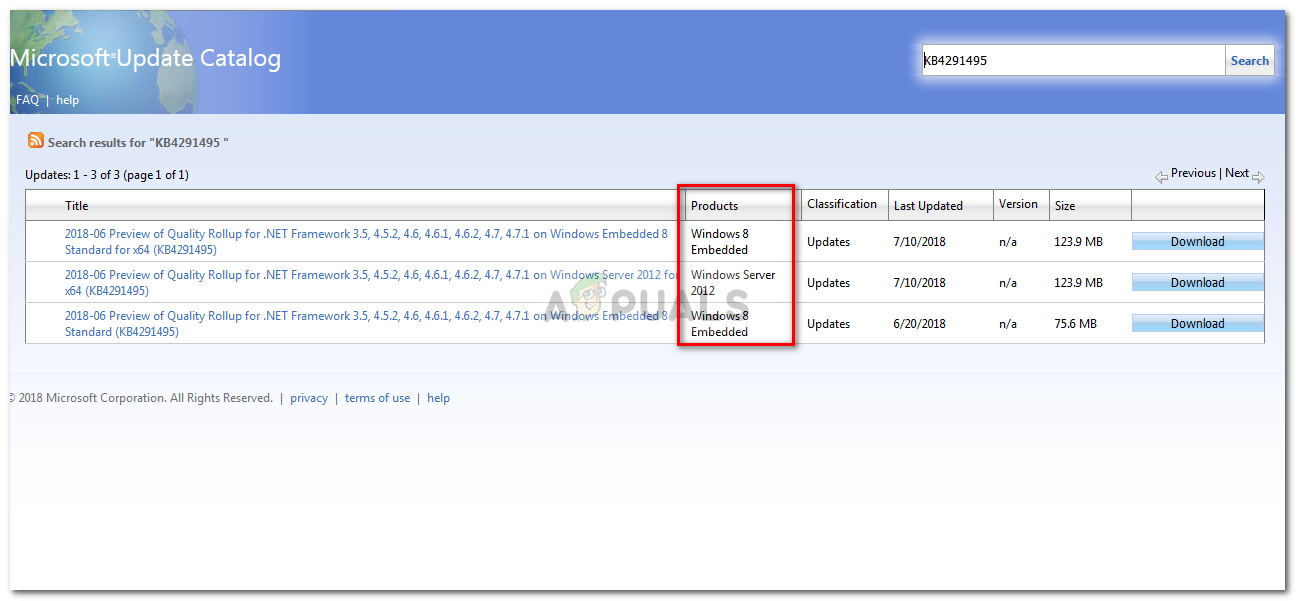
- Go to Microsoft Update Catalog.
- Search in your update, for the sake of this article, we are going to use KB4291495.
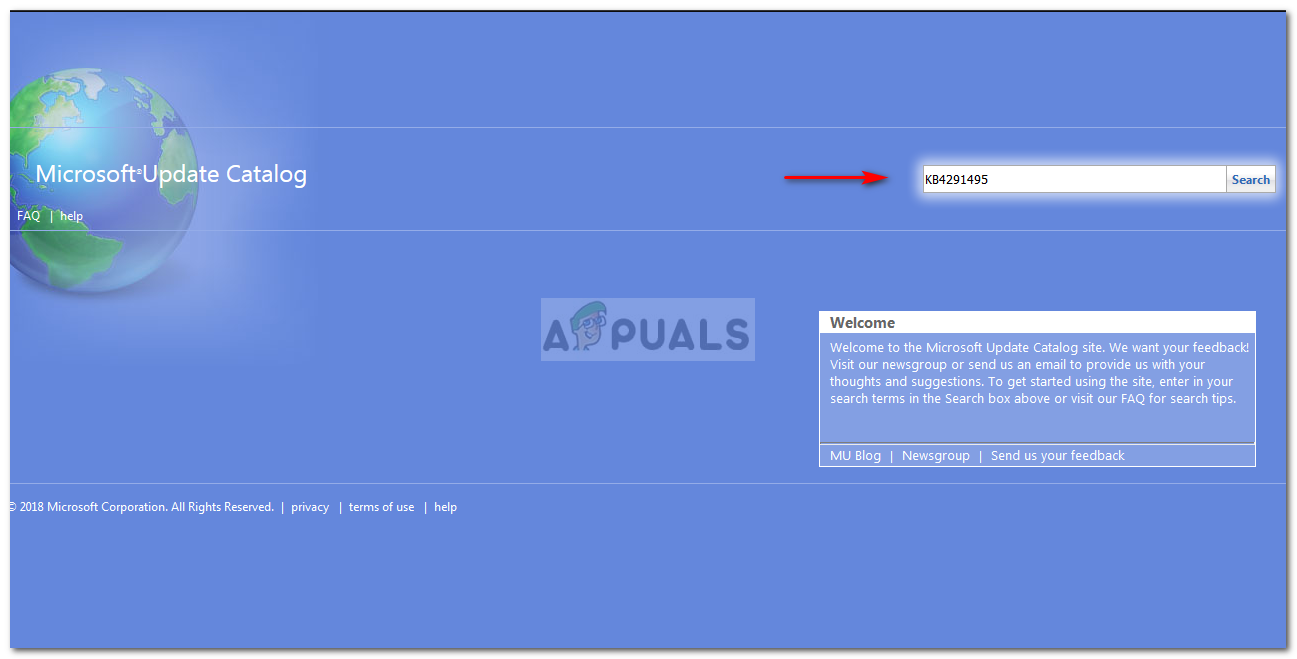
Microsoft Update Catalog Homepage - Look out for the Product (Windows version) it has been allotted to.
Watch out for your Windows version
When your download completes, here’s how to install the update:
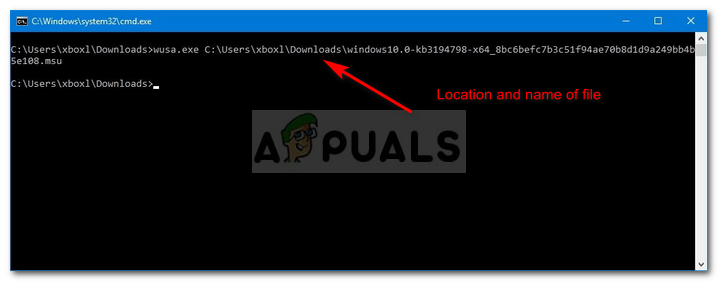
- Open cmd as an Administrator.
- Type in the following and hit enter:
wusa C:\PATH-TO-UPDATE\NAME-OF-UPDATE.msu /quiet /norestart
Note:
/quiet and /norestart tells your device not to restart once the update has been installed. Do make sure to restart your device manually afterwards.


