Fix: Windows Update Error 0x800704c7 on Windows 10
The error 0x800704c7 is caused due to missing or corrupted files, as well as background processes conflicting with the update due to which you are not able to get the update. The error, sometimes, appears while your system is being updated and out of the blue, you are prompted with this error. The hotfixes released by Microsoft are paramount and your system is really dependent on it, however, errors like this one can prevent you from getting your hands on the update.
It is of some essence as the error doesn’t only appear while updating but it has the potential of emerging while you are doing your daily-routine tasks i.e browsing etc. There have been reports that this error popped up while using Chrome so it is not something to ignore. Nevertheless, this article will show you how to resolve your problem in the easiest way possible.
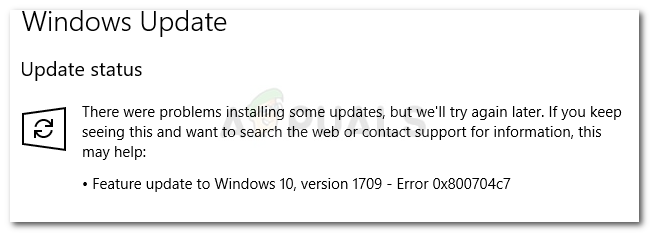
What causes the Update Error 0x800704c7 on Windows 10?
Like we mentioned, the error has the potential of popping up while you are busy in your daily routine tasks, hence, it is usually caused by —
- Missing or corrupted system files. Missing or corrupted system files mean your system won’t be able to operate normally and you’ll be confronting many errors including this one.
- Background processes. Another thing that can cause this error to pop up would be background processes. If your background applications like antivirus etc are interfering with your system, the error could be caused because of it.
With that said, it is time to get into the solutions.
Solution 1: Turn off your Antivirus
Third-party antiviruses are good and they get the credit for it, however, there are certain cons to them as well. The major one would be that they interfere with your system to the degree that they’re able to stop or prevent anything. Due to this interference, you can be prompted with the 0x800704c7 error code. Hence, before we go on any deeper, make sure you’ve turned off your third-party antivirus. Also, make a reboot and try to run the update after your antivirus has been disabled.
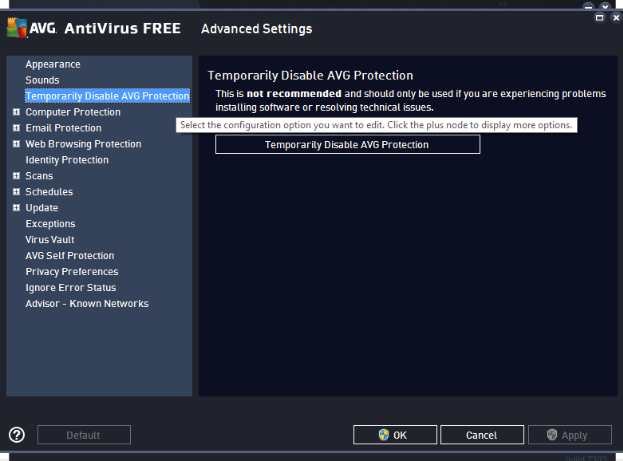
You can check our article on How to Turn Your Antivirus Off.
Solution 2: Waiting it out
If you are one of the victims whose update gets stuck after reaching a specific percentage, this solution is for you. Sometimes, the update can be delayed from the server-side or potentially anything else due to which it requires some time. Therefore, if your update is stuck, make sure to give it a couple of hours. If the update wizard still doesn’t proceed, you may proceed to the below-mentioned solutions.
Solution 3: Fixing Windows File Corruption
Windows system files corruption could be one of the reasons you are encountering the error. Such scenarios are not that generic, however, they do happen. In such an event, you’ll have to repair or fix your Windows system files using two command-line utilities called SFC and DISM. System File Checker (SFC) is a tool that lets you scan your system and repair any corrupted or bad files; if found. However, there are times when SFC isn’t able to get the errors in which case the Deployment Image Servicing and Management (DISM) comes in handy. It will perform a thorough search of your system and fix the corrupted files.
To learn how to use these utilities, please refer to SFC and DISM articles published on our site containing quite the details.
Solution 4: Downloading the recent KB
You can also try to download the most recent KB that you’ve been trying to install on your system from Microsoft Update Catalog. Here’s how to do it:
- Press Winkey + I to open Settings.
- Go to ‘Update and Security’.
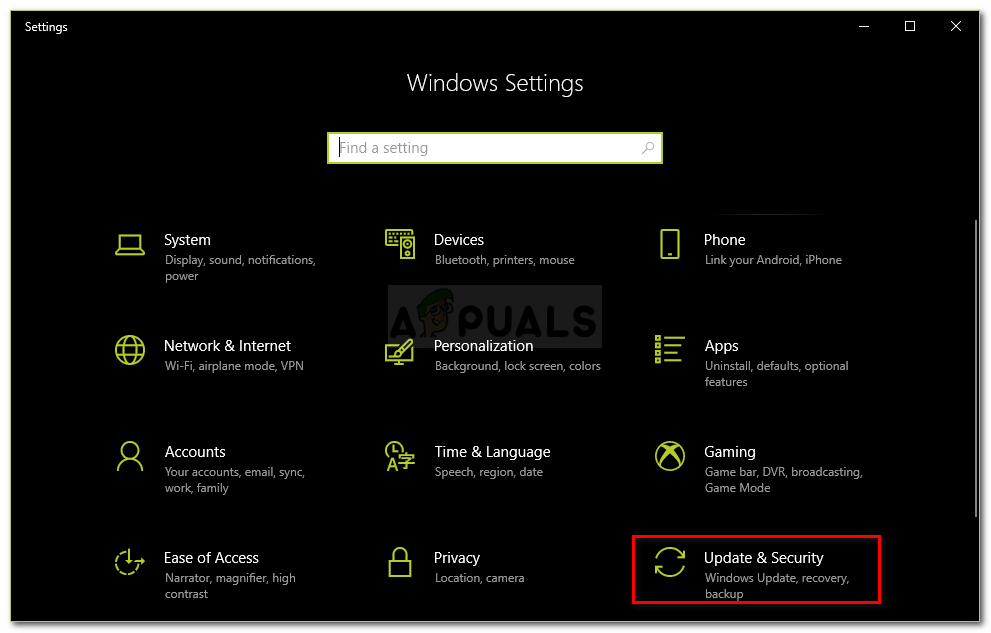
Settings – Update and Security - In the middle pane, you’ll see ‘View update history’. Click on it.
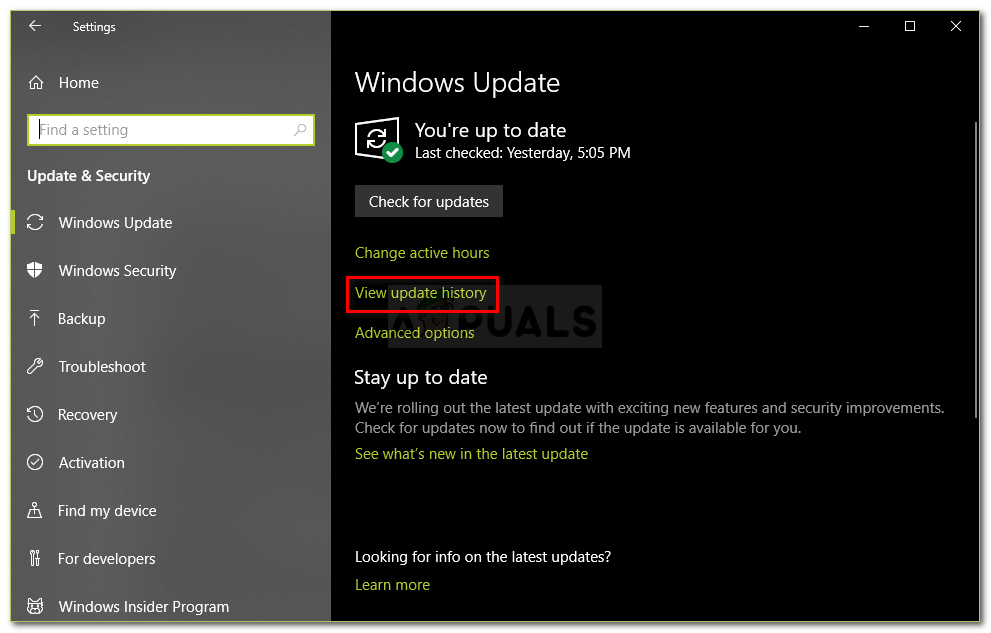
Settings – Windows Updates - There, find the most recent KB which is usually located at the top. Copy the KB code.
- Head to Microsoft Update website and search the KB code.

Microsoft Windows Catalog Search Results - Download it for your respective Windows.
- Once the download finishes, open it up and install.
Solution 5: Performing a System Restore
System Restore is something you can utilize if you are facing an error which is popping up after a certain software installation or any other change. It will restore your system to a point back where your error wasn’t occurring. Here’s how to do it:
- Go to Start Menu and open up Control Panel.
- Type in Recovery in the search box and then click on it.
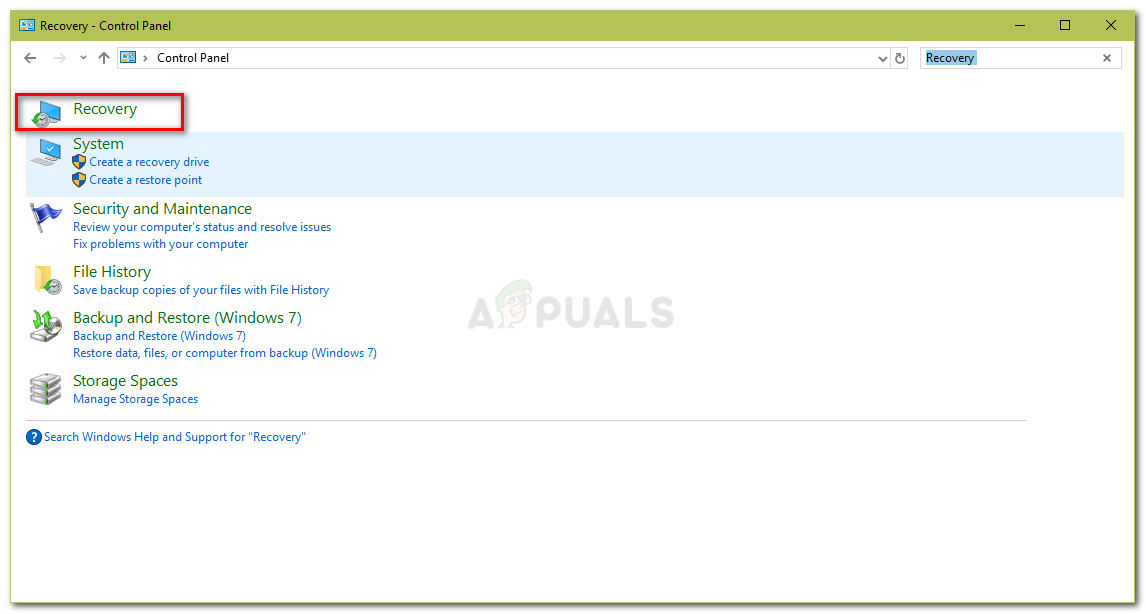
Control Panel – Recovery - Select ‘Open System Restore’.
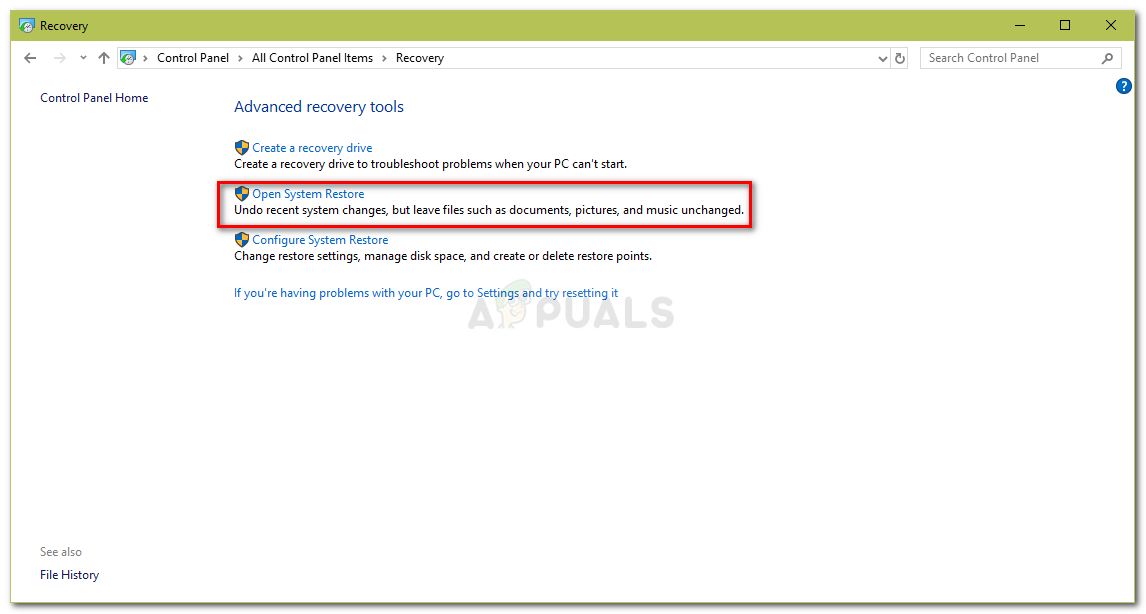
Control Panel – System Restore - After that, select a system restore point when the error didn’t pop up. Click Next and then hit Finish.
Solution 6: Using MCT
Finally, using the Media Creation Tool is your last resort. This is a tool built by Microsoft to help the users upgrade/update their system to the latest version or even perform a fresh Windows installation. Here’s how to do it:
- Download the tool from Microsoft’s website.
- After the download completes, open it up.
- Agree to the terms, and then select ‘Upgrade this PC now’.
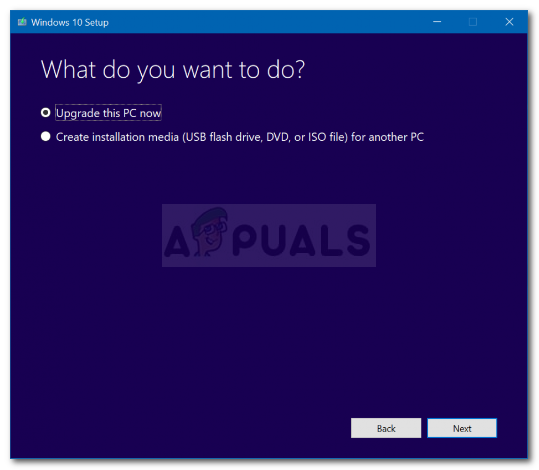
Windows Media Creation Tool - Select ‘Keep Personal Files’ to make sure your files are safe.
- Let it finish.


