How to Fix User Profile Cannot Be Loaded Error?
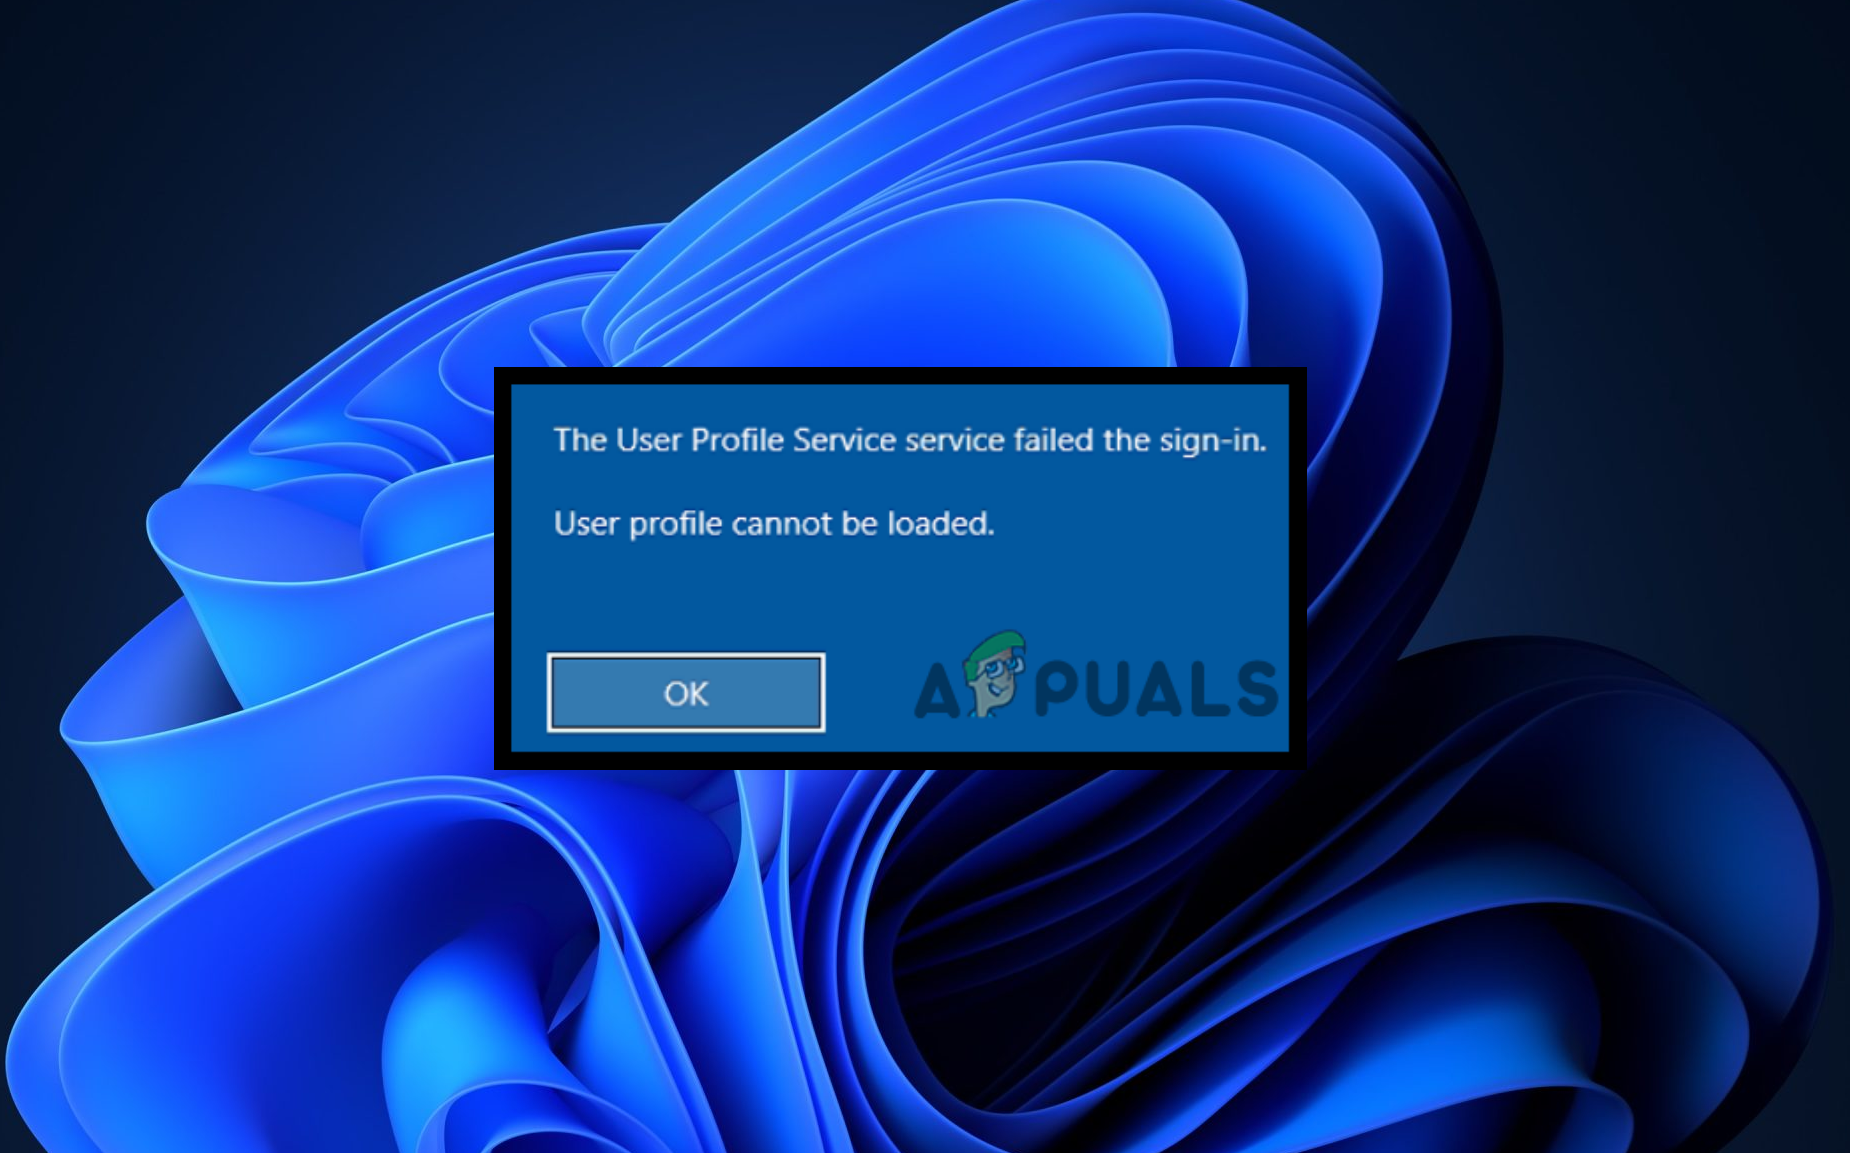
When the “User Profile Service failed the logon” error occurs, the system prevents the user from logging in, displaying a message that the user profile cannot be loaded. This error means the user profile, which contains settings and preferences for the user account, is corrupted or cannot be read by the system.
The usual cause of this issue is a corrupted user profile due to a sudden shutdown, disk errors, or system updates. Other causes include wrong permissions on the profile directory and registry issues.
Before trying the solutions below, we recommend restarting your computer.
If the issue persists, try the following methods:
Important Step: Boot Windows in Safe Mode
To follow the methods below, boot in Safe Mode. Safe Mode only loads essential services and drivers, which can help diagnose and resolve problems.
- On the sign-in screen, click the power button in the bottom right corner.
- Hold Shift and click Restart.
- On the Options screen, click Troubleshoot > Advanced Options > Startup Settings.
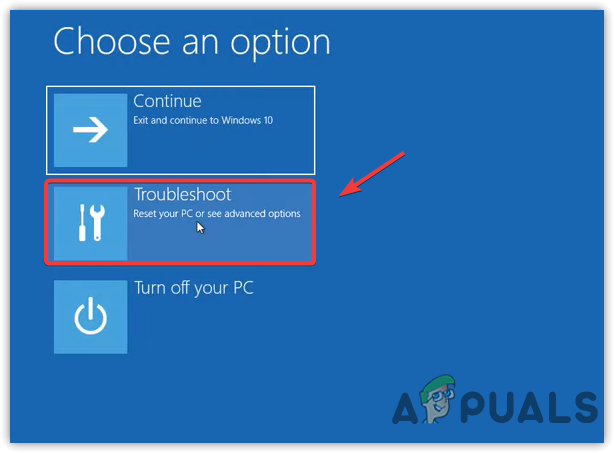
Navigating to Troubleshoot - Click Restart in the bottom right.
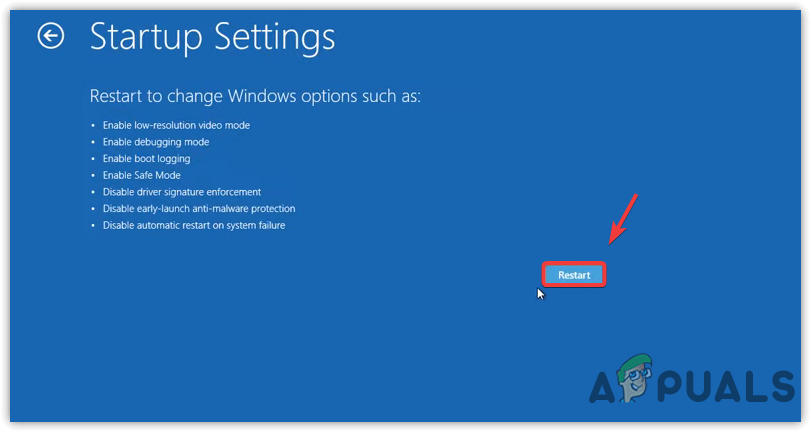
Restarting the Computer to Boot into Safe Mode - Once the computer restarts, press 5 or F5 to boot into Safe Mode with Networking.
- After entering Safe Mode, try the following methods to resolve the error.
1. Edit Registry Profile Entry
Windows Registry contains a key named ‘ProfileList’ that stores info about user profiles. Each user profile is represented by a unique subkey under ‘ProfileList’, which includes various settings and paths related to that user’s profile. Sometimes, duplicate or corrupted entries in this key can cause user profile errors, like “The User Profile Service failed the logon.”
Editing the registry incorrectly can cause system instability or prevent Windows from running correctly. Follow the instructions precisely and only make changes if you’re confident. It’s also advisable to back up the registry before making changes.
- Press the Start Menu button and type “Registry Editor”.
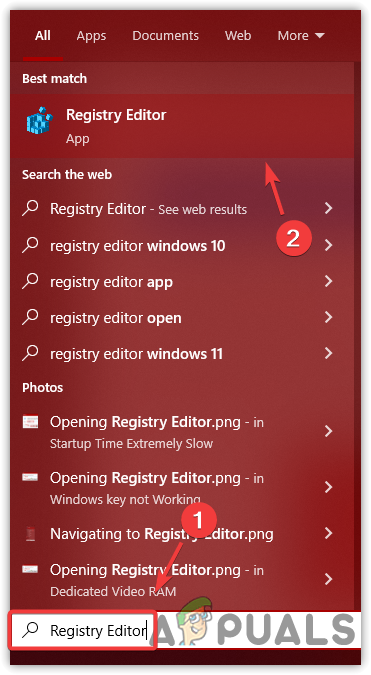
Opening Registry Editor - Launch the Registry Editor and navigate to:
Computer\HKEY_LOCAL_MACHINE\SOFTWARE\Microsoft\Windows NT\CurrentVersion\ProfileList
- Check for any subkeys with a .bak extension. If you don’t find any, skip to step 6.
- If a subkey with a .bak extension is present, right-click it and select Rename.
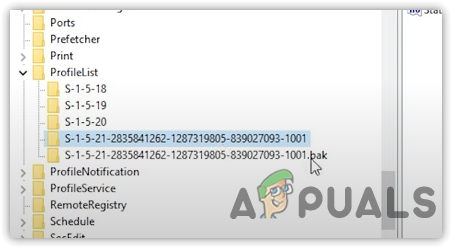
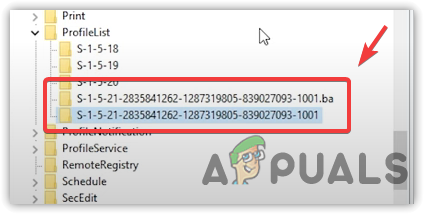
Checking For Duplicate Entries - Remove the .bak extension. Next, right-click the subkey without the .bak extension and select Rename. Add .bak or .ba to this subkey name and press Enter to save changes.
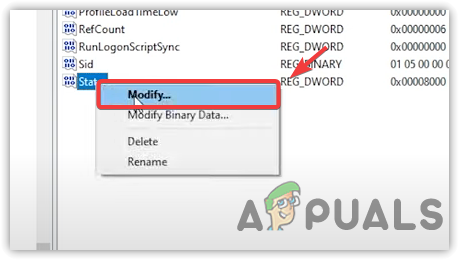
Renaming Entries - In the right pane, right-click the State key and select Modify.
Clicking Modify - Set the value data to 0.
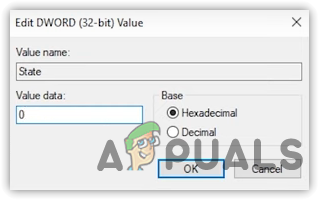
Editing a Registry Value - Repeat the same steps for the RefCount key.
- After completing these steps, close the Registry Editor and restart your computer to see if the error is resolved.
2. Replace NTUSER.DAT
The NTUSER.DAT file contains your individual configurations and settings; if it becomes corrupt, it could be the direct reason for login issues. By renaming the old file and copying a working version from another profile, you effectively reset your profile’s state, which can fix any errors preventing you from signing in.
- Boot into Safe Mode as instructed above.
- Open File Explorer and navigate to the drive where your OS is installed.
- Go to the Users directory.
- Click on View at the top and check the Hidden Items option.
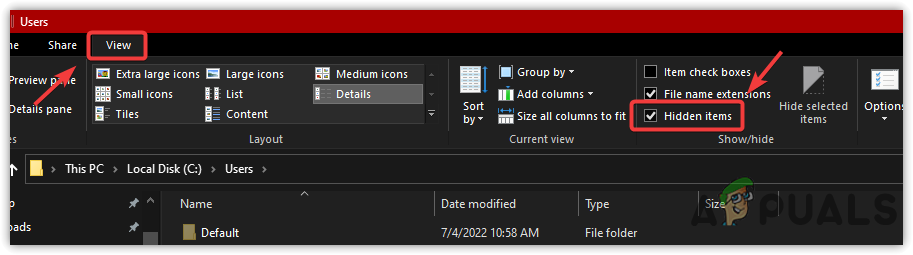
Seeing Hidden Items - Navigate to the Default folder.

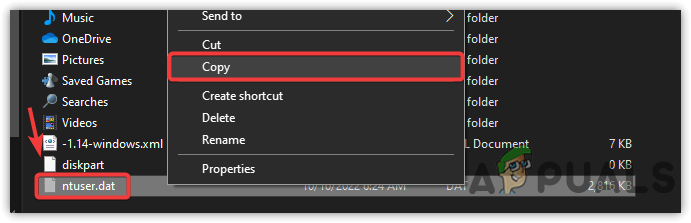
Opening Default Folder - Right-click the NTUSER.DAT file and select Rename.
- Add .old to rename the file to NTUSER.DAT.old.

Renaming User Profile File - Return to the Users directory and enter the Guest folder or another user folder.
- Copy the NTUSER.DAT file from there.
Copying User File - Paste the copied file into the Default folder.
- Restart your computer to see if the error is fixed.
3. Use System Restore
System Restore can revert Windows to an earlier state using a restore point, which may fix various issues, including driver corruption and the current login error.
Note: Although the System Restore method only works if a restore point exists prior to having this problem, Windows often creates restore points automatically during updates or software installs. Hence, try this method as your system might already have an existing restore point.
- Click the power button and hold the Shift key, then click Restart.
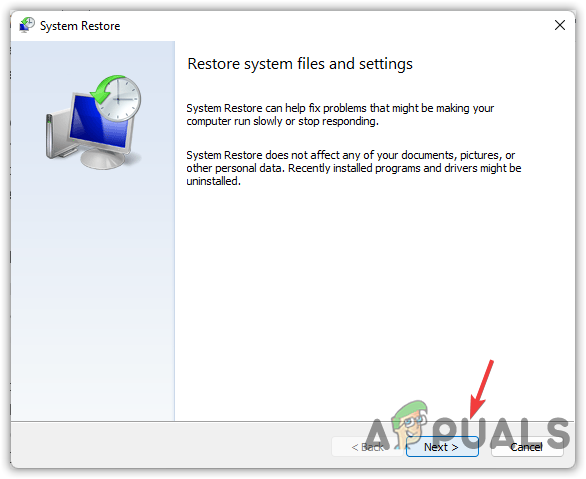
- Go to Troubleshoot > Advanced Options.

Navigating to Troubleshoot - Click on System Restore and then click Next.
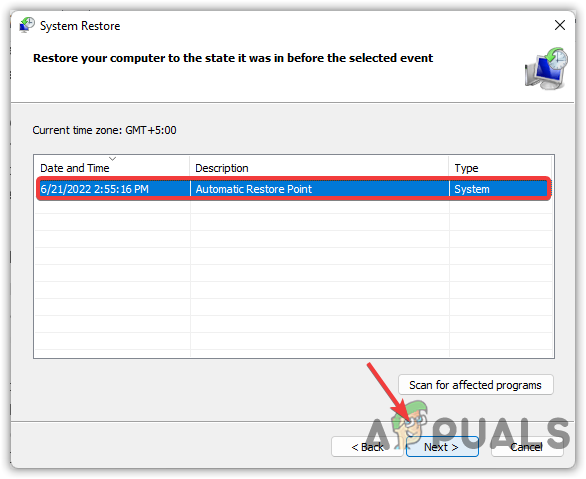
Clicking Next - Choose a restore point and click Next.
Selecting a Restore Point - Click Finish to start the restoration.
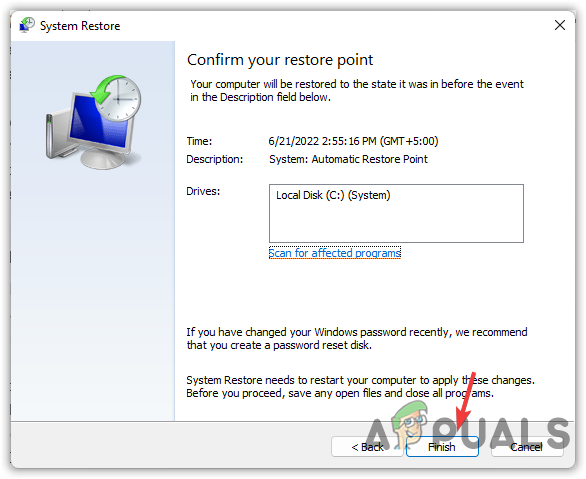
Clicking Finish - Once the restoration process is complete, the error should be resolved.
4. Restart the User Profile Service
The User Profile Service is crucial for user logon management in Windows. If it’s not running due to a glitch or configuration issue, users may be unable to log into their accounts, thus causing the error message. By restarting the service and setting it to Automatic, you’ll make sure it’s active and ready to manage user profiles as soon as the system boots up, hence resolving any login issues.
- First, boot your computer into Safe Mode by following the instructions provided above.
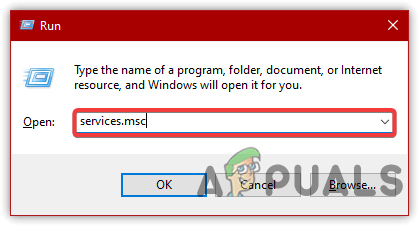
- Press Win + R to open the Run dialog box.
- In the Run dialog box, type Services.msc and press Enter.
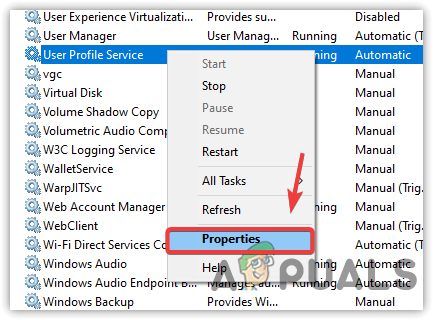
Navigating to Services Window - In the Services window, find the service named User Profile Service, right-click on it, and select Properties.
Opening Service Properties - Check if the startup type is set to Automatic. If it is not, change it to Automatic, and click Apply. If the service is not currently running, click Start, then click OK to save the changes.
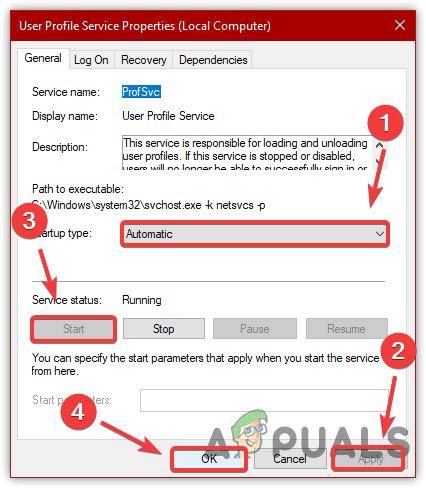
Restarting User Profile Service - Close the properties window and restart the service. Finally, restart your computer to check if the issue has been resolved.
5. Create a New User Account
By creating a new user account, you remove any potential corruption in the profile that’s causing the logon issue. The new user account essentially acts as a clean slate and, if successful, provides a path to smoothly transition your personal files without the issues of the previous account’s errors.
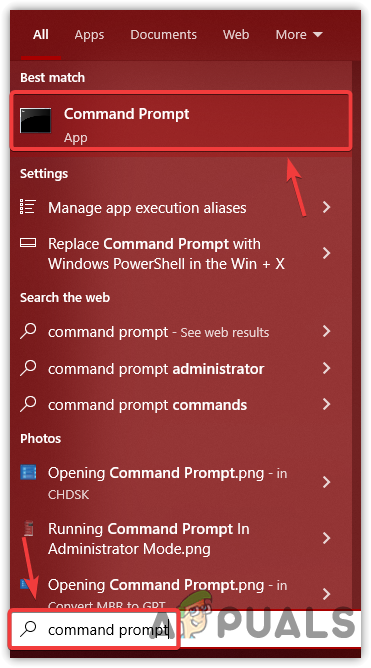
- In Safe Mode, click the Start Menu and type Command Prompt into the search box. Then, press Enter.
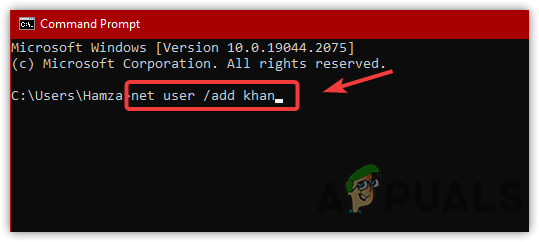
Opening Command Prompt - In the Command Prompt window, type the following command to add a new user and press Enter:
net user /add username password
Note: Replace “username” with your desired account name and “password” with your chosen password (optional).
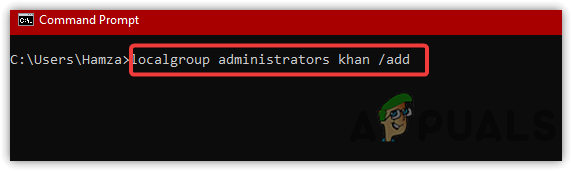
Adding A New User Account - Next, add the new user to the administrators group by entering this command and pressing Enter:
net localgroup administrators username /add
Adding A New User Account to Administrators - Log out and then log in with the new account. Transfer your data into this new account.
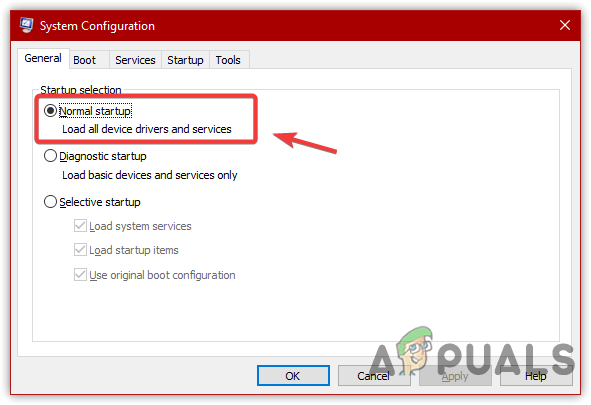
6. Switch to Normal Startup
Selectively disabling Microsoft services during a clean boot can result in various errors. Make sure no Microsoft services are disabled and consider switching back to a normal startup, which enables all drivers and services.
- First, boot your computer into Safe Mode using the instructions provided in previous methods.
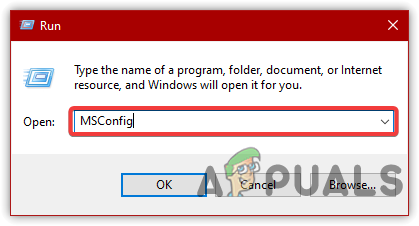
- Press Win + R to open the Run dialog box, type msconfig, and then click OK.
Opening MS Configuration - In the System Configuration window, if the startup selection is set to “Selective Startup,” change it to Normal Startup.
Selecting Normal Startup - Next, go to the Services tab. If available, click on Enable All.

Enabling Microsoft Services - Restart your computer and check to see if the issue has been resolved.
7. Reset or Reinstall Windows
If the error persists, consider resetting or reinstalling Windows as a last resort. Follow the link to learn how to perform a clean installation.
This is very helpful, thank you. Seems to have fixed my issues.