Fix: Windows 10 Limited Connectivity
Windows Update is an important part of any Windows operating system. It delivers the necessary fixes and updates to enhance your experience and help your operating system be more efficient and be updated with all new features.
Sometimes while updating Windows 10, users might experience a bug where their network connectivity is limited and they are unable to access the internet properly. This occurs even when you have a stable internet connection and it is working perfectly on other devices. This problem can be traced back to third-party applications or some configurations. We have put together a guide to help you solve this problem. Start with the first solution and work your way down.
Solution 1: Uninstalling third party firewall/antivirus
Antivirus/Firewall protect your computer from malware and viruses. They put up an additional shield before the data is processed by your computer. Many users reported that after updating their computer, they lost connectivity and were left with limited status.
Furthermore, they reported that this was caused by their third-party antivirus or firewall. Why does this happen? It seems that after the update, Microsoft changed some of the network settings. The third-party applications were not updated with this change; thus they limited the connectivity of your machine with the internet. We can try uninstalling the software and check if this solves the problem.
- Press Windows + R button to launch the Run application. Type “control panel” and hit Enter.
- Once in the control panel, click on “Uninstall a program” found under the title of Programs and Features.
- Now Windows will list all the installed programs in front of you. Navigate through them until you find the program which is causing you problems.

- Once it is uninstalled, restart your computer and check if this fixed your problem.
Note: Please uninstall your antivirus/firewall at your own risk. We will not be responsible if your computer sustains any damage in whatever way possible.
Solution 2: Resetting your network configurations
It is also possible that your limited connectivity error is due to IP address problem. We can try resetting your TCP/IP stack to its default value. TCP/IP is mostly the main protocol used to access internet in the majority of the computers.
- Press Windows + S to launch the start menu’s search bar and type “command prompt”. Right click on the first result which comes forth and select Run as administrator.
- Now type the following commands followed by Enter after each line:
netsh winsock reset catalog
netsh int ipv4 reset reset.log
These commands will reset your WINSOCK entries and TCP/IP stack to their default values.
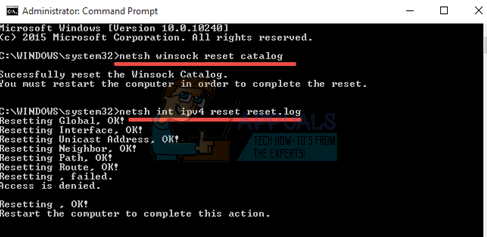
- Now restart your computer to save all the changes. After restarting, check if the problem still persists.
Solution 3: Disabling Power Saving mode of your Wi-Fi adapter
Windows 10 has a feature which turns off devices when not in use to save power and conserve energy. This is done so to maximize the battery life of your machines. Chances are that the system turned off your device and it isn’t turning back on. We can try disabling the power saving mode and check if this brings any improvement to our case.
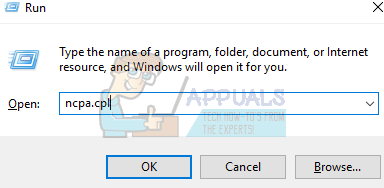
- Press Windows + R to launch the Run Type “ncpa.cpl” in the dialogue box and press Enter. This will launch a window consisting of all the adapters present on your computer.
- Right-click on the Wi-Fi adapter and select Properties.

- Once the Properties have opened, click on the Configure button present at the near start of the window. You will be redirected to the properties of Wi-Fi hardware.

- Select the Power Management tab and uncheck the option which says “Allow the computer to turn off this device to save power”.
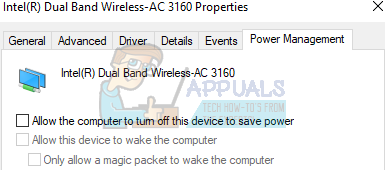
- Press Ok to save changes and exit. You might need to restart your computer.
Solution 4: Resetting Drivers of your Wi-Fi adapter
Another problem might be regarding the drivers of your Wi-Fi adapter. We can try updating your Wi-Fi adapters. If this still doesn’t work, we can try uninstalling the adapter and restart your machine. Upon the restart, the computer will automatically detect the hardware and install the default drivers for it.
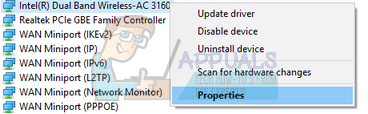
- Press Windows + R to launch the Run Type “devmgmt.msc” in the dialogue box and hit Enter. This will launch your computer’s device manager.
- Navigate through all the hardware and click on the Network Adapters Right click on your Wireless hardware it and select “Update driver”.
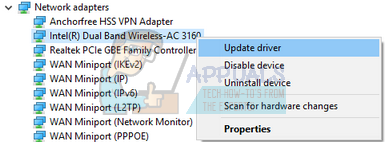
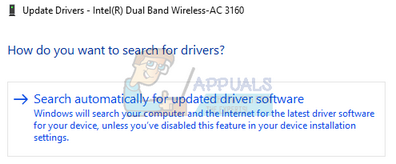
- Now Windows will pop a dialogue box asking you which way do you want to update your driver. Select the first option (Search automatically for updated driver software) and proceed. If you are unable to update the drivers, you can head over to your manufacturer’s site and install them manually.
- Restart your computer and check if the problem gets resolved. If it doesn’t, head back to your wireless hardware in the device manager, right click on it and select “Uninstall device”.
- After uninstalling, restart your computer again.
Solution 5: Unchecking File Sharing etc.
Another problem due to which you get limited connectivity is due to file or printer sharing in your wireless adapter properties. It is possible that after the Windows update, these settings are not correctly configured on your computer and are causing you problems. We can try disabling these settings and check if they make a difference.
- Press Windows + R to launch the Run application. Type “ncpa.cpl” in the dialogue box and press Enter. This will launch a window consisting of all the adapters present on your computer.
- Right-click on the Wi-Fi adapter and select Properties.
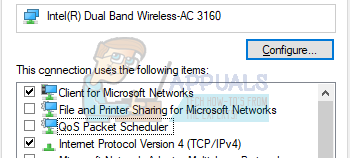
- Once in the Properties, uncheck the options which state:
“File and Printer Sharing for Microsoft Networks”
“QoS Packet Scheduler”
- Press Ok to save changes and exit. You might need to restart your computer in order for the changes to take effect.
Solution 6: Changing setting of Buffers
We can try changing the value of your Buffers transmission to maximum and check if this solves the problem. You can always revert the settings if they don’t work for you.
- Press Windows + R to launch the Run Type “devmgmt.msc” in the dialogue box and hit Enter. This will launch your computer’s device manager.
- Navigate through all the hardware and click on the Network Adapters Right click on your Wireless hardware it and select “Properties”.
- Once in the properties, navigate to the Advanced tab and locate the entry of “Receive Buffers”. Increase this value to maximum using the option at the right side of the screen.
- Now locate the entry of “Transmit Buffers”. Increase this value to maximum using the option at the right side of the screen.
- Click Ok to save changes and exit. Check if the problem got solved.
Solution 7: Running the Troubleshooter
Windows has an inbuilt troubleshooter to detect settings or configurations which are not correct on your computer and change them accordingly. Sometimes, it may even inform you what the problem is so you can fix it manually.
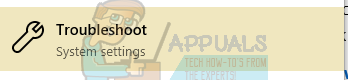
- Press Windows + S to launch the start menu’s search bar. Type “troubleshoot” in the dialogue box and select the first result which comes forth.
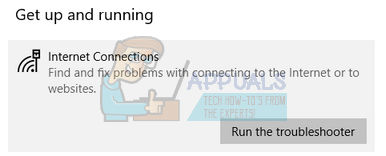
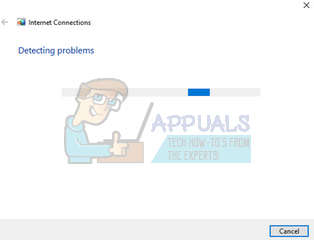
- Once in the troubleshooting menu, select the option of internet connections and click the button “Run the troubleshooter”.
- Now Windows will automatically start detecting problems with your internet connection and inform you if there is any discrepancy. Be patient as this process might take a while to complete.
Solution 8: Removing Proxy Settings
If you use proxy settings for your work or university, it is possible that this is causing the issue. Proxy settings provide another path for the internet to work. This implementation is mainly done in institutions or workplaces who don’t allow full internet access or monitor it.
- Press Windows + S to launch the search bar of your start. Type “proxy” in the dialogue box and select the first result which comes forth.

- Press LAN Settings button present at the near end of the window.
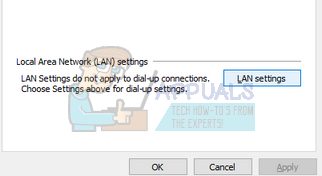
- Uncheck the box which says “Use a proxy server for your LAN”. Press Ok to save changes and exit.
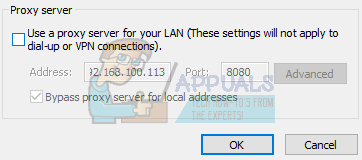
- Now check if the problem got fixed.
Solution 9: Selecting Maximum Bandwidth value
Users reported that setting the bandwidth to the maximum value also tended to solve their problem. This can be done using the advanced settings through the device manager.
- Press Windows + R to launch the Run Type “devmgmt.msc” in the dialogue box and hit Enter. This will launch your computer’s device manager.
- Navigate through all the hardware and click on the Network Adapters Right click on your Wireless hardware it and select “Properties”.
- Now locate the entry of bandwidth at the left side of the screen. Increase this value to maximum using the option at the right side of the screen.
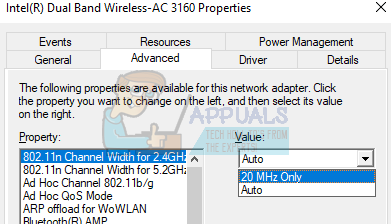
- Click Ok to save changes and exit. Check if the problem got solved.
Solution 10: Changing Roaming Sensitivity
Users reported that changing their roaming sensitivity also fixed their problem. This can be changed using the advanced settings of your network adapter.
- Press Windows + R to launch the Run Type “devmgmt.msc” in the dialogue box and hit Enter. This will launch your computer’s device manager.
- Navigate through all the hardware and click on the Network Adapters Right click on your Wireless hardware it and select “Properties”.
- Once in the properties, navigate to the Advanced tab and locate the entry of “Roaming aggressiveness”. Decrease this value to the minimum (number 1).
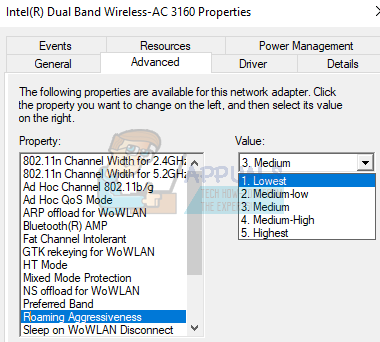
- Click Ok to save changes and exit. Check if the problem got solved.
Solution 11: Using Airplane mode
You can try temporarily disabling your Wi-Fi using the airplane mode. The airplane mode option in Windows 10 disables all internet connectivity on your computer until you turn it off again. Users reported that using the airplane mode somewhat solved their problem.
- Press the network icon present at the bottom right side of the screen.
- Click on Airplane mode with the icon of an airplane.
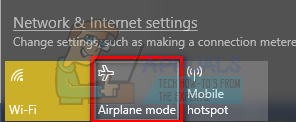
- Wait a few minutes and turn it off again. Now check if the problem got solved.
Solution 12: Some additional commands
If all the above solutions don’t work, we can try some additional commands.
- Press Windows + S to launch the start menu’s search bar and type “command prompt”. Right click on the first result which comes forth and select Run as administrator.
- Now type the following commands followed by Enter after each line:
netsh int tcp set heuristics disabled
netsh int tcp set global autotuninglevel=disabled
netsh int tcp set global rss=enabled
- Now run this command to see if the settings are disabled
nets hint tcp show global
- Now reboot your machine and check if the problem got solved.