Fix: Windows Update Error Code 0xc1900107
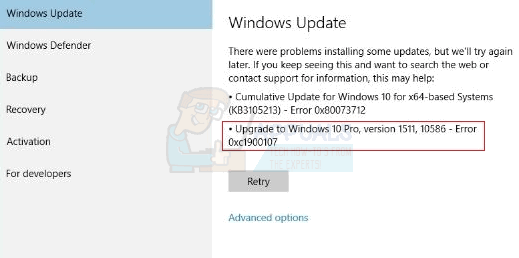
Whenever Microsoft releases a new update for the Windows Operating System, most users are expected to receive and install the update seamlessly, but some users having problems with the update is guaranteed. Unfortunately, the Windows 10 anniversary update is no different. For many of the Windows 10 users who are having trouble installing the anniversary update on their computers, it is error code 0xc1900107 that stands in their way. Whenever a Windows 10 user affected by this problem tries to install the anniversary update, the installation fails and they see an error message containing error code 0xc1900107 that either said something went wrong or there were problems installing the update.
Error code 0xc1900107 is usually associated with pending Windows updates, but that can’t be the cause here because for most affected users, the anniversary update is the only pending Windows update for their computer. In this case, error code 0xc1900107 is caused by either malfunctioning Windows Update components or corrupt update files in the folder where Windows stores downloaded material for Windows updates. If you are unable to install the Windows 10 anniversary update because of error code 0xc1900107, the following are the two most effective solutions that you can use to try and fix the problem and successfully install the anniversary update:
Solution 1: Manually reset Windows Update components
If a problem with your computer’s Windows Update components is the reason why you cannot install the anniversary update and run into error code 0xc1900107 every time you try to install it, there is a pretty decent chance you’ll be able to resolve the issue if you manually reset your computer’s Windows Update components. In order to do so, you need to:
- Right-click on the Start Menu button to open the WinX Menu or Click Start and Type cmd, right click cmd and choose Run As Administrator.
- Click on Command Prompt (Admin) in the WinX Menu to launch an elevated Command Prompt.
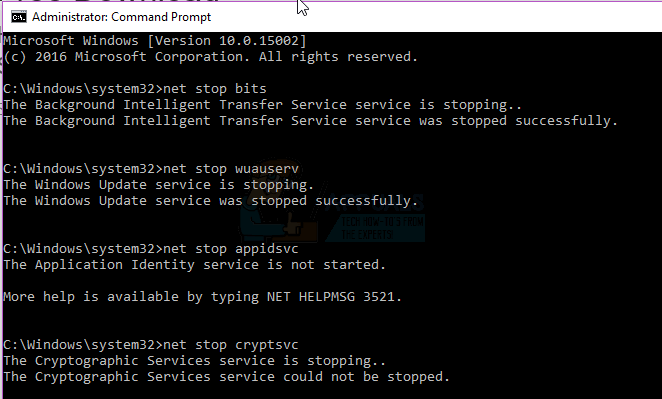
- One by one, type the following commands into the elevated Command Prompt, pressing Enter after typing in each one and waiting for one command to be successfully executed before typing in the next one:
net stop bits
net stop wuauserv
net stop appidsvc
net stop cryptsvc
ren %systemroot%\SoftwareDistribution SoftwareDistribution.bak
ren %systemroot%\system32\catroot2 catroot2.bak
net start bits
net start wuauserv
net start appidsvc
net start cryptsvc
- Close the elevated Command Prompt.
- Restart your computer.
When the computer boots up, try installing the anniversary update and see whether or not it installs successfully.
Solution 2: Delete (or rename) the $WINDOWS.~BT folder
If Solution 1 doesn’t work for you, the cause of the issue in your case may be corrupted files in the folder where Windows stores downloaded material for Windows updates – the $WINDOWS.~BT folder. If that’s the case, simply deleting this folder should get rid of the corrupted files inside it. Don’t worry, though, as Windows will simply recreate the folder from scratch and then download everything it needs for the anniversary update once again, so you won’t be doing your computer any harm.
- Launch File Explorer by pressing the Windows Logo key + E.
- Open the partition of your computer’s hard drive that Windows 10 is installed on. For most users, this is the C:\
- Navigate to the View tab in the toolbar at the top of the File Explorer
- Enable the Hidden items option by making sure that the checkbox beside it is checked.
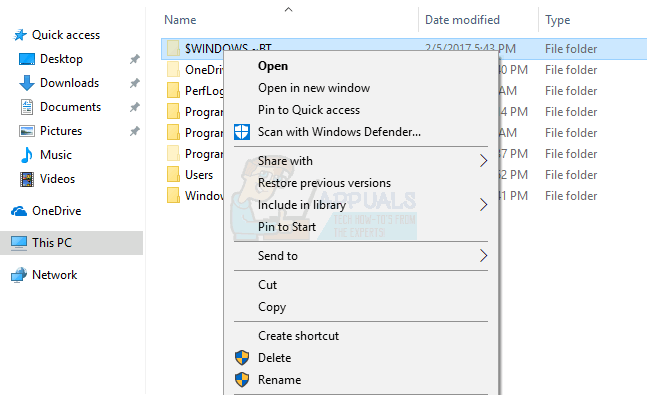
- When the Hidden items option is enabled, you should see the folder named $WINDOWS.~BT.
- Right-click on the $WINDOWS.~BT folder, click on Delete and confirm the action in the resulting popup to delete the folder. There is a chance, however, that you see a message on your screen informing you that you do not have permission to delete the folder. If so, do not worry – simply dismiss the message, right-click on the $WINDOWS.~BT folder, click on Rename, rename the folder to anything other than $WINDOWS.~BT and press Enter. Renaming the folder has the same effect as deleting it.
Note: If you are unable to even rename the $WINDOWS.~BT folder, try deleting (or renaming) it in Safe Mode, and you should be successful. If you do not know how to boot your computer into Safe Mode, use this guide.
- Close the File Explorer and restart your computer.
When the computer boots up, try installing the anniversary update and see whether or not the problem has been resolved.