Fix: Unable to Initialize Steam API
This is yet another error from the broad library of errors that appear right after launching a game on Steam. The error may appear after launching any game in your Steam library and it prevents the users from launching the game at all.
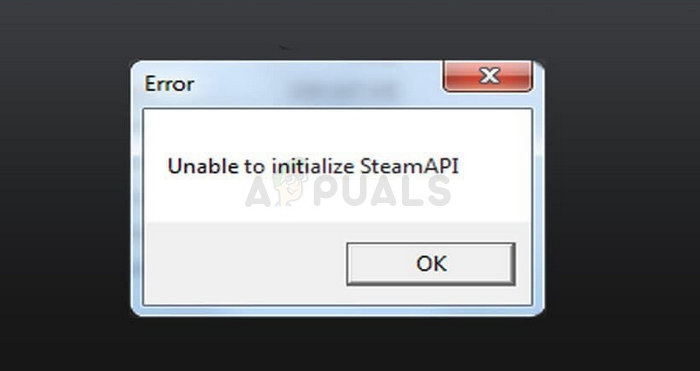
The error can be caused by various different things on users’ computers, Steam clients, or settings, and there are no clear rules as to how to fix the error for everyone. There are, however, plenty of things which have worked for plenty of people and we have gathered these methods to form an article which should help you solve the problem.
What Causes Unable to Initialize Steam API?
This error is a broad one and the cause for it differs almost from one game to another. However, the most common causes which can be observed the most online can be put in a shortlist so make sure you check it out below:
- Your firewall might be blocking the game’s executable from connecting to the Internet, causing this error.
- Comodo Internet Security may have put the game on the Auto-Containment list which has bugged almost everyone trying to launch a Steam game with this antivirus installed.
- Steam beta clients are known to have caused this issue is some builds so it’s sometimes for the best to stay with the regular public client.
Solution 1: Make an Exception for the Game’s Executable in Your Firewall
Among unusual methods which could solve the problem, this one stands out as it has helped plenty of people get rid of the problem almost immediately. If you have a third-party firewall active or if you have turned on Windows Defender Firewall, it might be blocking the game’s executable from connecting to the Internet properly.
Note: If you are using a third-party firewall, instructions on how to allow a program through it differ from one firewall program to another and you should perform a simple Google search which should help you deal with the problem. If you are using Windows Firewall, you can follow the simple steps below:
- Open Control Panel by searching for this tool in the Start button or by clicking the Search magnifying glass or the circular Cortana button at the left part of your taskbar.
- After Control Panel window opens, change the view to Large or Small icons and navigate to the bottom of it in order to locate Windows Firewall option.
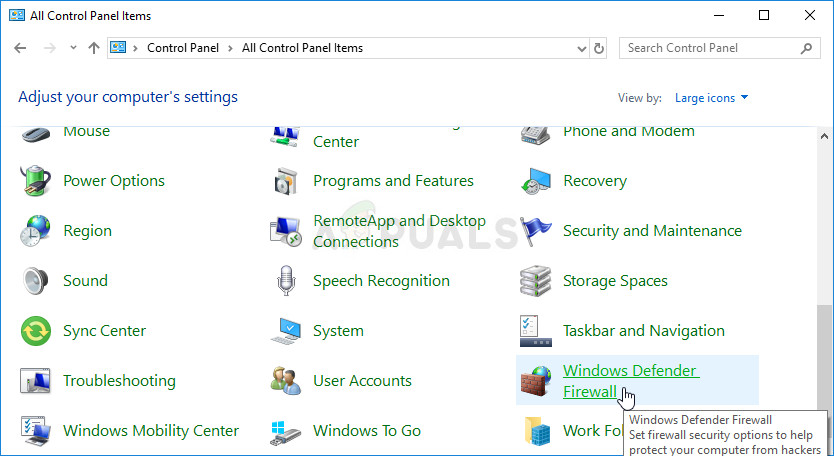
- Click on Windows Firewall and click on the Allow and app or feature through Windows Firewall option from the left side list of options. A list of apps should open. Locate the problematic game’s entry on the list and check the boxes next to both Private and Public networks.
- Click OK and restart your computer before re-launching the problematic game via Steam and checking if it will now run without displaying the “Unable to initialize Steam API” error message.
Solution 2: Opt-out of Steam Beta and Restart Steam
The Steam Beta client is a known culprit of the problem. Steam Beta users receive the new updates before everyone else but you also agree to test out features that might be buggy or unfinished and it can totally ruin your gaming experience with errors like this one.
Even if you are opted out of all Steam beta projects, you should still follow the rest of the steps provided in this solution as simply restarting Steam by exiting it completely and opening it again has managed to solve the problem for plenty of users.
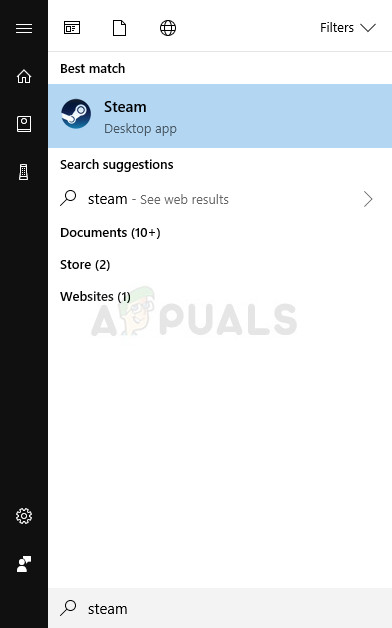
- Open your Steam PC client by double-clicking it on the Desktop or by searching for it in the Start menu and clicking on the first available result.
- Click on the Steam option at the menu at the top of the client’s screen and choose Settings. In the Settings window stay in the Account tab and click the Change button under the Beta participation section.
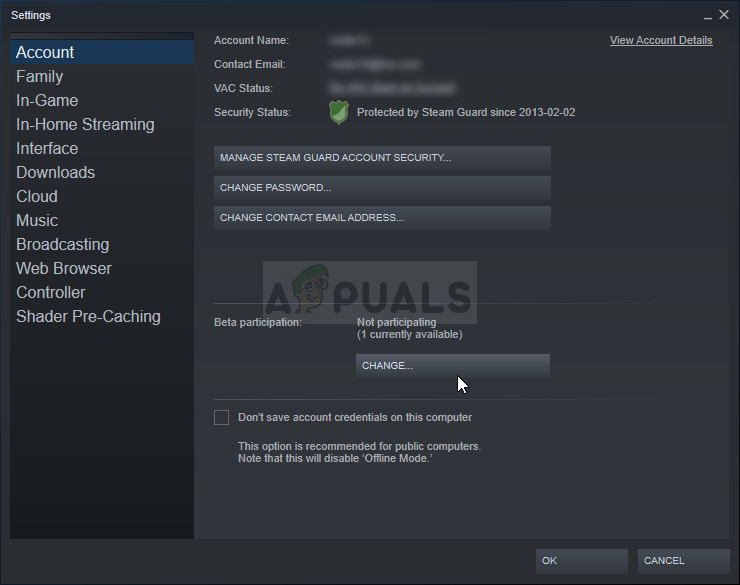
- A new window should open so check again under Beta participation and click to open the drop-down menu. Choose the “NOTE – Opt-out of all beta programs” option and Apply the changes you have made.
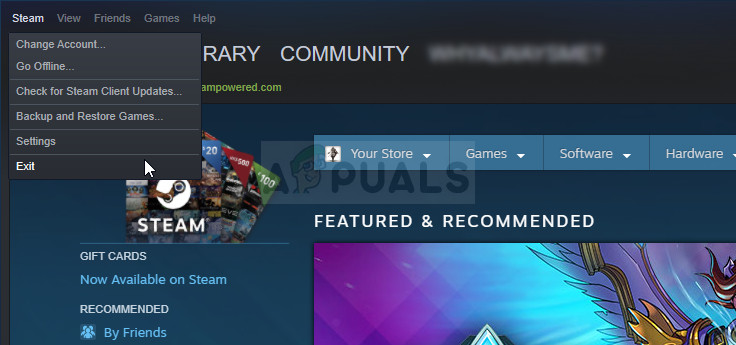
- Click the Steam option at the top left part of the Steam window and choose Exit in order to exit Steam completely (don’t just click the x button at the top right corner).
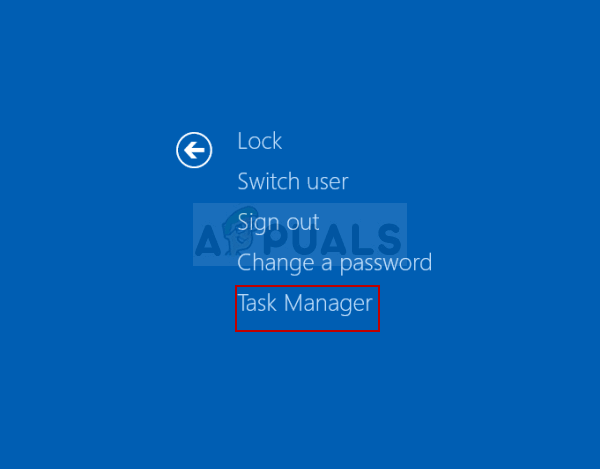
- Now you will have to kill all Steam-related processes using Task Manager. Use the Ctrl + Shift + Esc key combination by pressing the keys in the same time to open the Task Manager utility.
- Alternatively, you can use the Ctrl + Alt + Del key combination and select Task Manager from the popup blue screen which will appear with several options. You can also search for it in the Start menu.
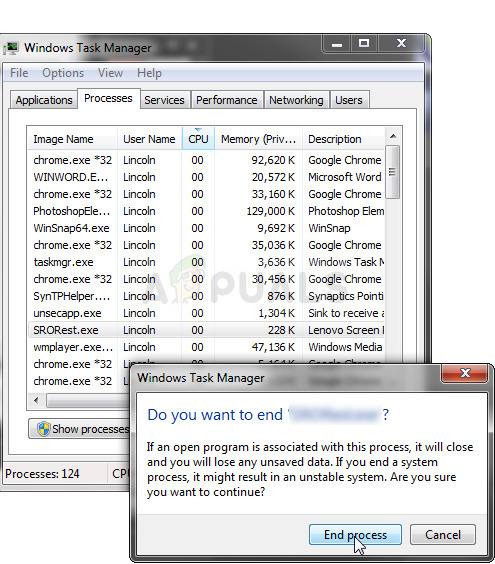
- Click on More details at the bottom left part of the window in order to expand Task Manager and search for any Steam-related processes such as Steam.exe, Steam Client Bootstrapper, or GameOverlayUI.exe. They should be located right under Background processes. Select them one by one and choose the End task option from the lower right part of the window.
- Click Yes to the message which is going to be displayed which should warn about how ending various processes may affect your computer so make sure you just confirm it.
- Reopen the client by following the instructions from the first step and launch the game from the Library tab. Check to see if the problem still appears on startup.
Note: If the steps above failed to fix your problem, you should still opt out of all beta programs and exit Steam completely by following the steps above closely. After that, we recommend you try out running the Steam.exe client as an administrator as this was able to solve the problem for plenty of users.
- Locate the Steam executable and open its properties by right-clicking its entry either on the Desktop or the Start menu or the Search results window and choose Properties from the pop-up context menu.
- Navigate to the Compatibility tab in the Properties window and check the box next to the Run this program as an administrator option before applying the changes.
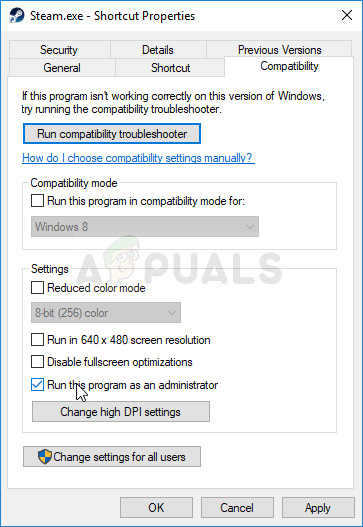
- Make sure you confirm any dialogs which may appear which should prompt you to confirm the choice with admin privileges and Steam should launch with admin privileges from now on. Open Steam by double-clicking its icon and try relaunching the game to see if the “Unable to initialize Steam API” still appears.
Solution 3: Disable Auto-Containment on Comodo Internet Security
If you are using the Comodo antivirus program on your computer, you might have noticed that the program sometimes blocks innocent programs completely using its Auto-Containment options which is activated automatically.
You should disable this option or simply delete the game’s executable from the list of blocked programs in order to solve the problem immediately.
- Open the Comodo Internet Security user interface by double-clicking its icon on the Desktop or the system tray (lower right part of the screen).
- Open the Settings window by clicking the Settings button from the home screen and make sure you navigate to the Containment tab. Under this tab, you should be able to click the Auto-Containment sub-section.
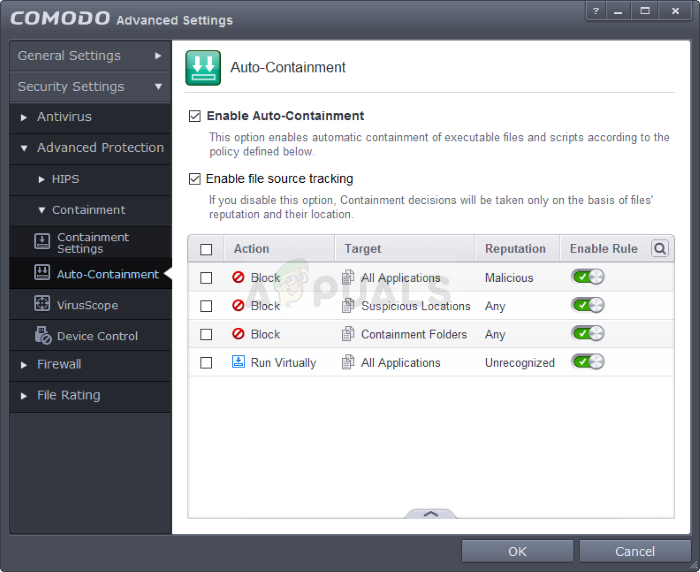
- After clicking the Auto-Containment section, you should see a checkbox at the top of the window saying Enable Auto-Containment. You can simply uncheck it in order to stop using this feature which automatically blocks certain programs from running.
- Alternatively, you can locate the game’s executable from the list which will appear below and simply turn off the slider under the Enable Auto-containment option in order to stop blocking the app at hand. Confirm the changes and relaunch the game to see if the issue still appears.
https://steamcommunity.com/app/480490/discussions/0/1327844097117293195/?ctp=2
Solution 4: Reinstall Steam
Reinstalling Steam is one of the least popular methods and there is a reason why it’s placed so low on our list. The method has solved the problem for so many users but it should be a last resort as there are plenty of simpler methods you should try out before doing this.
It’s true that uninstalling Steam deletes your game files which later need to be redownloaded but following the steps below you should be able to back up these files easily.
- Open your Steam PC client by double-clicking it on the Desktop or by searching for it in the Start menu and clicking on the first available result.
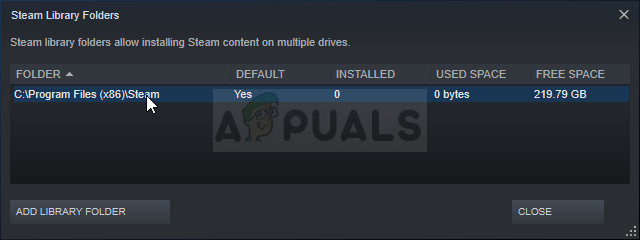
- After the Steam client opens, click the Steam button at the top right part of the window and choose Settings from the dropdown menu. Navigate to the Downloads tab in the Settings window and click on Steam Library Folders.
- Here you should see the full list of all libraries you currently use and the folders you should look for when backing up. Since the default folder is C >> Program Files (x86) >> Steam >> steamapps, let’s see how to back it up.
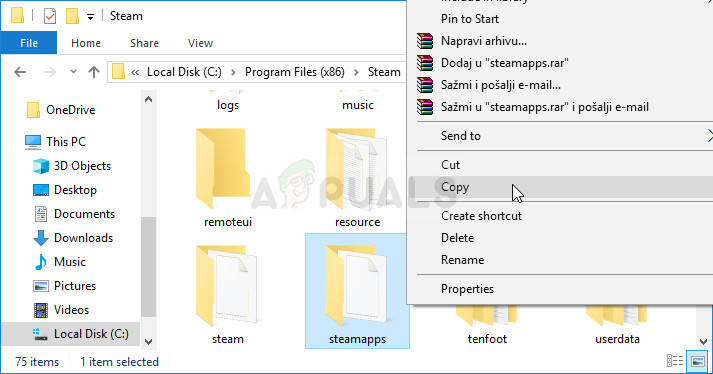
- Navigate to the location above by clicking to open any folder or the File Explorer and clicking This PC or My Computer at the right pane. After that, open the location above and find the “steamapps” folder.
- Right-click the folder and choose the Copy option from the context menu. Navigate to any location outside the Steam folder on your computer and paste the folder by right-clicking and choosing Paste. The best location would be your Desktop.
- Repeat the same process for all library folders. After uninstalling Steam, you will have to add the folders again as the Steam library folders as you did the first time.
After you have backed up your game installations, the next step is to uninstall Steam from your computer. This can be done easily using the Settings app or the Control Panel.
- First of all, make sure you have logged in with an admin account as you won’t be able to uninstall programs using any other account privileges.
- Make sure you have performed the steps above for every library folder you use on your computer and take note of their proper locations so that you can add them back once Steam is reinstalled.
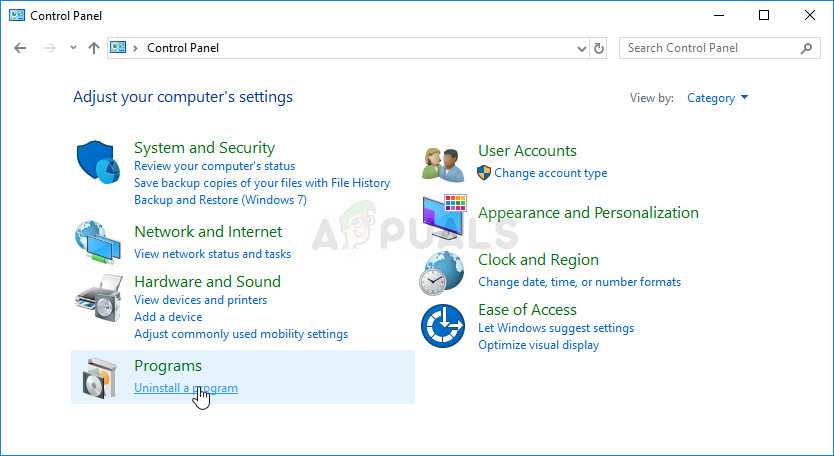
- Click on the Start menu and open Control Panel by searching for it. Alternatively, you can click on the gear icon in order to open settings if you are using Windows 10.
- In Control Panel, select View as Category at the top right corner and click on Uninstall a Program under the Programs section.
- If you are using the Settings app, clicking on Apps should immediately open a list of all installed programs on your PC.
- Locate the Steam entry on the list and click on it once. Click on the Uninstall button above the list and confirm any dialog boxes which may appear. Follow the instructions on-screen in order to uninstall Steam and restart your computer afterward.
Redownload the Steam client by navigating to this link and run the downloaded executable on your computer by locating it in the Downloads folder and double-clicking on it. Follow the instructions on the screen in order to install Steam again and check to see if the same problem appears on your computer again! If that doesn’t work for you as well. It’s recommended to disable any third-party anti-virus or firewall present on your computer temporarily. Just to install Steam again and check if that works for you. If the installation is successful and you aren’t getting any errors then you will have to uninstall and install the anti-virus again. If that doesn’t help you as well. You will have to contact Steam Support to get this issue resolved.