Fix: Unable to Connect to Host in Call of Duty World War II
Call of Duty: WWII was announced to be released by Activision in November of 2017 and it took the fans by surprise as Call of Duty was diving in the World War once again and it was ensured to revive some nostalgic feel from the previous Call of Duty titles that were always fans’ favorites.
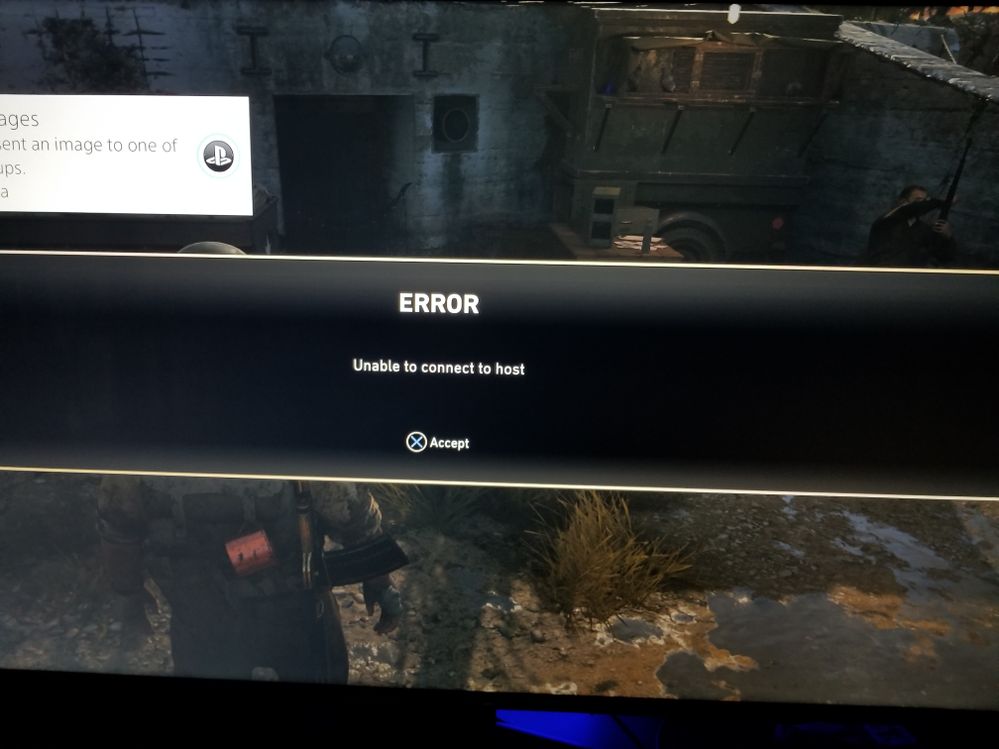
The game also allows players to team up with their friends in a party and play together. However, we have received a lot of reports of the players having issue joining each other’s parties. An error message that reads “Unable to Connect to Host” pops up when trying to connect to a party. In this article, we will tell you some of the reasons due to which this error can be triggered and provide you with viable solutions to ensure complete elimination of the problem.
What Causes the “Unable to Connect to Host” Error?
The problem can arise due to a number of general misconfigurations some of which are:
- Cache: In order to improve gameplay, temporary files and data are stored on the console. Over time this data can get corrupted and cause problems with connectivity, lag or random crashes.
- Port: In some cases, it is also possible that the Ports have not been forwarded or are closed. Ports are simple virtual pipelines that allow two computers to communicate and send data back and forth. Port forwarding is used mostly by gamers to make the connection faster, reduce lobby waiting time etc. If the Ports have not been forwarded this issue can arise.
- Connectivity Issues: Sometimes it is also possible that the Firewall on your computer might be preventing the game from making contact with the servers also it is possible that the modem might be facing connectivity issues with the ISP.
Now that you have a basic understanding of the nature of the problem we will move on towards the solutions.
Solution 1: Restarting Internet.
it is possible that the internet modem might be facing connectivity issues with the ISP. Therefore, in this step, we are going to power-cycle our internet router in order to remove any connectivity issues
- Unplug the power to your Internet Router

Unplugging - Wait at least 5 minutes before plugging the power back in
- Try to Host the party and see if the problem is solved
If this step does not work for you don’t worry as it is the most basic troubleshooting step.
Solution 2: Clearing Cache
In order to improve gameplay, temporary files and data are stored on the console. Over time this data can get corrupted and cause problems with connectivity, lag or random crashes. On PS4 and XBOX this can be cleared whilst on PC we can verify the integrity of the cache to do that:
For PS4:
In order to clear the cache on your PlayStation 4
- Press and Hold the PlayStation button on the controller
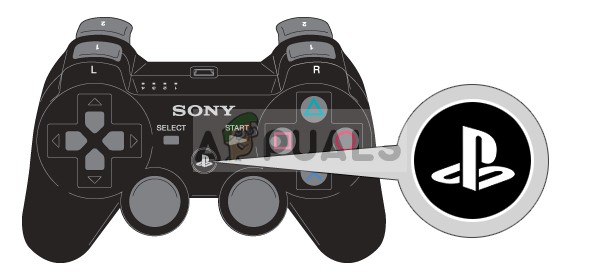
PlayStation button on the controller - Chose “Turn off PS4” option
- Wait for the console to power down and wait for 5 minutes
- Restart the console
- Hold the L1+R1 Buttons before booting up Call of Duty World War II
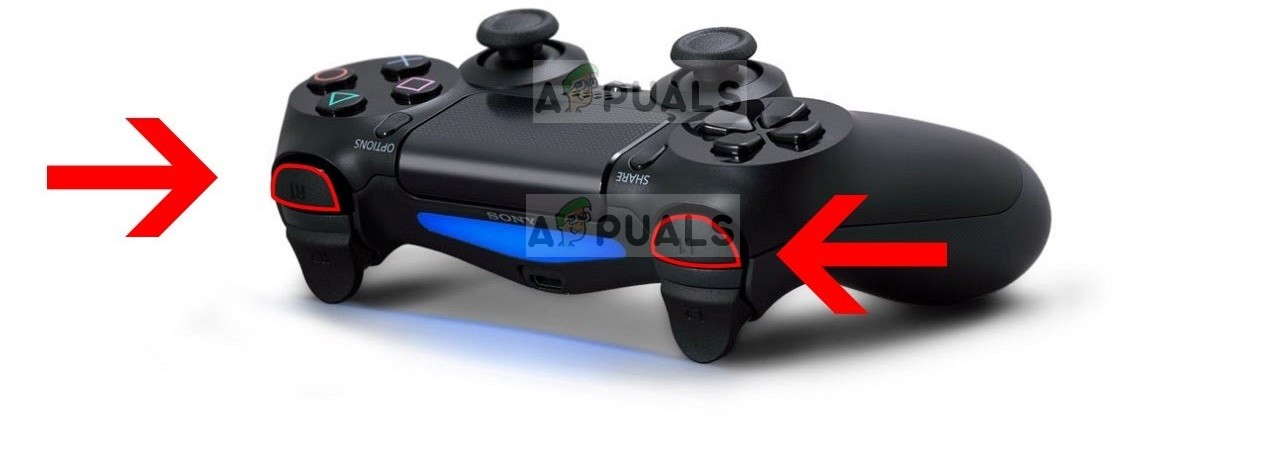
L1+R1 button combo - The brightness and the choice of language are also reset in this process but the saved games remain.
For Xbox:
In order to clear the cache on your Xbox
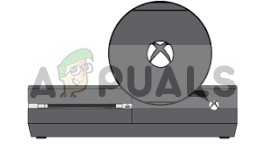
- Press and hold the Xbox Power button on the Console until the console shuts down completely
Power button Xbox - Remove the Power Cord from the back of the Xbox Console
- Wait for 5 Minutes and plug the cord back in
- Wait for the Indicator Light on the Battery Pack to turn Orange from White
- Turn on the Console
- Your cache has been cleared the console will take a while longer to boot up than usual.
For PC:
For PC, we will be checking the integrity of game files intead.
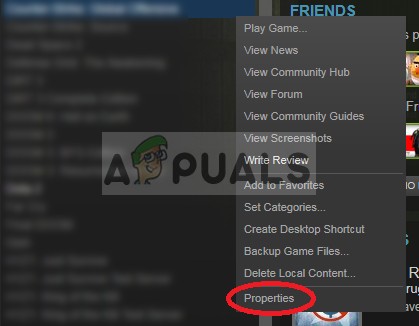
- Launch Steam and sign in to your account
- Go into the library section, right–click on the game and select “Properties”.
Opening Game Properties in steam - After that Click on the Local Files option and click on the “Verify the integrity of Game Cache” option
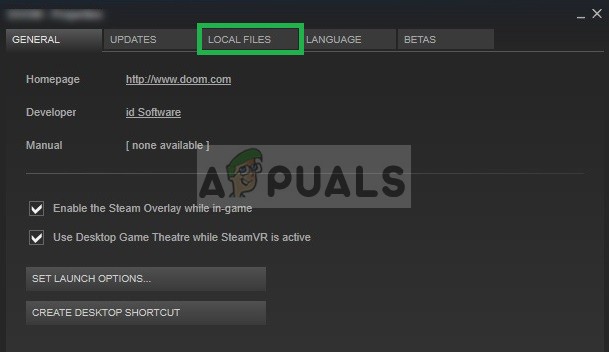
Opening Local files - This will take some time to verify after it is done try to run the game
Solution 3: Changing NAT to Open/Port Forwarding
Port forwarding is used mostly by gamers to make the connection faster, reduce lobby waiting time etc. If the Ports have not been forwarded this issue can arise. Therefore, in this step, we will be forwarding the Port. But before we proceed, we have to find the IP addresses of the consoles
For PS4:
- Go to Settings and select Network
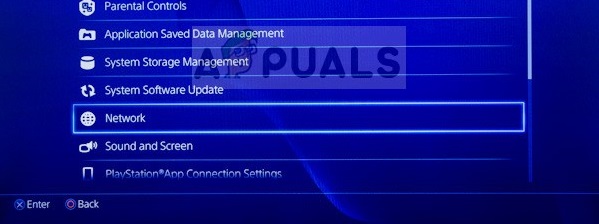
Selecting Network - Select “View Connect Status“
- Make note of the numbers listed next to IP Address
For Xbox:
- Go to Settings
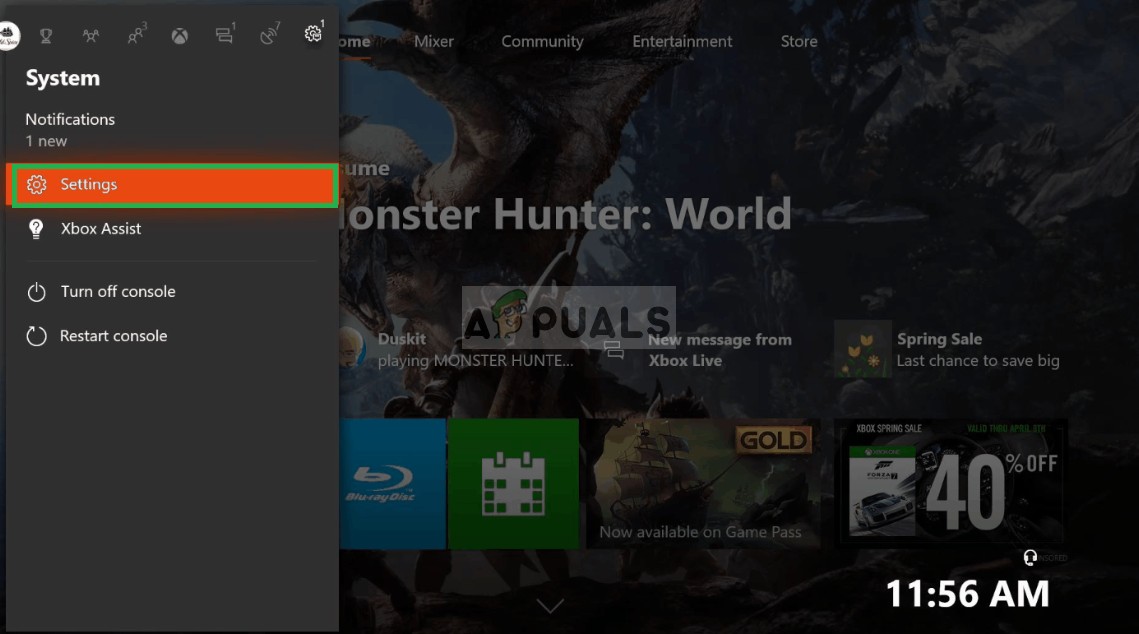
Selecting Settings - Go to Network
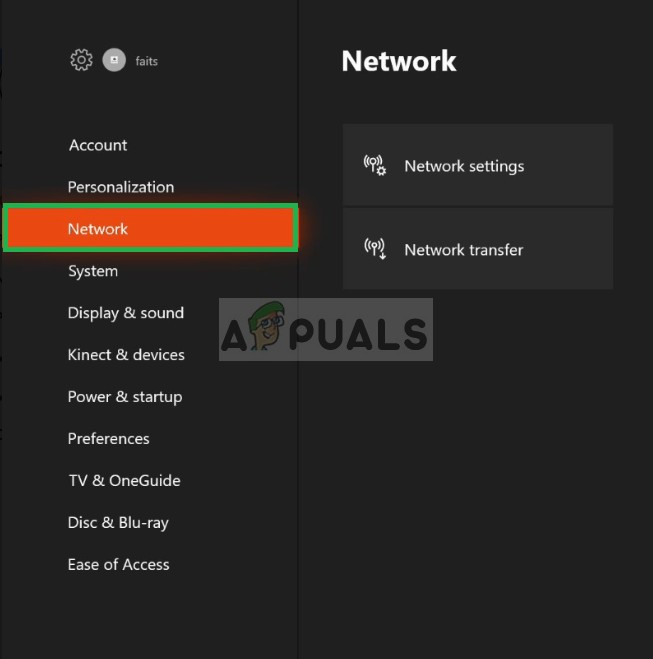
Selecting Network - Select Network Settings from the right
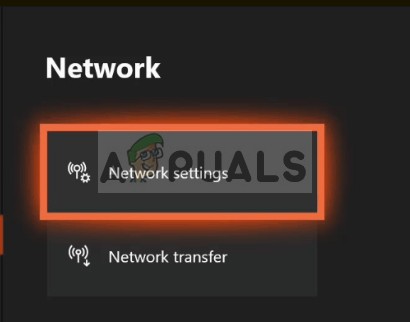
Selecting Network Settings - Select Advanced Settings
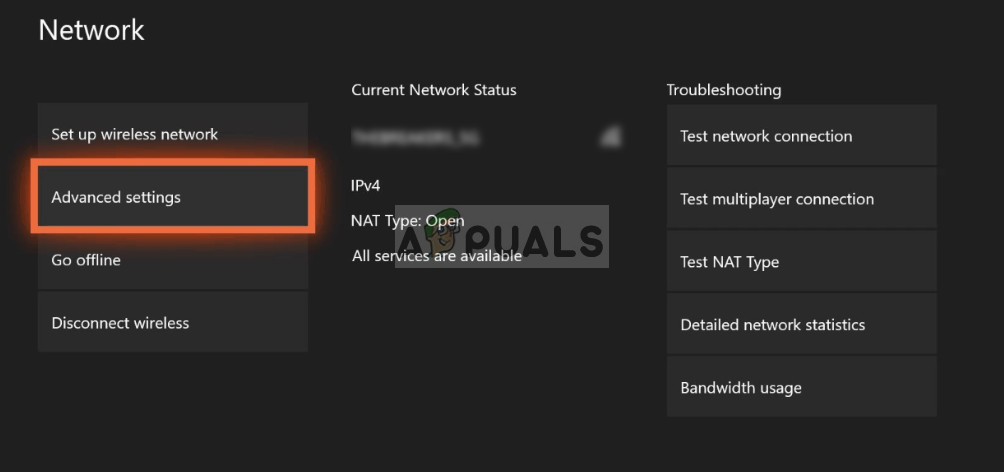
Selecting Advanced Settings - Make note of the numbers listed next to IP address
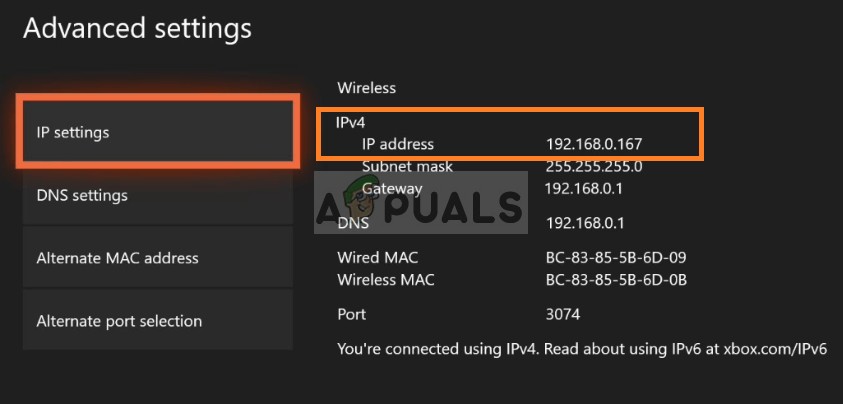
IP Address
For PC:
- Type in Command Prompt in the search bar

Typing Command Prompt - Type “ipconfig” inside the command prompt
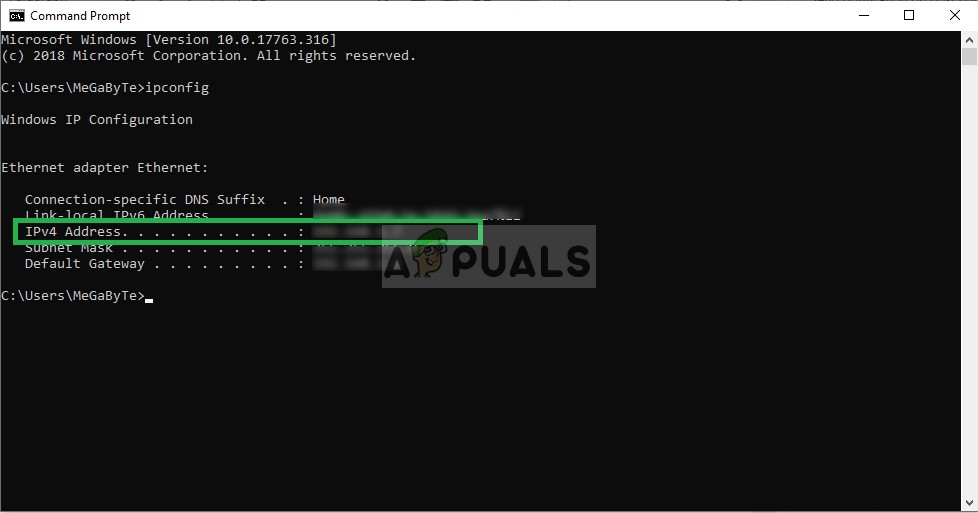
Typing ipconfig - Make note of the IPV4 address
Changing NAT to Open:
Now that we know the IP address we will be changing the NAT to open
Ports for PC:
TCP: 3074, 27015-27030, 27036-27037
UDP: 3074, 4380, 27000-27031, 27036
Ports for Xbox One:
TCP: 53, 80, 3074
UDP: 53, 88, 500, 3074, 3544, 4500
Ports for PlayStation 4:
TCP: 80, 443, 3074, 3478-3480
UDP: 3074, 3478-3479
Changing NAT in Windows:
In order to change the NAT to Open you will need a PC connected to the router that you use to play the game. This step requires to be done on a PC and will work for every console that you connects to the router. Therefore, we will be forwarding the ports on PC for which you need to:
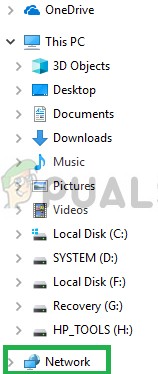
- Go to your file explorer
- Click on Network on the Right Side
Clicking on Network - Right–click on your router located beneath Network Infrastructure
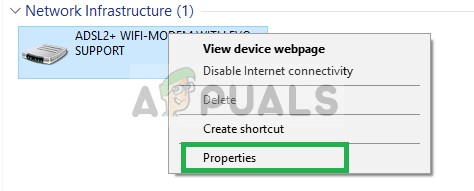
Right Clicking on the Router - Select Properties and click on “Settings”
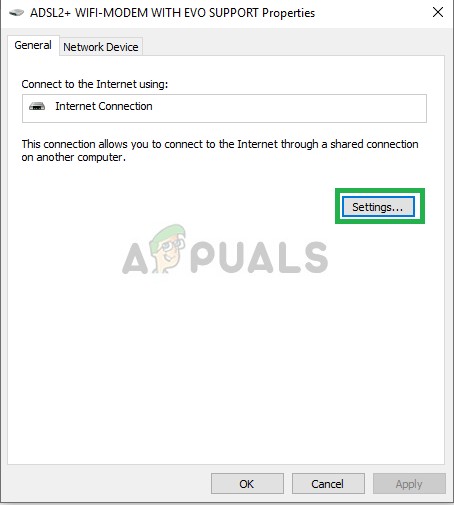
Right-Clicking on the Router, Selecting Properties then Settings - Click on “Add”
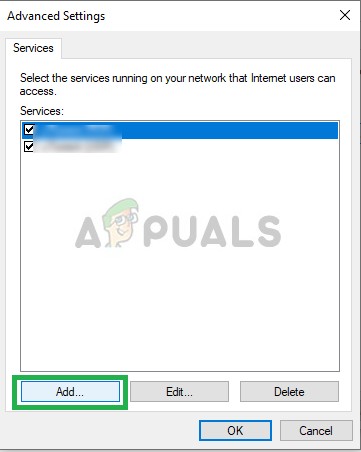
Clicking on ADD - Write a name beneath Description of service (it can be anything)
- Write the IP address found on your PS4 / Xbox One / PC
- In both External Port and Internal Port, write each TCP number that was included in the list (for example, for PC you will first write “3074” in both the “External Port for this service” and “Internal Port for this Service” option and press “OK” then repeat the process for “27015-27030, 27036-27037” numbers).
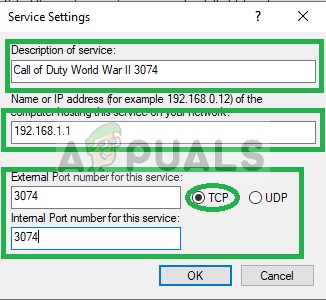
Writing Description, the IP address and the settings - After each TCP number has been entered, change the selection to UDP and do the same for those numbers as done with the previous TCP numbers.
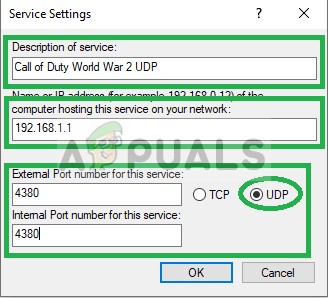
Adding UDP ports - When the Process is completed and all the TCP and UDP ports for your console have been added try to connect to the party.


